How I made a second monitor from a laptop display
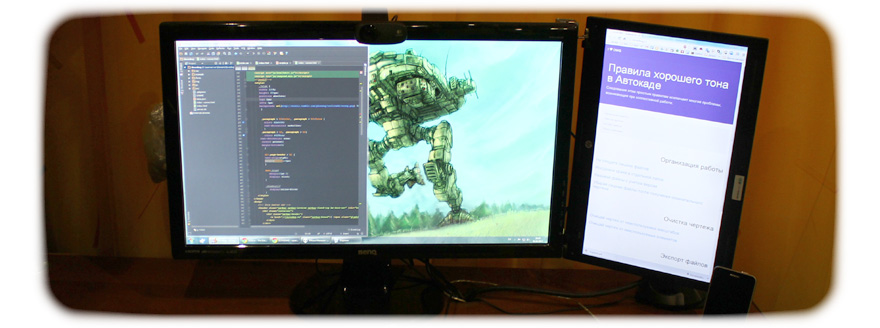
It so happened that I had in my hands a dead HP 625 laptop with a 15.6 "matrix and an NTA92C VGA / DVI LCD controller. There was no desire to restore the laptop, so it was decided to create a second monitor from the above details, so that with fastening to VESA the usual monitor. With minimal time and financial costs for me as part of the “weekend project”.
“Weekend project” is what I do for a short period of time (weekends or within 1-2 weeks) with the goal of solving atypical tasks for me. The main goal: to solve the problem, gain experience and skills, expand your "toolbox".The ability to connect laptop displays to a computer (VGA / DVI / HDMI) is provided by various kinds of LCD panel controllers. The NTA92C controller was suitable for my display (you can buy it on ebay, aliexpress, etc.)
Source materials
- 15.6 ”display
- NTA92C controller
- Power supply for controller 12V 4A
- Metal profile for drywall 60x27
- Metal profile for drywall 28x27
Instruments
- Drill
- Riveter
- Tapping tap
- Scissors for metal
- Assortment pliers and screwdrivers
- Glue gun
Theoretical part
The display will be attached to the monitor in place for the VESA mount and stick out from the side like an ear. It weighs not a little, which means that the monitor will be skewed. To avoid skewing, you need to add a counterweight on the other hand.

After weighing and measuring everything, I got this:
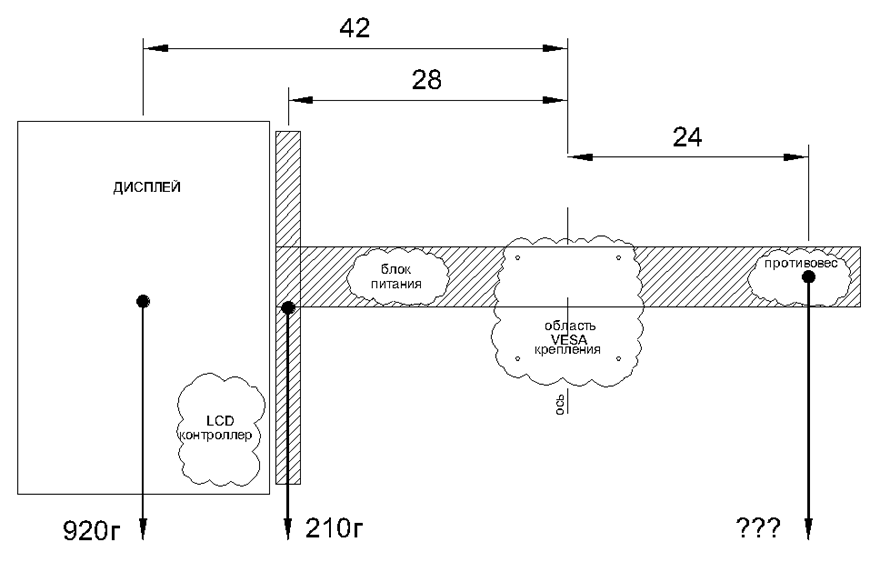
42cm * 920gram + 28cm * 210gram = 24cm * Xgram
X = 42cm * 920gram + 28cm * 210gram / 24cm = 1855 gram
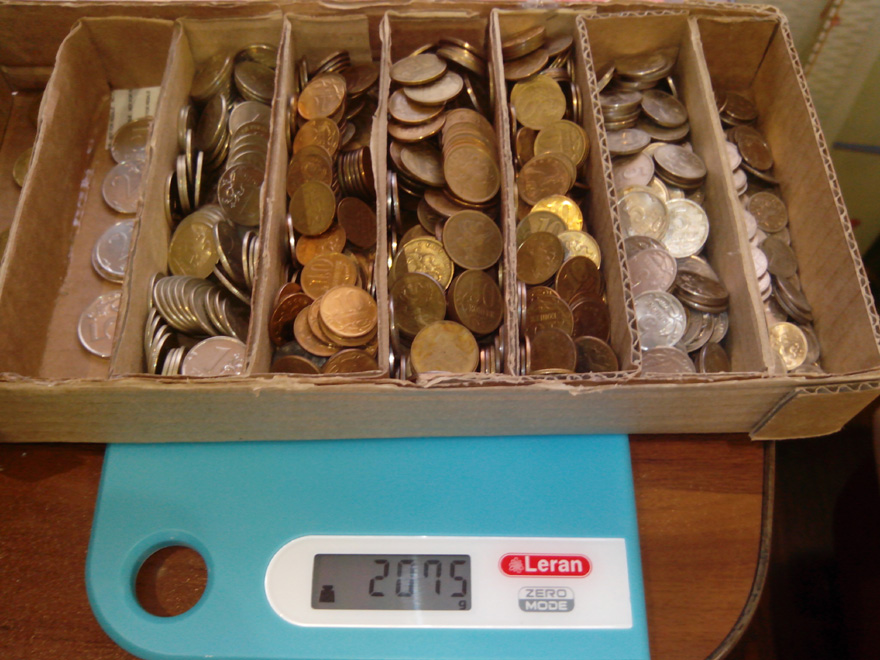
This is the figure that I focused on when collecting the counterweight. From the materials at hand for the counterweight, I took coins.
Practical part
Display
The display from the laptop is removed along with the body and hinges (as it seems aesthetically better). On the hinges there is a limiter for opening the lid of the laptop and it really bothers us, since now they will be open at angles of more than 140 degrees.
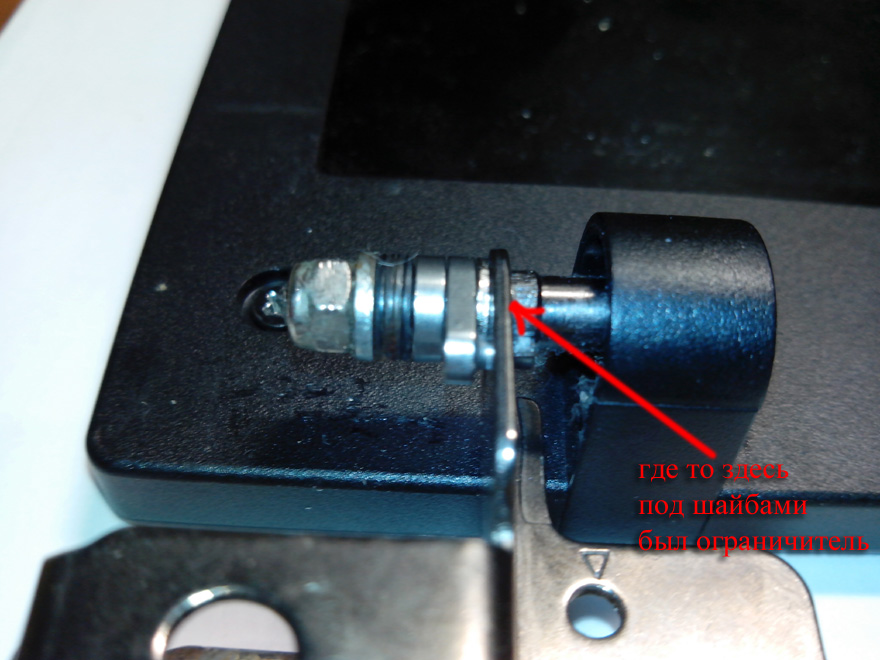
The limiter is a ledge in the frame. You can either grind it or hammer it back, as I did.
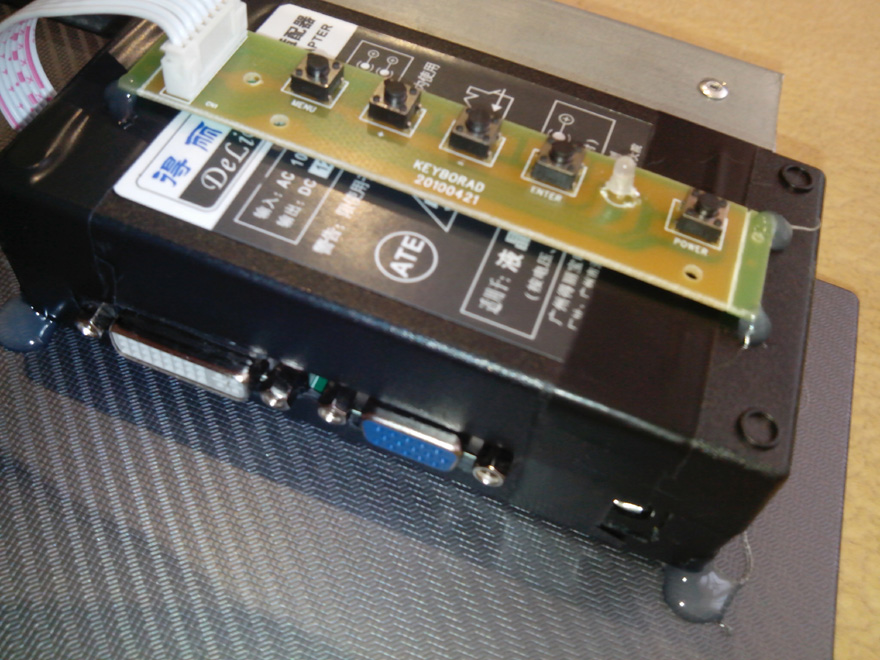
Further, having made the housing for the LCD controller from the housing from the power adapter (yes, I disassembled the power adapter), I attached this whole thing to the back of the display with a glue gun. That was the end of the display.
Frame
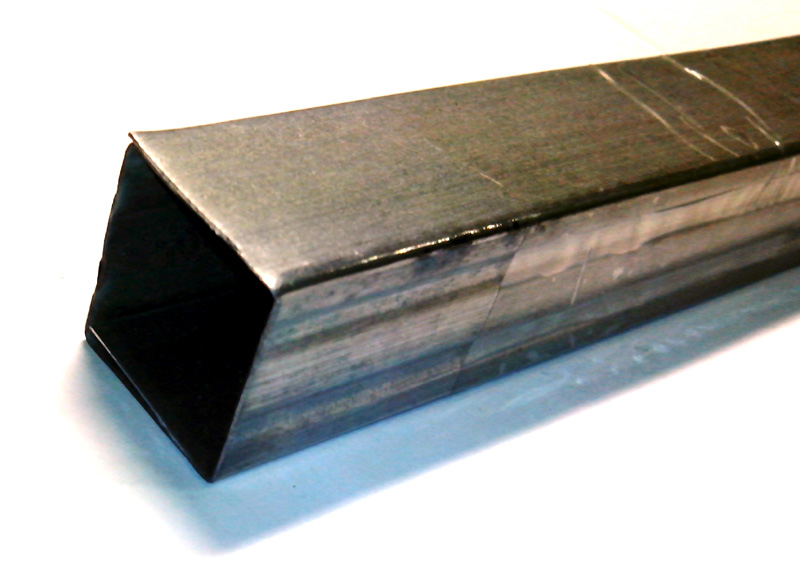
We collect a square from the profile 28x27. This is necessary firstly because the display hinges and the 60x27 profile are mounted on opposite sides of the square. And secondly, to increase the thickness of the metal under the thread for the bolts. The profiles are fastened together in a square with the help of a rivet, then the thread for the bolts is cut.

In the profile 60x27 we make 2 holes for the VESA mount (I have it VESA MIS-D, 100, C - that is, the holes are 10 cm from each other) and fasten with rivets with a previously made square.
Power Supply
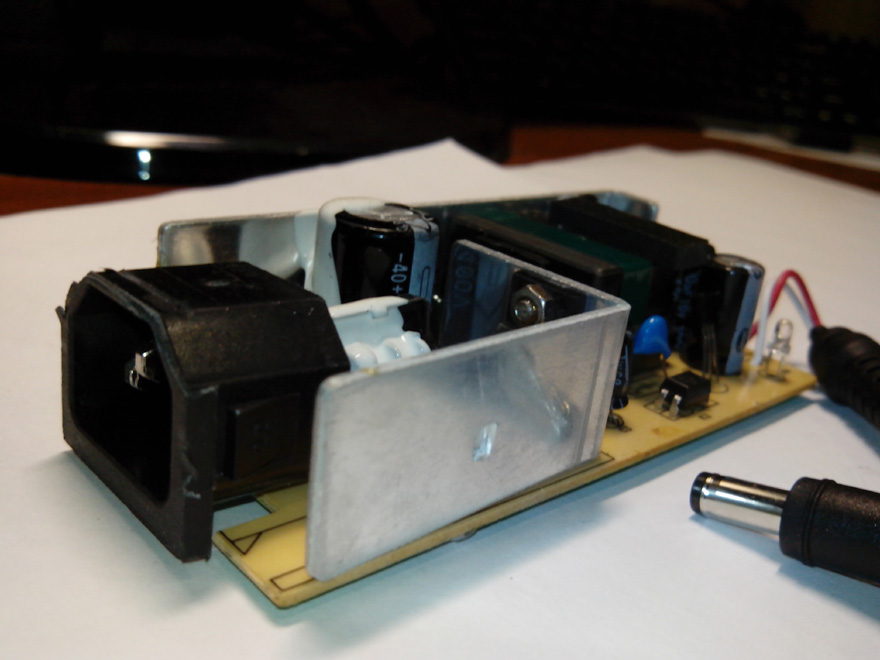
The power supply casing was disassembled for subsequent placement of the power supply inside the 60x27 profile (it did not
fit into the casing) I made the casing substitute (as insulation) from cardboard and glued it onto the profile with a gun. The power supply itself is glued to the corners of the cardboard.
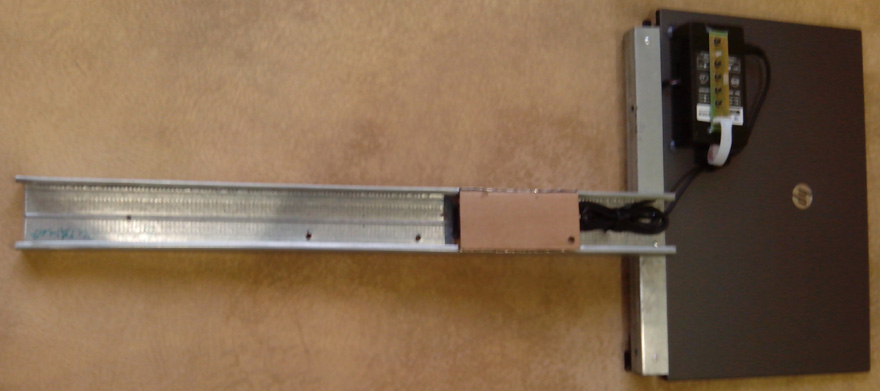
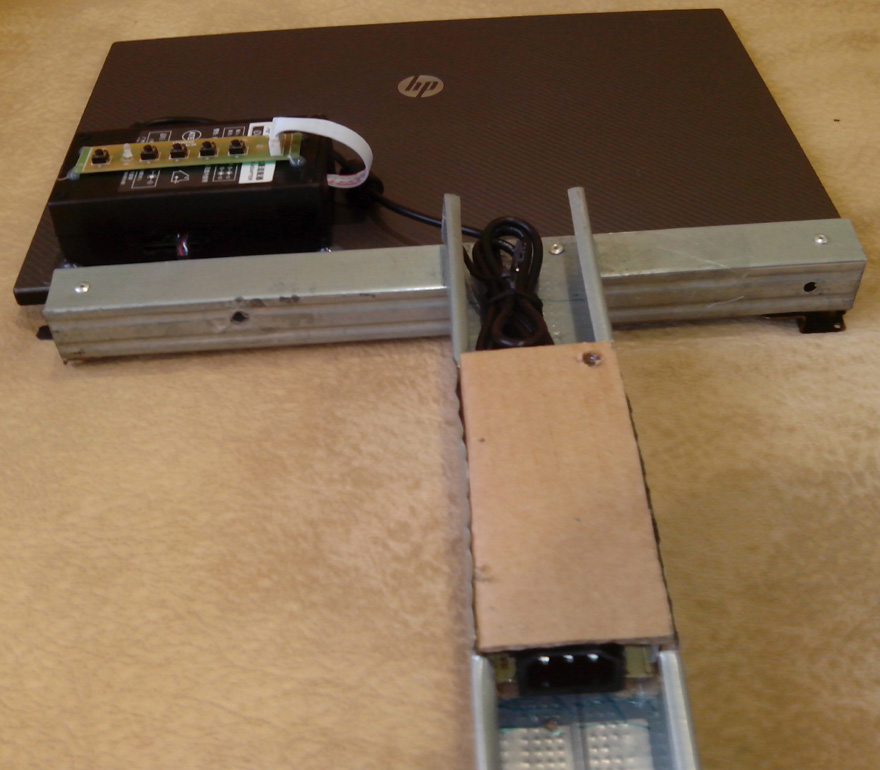
As a result, I got such a "shovel".
Installation and connection
We fasten the "shovel" to the main monitor with bolts (from some furniture left) on VESA. We attach a counterweight. We connect DVI and power.
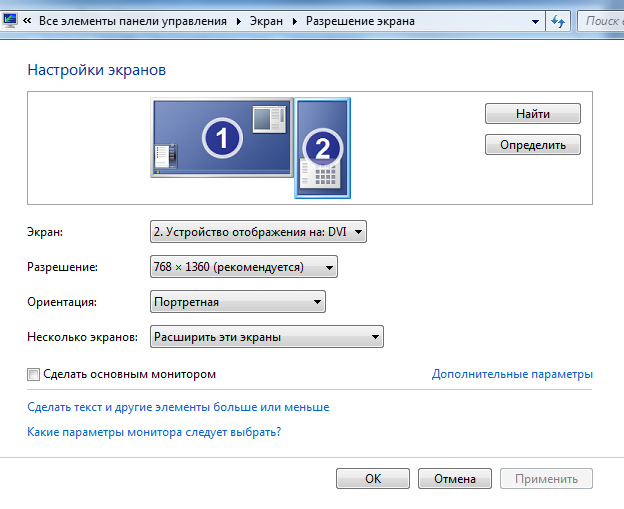
The display was not immediately determined. We go here: Control Panel → Screen → Screen Resolution Settings → Find and customize to your needs. All! Our second monitor is ready!
disadvantages
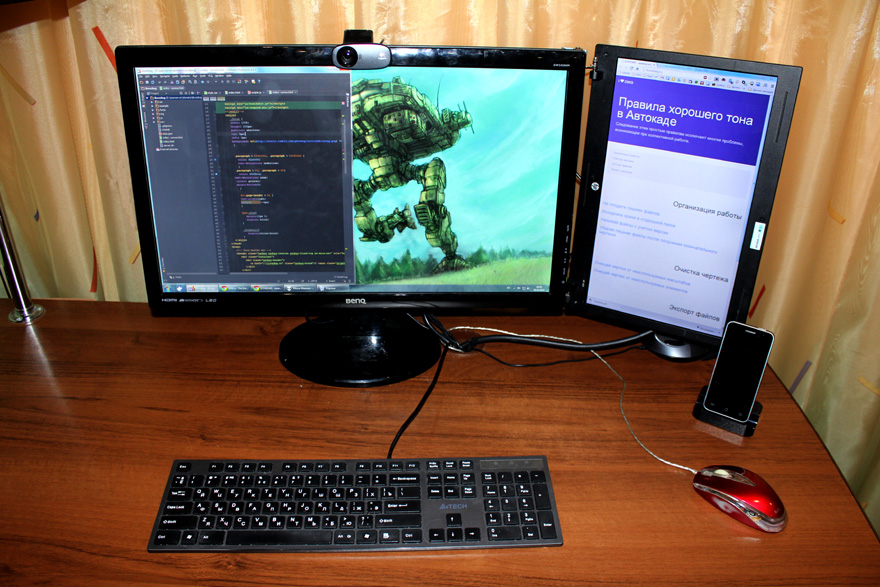
- Not a very good matrix. Firstly, it is glossy and glare because of this. Secondly, not very good viewing angles (Fortunately, the hinges did not lose their ability to rotate the display to the desired angle).
- Due to the difference in the ratios of the sides of the displays (primary 1920x1080, second 768x1360) there is no single display effect. Yes, I did a resolution of 768x1024, which is much better with solidity, but the picture didn’t suit me in quality (the letters floated a bit).
- My profile design is not very good because it is poorly resistant to torsion, which arises due to its features and the method of applying loads in it. This problem can be avoided by attaching a second profile to the lower two VESA mounting holes and riveting everything into a rigid structure.
By the way: I don’t know whose jamb it is, but when I connected my display to the VGA output of the Samsung R519 laptop under Xubuntu, the colors on the display were very strange.
conclusions
The next “project” was completed and the final result was obtained.
The total cost of the construction at the price of a matrix 1000 ~ 1500, a controller ~ 900 rubles, a power supply unit with a cord ~ 400 rubles and consumables 50 ~ 100 rubles is 1950 ~ 2500 rubles. For this money (well, maybe adding a little) you can buy a completely sane second monitor. I got the second display almost for nothing (having spent only 25 rubles on a small drill, well, and 150 rubles to 200 rubles coins). Anything else I had one way or another. All that was needed was to dig into the drawers of the table.
If I had to do it a second time, then I would use aluminum corners or squares.