The epic about WD My Book Live, or “device candy” with “cookies”
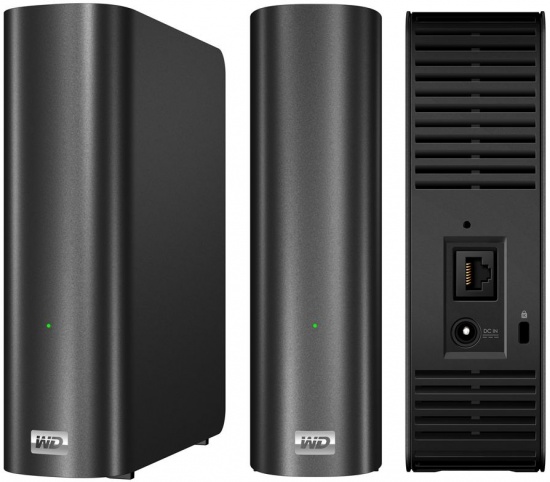
Hi% username %! At the beginning of this year, I finally turned a quarter. Realizing that I had become an adult child and needed adult toys, I bought WD My Book Live on 3Tb tanks, which in our happy family killed N rabbits right away. My happiness knew no bounds. The device bribed with its price, hardware and the presence of full-fledged Linux on board. However, as it turned out later, Linux Debian turned out to be not very full-fledged, rather castrated and, judging by the reviews of ordinary owners, a lover of brickwork. However, thanks to engineers from WD, the device quite easily rises from the state of a brick to the state of a working device ( proof 1 and proof 2) But you must admit, the times of hard reset with pliers from the economic department around the corner have long passed. Still, the era of nano-polymers and innovation. And that means the device is no longer wanted to be killed.
I am in no way a Linuxoid and for me Linux, in its essence, is a dark forest! Therefore, for starters, while studying the Internet for a long time, I only saw myself mc and transmission, which for the first time was enough for me. And I was amazed how easy it was for me - the person who first launched SSH! Six months have passed, I read the forums dedicated to the device. Day D arrived and I rolled up my sleeves and started making candy out of my device. And not simple, but “sweetie” with “cookies”, namely:
- The device is specific in that after flashing to a newer version, almost all software and system settings are lost, which you carefully and painstakingly entered,% username %. But chroot happily solves this problem. And all subsequent software should spin only on it
- The device works great as a file wash on the network. It would be too cynical to have such a resource and not use it to implement a home dropbox.
- In addition, the device must be able to upload torrents on its own, and the maximum that is required of me is to download .torrent to a specific directory, and everything else must be done by itself!
- The built-in Twonky 5 media server is working ... and thank goodness! But I would like to have something with a web-muzzle that eats more media and has the ability to configure. Twonky6 \ 7 is swept away by virtue of its not selflessness.
- Have an interface for monitoring the status of the device, in order to know how it “breathes”.
- It’s like, but as a web developer, I would like to have my own home web server for my personal mini-projects and developments (as an alternative to Denwer), but we’ll do it later, when I will have much more time.
Why did I just start all this ... It is worth remembering that all these bells and whistles create a noticeable load on the device, so it is better to decide in advance whether you need it? But come on, roll up your sleeves and get started!
Start transforming
My enthusiasm was at its limit, as I remembered the first successful experience in communicating with my Debian terminal. The first thing I dreamed about doing for a long time was to update the firmware version of my MBL. At the time of the acquisition of the device, firmware 02.41.05-034 was installed on it . The latest to date is 02.42.03-027 . It was not updated solely because this procedure inevitably leads to the erasure of all the software I installed. But now I install chroot and everything will be alright! We stocked up with two external USB-HDDs of 750Gb each and transferred all the necessary data from the MBL, which I highly recommend doing to you,% username %. In the process, I managed to rub a couple of times the files on the MBL (solely by my carelessness), so it will not be superfluous!
After copying all the data, I began to flash. From the web-based interface it was quite easy to do, but if you really do something, then do it in an adult way. Therefore, I preferred to increase my level of knowledge by updating the firmware through the terminal. In this case, any firmware version can be downloaded from the WD website .
If someone else does not have SSH enabled on the device, then this can easily be done by clicking on the link http: // mybooklive / UI / ssh or by contacting the IP address of the device, in my case it is http://192.168.0.41/ ui / ssh . Check the “SSH Access” checkbox.

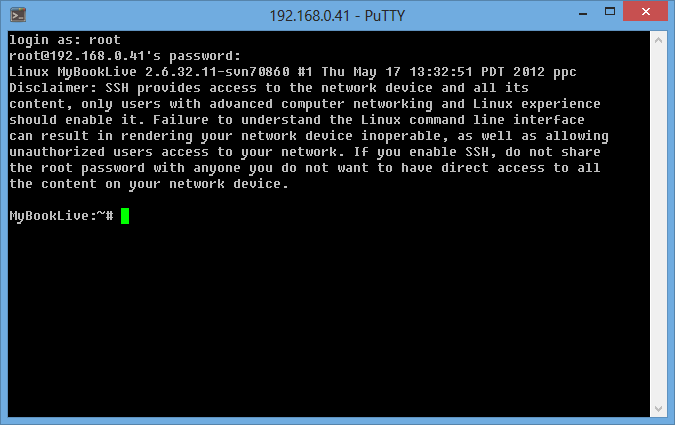
To connect to the device via SSH, you need to download any ssh client. I prefer to use PUTTY . In its settings, it is enough to register the host name or IP address of the MBL and click the “ Connect ” button . When prompting for a username and password, specify the standard root username and password welc0me (with zero instead of O). If everything is in order, then the console will respond with a welcome message and a line:
MyBookLive:~#
In the future, I will use this particular input line prefix to understand what environment we are in now and, accordingly, where to write these or those commands:
“MyBookLive:~# ” – среда корневой операционной системы.
“(chroot-debian)/# ” – среда chroot.
To begin with, if you have never done this, you should remove the full backup MBR and disk partitions:
MyBookLive:~# dd if=/dev/sda bs=15728640 count=1 | bzip2 > /DataVolume/shares/Public/SDA_MBR_FREESPACE.bz2
MyBookLive:~# dd if=/dev/sda1 | bzip2 > /DataVolume/shares/Public/SDA1_IMAGE.bz2
MyBookLive:~# dd if=/dev/sda2 | bzip2 > /DataVolume/shares/Public/SDA2_IMAGE.bz2
Now it remains only to download the received files from the directory / DataVolume / shares / Public / to another medium. And in case of any problem, we have something to roll back to. This is best done if the MBL is still empty.
And now I highly recommend changing the password to a more complex one:
MyBookLive:~# passwd [новый пароль]
The password must be entered 2 times in a row (after the first time, the system will ask you to re-enter the password) for the system to accept it. For reference, in the PUTTY console, you can paste the commands copied from the clipboard using the Shift + Ins key combination so as not to type all the commands manually and get rid of errors.
Stitching
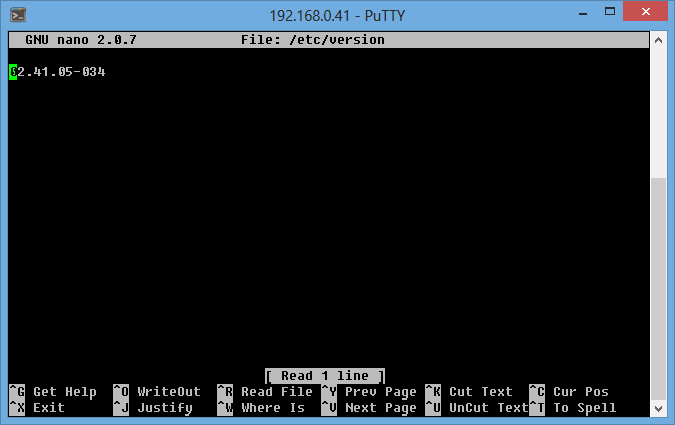
Now that we have full SSH, we can do anything we want (within reason, of course). A step with firmware is optional, but extremely desirable, because working with a bare system is more pleasant (anyway, we will lose everything during the next update). If you have the latest version of the update installed, but you want to install the same firmware from scratch, then this will suit you. First you need to see the current firmware version in the / etc / version file . To do this, type in the console:
MyBookLive:~# nano /etc/version
The Nano Editor opens. The firmware version will be written in its text box at the very top. In my case, it is 02.41.05-034 .
Нажмём Ctrl + X, чтобы выйти из редактора. Если у вас стоит самая последняя версия прошивки (т.е., на сегодняшний день это 02.42.03-027), то без проблем меняй номер прошивки на любой предыдущий (как вариант, можно вписать и мой – на скриншоте выше). В этом случае, чтобы сохранить изменения, необходимо нажать Ctrl + O, после чего согласиться нажатием клавиши Enter, а затем выйти из редактора Ctrl + X.
И так, нас всё устраивает, мы начинаем обновлять прошивку. Скачиваю и устанавливаю последнюю (на сегодняшний день) прошивку apnc-024203-027-20130529.deb с зеркала и перемещаю её в директорию /DataVolume/shares/Public/my MBL. Next, in the console you need to write:
MyBookLive:~# updateFirmwareFromFile.sh /DataVolume/shares/Public/apnc-024203-027-20130529.deb
The firmware will destroy all the programs you installed on the device, but will not affect the user files stored on the device. However, I highly recommended it earlier and will repeat it now - it is better to have a copy of these files on your hard drive than to tear your hair out afterwards! .. The firmware process will not be fast. In no case do not close the session in the SSH console and be sure to wait for its response with the message:
The system is going down for reboot NOW!
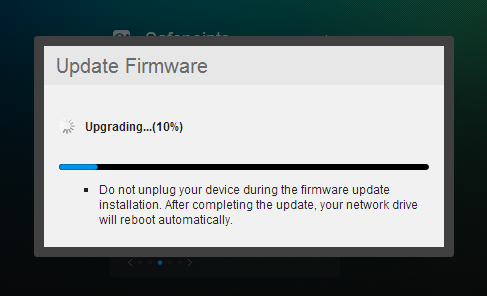
If in the process of updating the firmware, a window with the MBL web-interface is open in your browser, you most likely noticed a status window of the update process in it. Bug?
The first thing after the firmware is to freeze the udev ... Keep away from sin!
MyBookLive:~# aptitude hold udev
The list of repositories is better not to modify, because it is fraught! Run the following in the console:
MyBookLive:~# sudo apt-get update
Most likely the console swears somehow like this:
W: GPG error: http://ftp.us.debian.org wheezy Release: The following signatures couldn't be verified because the public key is not available: NO_PUBKEY AED4B06F473041FA
A similar situation arises after updating the list of repositories registered in /etc/apt/sources.list and the subsequent attempt to install something from there. The reason is that the system simply does not have public GPG keys for the repository from which the package is installed. And this same key (in my case - AED4B06F473041FA ) must be added to the system apt database. Let's do the following:
MyBookLive:~# gpg --keyserver subkeys.pgp.net --recv AED4B06F473041FA
MyBookLive:~# gpg --export --armor AED4B06F473041FA | sudo apt-key add -
If everything went well, the system will reply:
OK
Now try again:
MyBookLive:~# sudo apt-get update
Now everything is fine and this is enough to start! Does it make sense to further customize the bare system for yourself? Everyone will answer this question for himself, I don’t see the point, so I’ll immediately proceed to the next salivary point of the program!
Install chroot
Now, with a clear conscience, you can proceed to install chroot. All the necessary information is on the Code.Google project. From the instructions for the link and the descriptions from the Internet, the process is not complicated. Well, let's get started?
To get started, download the installation script.
MyBookLive:~# wget http://mbl-common.googlecode.com/svn/chroot-install/install.sh
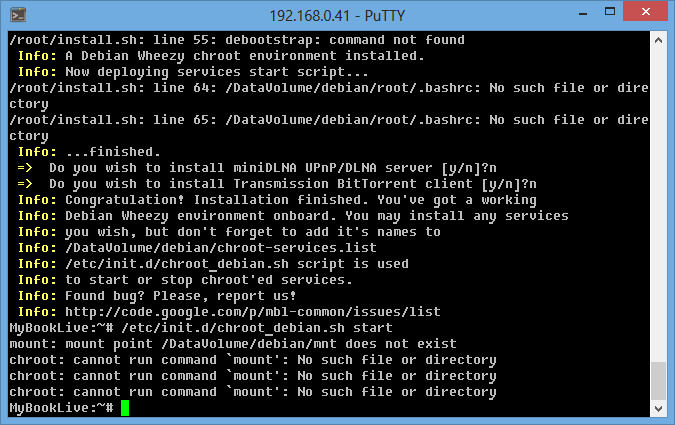
Perhaps someone will go on the run, but he scolded me, spat, frowned, puffed out his cheeks and refused to do anything. The cause of all was the reference to the outdated repository 55 bar (me through the link editor nano ftp.debian.org/debian on mirror.yandex.ru/debian ). It also turned out that it is fundamentally important to escape the triangular brackets “ < ” and “ > ” in line 36, appending a character “ \ ” before each , since the installer also cursed them. For the lazy I give a link to the installer that I have already corrected . Now run the installation process:
MyBookLive:~# sudo sh /root/install.sh
We answer all questions of the system with a positive “ y ”. The installation process itself should take from 20 to 40 minutes. In the process, a miniDLNA server, Transmission and chroot itself should be installed (although I preferred to install only chroot and deliver the rest of the buns myself). If, nevertheless, you decided to install from the stock installer and you got out problems (as in the screenshots below), then inevitably edit the installer yourself or download the link above!

But before starting a new installation, you need to correctly remove chroot so that you do not get the user files from mounted directories:
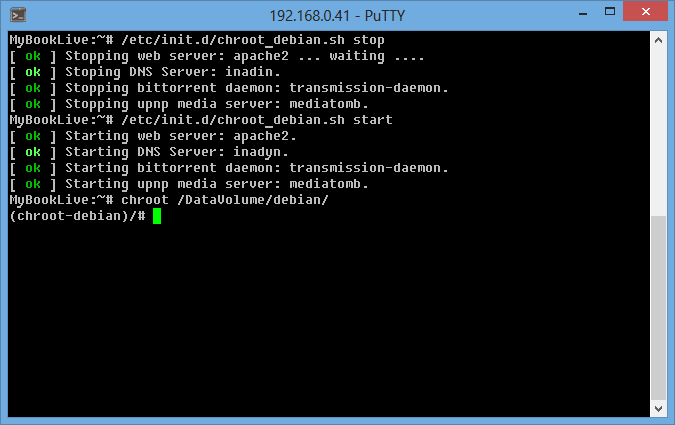
MyBookLive:~# /etc/init.d/chroot_debian.sh stop
MyBookLive:~# /etc/init.d/chroot_debian.sh remove
reboot
MyBookLive:~# rm -fr /DataVolume/debian/
Now you can start the installation again. It is important to note that it is better to do this with the sudo command, otherwise chroot does not install all the packages and, as a result, does not start as well. If you did everything, as I wrote, then in the end we get a finished sandbox and a fantasy stimulator. How to manage it is described in detail here , but still, I will try to explain.
To start chroot you need to write in the console:
MyBookLive:~# /etc/init.d/chroot_debian.sh start
By itself, chroot starts automatically when MBL starts, but still ... During the start, the services specified in /DataVolume/debian/chroot-services.list are also launched . It is important to note that the application names in this file correspond to the file names from the /DataVolume/debian/etc/init.d/ directory .
After starting, you must enter the chroot environment:
MyBookLive:~# chroot /DataVolume/debian/
While you are in a chroot environment, you can install anything and experiment without fear! A full Debian Wheezy distribution is installed in the environment. This is truly a real sandbox for imagination! To exit the chroot environment and return to the MBL environment, you must enter the exit command:
(chroot-debian)/# exit
To stop the environment, enter:
MyBookLive:~# /etc/init.d/chroot_debian.sh stop
The most interesting thing, as I wrote above, chroot is good in that when changing the MBL firmware, chroot itself and the software installed in it are not deleted. As soon as you update the firmware of the device, you can immediately enter the chroot restore command and return everything as it was:
MyBookLive:~# /DataVolume/debian/chroot_debian.sh install
You can delete the environment by stopping it, and then delete the environment startup script. After that, you must restart the MBL and clean out the / DataVolume / debian / directory completely :
MyBookLive:~# /etc/init.d/chroot_debian.sh stop
MyBookLive:~# /etc/init.d/chroot_debian.sh remove
MyBookLive:~# reboot
MyBookLive:~# rm -fr /DataVolume/debian/
Actually, with this method, I deleted the result of the chroot installation the last time.
Customize chroot
Now it’s worth it to tune the chroot environment to your needs. There is an incentive for everyone to take their imagination. I will only give an example of how I did it, so this section is more advisory in nature. If we are not in chroot yet, then it's time to enter it:
MyBookLive:~# chroot /DataVolume/debian/
To begin with, I would recommend installing 3 important packages that were not in the chroot environment (sudo, wget, and cron). They are sure to come in handy. Therefore:
(chroot-debian)/# apt-get install sudo wget cron
Now you can expand the list of system repositories. To do this, add the repositories to our /etc/apt/sources.list . However, in the chroot environment, we have only one editor and its name is mcedit:
(chroot-debian)/# mcedit /etc/apt/sources.list
You need to add these repositories to the list, replacing the existing set:
deb http://mirror.yandex.ru/debian/ wheezy main
deb http://mirror.yandex.ru/debian/ stable main contrib non-free
deb-src http://mirror.yandex.ru/debian/ stable main contrib non-free
deb http://archive.debian.org/debian/ lenny main
deb-src http://archive.debian.org/debian/ lenny main
deb http://ftp.us.debian.org/debian/ squeeze main
deb-src http://ftp.us.debian.org/debian/ squeeze main
After that, you need to update the list of packages. Unlike the root system, it handles such a list of repositories perfectly. By the way, instead of my list, you can add any of your own at will. Run in the console:
(chroot-debian)/# sudo apt-get update
If you have problems with GPG public keys, you already know what to do (we did this when setting up the MBL root environment).
By default, the mcedit text editor is installed and it suits me personally, but you can install nano, vim, ed and others to your taste if desired. In this case, you need to select the default editor:
(chroot-debian)/# update-alternatives --config editor
In the dialog you need to enter the editor number, which will be used by default.
Now, perhaps, you can install the Russian language in a chroot environment. Personally, I prefer to use English, but if it's easier for you to communicate with the device in Cyrillic, then there is no problem. Nevertheless, I recommend to do this in order to avoid problems with the names of the files in Cyrillic. Let's do it as follows:
(chroot-debian)/# sudo apt-get update
(chroot-debian)/# sudo apt-get install locales
(chroot-debian)/# sudo dpkg-reconfigure locales
After executing the last command, a list of locales appears on the screen. You must press Enter until the locale number entry screen appears. The Russian locale is located at number 349 (package ru_RU.UTF-8 ). Next, a selection of default locale options will be provided. I had these:
1. None
2. ru_RU.UTF-8
We select the second and agree with the system. Now you need to leave the chroot environment and return to the MBL:
(chroot-debian)/# exit
Add to the files (via the nano editor, as we already did above, when changing the MBL firmware version) /DataVolume/debian/root/.bashrc and /DataVolume/debian/root/.profile at the end of 2 lines:
export LANG='ru_RU.UTF-8'
export LC_ALL='ru_RU.UTF-8'
We save the changes and again we can go into chroot and check that the console began to respond with Russian text to us. If there are problems with the display of Russian letters, then it is worth setting the UTF-8 encoding in the PUTTY settings: Settings -> Sections -> Window -> Encoding -> Encoding-> UTF-8 :

As a nice addition, you can install the application for monitoring the temperature of the hard drive. Personally, I thought that I might need this in the future:
(chroot-debian)/# sudo apt-get install hddtemp
(chroot-debian)/# hddtemp /proc/1/cwd/dev/sda
Thanks to this package, I now know that the temperature of the hard drive is 63 degrees Celsius.
In principle, for me personally, these settings are enough! Moving on?
Installing your ownCloud cloud storage
Well,% username %, right now, perhaps the most interesting is starting. I have long dreamed of having my own cloud, which does not limit the volume of the hard drive. And the subject fits all my Wishlist more than - there is a client for Windows and Android! We can easily find the necessary documentation and distributions on the ownCloud project website .
I will not describe the installation process in detail. The whole process is based on this tutorial and post . Before starting the installation, you need to deal with dependent packages that need to be installed:
(chroot-debian)/# sudo apt-get install apache2 php5 php5-gd php-xml-parser php5-intl
(chroot-debian)/# sudo apt-get install php5-sqlite php5-mysql php5-pgsql smbclient curl libcurl3 php5-curl
Earlier, we already installed the wget package and we just need it now. We begin with its help to download and install ownCloud:
(chroot-debian)/# wget http://download.opensuse.org/repositories/isv:/ownCloud:/community/xUbuntu_12.04/all/owncloud_5.0.11-0_all.deb
(chroot-debian)/# sudo dpkg -i /owncloud_5.0.11-0_all.deb
If you encounter problems with the NTP server, then simply run the command:
(chroot-debian)/# sudo apt-get -f install
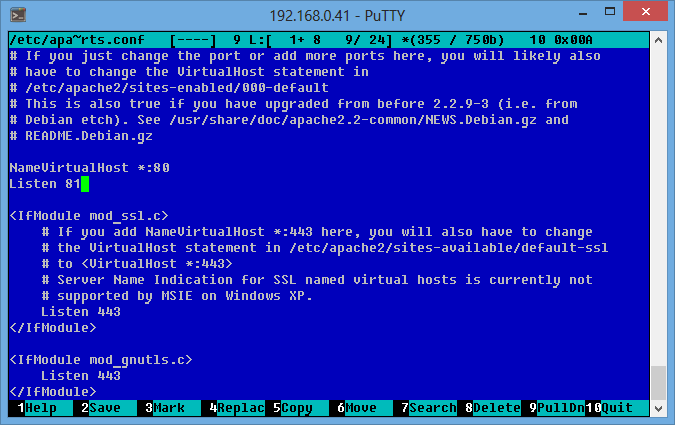
We already have the apache2 package installed. But it does not start because it requires port 80 for itself. However, this port is already occupied by the apache of the root system and hangs on it, not a little, not a little, but the MBL web interface. Personally, I did not want to lose the web interface, so I decided that ownCloud would work quite successfully for my benefit on port 81. However, it is worth remembering that in order to access ownCloud from the cloud, it will be necessary to forward the 80 port of the router to the 81 MBL port. Stop apache and edit the configuration of its ports /etc/apache2/ports.conf :
(chroot-debian)/# /etc/init.d/apache2 stop
(chroot-debian)/# mcedit /etc/apache2/ports.conf
In the file for the Listen directive, change the port from 80 to 81 . Press F2 to save and F10 to exit the editor:
Now it’s worth starting Apache again:
(chroot-debian)/# /etc/init.d/apache2 start
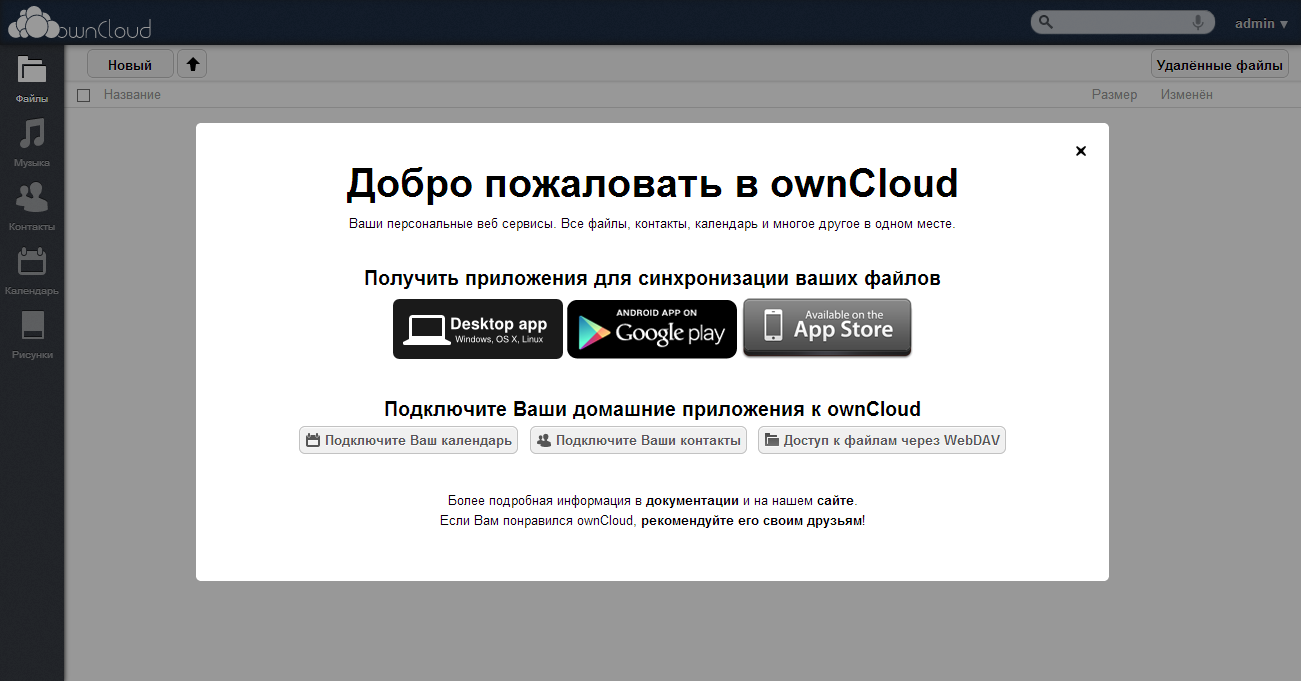
If we did everything right, then the link http: // mybooklive: 81 / owncloud / should open the ownCloud page! Hurrah!
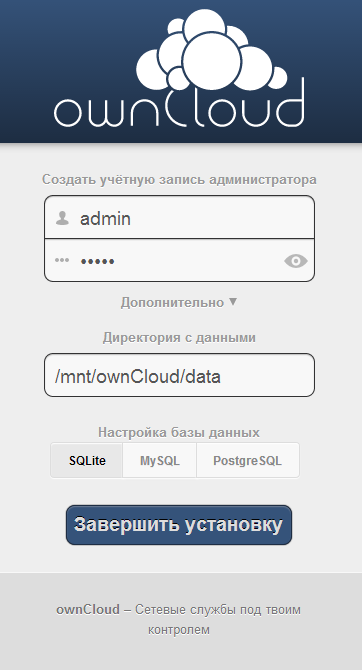
Now we need to create a cloud file storage directory. For this, I recommend creating a directory outside the / mnt / Public / directory so that there is no public access to the cloud data. However, you yourself have the right to decide, based on your requirements, where this directory should be located. Proceed:
(chroot-debian)/# mkdir -p /mnt/ownCloud/data
(chroot-debian)/# chmod -R a+rwx /mnt/ownCloud
Also, if you need to give access to the directory over the network, you must create a similar directory through the MBL web interface.
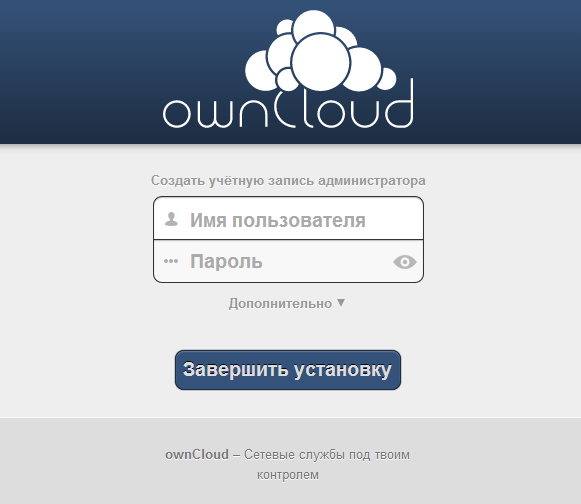
Let's set up the web-interface. We need to come up with the login / password of the cloud administrator, assign the data directory created by us above, and also select the database. I usually prefer MySQL, but this time I decided to experiment with SQLite. In other matters, when choosing MySQL as a database, be prepared to enter the database name for your ownCloud, as well as the MySQL username and password. If everything is ready, click “ Finish installation ”.
Hooray, it was worth it! It remains now to download the client for Windows, OS X, Linux , Android or iOS . Documentation is available here . However, that is not all. For successful operation, we also need to add the apache2 daemon to the startup file of the chroot environment. To do this, edit the file /chroot-services.list :
(chroot-debian)/# mcedit /chroot-services.list
And add a line with the name of the service to it:
apache2
Excellent. It is worth recalling that ownCloud is certainly good, but it does not load the device badly! At least for me.
Install Inadyn
The cloud is good when it is visible not only in the home network, otherwise there is not much use from it! In solving this issue, I took advantage of the experience of the distinguished comrade phoenixweiss in his tutorial . However, I want to note one important point, so please first read the material here! Inadyn needs to start when the chroot environment starts. In principle, it is not difficult to do this by writing it to Crontab with the reboot directive so that it rises automatically when the system boots. However, by installing the cron package and writing inadyn in this way, I got the understanding that the reboot directive didn’t work at all in chroot.
I thought! Invented! Why reinvent the wheel, because we already have a very kosher way to autoload important packages for us through/chroot-services.list . He decided to use it. However, for our package to start, the launch file for the package must have the location /etc/init.d/inadyn and respond to the start / stop / restart / reload / status parameters . It remains, however, to learn how to write Bash scripts, but for me (the person who sees the Linux console for the second time in life) it was not difficult, a couple of hours of googling and I gave birth to my first script:
File Contents /etc/init.d/inadyn
#!/bin/sh
# Проверяем параметры запуска
case $1 in
	start) # Старт
		# Если пакет запущен, он вернёт свой PID
		if [ -z "$(pidof inadyn)" ];
		then
			# Если PID пустой, значит пакет не запущен! Запустим пакет
			/usr/sbin/inadyn
			echo "[ \033[1;32mok\033[0m ] Starting DNS Server: inadyn."
		Else
			# Иначе пакет запущен!
			echo "[ \033[1;31mfailure\033[0m ] Starting DNS Server: inadyn already running."
		fi
		;;
	stop) # Стоп
		# Если пакет запущен, он вернёт свой PID
		if [ -z "$(pidof inadyn)" ];
		then
			# Если PID пустой, значит пакет не запущен и останавливать нечего
			echo "[ \033[1;31mfailure\033[0m ] Stoping DNS Server: inadin is not running."
		Else
			# Иначе пакет запущен. Убиваем его по PID
			for pid in $(pidof inadyn)
			do
				kill -9 "$pid"
			done
			echo "[ \033[1;32mok\033[0m ] Stoping DNS Server: inadin."
		fi
		;;
	restart|reload) # Перезапуск
		$0 stop
		sleep 3
		$0 start
		;;
	status) # Статус
		# По аналогии, выводим статус
		if [ -z "$(pidof inadyn)" ];
		then
			echo "[ \033[1;33minfo\033[0m ] Status DNS Server: inadin is not runned."
		else
			echo "[ \033[1;33minfo\033[0m ] Status DNS Server: inadin is runned."
		fi
		;;
	*)
	echo "Usage: $0 {start|stop|restart|reload|status}"
	exit 1
	;;
esac
exit 0
Save this code to the /etc/init.d/inadyn file . Again, the lazy can easily download the finished script from the link . Now we can add the line with the package name to the /chroot-services.list file and check by stopping and starting the chroot environment. Excellent!

Installing the Transmission torrent client
Perhaps the best torrent client for MBL is Transmission. Let's install it faster:
(chroot-debian)/# sudo apt-get install transmission-daemon
If the installation was successful, then at its completion the transmission-daemon daemon will be launched. The following commands are used to control the daemon:
(chroot-debian)/# /etc/init.d/transmission-daemon start
(chroot-debian)/# /etc/init.d/transmission-daemon stop
(chroot-debian)/# /etc/init.d/transmission-daemon reload
It is not difficult to understand what is needed for what. It is also necessary to correct the transmission-daemon settings, which are located in the /etc/transmission-daemon/settings.json file . The file is in JSON format. You can configure it yourself, or you can download my configuration file by reference , after redirecting links to directories. A description of all directives can be found here . In my config, auto-capture of .torrent files from the / mnt / Torrents / Init / directory has already been configured and the download of torrents starts automatically.
Also, so that the transmission daemon starts automatically with the start of chroot, you need to add the line “transmission-daemon” to the file /chroot-services.list relative to the root of the chroot directory.
To check the result, reboot the chroot environment. If everything went fine, we will see this:

To access the web-based interface, go to the link http: // mybooklive: 9091 / transmission / web / . For detailed information, I suggest visiting the project website , and if someone is looking for where gui will be pulled, then feel free to come here !
Now our MBL is a little cooler than a simple Linux box on board. But that is not all!
Install MediaTomb Media Server
Everyone, of course, decides for himself which media server to use, however Twonky is not enough for me personally! There was a choice between installing miniDLNA and MediaTomb. I made a choice in favor of the second.
First, stop the Twonky Server service on MBL. In principle, it should not damage us, but nevertheless, it is better to disable it as unnecessary:
MyBookLive:~# /etc/init.d/twonky stop
And also in the Settings-> Media-> Twonky Service section in the MBL web shell.

Next, switch to the chroot environment and run the MediaTomb installation:
(chroot-debian)/# sudo apt-get install mediatomb
The system should inform that many dependent packages will be installed, which we agree to. It would not be superfluous to install the ffmpegthumbnailer and ffmpeg packages for displaying tumblenails:
(chroot-debian)/# sudo apt-get install ffmpegthumbnailer ffmpeg
For Mediatomb to work correctly, however, I recommend installing the Russian locale, otherwise the Cyrillic file names in the system and web-interface will look like this: “ ????????????. Avi ”. The following commands are used to control the application:
(chroot-debian)/# /etc/init.d/mediatomb start
(chroot-debian)/# /etc/init.d/mediatomb stop
(chroot-debian)/# /etc/init.d/mediatomb restart
By analogy with Transmission, everything is easy here. Now it’s worth a bit to modify the application settings, the file of which is located in /etc/mediatomb/config.xml . More detailed information on the configuration description can be found here . However, you can also use my configuration file , after replacing the 14th line in it “ uuid: 88be34d6-51bd-4cd4-a4a3-a663dd068969 ” with the same one from your default config (well, if it was not there, leave mine). Judging by the experience of the Internet community, some with such settings do not stream mkv files. In this case, line 91 of my config should be replaced with one of the lines below:
After that, it is worth restarting the server and trying to get to the web interface of the media server at the link http: // mybooklive: 49152 / .
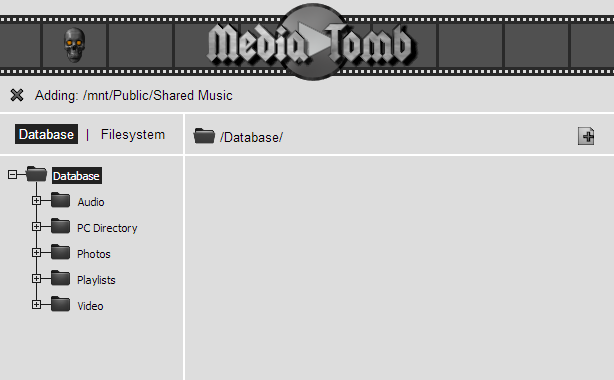
If the web-interface has opened successfully, then everything works fine! You can share directories with media files in it. It remains now to register mediatomb at startup /chroot-services.list (the last line, immediately after transmission-daemon, you need to add mediatomb). After rebooting, chroot should now start apache2, inadyn, transmission and mediatomb - great!
The project has a website where, of course, you can find comprehensive information. I also found a good faq on mediatomb in Russian, a manual for connecting subtitles to mediatomb, and information on transcoding settings ( link1 , link2 ). I didn’t set them up, because there wasn’t a TV box with DLNA support in fact (it is expected to be purchased only after the repair work at home is completed), so I’ll probably add an article on this topic later.
Install Monitorix
Monitorix is one of the best, in my opinion, packages for monitoring the state of iron. Its advantages are that it essentially does not burden the MBL with constant data generation, but generates them only when the user accesses the web interface of the package. Well, install it? First we need to install the dependent packages:
(chroot-debian)/# sudo apt-get install rrdtool librrds-perl libwww-perl libdbi-perl libemail-date-format-perl libmime-lite-perl libmime-types-perl libnet-daemon-perl libplrpc-perl nullmailer
Some of the packages have already been installed, some not yet - not scary! Now we begin to install Monitorix itself:
(chroot-debian)/# sudo wget -P / http://www.monitorix.org/monitorix_3.3.0-izzy1_all.deb
(chroot-debian)/# sudo dpkg -i /monitorix_3.3.0-izzy1_all.deb
If the installation process stops due to the lack of dependent packages, then we fix the situation:
(chroot-debian)/# sudo apt-get -f install
(chroot-debian)/# sudo dpkg -i /monitorix_3.3.0-izzy1_all.deb
Now that the installation is complete, we need to edit the /etc/apache2/conf.d/monitorix.conf file and replace the corresponding settings in it with the code below:
		DirectoryIndex monitorix.cgi
		Options ExecCGI
		order deny,allow
		deny from all
		allow from all # Ну или пишем IP-адрес, с которого хотим заходить в web-интерфейс
Now restart apache2 and monitorix itself:
(chroot-debian)/# /etc/init.d/monitorix restart
(chroot-debian)/# /etc/init.d/apache2 restart
And we check the package through the web interface http: // mybooklive: 81 / monitorix / .
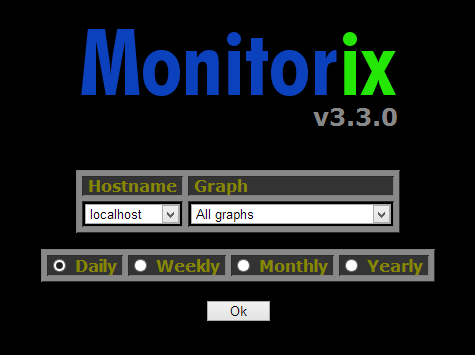
If everything is done correctly, then you will also see that on the screenshots above. It is also worth remembering that the program settings are located in the /etc/monitorix.conf files . Armed with documentation from the project website, you can configure it yourself, or download my configuration file .
Conclusion
Well,% username %, with a little effort, at the end we got a box with decent functionality, a sandbox and a fantasy stimulator. In the article, I tuned MBL exclusively for my Wishlist, but the prospects for its use have now become truly limitless! After installing Chroot, we untied our hands, and now, like a sculptor, we can begin to sculpt our creations! I wish you success and a creative flight. And I hope that the community will meet with interest the prospect of further improvement of the device!
useful links
- WD My Book Live networked storage and its refinement - device improvements from comrade cmepthuk .
- We create a personal 3 TB cloud - a more detailed post about OwnCloud from a friend phoenixweiss .
- WD MyBook Live — расширение стандартной функциональности — интересные доработки от товарища ZimniY.
- Два DNLA-сервера на одном WD My Book Live — позитивный опыт скрещивания от товарища gorynych_zmey.
- NAS Western Digital My Book Live — ветка по устройству на форуме ixbt.
- Разбор, восстановление и обзор WD MyBook Live — вскрытие и попытка восстановление устройства от отечественного комрада.
- Backup Images Of MyBook (MyBook Live At End Of Page) — инструкция по снятию бэкапа.
- Debricking Script That Can Keep Data — инструкция по раскирпичиванию устройства.
- Официальный репозиторий прошивок — респаун котиков, радуги и добра.
- reinstall scripts (updateFirmwareFromFile.sh, share-param.sh, etc.) - reinstallation of firmware update scripts. In case the CHEF, EVERYTHING IS LOST!