Install Os X Mountain Lion 10.8.3 on ESXi

After seeing how my colleagues put Os X Mountain Lion 10.8.3 on ESXi on the 3rd day, I decided to remember and record their steps to deploy this product.
1. First you need to download the image: Os X Mountain Lion 10.8.3 (Image for VMware) . This installation was made from this image, although before that the same thing had been done for another, lighter image.
2. Unpack and everything that is in Os X Mountain Lion 10.8.3 upload to ESXi.
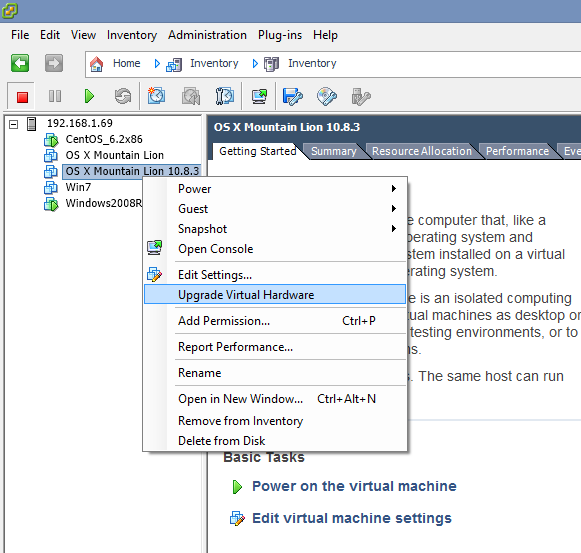
3. We make "Upgrade Virtual Hardware".
4. We start the virtual machine and we immediately get the error :
“Unsupported or invalid disk type 7“
We treat the error by the method of converting the disk as it is written in my article VMWare: Unsupported or invalid disk type 7 .
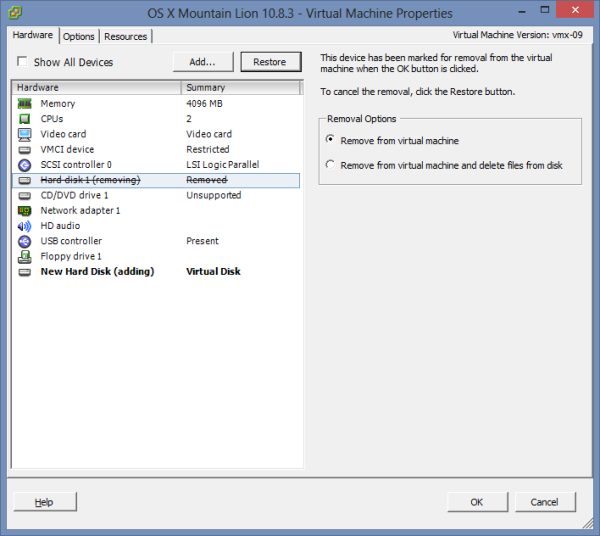
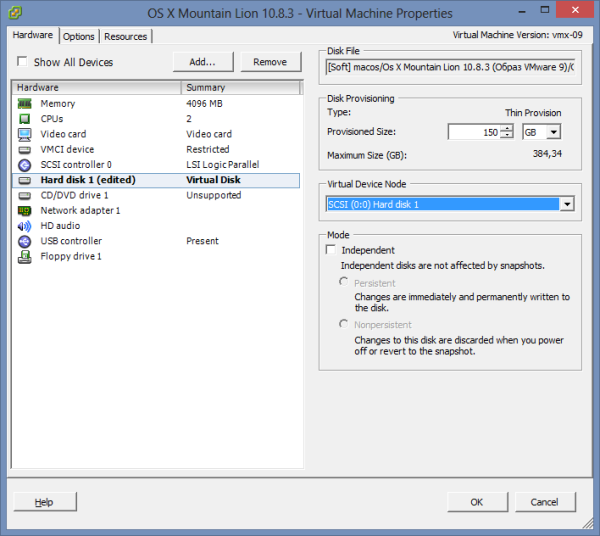
5. We do a disk replacement.
Just in case, I put a new disk on the same scsi lun.
6. We launch a virtualka.
MacOS successfully started, and after answering standard questions (and there may not be any, it all depends on the image), we proceed to the configuration.
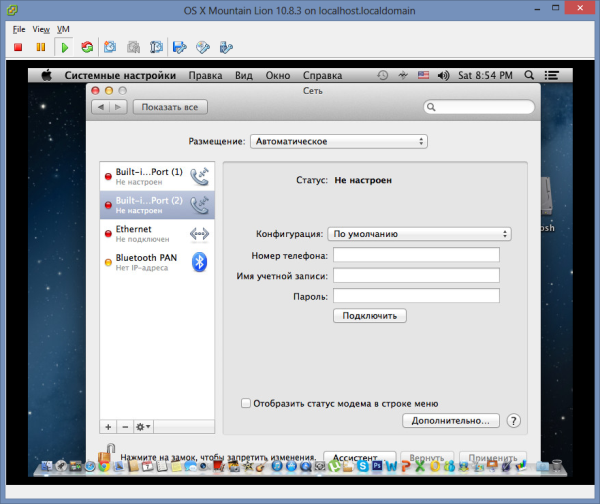
7. The first thing that catches your eye is a broken network.
It's all about a non-standard network card. It makes no sense to put “VMWare tools”, because on this process, the virtual machine is likely to freeze. Therefore, we will act differently.
We remove the non-working network adapter through the sphere, add the standard E1000E (just in case, remember its MAC address).

Synchronously remove the idle network adapter from Os X.
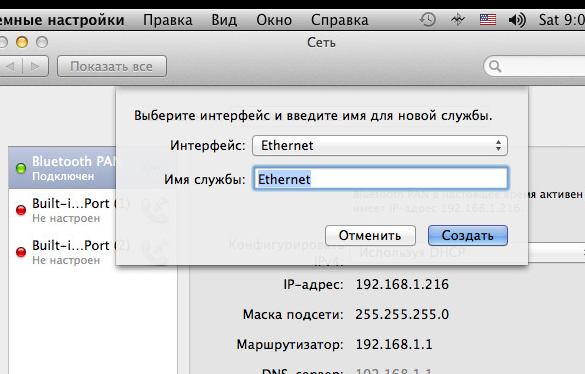
8.We send MacOS to reboot.
After starting, again go to "System Settings -> Network" and add a new network adapter.
Through the menu "Advanced -> Hardware" , we verify that the network card has the same MAC that we remembered earlier.
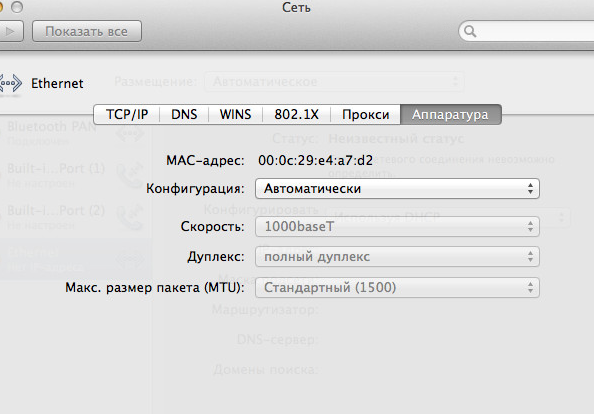
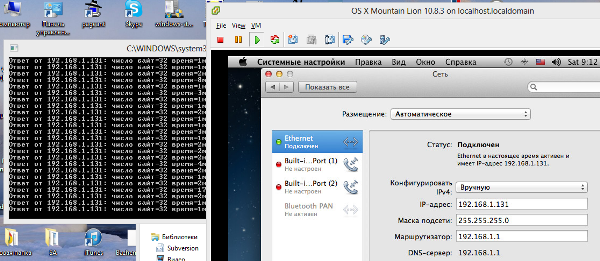
Click "apply", and if we did everything right, the network should appear.
I am somewhat inconvenient to work through vSphere Client, so I activate the built-in VNC server for remote work.
1. To enable VNC in Leopard or Snow Leopard, click "System Settings -> Sharing" and put a daw for the service "Common Screen".
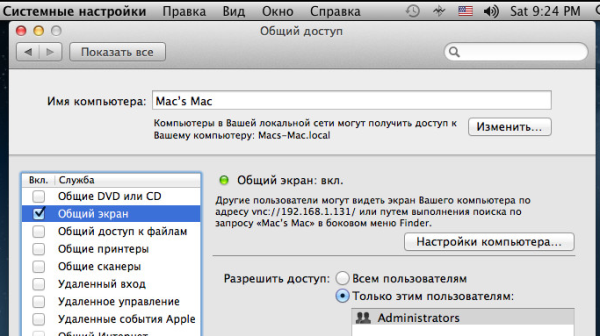
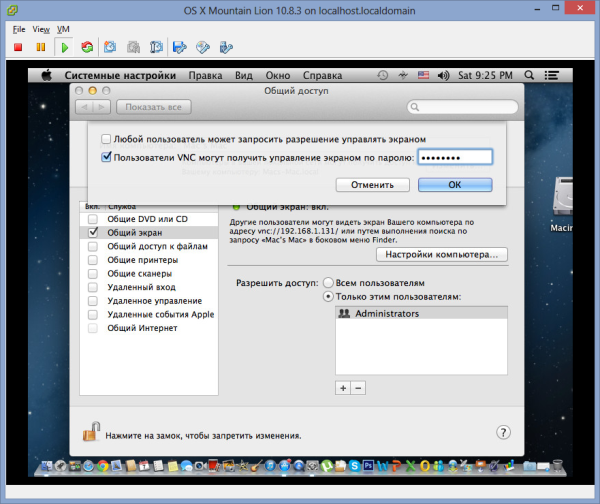
2. Click the "Computer Settings" button.
We mark the item “VNC users can get screen control by password” and specify the password.
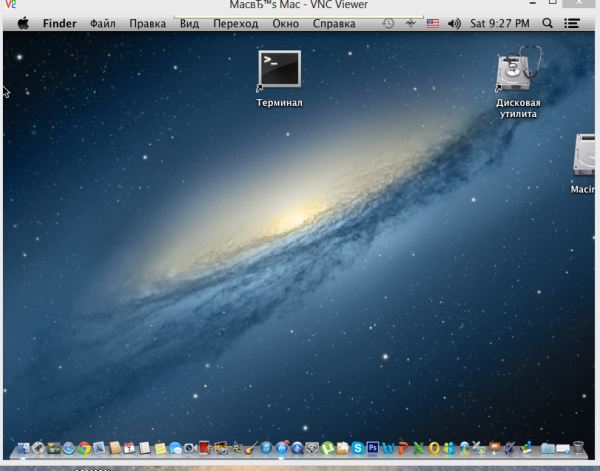
3. If everything is done correctly, then the remote VNC client, you can access our MacOS image.
If you are not particularly distracted, then the whole process from downloading the image to the very last item takes about 1.5-2 hours.