DJI Ronin S - the first start and the main functions
In this review article we will talk about the new product DJI Ronin S. The device will help you not only to shoot a stable video, but also to enjoy the creative process. To do this, we turn to deal with his work and the embodiment of your ideas in life will become much easier.
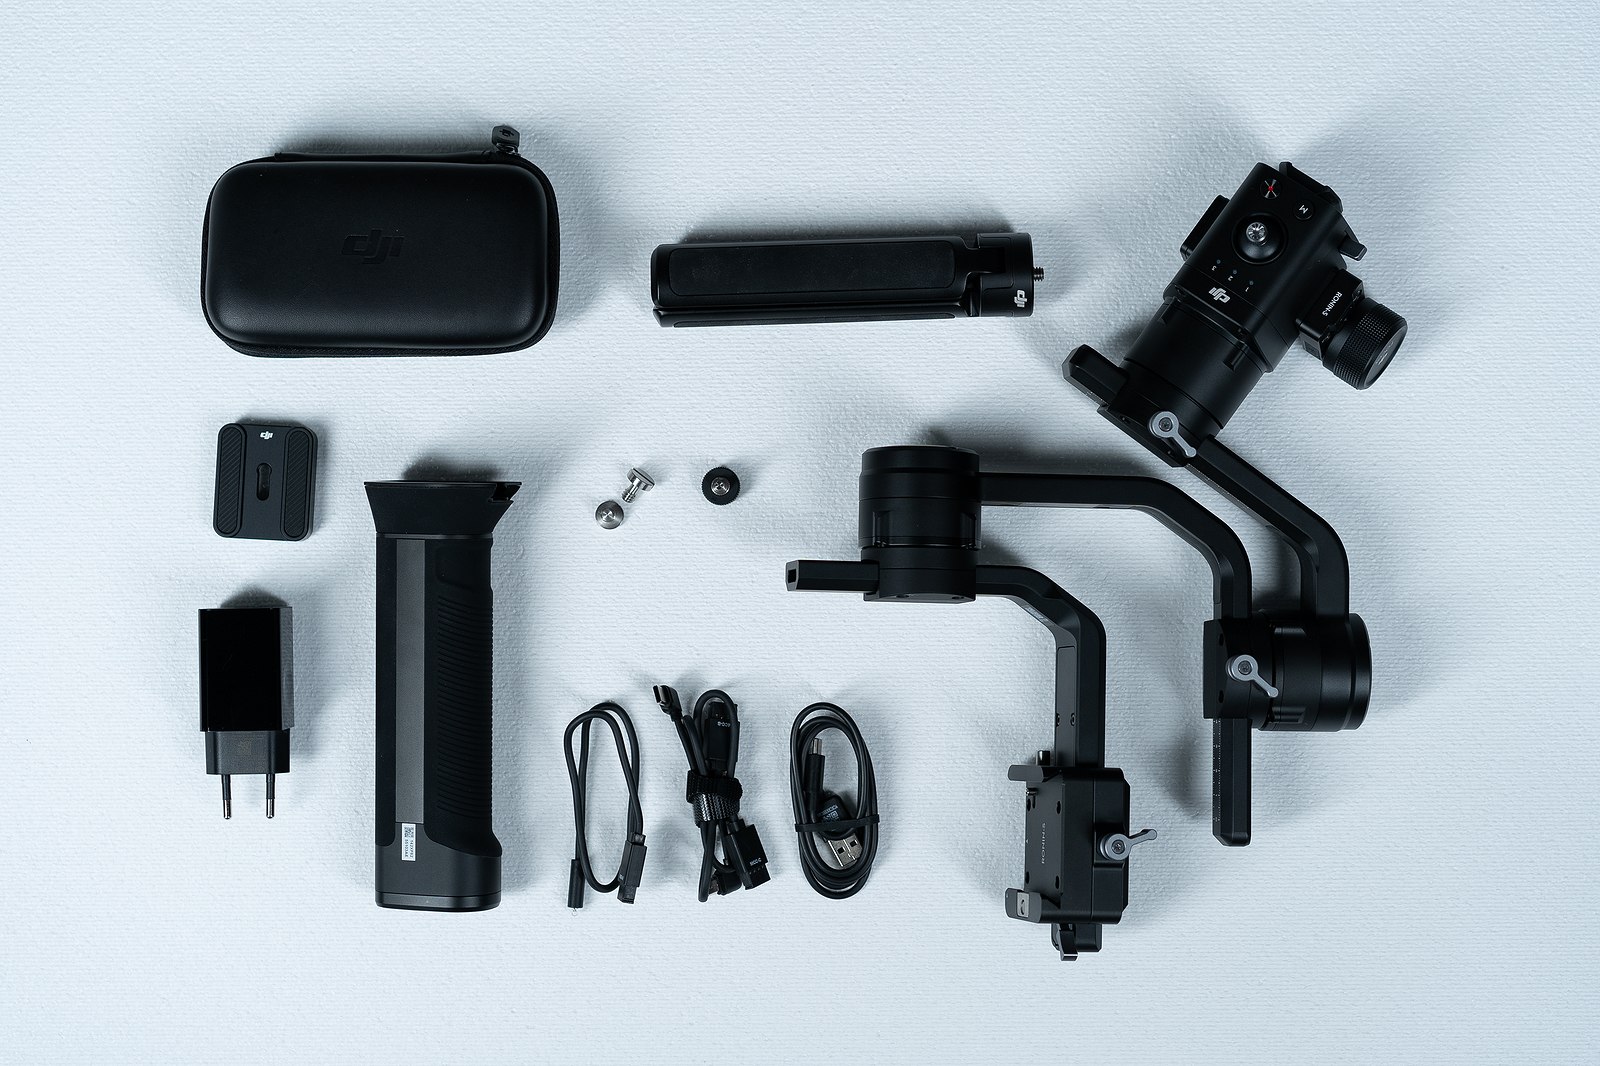
It is worth starting with a review of the complete set of stesedikam
Having collected just a few details (remembering the first DJI Ronin, it should be noted that the process was significantly simplified) it is necessary to balance the camera as usual, achieving a state of something similar to weightlessness - the camera should not “peck” on any axis, but retain its no matter how you turn it. Such a balance will reduce the load on the motors and, consequently, achieve maximum battery life.
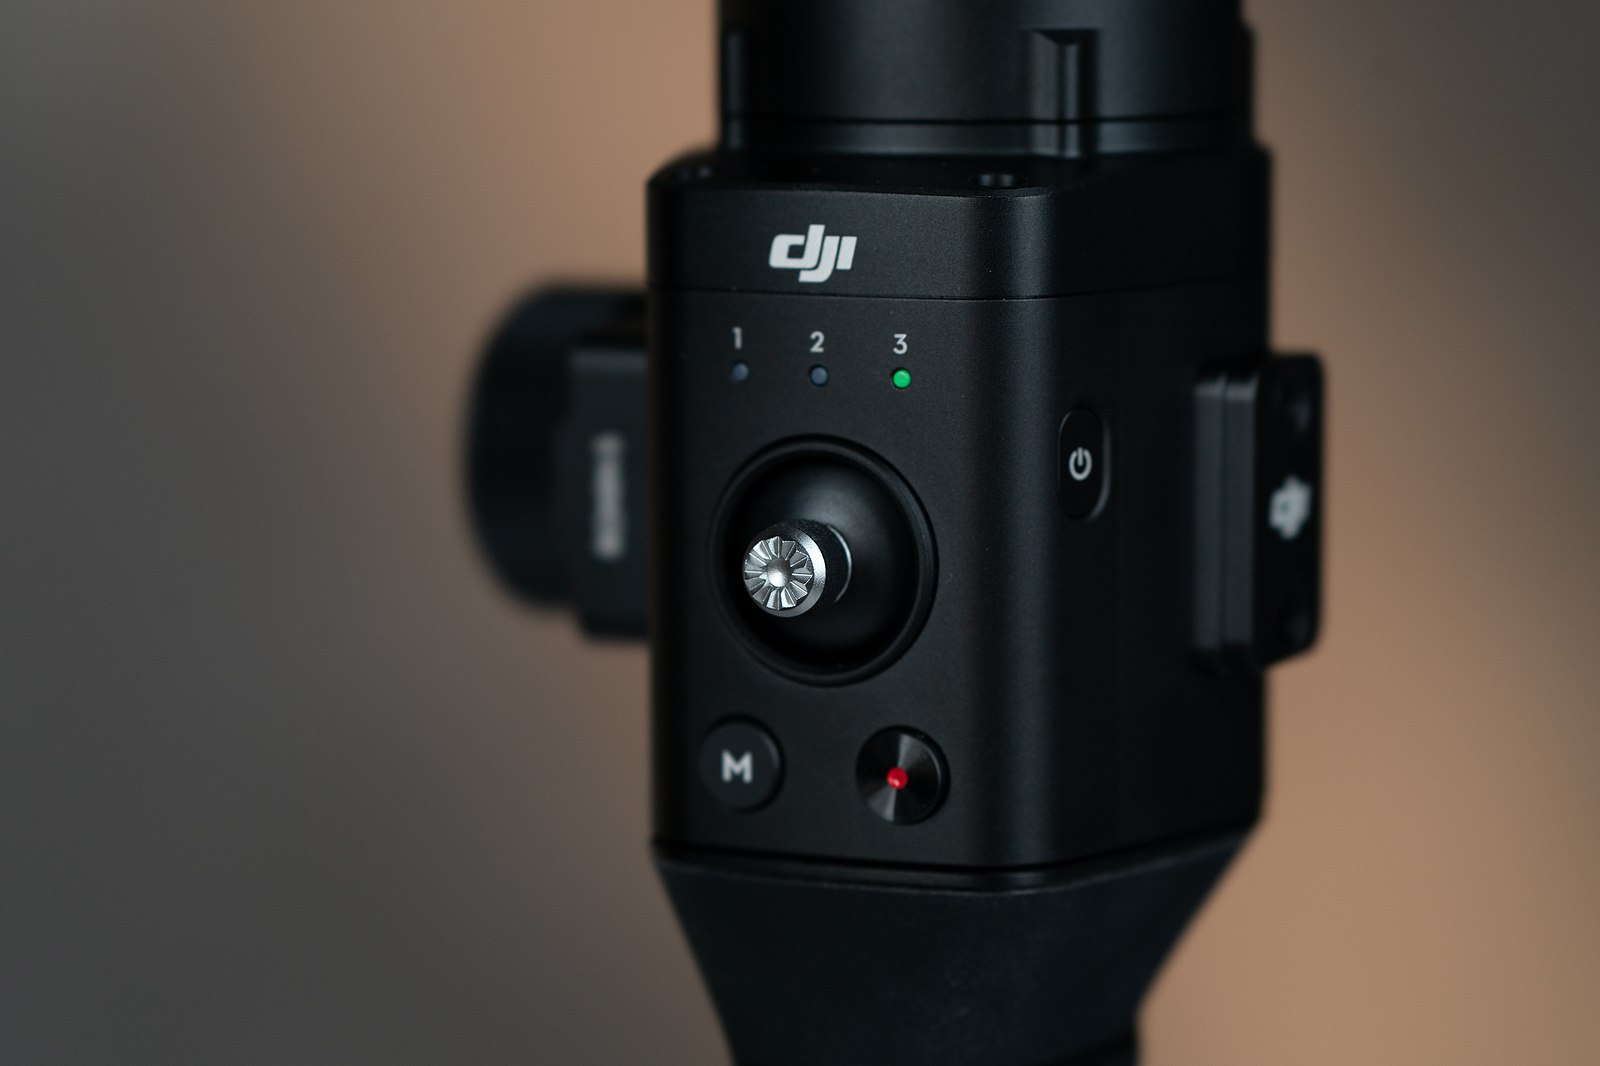
Now you can turn on the device. The process consists of 3 simple steps:
It is worth noting that the last point is not at all mandatory, since needed mainly for the initial activation of the new device and settings, as well as checking the status and parameters. Unlike DJI Osmo mobile, here the recording is made on the camera's flash drive, so the application is more like a “service” function and by and large it doesn’t even have to be kept on the phone all the time.
Some functions of the application - for example, turning off motors or “selfie mode” is available directly from the handle by pressing the trigger 2 or 3 times. Switching the profile is also available from the application, as well as from the very steadicam.
A little bit about the creative profiles. In total, you can program up to 3 profiles. This is done through the application DJI. Here you can adjust the sensitivity, the speed of recoil and the smoothing of the pulse for each individual motor, and then save it to one of the 3 profiles. It is also possible to reassign control channels, for example, to assign horizon control, in order to be able to rotate the camera 360 degrees along the ROLL axis. Here you can configure and reverse channel. In this way, you can create presets for smooth, dynamic and, for example, shooting 360 degrees.
In addition to the settings of the joystick, you will need to adjust the stabilizer itself. This is done in the Smooth Track menu. With the help of these settings you can make the suspension as responsive as possible to each movement of the operator, as well as smooth and inert. If you activate the Push function, you will be able to manually change the position of the steadicum simply by turning it with your hand, in the standard mode, the gimbal will always try to return to the initial position.
And of course there is the possibility of manual adjustment of the motors, which is required for the most proper adjustment of the work under the weight of the camera. It is worth noting that the maximum weight of the camera being installed, declared by the manufacturer, is 3.6 kg.
The manufacturer also took care of those who are not very versed in the technique of leaving, as in previous versions of the stabilizer, the function of automatic adjustment of the motors.
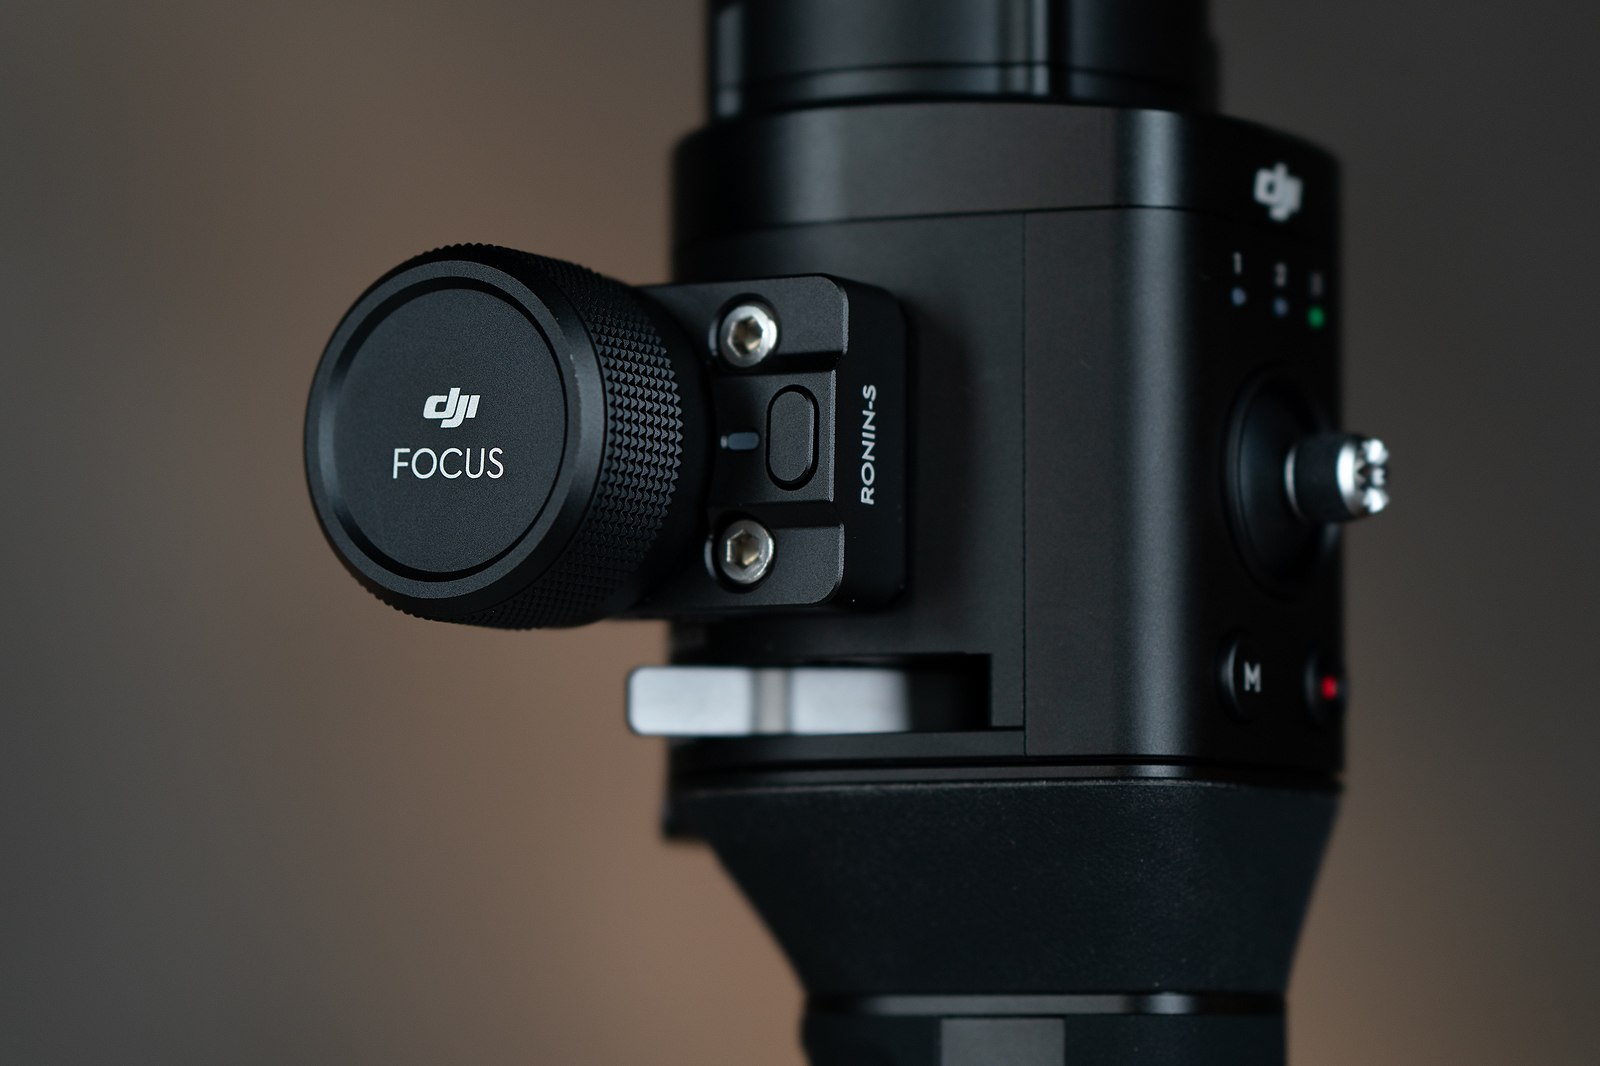
If in terms of customization almost nothing has changed, then in terms of shooting in this version we got additional functions. To use them, we need to connect the camera to the receiver with one of the included cables. USB type B / C or remote control cable, but with the latter most likely you will not be able to use the most necessary function-focus ring.
In order to use all possible functions, it is recommended to familiarize yourself with the list of supported cameras / lenses and the functions that work with them before purchasing. For the remote control to work, you may need to enable this feature in the camera itself. Then you will be able to control the start of recording and stop using the button on the handle, which is undoubtedly very convenient.

Let's return to the functions of the application. The first item - “Capture” - allows you to control the stabilizer from your smartphone using a virtual joystick. Secondly, the “Panorama” function is rather a tool for photographers whose main task is to shoot panoramas, which allows you to fully automate the process by setting parameters such as matrix size, focal length, frame overlap percentage, delay and number of rows. The next mode - “Timelapse” - in general - nothing remarkable - the usual adjustable interval shooting, but the other mode - “Motion Lapse” is much more interesting. In general, it repeats this function in Osmo Mobile, but for a large camera. Now you can shoot sunrise or sunset, the movement of clouds or other “charms” of nature in the maximum resolution of your camera. And the last function is “Track”,
If the technical side as a whole is more or less clear, then it is worth turning to the impressions. Perhaps this can be a kind of resume.
What is this stabilizer for and for whom?
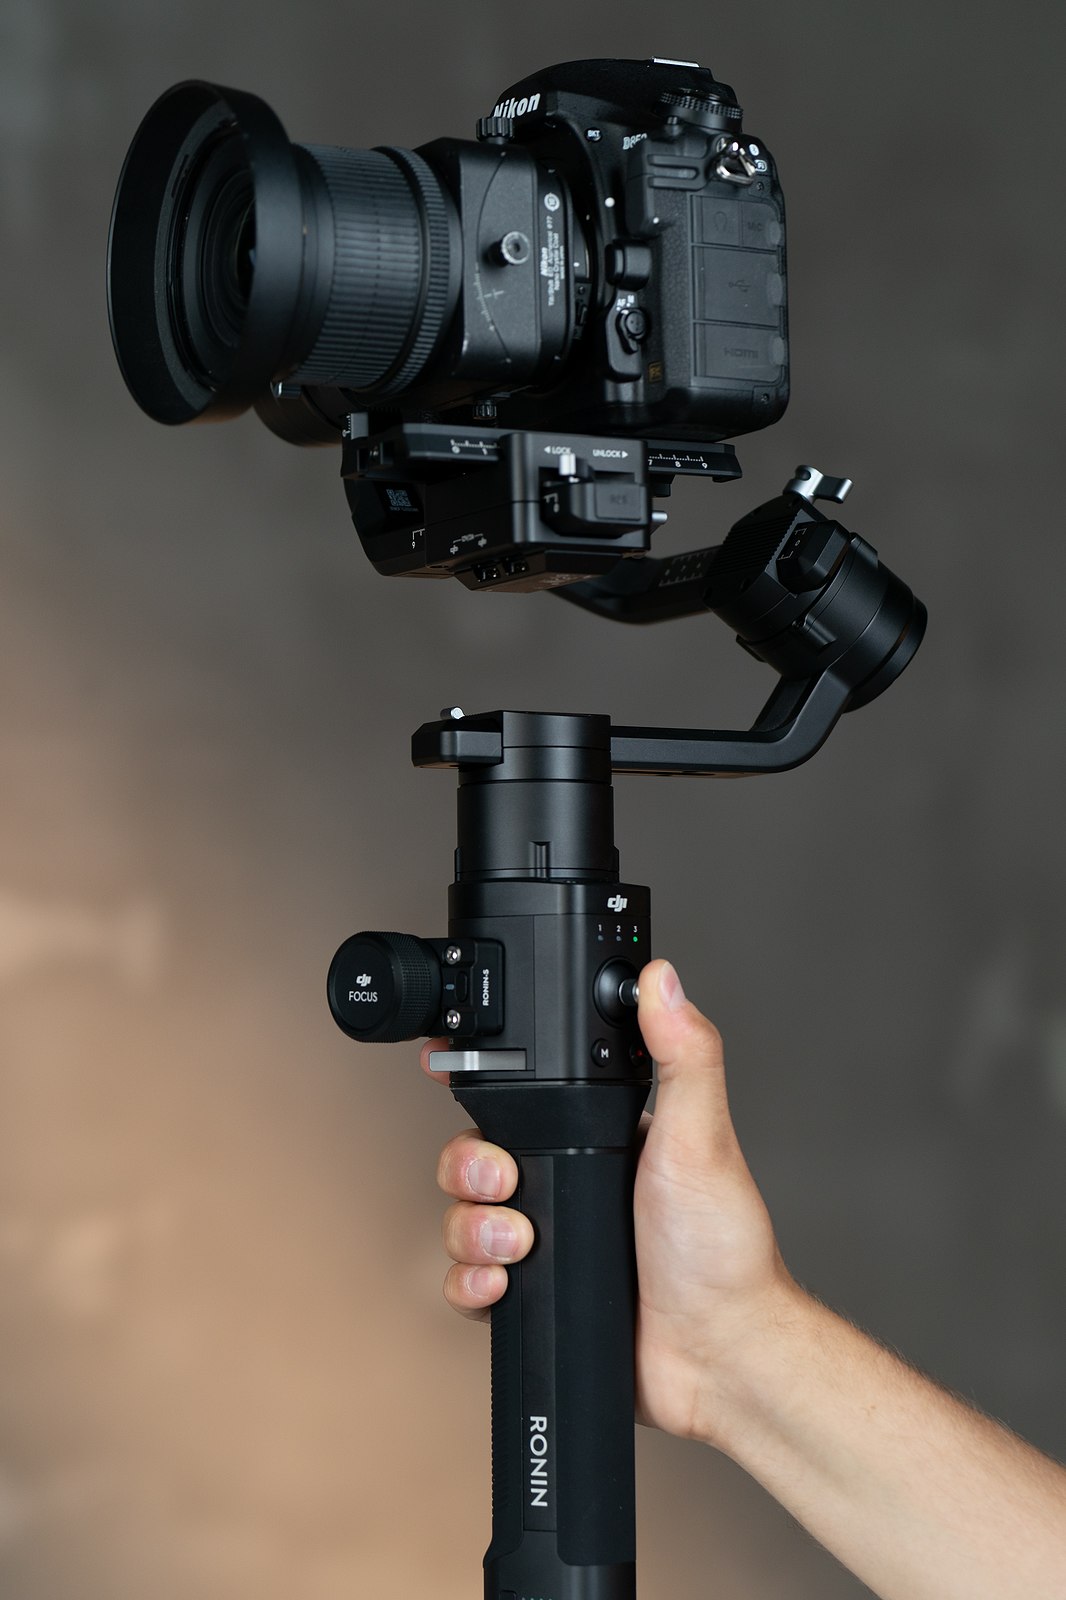
First, it is incomparably lighter than the big two-handed version - just 1.85 kg (without a camera). A very capacious built-in battery will allow you to shoot almost “all day” (up to 12 hours of continuous operation when properly configured, as stated by DJI).
Secondly, the stabilizer itself is quite compact - this applies not only to carrying, but also the ability to shoot in a confined space (for example, through a car window), as well as from lower points. In general, a form factor with such a handle brings it closer in mobility and convenience to DJI Osmo, making it not only a professional tool, but also potentially suitable for travelers, bloggers and simply for home use.
Thirdly - it should be noted also the price factor - less than 60 thousand rubles. Not a little, as it may seem at first glance, but not so much, considering that this stabilizer includes in general everything that is needed, does not require any additional investments like 3-4 replaceable batteries, a separate expensive system focus (like DJI Focus), additional control panels, which take up a lot of space in the backpack, and even require a separate bulky case and space in the luggage. Here we have the opportunity to throw everything in the photo backpack and go hiking or even a long journey, getting great stabilization and ease of use!
It is worth starting with a review of the complete set of stesedikam
- pen with built-in battery 2400mach
- Stabilization hanger — levers and motors — the most important part of the stabilizer; an eccentric clamp allows you to connect them to the handle and bring the system into readiness in a matter of seconds
- the tripod / tripod also comes bundled so that you can relax a bit and use a suitable surface if shooting is not planned.
- mounting plate - provides direct connection of the camera to the stabilizer pad
- case with the necessary additions such as cables, lens latch, platform for the camera and standard mounting bolts.
Having collected just a few details (remembering the first DJI Ronin, it should be noted that the process was significantly simplified) it is necessary to balance the camera as usual, achieving a state of something similar to weightlessness - the camera should not “peck” on any axis, but retain its no matter how you turn it. Such a balance will reduce the load on the motors and, consequently, achieve maximum battery life.
Now you can turn on the device. The process consists of 3 simple steps:
- turn on the battery
- activate the stabilizer with a separate button
- run the application and establish a Bluetooth connection
It is worth noting that the last point is not at all mandatory, since needed mainly for the initial activation of the new device and settings, as well as checking the status and parameters. Unlike DJI Osmo mobile, here the recording is made on the camera's flash drive, so the application is more like a “service” function and by and large it doesn’t even have to be kept on the phone all the time.
Some functions of the application - for example, turning off motors or “selfie mode” is available directly from the handle by pressing the trigger 2 or 3 times. Switching the profile is also available from the application, as well as from the very steadicam.
A little bit about the creative profiles. In total, you can program up to 3 profiles. This is done through the application DJI. Here you can adjust the sensitivity, the speed of recoil and the smoothing of the pulse for each individual motor, and then save it to one of the 3 profiles. It is also possible to reassign control channels, for example, to assign horizon control, in order to be able to rotate the camera 360 degrees along the ROLL axis. Here you can configure and reverse channel. In this way, you can create presets for smooth, dynamic and, for example, shooting 360 degrees.
In addition to the settings of the joystick, you will need to adjust the stabilizer itself. This is done in the Smooth Track menu. With the help of these settings you can make the suspension as responsive as possible to each movement of the operator, as well as smooth and inert. If you activate the Push function, you will be able to manually change the position of the steadicum simply by turning it with your hand, in the standard mode, the gimbal will always try to return to the initial position.
And of course there is the possibility of manual adjustment of the motors, which is required for the most proper adjustment of the work under the weight of the camera. It is worth noting that the maximum weight of the camera being installed, declared by the manufacturer, is 3.6 kg.
The manufacturer also took care of those who are not very versed in the technique of leaving, as in previous versions of the stabilizer, the function of automatic adjustment of the motors.
If in terms of customization almost nothing has changed, then in terms of shooting in this version we got additional functions. To use them, we need to connect the camera to the receiver with one of the included cables. USB type B / C or remote control cable, but with the latter most likely you will not be able to use the most necessary function-focus ring.
In order to use all possible functions, it is recommended to familiarize yourself with the list of supported cameras / lenses and the functions that work with them before purchasing. For the remote control to work, you may need to enable this feature in the camera itself. Then you will be able to control the start of recording and stop using the button on the handle, which is undoubtedly very convenient.
Let's return to the functions of the application. The first item - “Capture” - allows you to control the stabilizer from your smartphone using a virtual joystick. Secondly, the “Panorama” function is rather a tool for photographers whose main task is to shoot panoramas, which allows you to fully automate the process by setting parameters such as matrix size, focal length, frame overlap percentage, delay and number of rows. The next mode - “Timelapse” - in general - nothing remarkable - the usual adjustable interval shooting, but the other mode - “Motion Lapse” is much more interesting. In general, it repeats this function in Osmo Mobile, but for a large camera. Now you can shoot sunrise or sunset, the movement of clouds or other “charms” of nature in the maximum resolution of your camera. And the last function is “Track”,
If the technical side as a whole is more or less clear, then it is worth turning to the impressions. Perhaps this can be a kind of resume.
What is this stabilizer for and for whom?
First, it is incomparably lighter than the big two-handed version - just 1.85 kg (without a camera). A very capacious built-in battery will allow you to shoot almost “all day” (up to 12 hours of continuous operation when properly configured, as stated by DJI).
Secondly, the stabilizer itself is quite compact - this applies not only to carrying, but also the ability to shoot in a confined space (for example, through a car window), as well as from lower points. In general, a form factor with such a handle brings it closer in mobility and convenience to DJI Osmo, making it not only a professional tool, but also potentially suitable for travelers, bloggers and simply for home use.
Thirdly - it should be noted also the price factor - less than 60 thousand rubles. Not a little, as it may seem at first glance, but not so much, considering that this stabilizer includes in general everything that is needed, does not require any additional investments like 3-4 replaceable batteries, a separate expensive system focus (like DJI Focus), additional control panels, which take up a lot of space in the backpack, and even require a separate bulky case and space in the luggage. Here we have the opportunity to throw everything in the photo backpack and go hiking or even a long journey, getting great stabilization and ease of use!