PXE boot menu with System Center Configuration Manager
- From the sandbox
- Tutorial
Consider expanding the capabilities of System Center Configuration Manager (a product for managing IT infrastructure) when booting custom PCs over a network using PXE. We create a boot menu based on PXELinux with the functionality of System Center and add anti-virus scan capabilities, diagnostic and recovery images. At the end of the article, we discuss the features of how System Center 2012 Configuration Manager works in conjunction with Windows Deployment Services (WDS) when booting through PXE.
All actions are performed on a test environment in which there is already installed System Center 2012 Configuration Manager SP1, a domain controller, and a number of test machines. It is assumed that SCCM already uses network deployment using PXE.
Introduction
The test environment consists of several virtual machines. All machines have Microsoft Windows Server 2008 R2 (x64) guest OS, E1000 network adapter, SCSI Controller: LSI Logic SAS
| Name (Roles) | IP address / DNS name | Functional |
|---|---|---|
| SCCM (System Center Configuration Manager) | 192.168.57.102 sccm2012.test.local | Installed System Center Configuration Manager 2012 SP1 |
| DC (AD, DHCP, DNS) | 192.168.57.10 dc1.test.local | The role of the domain controller, DHCP server and DNS server |
| TEST (Test machine) | 192.168.57.103 test.test.local | For testing |
| GW (Gateway) | 192.168.57.1 | Routing between networks. Gateway role |
1. Add PXELinux to SCCM
Actions are performed on the machine where System Center Configuration Manager is installed.
- Define the directory where the WDS files for download are located, for this, in the registry, look at the parameter value
RootFolderin the branch.HKEY_LOCAL_MACHINE\SYSTEM\CurrentControlSet\services\WDSServer\Providers\WDSTFTP
Default value.C:\RemoteInstall
Files for download from the SCCM deployment point are located in directoriessmsboot\x86\andsmsboot\x64\depending on the architecture.
First, configure the directory for the 32-bit architecture, by defaultc:\Remoteinstall\smsboot\x86\ - Download the archive with the latest syslinux . Copy from syslinux-5.01.zip to the
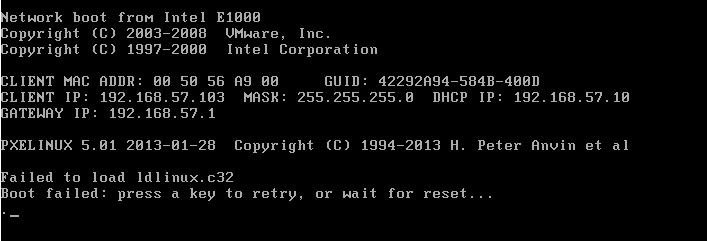
c:\Remoteinstall\smsboot\x86\following files:memdisk, chain.c32, ldlinux.c32, libcom32.c32, libutil.c32, pxechn.c32, vesamenu.c32, pxelinux.0
Additional files are needed so that there is no such error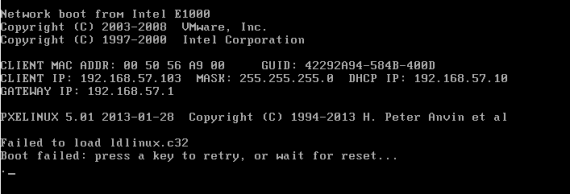
- In
c:\Remoteinstall\smsboot\x86\renamepxelinux.0topxelinux.com
In the folderc:\remoteinstall\smsboot\x86\we make a copyabortpxe.comand rename it toabortpxe.0
If you do not rename it to an extension.0, then for example an instruction
will fail: Booting kernel failed: Bad file numberKernel abortpxe.com
For PXELINUX, the boot file extension should be set accordingly to the nameplate
Source: http://www.syslinux.org/wiki/index.php/SYSLINUX#KERNEL_file “Kernel file” sectionnone or other Linux kernel image .0 PXE bootstrap program (NBP) [PXELINUX only] .bin "CD boot sector" [ISOLINUX only] .bs Boot sector [SYSLINUX only] .bss Boot sector, DOS superblock will be patched in [SYSLINUX only] .c32 COM32 image (32-bit COMBOOT) .cbt COMBOOT image (not runnable from DOS) .com COMBOOT image (runnable from DOS) .img Disk image [ISOLINUX only] - In order not to press the F12 key several times while loading SCCM through the menu, rename pxeboot.com to pxeboot.com.f12, copy pxeboot.n12 to pxeboot.com
If this is not done, then we will receive this message each time Note: Do not forget to rename these files in the folder for x64 as well. when loaded from the x86 folder, the loader determines the processor architecture and the next file loads from the folder with the corresponding architecture. Thus, for x64, the subsequent file will not be , but
x86\wdsnbp.comx86\pxeboot.comx64\pxeboot.com - Download / create background.png , resolution 640x480, copy to the same folder. Create a folder
\ISOwhere we will place the ISO images. Create a folder\pxelinux.cfgfor configs. - In the \ pxelinux.cfg folder, create the default file, in non-Unicode encoding, with the contentsdefault (Click to display)In the folder,
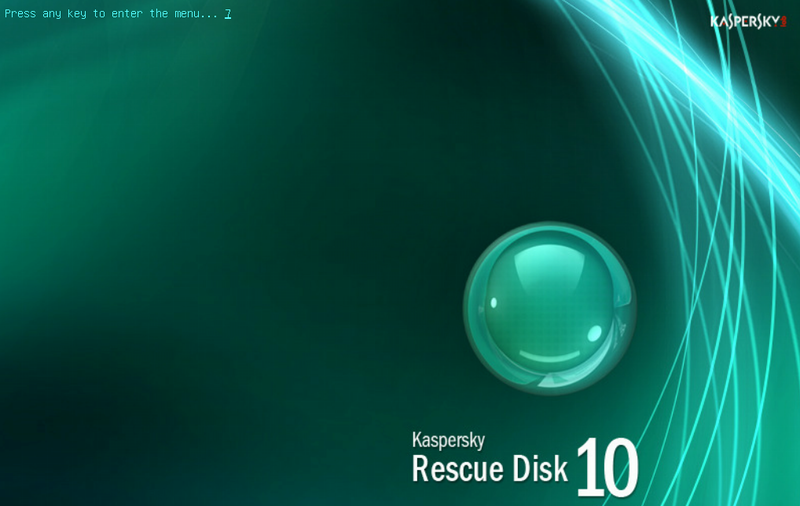
# используем графическое меню DEFAULT vesamenu.c32 PROMPT 0 timeout 80 TOTALTIMEOUT 9000 MENU TITLE PXE Boot Menu (x86) MENU INCLUDE pxelinux.cfg/graphics.conf MENU AUTOBOOT Starting Local System in 8 seconds # Boot local HDD (default) LABEL bootlocal menu label Boot Local menu default localboot 0x80 # if it doesn't work #kernel chain.c32 #append hd0 # Вход в меню по паролю Qwerty, алгоритм MD5 label av menu label Antivirus and tools menu PASSWD $1$15opgKTx$dP/IaLNiCbfECiC2KPkDC0 kernel vesamenu.c32 append pxelinux.cfg\av.conf label sccm menu label Start to SCCM COM32 pxechn.c32 APPEND sccm2012.test.local::smsboot\x86\wdsnbp.com -W label pxe64 menu label Start to x64 pxelinux COM32 pxechn.c32 APPEND sccm2012.test.local::smsboot\x64\pxelinux.com LABEL Abort MENU LABEL Exit KERNEL abortpxe.0\pxelinux.cfgcreate a filegraphics.confwith the contentsgraphics.conf (Click to display)In the folder,MENU MARGIN 10 MENU ROWS 16 MENU TABMSGROW 21 MENU TIMEOUTROW 26 MENU COLOR BORDER 30;44 #00000000 #00000000 none MENU COLOR SCROLLBAR 30;44 #00000000 #00000000 none MENU COLOR TITLE 0 #ffffffff #00000000 none MENU COLOR SEL 30;47 #40000000 #20ffffff MENU BACKGROUND background.png NOESCAPE 0 ALLOWOPTIONS 0\pxelinux.cfgcreate a fileav.confwith the contentsav.conf (Click to display)DEFAULT vesamenu.c32 PROMPT 0 MENU TITLE Antivirus and tools MENU INCLUDE pxelinux.cfg/graphics.conf label main menu menu label return to main menu kernel vesamenu.c32 append pxelinux.cfg/default label drweb menu label DrWeb kernel memdisk append iso raw initrd=iso\drweb.iso label eset menu label Eset kernel memdisk append iso raw initrd=iso\eset_sysrescue.iso label kav menu label KAV Rescue CD KERNEL kav/rescue APPEND initrd=kav/rescue.igz root=live rootfstype=auto vga=791 init=/init kav_lang=ru udev liveimg doscsi nomodeset quiet splash #Загружаем ISO по полному пути, можно загружать с другого TFTP label winpe menu label WinPE from another TFTP kernel sccm2012.test.local::smsboot\x86\memdisk append iso raw initrd=sccm2012.test.local::smsboot\x86\iso\WinPE_RaSla.iso label clonezilla menu label Clonezilla kernel memdisk append iso raw initrd=iso\clonezilla.iso - As a result, the c: \ remoteinstall \ smsboot \ x86 \ directory contains the structure
c: \ remoteinstall \ smsboot \ x86 \ pxelinux.cfg \ \
\
\
\
\
\
\
\
\
\
\
\
\
\
\
\
\
\
\
\ \chain.c32
ldlinux.c32
libcom32.c32
libutil.c32
pxechn.c32
vesamenu.c32
pxelinux.com
background.png
pxelinux.cfg \
pxelinux.cfg \
pxelinux.cfg \
ISO \
abortpxe.0
wdsnbp.com
bootmgfw.fi
wdsmffeff
bootmgr.exe
pxeboot.n12
pxeboot.com
abortpxe.com
default
av.conf
graphics.conf
* .iso - For the x64 architecture, we similarly copy and create the same structure in the folder
c:\remoteinstall\smsboot\x64\

Supplement
When using the command, themenu PASSWDpassword can be set either as is, or the hash algorithm can be used by adding the corresponding signature at the beginning of the parameterSo for password
Algorithm Signature MD5 $ 1 $ SHA-1 $ 4 $ SHA-2-256 $ 5 $ SHA-2-512 $ 6 $ Qwertyand MD5 algorithmYou can generate a password, for example, through the online hash generator www.insidepro.com/hashes.php?lang=rus , linemenu PASSWD $1$15opgKTx$dP/IaLNiCbfECiC2KPkDC0MD5(Unix)
2. Set up PXELinux download
Now we indicate how to load pxelinux.com and get the menu.
Specifying the pxelinux.com bootloader via WDS functionality does not work in SCCM. View Commands
wdsutil /set-server /bootprogram:boot\x86\pxeboot.com /architecture:x86
wdsutil /get-server /show:images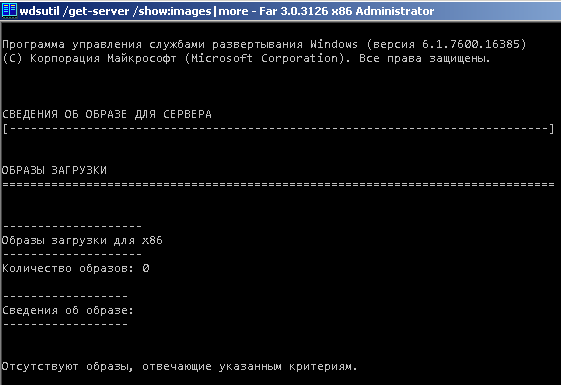
Therefore, in SCCM 2012, you cannot specify your file for downloading via PXE for the SMSPXE provider. Therefore, we will configure the active area of the DHCP server.
In the parameters of the DHCP active area, set the parameters according to the nameplate
| DHCP option | Parameter Name | Value |
|---|---|---|
| 066 | Boot server host name | sccm2012.test.local |
| 067 | Bootfile name | smsboot \ x86 \ pxelinux.com |
| 006 | DNS Servers | 192.168.57.10 |
| 015 | DNS Domain Name | test.local |
Addition: mvgolubev
described the DHCP configuration in more detail here . But on option 150, the IP address of the TFTP server was missing from the DHCP scope settings and specifying option 150 through netsh did not work.DC

3. Verification of work
The basic settings are completed and you can start checking. We indicate on the test computer that the BIOS is loaded over the network and loads into the menu. We select the item and if a task sequence is assigned to the computer, after a while the "Create task sequence wizard" window appears asking you to enter the password. We reboot the machine, go to the menu again, select the menu and enter the password. Choose an arbitrary item and observe the loading of the ISO image into the memory. Wait and see the result. Verification completed

«Start to SCCM»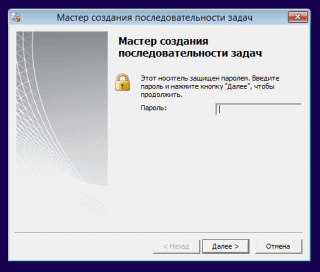
«Antivirus and tools»Qwerty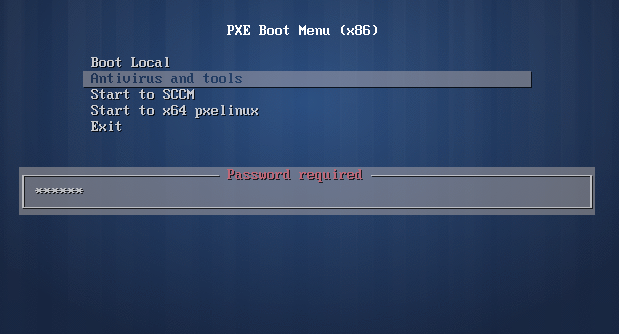


4. Additional settings and features
Routing setup
If the client, the DHCP server and the server containing the network bootloader are in the same network segment, then no additional configuration is required. If the client and the DHCP server or WDS / SCCM server are in different segments of the network, it is recommended that the routers forward the broadcast packets from the client to the existing DHCP server and the existing WDS / SCCM server. In the English language literature this process is known as “IP Helper table updates”. In this case, the client, after receiving the IP address, communicates with the server containing the network bootloader directly through DHCP packets in order to download the network bootloader.
For Cisco routers, use the command
ip helper-address {ip address}
{ip address}address of the DHCP server or WDS / SCCM server. When using this command, the following UDP broadcast packets are also forwarded.| Port | Protocol |
|---|---|
| 69 | TFTP |
| 53 | Domain Name System (DNS) |
| 37 | Time service |
| 137 | NetBIOS Name Server |
| 138 | NetBIOS Datagram Server |
| 67 | Bootstrap Protocol (BOOTP) |
| 49 | Tacacs |
«PXEClient»in all DHCP scopes only if the DHCP server is located on the same server as the Windows Deployment Services. In this case, the client communicates with the Windows Deployment Services server directly via TFTP over UDP port 4011, and not through DHCP. This method is not recommended by Microsoft due to problems with load balancing, incorrect processing of DHCP parameters and client-side Windows Deployment Services response parameters. And also because the use of only two DHCP options 66 and 67 allows you to bypass the parameters specified on the network boot server.You also need to open the following UDP ports on the Windows Deployment Services server
port 67 (DHCP)
port 69 (TFTP)
port 4011 (PXE)
and port 68 if DHCP authorization on the server is required.
In more detail, the configuration process and the nuances of redirection between different WDS servers are described below in the sources:
Managing network boot programs http://technet.microsoft.com/en-us/library/cc732351(v=ws.10).aspx
Server management http: //technet.microsoft.com/en-us/library/cc770637(v=ws.10).aspx
Microsoft Product Support Services (PSS) support boundaries for network booting Microsoft Windows Preinstallation Environment (Windows PE) 2.0 http: // support .microsoft.com / kb / 926172 / en-us
How to forward UDP broadcast (BOOTP / DHCP) on Cisco http://www.cisco-faq.com/163/forward_udp_broadcas.html
DHCP Operation and Configuration Features on Cisco Routers ( Part 2) http://habrahabr.ru/post/89997/
Additional local boot features
On a test environment, the command
localboot 0
From the syslinux documentation it follows that when
localboot 0localboot 0x80If there is a need to boot from a specific drive, partition or command
localbootdoes not work, then you can take advantage of the module chain.c32. After loading it, use the append command to specify a specific disk or disk partition, disk numbering starts at 0, and partition numbering starts at 1 because if section 0 is specified, the MBR is loaded. When specifying a drive, the section can be omitted.KERNEL chain.c32
APPEND hd0 0KERNEL chain.c32
APPEND hd0Sources: http://www.syslinux.org/wiki/index.php/SYSLINUX#LOCALBOOT_type_.5BISOLINUX.2C_PXELINUX.5D
http://www.gossamer-threads.com/lists/syslinux/users/7127
The order and description of downloading files via PXE
As mentioned at the beginning of the article, the directory where the WDS files are located for downloading is contained in the value of the parameter
RootFolderin the registry branch. HKEY_LOCAL_MACHINE\SYSTEM\CurrentControlSet\services\WDSServer\Providers\WDSTFTPDefault value
C:\RemoteInstall. The parameter also
ReadFiltercontains the directories where the TFTP server searches for files to download starting from the root. With SCCM 2012 SP1 installed, this parameter is\boot\*
\tmp\*
\SMSBoot\*
\SMSTemp\*
\SMSImages\*If you change the parameter value,
\*then all files located in the directory will be processed RemoteInstall. The role of the SCCM 2012 deployment point is specified in the registry parameter
ProvidersOrderlocated in the HKLM\System\CurrentControlSet\WDSServer\Providers\WDSPXEParameter branch
ProvidersOrdercan take values| SMSPXE | PXE service point in SCCM |
| SMS.PXE.Filter | PXE script handler from MDT (Microsoft Deployment Toolkit) |
| Binlsvc | Standard WDS and RIS handler |
ProvidersOrderis relevant SMSPXE. By changing the parameter, you can change the loading order of providers. The directory
RemoteInstallcontains the following standard fileswdsnbp.com | Программа сетевой загрузки, разработанная для служб развертывания Windows и выполняющая следующие задачи: 1. Обнаружение архитектуры. 2. Обслуживание ожидающих компьютеров. Когда включена политика автоматического добавления, эта программа сетевой загрузки посылается на ожидающие компьютеры, чтобы приостановить сетевую загрузку и сообщить серверу архитектуру клиентского компьютера. 3. Использование ссылок сетевой загрузки (включая использование параметров 66 и 67 протокола DHCP) |
PXEboot.com | (По умолчанию) Требует, чтобы пользователь нажал клавишу F12 для продолжения сетевой загрузки |
PXEboot.n12 | Не требует нажатия пользователем клавиши F12 и немедленно начинает сетевую загрузку |
AbortPXE.com | Загружает компьютер с использованием следующего элемента загрузки в BIOS без ожидания |
Bootmgr.exe | Диспетчер загрузки Windows (Bootmgr.exe или Bootmgr.efi). Загружает с помощью встроенного ПО загрузчик Windows из определенного раздела диска или через сетевое подключение (в случае сетевой загрузки) |
Bootmgfw.efi | Версия EFI программ PXEboot.com и PXEboot.n12 (в EFI выбор загружать или не загружать PXE осуществляется в оболочке EFI, а не программой сетевой загрузки). Программа Bootmgfw.efi объединяет возможности PXEboot.com, PXEboot.n12, abortpxe.com и bootmgr.exe. На данный момент она существует только для архитектур x64 и Itanium |
Default.bcd | Хранилище данных конфигурации загрузки (BCD), формат REGF, можно загружать в REGEDIT, заменяет собой текстовый файл Boot.ini |
1. Downloading wdsnbp.com.
2. Next, pxeboot.com of the appropriate architecture is
loaded 3. PXEBoot.com downloads bootmgr.exe and the BCD boot configuration data storage
4. Bootmgr.exe reads the operating system records of the BCD boot configuration data and downloads the Boot.sdi file and the Windows PE image (boot. wim)
5. Bootmgr.exe starts loading Windows PE by accessing Winload.exe in the Windows PE image
If
RemoteInstallthere are folders in\Boot
\Images
\Mgmt
\Templates
\Tmp
\WdsClientUnattendFor the distribution point role (PXE service point in SCCM 2007), only the following folders are sufficient
\SMSBoot
\SMSIMAGES
\SMSTemp
\StoresA very detailed solution to various problems of the WDS, SCCM and PXE bundles is discussed in the article Troubleshooting the PXE Service Point and WDS in Configuration Manager 2007
Total
In the IT infrastructure running System Center Configuration Manager, a new tool has been added for field administrators.
List of links to ISO images (Click to display)
download.f-secure.com/estore/rescue-cd-3.16-52606.iso
git.ipxe.org/releases/wimboot/wimboot-latest.zip
download.geo.drweb.com/pub/drweb/livecd/drweb- livecd-602.iso
rescuedisk.kaspersky-labs.com/rescuedisk/updatable/kav_rescue_10.iso
esetsupport.ru/eset_sysrescue.iso
boot.ipxe.org/ipxe.iso
citylan.dl.sourceforge.net/project/clonezilla/clonealative_live 20130226-quantal / clonezilla-live-20130226-quantal-i386.iso
ftp.rasla.ru/_Distr_/WinPE/RaSla/WinPE_RaSla.iso
www.kernel.org/pub/linux/utils/boot/syslinux/syslinux-5.01. zip
Thanks for attention!