3D Printing Lessons. Printing thin-walled models from 3Dtool
Good day!
As always, our clients help us with ideas for articles. Today we will print the egg. On his example, we will test the built-in function Slic3r , which few people mention for some reason.
The egg needs to be printed not simple, but durable, with minimal plastic consumption and quickly.
It will continue to be suspended from the ceiling by the hook at the top. The bottom of the egg will be the front part, upwards with a crochet hook - rough, since it will hang high and the upper part will not be visible. You can print the whole egg with a loop down with the supports at the bottom, but printing and removing the supports will take time.
For this task, we chose a Hercules 2018 3D printer.- This is a very versatile 3D printer as it can print all kinds of plastic and has a large working chamber.
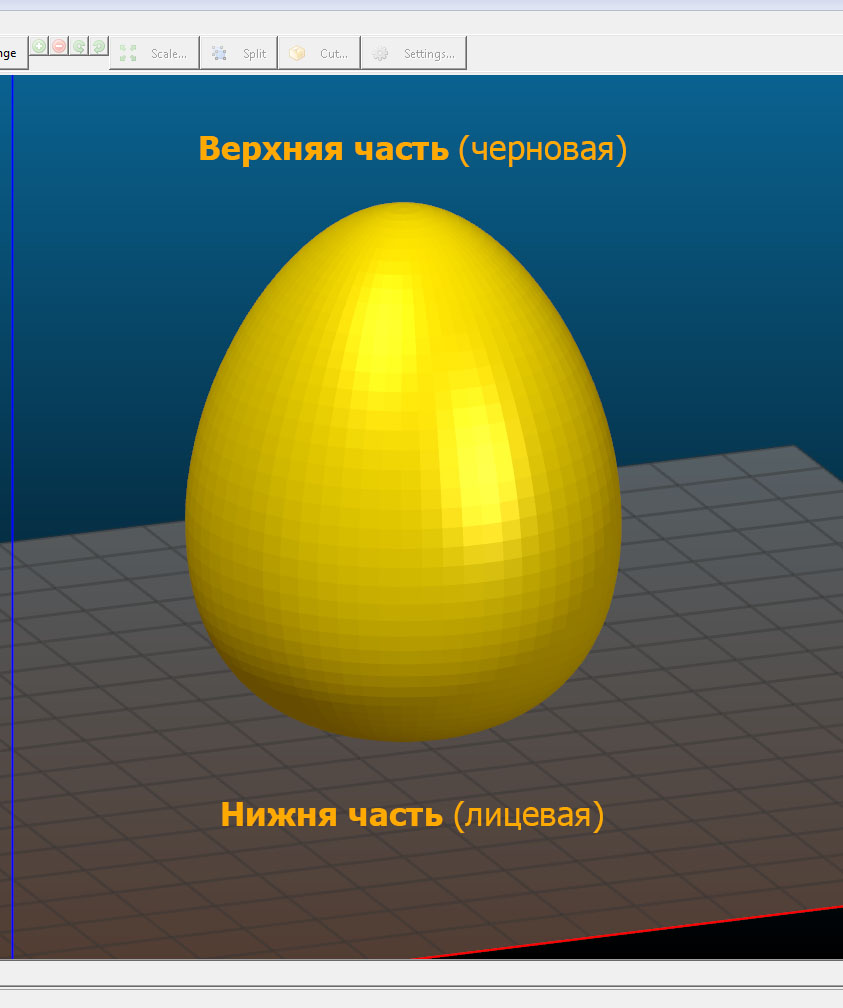
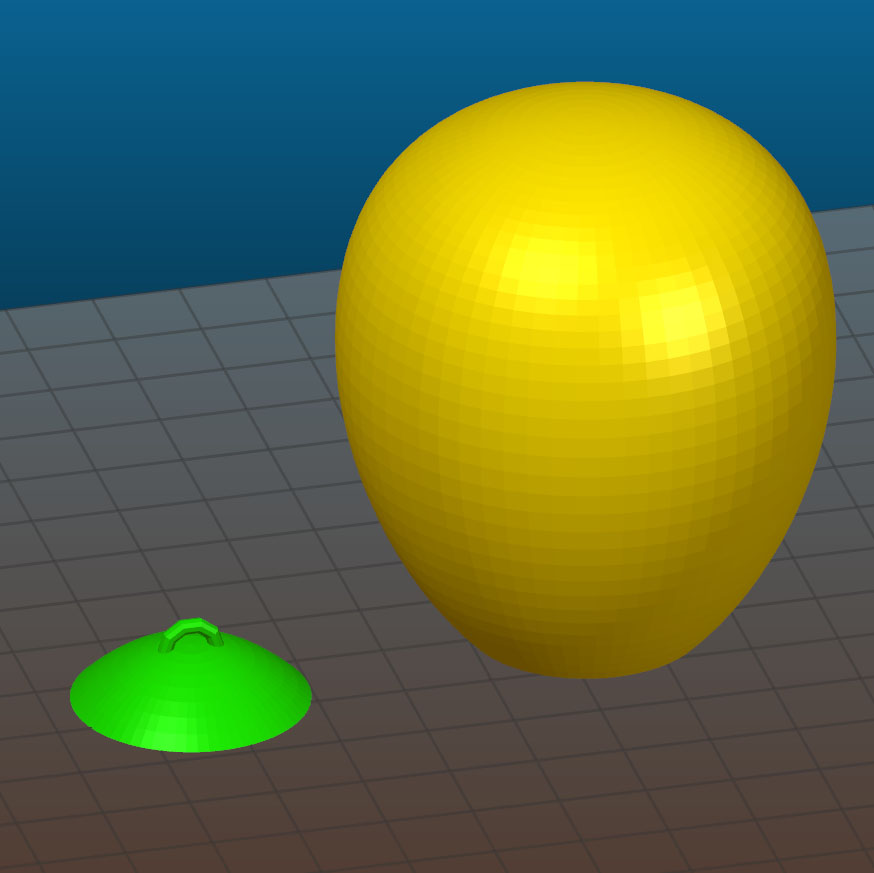
Therefore, we cut the egg into 2 parts, at the same time we add a loop on the top. After printing we will glue the top with dichloroethane.
Now you need to work out the print mode. The part with the eyelet is printed without problems on the standard mode with a 0.5 nozzle, therefore we will select the mode for a large “half”. The difficulty of printing lies in the fact that: firstly, if you print an egg without filling, in the upper part of the walls at some point there is nothing to cling to, and they will start to fall down and you will get holes. Secondly, to improve the quality of the surface, the height of the layer in the upper part of the egg, where the angle of inclination of the perimeters begins to rapidly decrease, will need to be reduced.


Let's start with the usual settings without using a tambourine.
Since the model should turn out with even walls without waves from accelerations, we will not print at outrageous speeds. The speed is not more than 50 mm / s.
Method number 1 - PLA, 0.5 nozzle, 2 perimeter, 10% filling, layer height 0.2mm-0.1mm. The speed of 50 mm / s, the width of the extrusion on the filling is reduced to 0.35 mm, because the filling in this case is used only to support the walls in the upper part, where the perimeter is printed at an angle. Printing time 2h 26m, plastic volume 22.7 cm3.
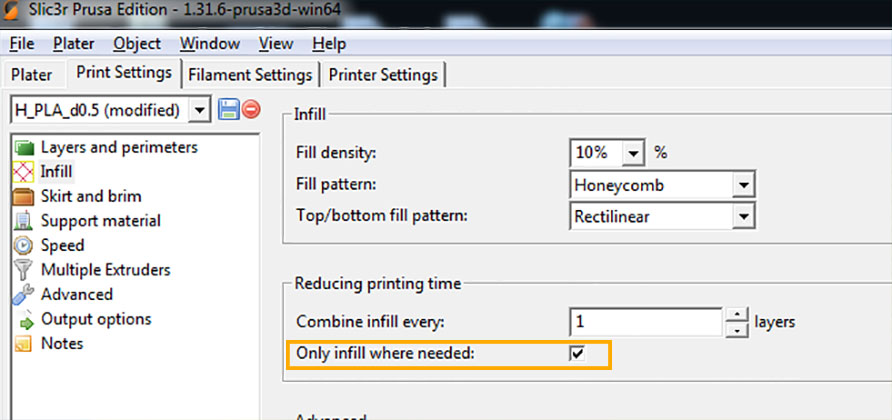
Method # 2 - 0.5 nozzle, 2 perimeters, filling Only Infill where needed 10% ... Speed 50 mm / s, filling extrusion width reduced to 0.35 mm, layer height 0.2mm-0.1mm. Printing time 1h 31m, plastic volume 14.2 cm3.
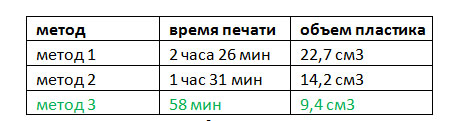
Method number 3- 0.5 nozzle, 2 perimeter, without filling, using the built-in new version of slic3r (Slic3r Prusa Edition) function Ensure vertical shell thickness (slic3r automatically adds support perimeters in places where the walls can fall down), layer height 0,2mm -0,1mm, speed 50 mm / s. Printing time 58 minutes, the volume of plastic 9.4 cm3.
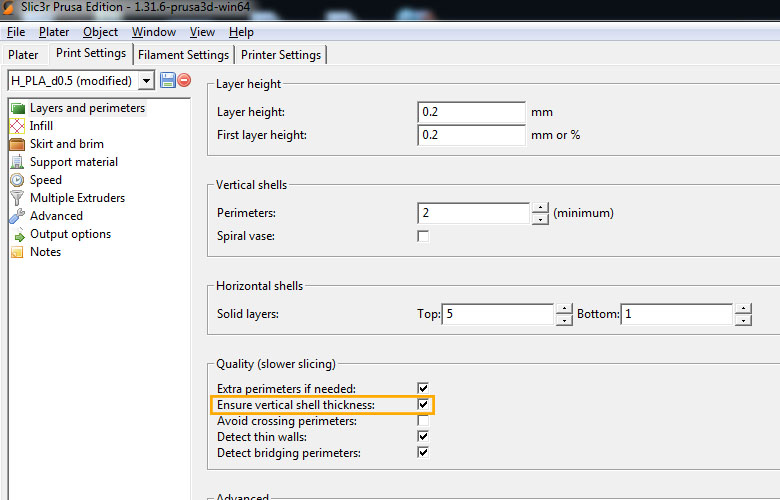
Table for understanding the ratio of printing time and volume of plastic.
By the time of printing and the volume of plastic, the third option suits us. We try.
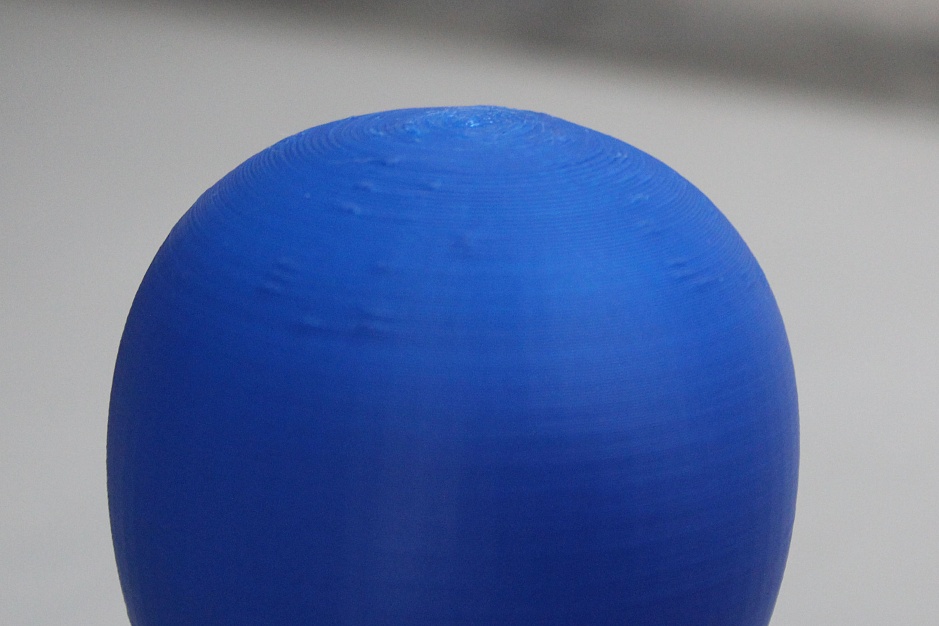

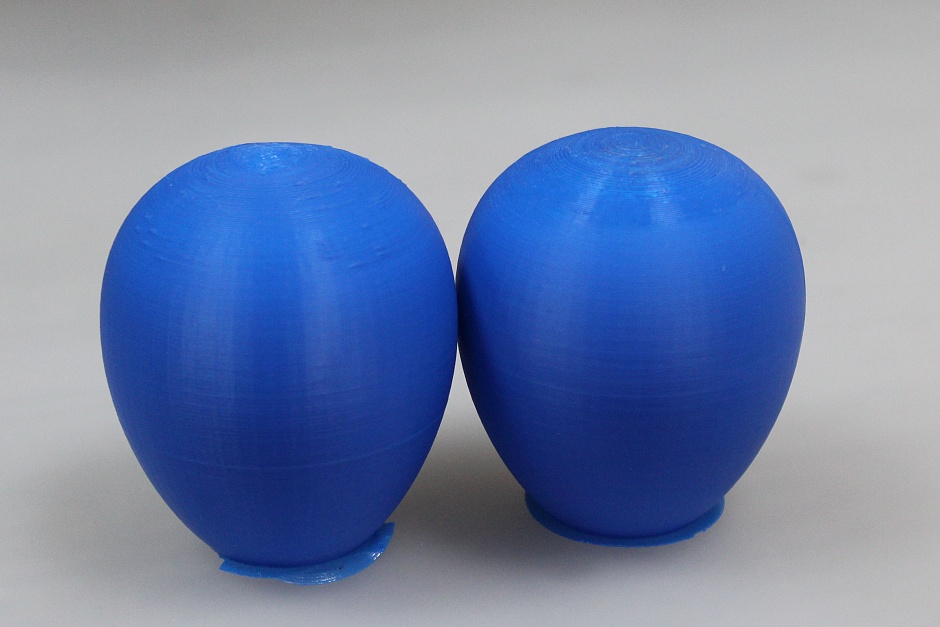
The option Ensure vertical shell thickness in this case with the support of the perimeters managed, but on the walls turned out bumps.
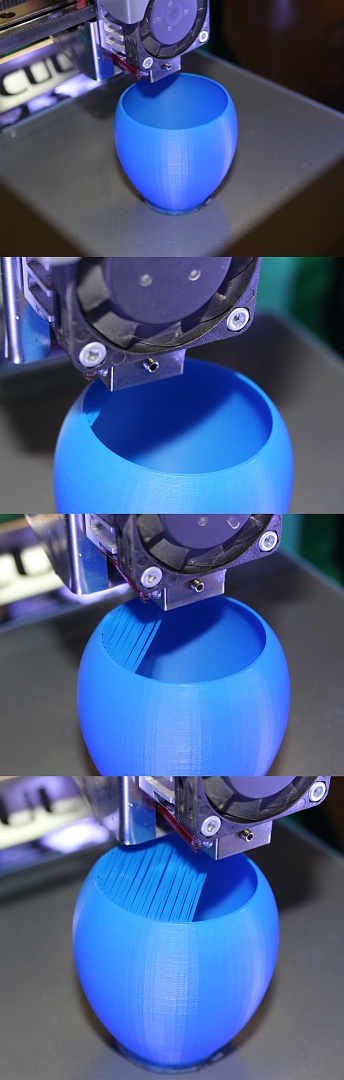
In addition, closer to the top, the speed in manual mode was reduced by 20% due to the fact that the printing angle of the perimeters began to decrease and the walls at the speed of 50 mm / s did not have time to freeze and were bent.
It turns out that in order to get smooth walls in places where the perimeters are printed at an angle and a flat tip, we need to slow down, so that the plastic has time to cool, and add a filling so that there are no gaps on the inclined surfaces. We will not reduce speed and add filling for the whole model, this is too much. In order to reduce the speed on certain layers and add filling where needed, we will use the built-in Slic3r function - modifier.
A modifier is a surface that is used to make adjustments to specific parts of a model. In more detail how to use modifiers, I will write in the following article.
For now ... double click on our model, the Settings window appears. Click Load modifier ... and load the pre-simulated surface (we have a cylinder).

In the place where the model intersects with the modifier, the basic settings of the model will overlap with the modifier settings. To set these settings, you need to select a modifier (cylinder) in a window or in a list and click on "+".

In our case, we reduce the speed of printing the perimeters, add filling and print one fill layer (Solid Infill every ...) before filling so that the fill has something to hold on. In order to determine on which layer to print a solid fill, first generate the code, look at the layer number that begins printing the fill in RepetierHost, and set the previous layer, we have 285. Reduce the print speed of the bridges so that the solid fill layer is printed “in air "without cliffs.
We put in print.
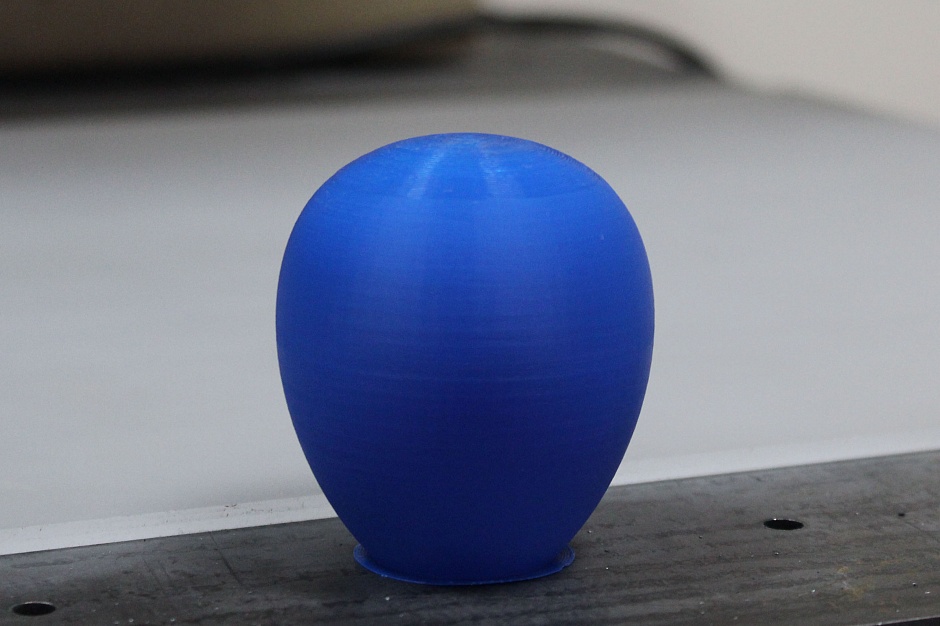
Printing time is 1 hour and 10 minutes; plastic volume is 9.8 cm3. Due to the slowing down of the printing speed, the plastic changed a little the color, but the layers turned out to be smoother than in the previous version, the walls without bumps, the tip without gaps.

Of all the options in terms of time, amount of plastic spent and print quality, we were approached by the latter method, using the modifier.
Everything described above is just useful in our opinion methods that may be useful to you. How to print depends on the complexity of the part and the desired result.
Catalog of 3D printers: https://3dtool.ru/category/3d-printery/
Do not forget to subscribe to our YouTube channel
(New videos come out every week).

As always, our clients help us with ideas for articles. Today we will print the egg. On his example, we will test the built-in function Slic3r , which few people mention for some reason.
The egg needs to be printed not simple, but durable, with minimal plastic consumption and quickly.
It will continue to be suspended from the ceiling by the hook at the top. The bottom of the egg will be the front part, upwards with a crochet hook - rough, since it will hang high and the upper part will not be visible. You can print the whole egg with a loop down with the supports at the bottom, but printing and removing the supports will take time.
For this task, we chose a Hercules 2018 3D printer.- This is a very versatile 3D printer as it can print all kinds of plastic and has a large working chamber.
Therefore, we cut the egg into 2 parts, at the same time we add a loop on the top. After printing we will glue the top with dichloroethane.
Now you need to work out the print mode. The part with the eyelet is printed without problems on the standard mode with a 0.5 nozzle, therefore we will select the mode for a large “half”. The difficulty of printing lies in the fact that: firstly, if you print an egg without filling, in the upper part of the walls at some point there is nothing to cling to, and they will start to fall down and you will get holes. Secondly, to improve the quality of the surface, the height of the layer in the upper part of the egg, where the angle of inclination of the perimeters begins to rapidly decrease, will need to be reduced.
Let's start with the usual settings without using a tambourine.
Since the model should turn out with even walls without waves from accelerations, we will not print at outrageous speeds. The speed is not more than 50 mm / s.
Method number 1 - PLA, 0.5 nozzle, 2 perimeter, 10% filling, layer height 0.2mm-0.1mm. The speed of 50 mm / s, the width of the extrusion on the filling is reduced to 0.35 mm, because the filling in this case is used only to support the walls in the upper part, where the perimeter is printed at an angle. Printing time 2h 26m, plastic volume 22.7 cm3.
Method # 2 - 0.5 nozzle, 2 perimeters, filling Only Infill where needed 10% ... Speed 50 mm / s, filling extrusion width reduced to 0.35 mm, layer height 0.2mm-0.1mm. Printing time 1h 31m, plastic volume 14.2 cm3.
Method number 3- 0.5 nozzle, 2 perimeter, without filling, using the built-in new version of slic3r (Slic3r Prusa Edition) function Ensure vertical shell thickness (slic3r automatically adds support perimeters in places where the walls can fall down), layer height 0,2mm -0,1mm, speed 50 mm / s. Printing time 58 minutes, the volume of plastic 9.4 cm3.
Table for understanding the ratio of printing time and volume of plastic.
By the time of printing and the volume of plastic, the third option suits us. We try.
The option Ensure vertical shell thickness in this case with the support of the perimeters managed, but on the walls turned out bumps.
In addition, closer to the top, the speed in manual mode was reduced by 20% due to the fact that the printing angle of the perimeters began to decrease and the walls at the speed of 50 mm / s did not have time to freeze and were bent.
It turns out that in order to get smooth walls in places where the perimeters are printed at an angle and a flat tip, we need to slow down, so that the plastic has time to cool, and add a filling so that there are no gaps on the inclined surfaces. We will not reduce speed and add filling for the whole model, this is too much. In order to reduce the speed on certain layers and add filling where needed, we will use the built-in Slic3r function - modifier.
A modifier is a surface that is used to make adjustments to specific parts of a model. In more detail how to use modifiers, I will write in the following article.
For now ... double click on our model, the Settings window appears. Click Load modifier ... and load the pre-simulated surface (we have a cylinder).
In the place where the model intersects with the modifier, the basic settings of the model will overlap with the modifier settings. To set these settings, you need to select a modifier (cylinder) in a window or in a list and click on "+".
In our case, we reduce the speed of printing the perimeters, add filling and print one fill layer (Solid Infill every ...) before filling so that the fill has something to hold on. In order to determine on which layer to print a solid fill, first generate the code, look at the layer number that begins printing the fill in RepetierHost, and set the previous layer, we have 285. Reduce the print speed of the bridges so that the solid fill layer is printed “in air "without cliffs.
We put in print.
Printing time is 1 hour and 10 minutes; plastic volume is 9.8 cm3. Due to the slowing down of the printing speed, the plastic changed a little the color, but the layers turned out to be smoother than in the previous version, the walls without bumps, the tip without gaps.
Of all the options in terms of time, amount of plastic spent and print quality, we were approached by the latter method, using the modifier.
Everything described above is just useful in our opinion methods that may be useful to you. How to print depends on the complexity of the part and the desired result.
Catalog of 3D printers: https://3dtool.ru/category/3d-printery/
Do not forget to subscribe to our YouTube channel
(New videos come out every week).