Easy spy tank programming
- Tutorial
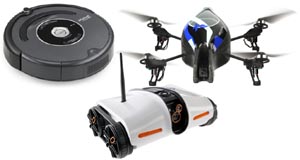
I want to tell you how to manage iGadgets from a PC, and even program them. Everything described in the article applies to both the Brookstone Rover Spy Tank and the AR Drone Parrot. There have already been articles on the Habré about the AR Drone Parrot series of high-tech gadgets. Somehow little interest is shown in the Brokstone Rover Spy Tank, although, strangely enough, this toy, although not so spectacular, due to the fact that it does not fly, is more practical. Firstly, the charge of 6 elements of the AA series pyatnia is enough for several hours of continuous operation. Secondly, it can be used as a geek webcam, with which you can monitor what is happening at home from any other computer, and, as a bonus, chase your pets. By setting up RDP access to your home computer, you can control this product like a mobile webcam,
To begin with, what is a Brookstone Rover Spy Tank

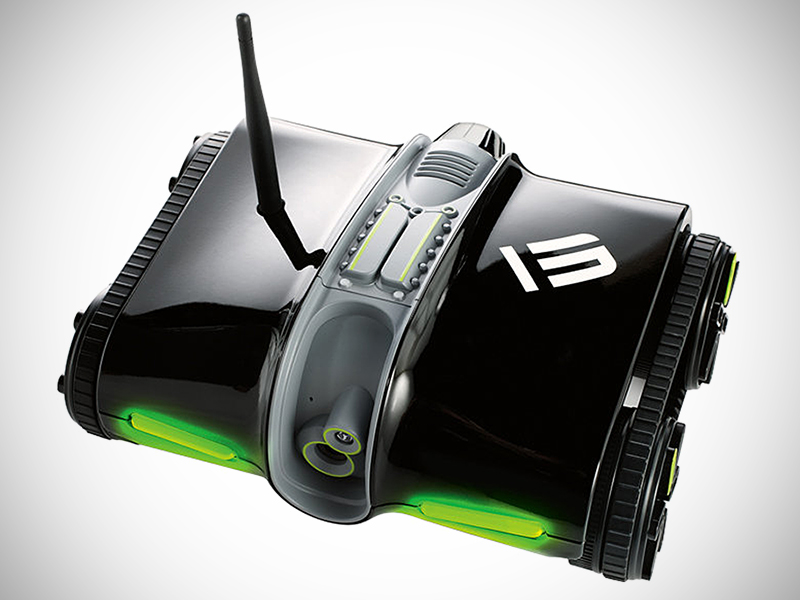
The Brookstone Rover Wireless Spy Tank is a wireless guided tank. An iPhone or iPad acts as a control panel. Communication takes place directly, through a created Wi-Fi point. The device is equipped with a built-in video camera, with which you can watch others. Also on the device is a microphone and an infrared emitter, for filming in complete darkness. The miracle tank is powered by six AA batteries. For Android device owners, there is an implementation of RoverOpen and is available for download on the GooglePlay market at play.google.com/store/apps/details?id=org.almende.roveropen
Recently, tanks of the second version appeared on the market. They added a couple of improvements. A servo drive has been added, with which the angle of rotation of the camcorder is controlled from the application and a speaker through which you can play sounds. In addition to all of the above, built-in lights were added to the all-terrain vehicle, the brightness of which can also be controlled remotely through the application. For this version of the tank, there are official applications in the App Store and on Google Play.
We control from PC
If you don’t have an iPhone or an Android device, then you are unlikely to get such a gadget. But if you really want to? What then?
There is such a wonderful software package - EZ-Builder, a tool of the Canadian comrade. It already implements an exchange protocol with AR Drone Parrot and Brookstone Rover Spy Tank. The program is written in C #. Management is simpler than a turnip. Download software from here
www.ez-robot.com/EZ-Builder
Installation is simple and requires no description.

Easy programming on EZ-Script
EZ-Builder has the ability to write simple scripts in the oncoming scripting language. It is somewhat reminiscent of BASIC. EZ-Builder allows you to program the behavior of the toy without being a professional robot builder and software engineer. In the EZ-Script language, you can write the simplest programs with which you can control our rover. To master them and understand the principle, we add the management console: “Script Console” to the desktop of EZ-Builder. To do this, just press F3 or select it in the item Add Control -> Scripting -> Script Console.
Let's analyze a few commands:
- Sleep (milliseconds) - Set a pause in milliseconds. 1 second pause example: Sleep (1000)
- SleepRandom (lowMilliSec, highMilliSec) - Pause for a random value. Example: SleepRandom (1000, 5000)
- Forward ([speed], [milliSeconds]) - a command to move forward. It takes a speed value from 0 to 255 and the engine operating time in milliseconds. The default is infinite. Examples: Forward (), Forward (50), Forward (255, 5000)
- Reverse ([speed], [milliSeconds]) - the reverse action of the Forward command, i.e. backward movement.
- Stop () - stop.
- Left ([speed], [milliSeconds]) - turn left. It takes the value of speed and time in milliseconds ..
- Right ([speed], [milliSeconds]) - turn right
- # - comments
- : Label - label for the GOTO (LABEL) command. Example:: MyLabel
- Goto (label) - go to the label
- Return () - exit GOTO to continue the program
- Halt () - terminate script execution
- HTTPGet (url) - send a GET request to the specified address
- Print (txt) - print text to the debug console
- Exec (EXE / Bat File, [parameters]) - call an external Windows program
- Browser (url) - launch the browser at the specified address
- Tweet (message) - send a message to the Twitter.com service. To do this, configure the Tweet module: File-> Twitter Settings. Example: Tweet (“I Love EZ-Robot!”). Example of sending a screenshot from a device’s camera to Twitter: ControlCommand (“Camera”, CameraTweet, “Our New Image”)
- ControlCommand (windowName, ControlCommandParameter, [values]) - execute the command by contacting the component by its name, where windowName is the name of the window on the EZ-Builder desktop, ControlCommandParameter is the command, [values] are additional optional parameters depending on the call context.
You can always get help on all commands on special tabs or by calling the corresponding help via:
Help -> Print Script Manual
Learning to track objects
In the Tracking Types section, check the box next to Color. We put a bright object (best of all red) in front of the camera of our device. Switch to the Color tab, select the minimum size of the detected object (Min Object Size) and set the brightness of the object (Object Brightness). As soon as the item is identified, our tank will begin to turn in his direction if we try to move it. I would advise in the settings in the Tracking Quadrant Settings section to move the vertical lines a little closer to the edge so that the robot responds more adequately to the movement of the object. Further, playing with different parameters, you can independently achieve the necessary settings and optimal values.
Simple program

Now, aggregating the information received, we connect everything together. Add the Script Manager component to the EZ-Builder desktop: Ad Control -> Scripting -> EZ-Script Manager. In the window that opens, click the Add Script button. In the Name field, write: PursuitTarget. This will be the name of our movement program. It will be very simple and consist of one line. In general, it must be said that in EZ-Builder all components are interconnected by window names and script names. We are writing a program of the following content:
forward(255)We only need this in order to set the forward speed to the maximum, since in the target search program we will reduce it. Again, click Add Script, in the Name field we write: FindTarget and, accordingly, the program text itself:
$findTargetSpeed = 100
$iteration = 0
:Loop1
 reverse($findTargetSpeed,1000)
 # Процесс осмотра
 left($findTargetSpeed, 2000)
 right($findTargetSpeed, 4000)
 left($findTargetSpeed, 2000)
 $iteration = $iteration + 1
 if ($iteration > 4)
   return()
goto(Loop1)
stop()
Now click Config button on the Camera panel, turn on the Scripts tab, under Tracking Scripts in Tracking Start field write call our sripta PursuitTarget:
ControlCommand( "Script Manager", ScriptStart, "PursuitTarget" )and in the field Tracking End entered:
ControlCommand( "Script Manager", ScriptStart, "FindTarget" )Go to the Tracking Settings tab in the Movement Tracking section and check the corresponding box. We also tick the box Allow Left / Right Movement. Save. Click the Refresh Device List, select Video Device: Brookstone_Rover, check the Debug and Color boxes. Go to the Color tab and set the size and brightness of the pursued object. Now it’s enough to throw a red ball in front of the “nose” of our terminator, as he immediately recognizes it and activates. After which he will begin his pursuit. As soon as the robot encounters it, the ball will most likely roll back to the side. The robot will turn in his direction, and if he completely loses sight of him, then he will begin to move back, turning from side to side and trying to find the pursued target.
Programming AR Drone Parrot
It is no different. Only engine start and landing commands are added.

What's next?
In the next article, there is a desire to describe an example of working in C #, at the same time we fasten the laser flashlight and, in conjunction with a webcam, turn it into a laser rangefinder.
PS: Thanks icases.ru for the kindly provided gadgets for testing