Clicker mouse
- Do you have a script that clicks the “add” button two thousand times? “Our Test Engineer asked me.”
“No ...” I said, “but we’ll come up with something.”
Writing a script is somehow boring and unsportsmanlike. So I decided to make a mouse. But not simple, but pumped:

The idea was simple: take an unnecessary mouse button (ours had a swinging wheel) and hang a click generator on it. He pressed the button - and sit, click, quickly and in the area does not annoy anyone the constant clicking “click-click”.
For a ponto, and, as you know, a good ponto is more expensive than money, I wanted to stick an indicator to this mouse as well.
So let's get started. We will need:
We disassemble the mouse, collect on the breadboard a typical “dynamic indication” (a word that is clever):
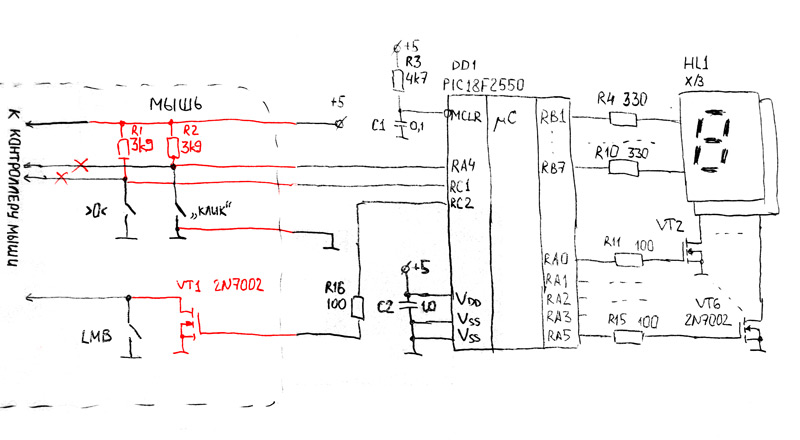
Red indicates the changes on the mouse board. Denominations are taken from the bulldozer, resistors R11-R16 are thrown out because "and so it goes." You can take almost any transistors, for example, on a breadboard I had BS170.
Here it is, the layout:

display - it's very simple, if you do not believe me - look leds.c . However, in order to translate a binary number into its display on seven LEDs, we need a primitive character generator.
So, the layout seems to work, you can turn on the soldering iron.
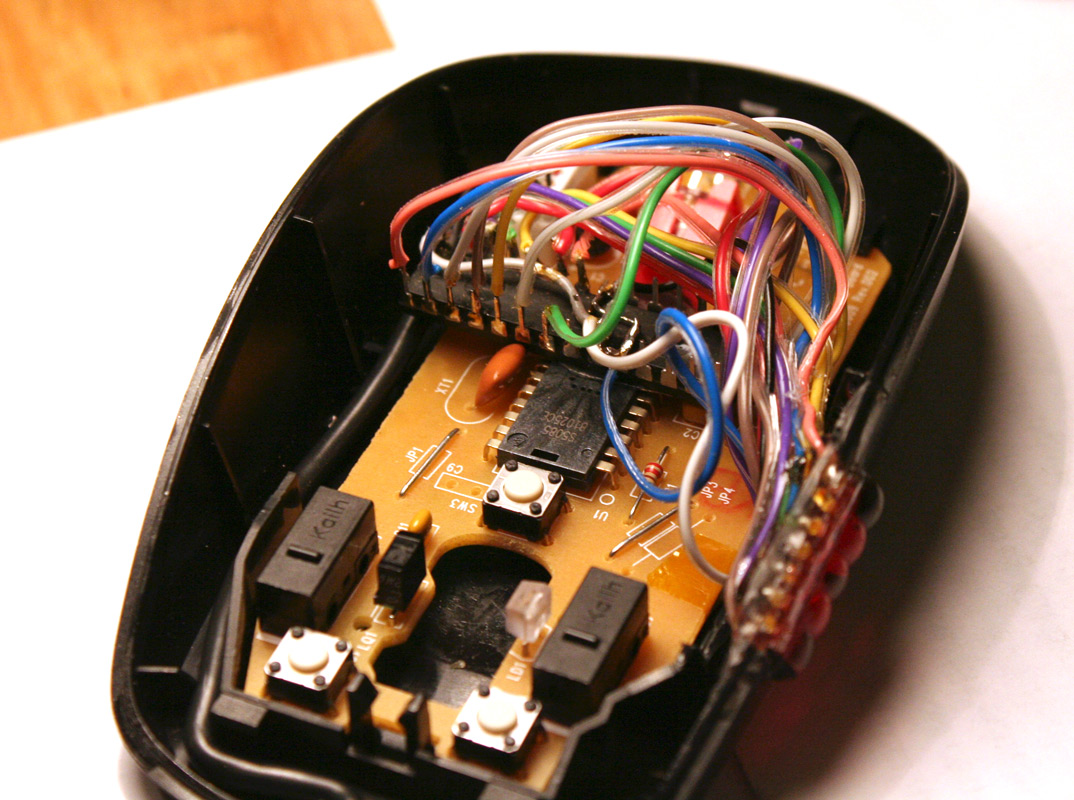
We cut off the legs at the indicator, they will no longer need them. We solder the current-limiting resistors and VT2-VT6 switches directly to what remains:

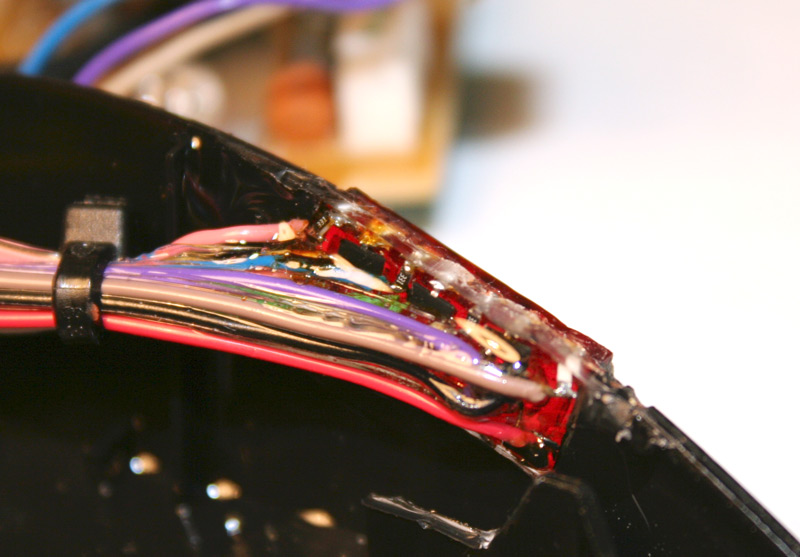
And then to them - wires. Be careful, contact pads fall off from SMD resistors at the slightest careless movement. To prevent this from happening, it is better to immediately fill in with epoxy or hot melt adhesive. And at the same time, insert it into the side wall of the mouse:
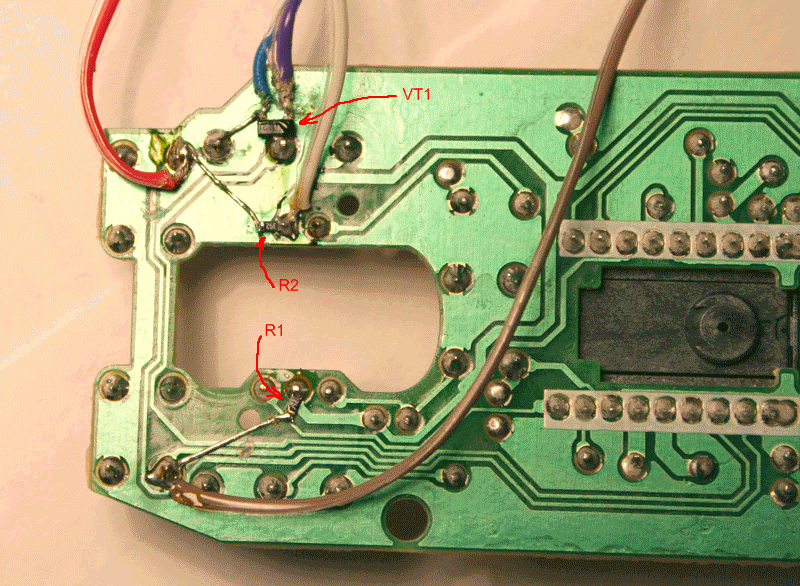
Slightly modify the mouse board (see the diagram above):
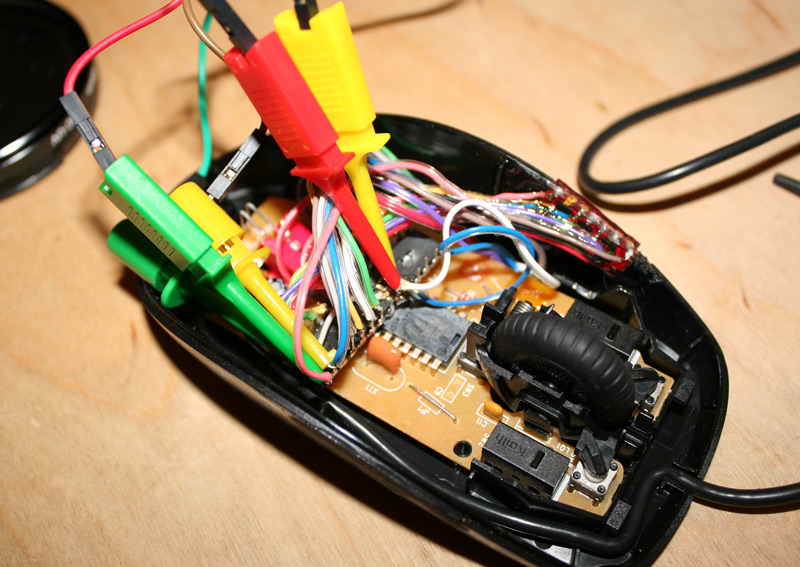
Solder the controller , and flash it: You
can get the sources here . And the binary is here .
Test run:

Now it remains only to write an article on the hub, and carefully fill the hole with an epoxy from the outside (to give the epoxy black color any black powder is suitable, for example, a crushed tablet of activated carbon):
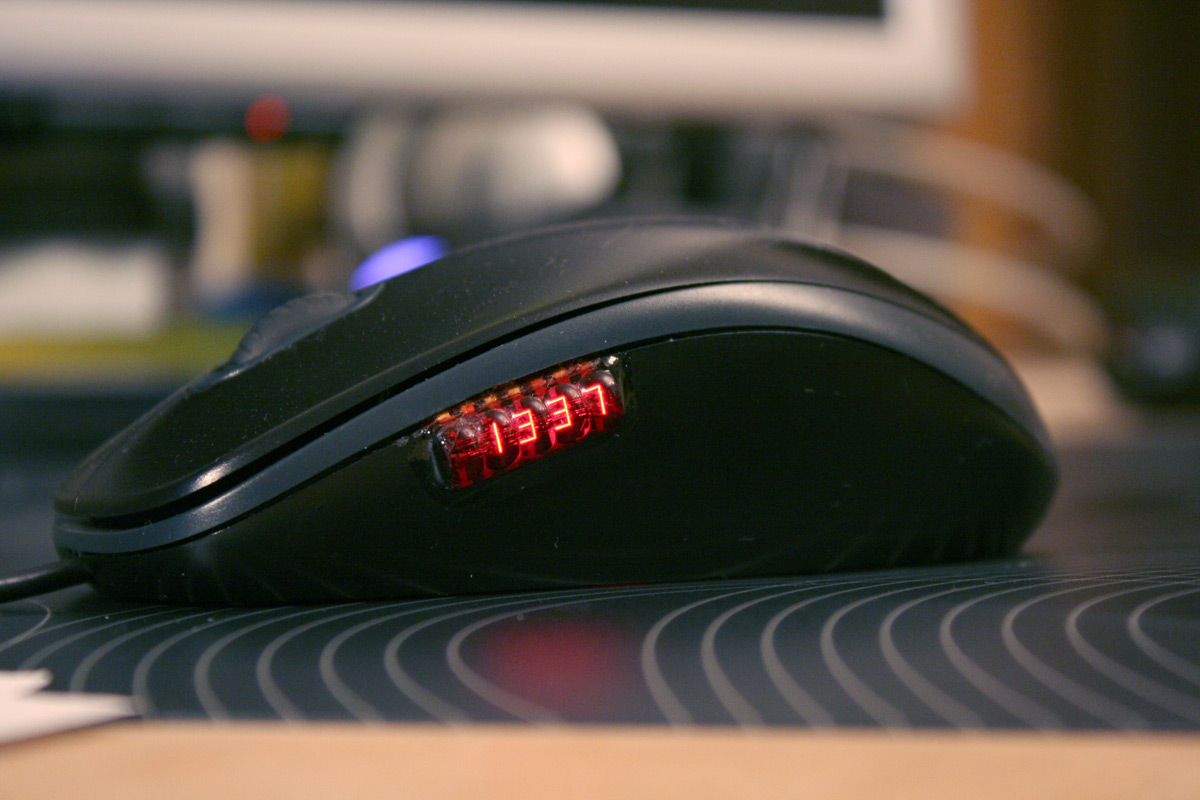
This is the final option.
Some sites they can "call out" to death, so be careful :)
Thank you all for your attention. Sources, if you need them, can be downloaded on github .
“No ...” I said, “but we’ll come up with something.”
Writing a script is somehow boring and unsportsmanlike. So I decided to make a mouse. But not simple, but pumped:
The idea was simple: take an unnecessary mouse button (ours had a swinging wheel) and hang a click generator on it. He pressed the button - and sit, click, quickly and in the area does not annoy anyone the constant clicking “click-click”.
For a ponto, and, as you know, a good ponto is more expensive than money, I wanted to stick an indicator to this mouse as well.
So let's get started. We will need:
- mouse - 1 piece, was found in a drawer;
- indicator - 1 piece, once long ago was brutally uprooted from a Soviet calculator;
- controller - 1 pc, took from those that were lying in large numbers;
- hands - 2 pcs;
- soldering iron - 1 pc;
- epoxy - 1 syringe;
- breadboard and loose powder.
We disassemble the mouse, collect on the breadboard a typical “dynamic indication” (a word that is clever):
Red indicates the changes on the mouse board. Denominations are taken from the bulldozer, resistors R11-R16 are thrown out because "and so it goes." You can take almost any transistors, for example, on a breadboard I had BS170.
Here it is, the layout:
display - it's very simple, if you do not believe me - look leds.c . However, in order to translate a binary number into its display on seven LEDs, we need a primitive character generator.
Note to the hostess: so as not to think “what bit should we put on what foot?” You can use such a signpicture

So, the layout seems to work, you can turn on the soldering iron.
We cut off the legs at the indicator, they will no longer need them. We solder the current-limiting resistors and VT2-VT6 switches directly to what remains:
And then to them - wires. Be careful, contact pads fall off from SMD resistors at the slightest careless movement. To prevent this from happening, it is better to immediately fill in with epoxy or hot melt adhesive. And at the same time, insert it into the side wall of the mouse:
Slightly modify the mouse board (see the diagram above):
Solder the controller , and flash it: You
can get the sources here . And the binary is here .
Test run:
Now it remains only to write an article on the hub, and carefully fill the hole with an epoxy from the outside (to give the epoxy black color any black powder is suitable, for example, a crushed tablet of activated carbon):
This is the final option.
Some sites they can "call out" to death, so be careful :)
Thank you all for your attention. Sources, if you need them, can be downloaded on
github .