Configuring the automatic launch of UI tests for Android applications through TeamCity
Sooner or later, any tester who develops autotesting practices faces the problem of performing their tests autonomously. Moreover, if an expert is experienced, he tries to face it as soon as possible. So, after the first successful AutoTest run locally, I decided to immediately set up a launch in TeamCity.
I note that in our company there is practically no expertise in the remote launch of instrumental tests for Android, so we had to google hard, but I didn’t find any deployed guides. Therefore, and decided to gash this instruction.
At the entrance we have:
Immediately a disclaimer about the server where the launch will take place: the configuration of the OS, hardware virtualization and the graphical shell is not the subject of this article and will be omitted.
Let's start with java. The main thing is to choose the right version. I had 3 dependencies: the tests themselves, android tools and the teamcity agent. I stopped at version 8 to use the same JVM for everyone. If you are less fortunate, and there will be conflicts, you will have to configure the use of multiple versions of Java on the same machine. Another note: if you have debian, then you first need to add webupd8team repositories (it is googling very quickly).
Next, create a user under which the agent will run and, accordingly, everything else. Do not forget to set a password.
Agent distribution can be obtained in the web interface of your teamcity. To do this, go to the Agents section and click on the Install Build Agents link in the upper right . Download and unpack to the desired folder on the server (I recommend our user's home folder -
If your version of teamcity supports Agent Push, it’s still easier. Just open the corresponding tab in the web interface, click the Install Agent button ... and follow the instructions.
Configuring the config. If you have used a remote installation, then it has already been created and in it you only need to set the name of the agent. If not, create:
Fill in with the
Run the command
To automatically start the agent, create a script
Add launch rights
Control reset, the agent has risen, we go further.
Download android sdk tools (Command line tools only) and unpack it in the correct directory. Create a directory to store future images of AVD (space should be enough). For me, the admins have connected the main repository to the directory
Add environment variables. Open the file for editing
Reboot and verify that the variables are correctly displayed in the teamcity web interface on the Agent Parameters tab .
We try to run sdkmanager: the command
Install the necessary tula and virtualok image (s).
So, downloaded the image
We transfer the name and the original image (must be downloaded in advance via sdkmanager). If the error returned, add a flag
Go to the emulator. First, check for the presence of emulator, platforms, platform-tools, system-images folders in the SDK directory. I created the platforms with my hands, the rest were created when installing packages via sdkmanager. Next, check the hardware acceleration. There must be such an answer.
If there is an access error
Plus, I also needed to install QEMU:
We do relogon and check the emulator again.
If everything is ok, then we try to run it. To see with our eyes, connect to the server via vnc. And run the emulator:
A window like this should appear:
During the tests we will run without graphics, so we add a parameter
We proceed to the final stage - setting up the autonomous launch of our tests. I have a 4 step build.
1. Run the emulator
Since the emulator “locks” the terminal, you need to untie the process with the help of the nohup utility (it’s possible and differently - you decide). Just in case, save the emulator log to a file
2. Waiting for the device to load.
We first wait for the status
3. Run the tests. Here everything is individual, here is my example:
4. Close the emulator. Here, so far, a simple termination process has been made.
But it is better, of course, to memorize the process ID when creating an emulator. It will be necessary when we start running tests in several threads, which by chance does not “kill” the wrong process.
That's all, thank you for reading. If there are comments from more experienced colleagues, I will gladly make changes to the manual.
I note that in our company there is practically no expertise in the remote launch of instrumental tests for Android, so we had to google hard, but I didn’t find any deployed guides. Therefore, and decided to gash this instruction.
At the entrance we have:
- test (s) running locally successfully
- running TeamCity server
- debian server with KVM and X
Immediately a disclaimer about the server where the launch will take place: the configuration of the OS, hardware virtualization and the graphical shell is not the subject of this article and will be omitted.
Install and configure the TeamCity agent
Let's start with java. The main thing is to choose the right version. I had 3 dependencies: the tests themselves, android tools and the teamcity agent. I stopped at version 8 to use the same JVM for everyone. If you are less fortunate, and there will be conflicts, you will have to configure the use of multiple versions of Java on the same machine. Another note: if you have debian, then you first need to add webupd8team repositories (it is googling very quickly).
sudo apt-get install oracle-java8-installer
sudo apt-get install oracle-java8-set-default
Next, create a user under which the agent will run and, accordingly, everything else. Do not forget to set a password.
sudo useradd -d /home/tc_agent -s /bin/bash -m tc_agent
sudo passwd tc_agent
Agent distribution can be obtained in the web interface of your teamcity. To do this, go to the Agents section and click on the Install Build Agents link in the upper right . Download and unpack to the desired folder on the server (I recommend our user's home folder -
/home/tc_agent). Next, add launch rights to all scripts:sudo chmod +x /home/tc_agent/BuildAgent/bin/*If your version of teamcity supports Agent Push, it’s still easier. Just open the corresponding tab in the web interface, click the Install Agent button ... and follow the instructions.
Configuring the config. If you have used a remote installation, then it has already been created and in it you only need to set the name of the agent. If not, create:
cd /home/tc_agent/BuildAgent/conf
cp buildAgent.dist.properties buildAgent.properties
nano buildAgent.properties
Fill in with the
serverUrl=address of the web interface of the server, and the name=unique name of the agent. If you have several agents or the default port (9090) is busy, then set your own using the parameter ownPort=. Run the command
/home/tc_agent/BuildAgent/bin/agent.sh start. If everything is configured correctly, then we will see our agent on the Unauthorized tab . Authorize and can use. To automatically start the agent, create a script
/etc/init.d/teamcity_agentwith the following contents:#!/bin/bash
BINARY="/home/tc_agent/BuildAgent/bin/agent.sh"
RUNAS="tc_agent"
LOGFILE="/home/tc_agent/BuildAgent/logs/start.log"
CMD="$BINARY$1$2"
runuser - "$RUNAS" -c "$CMD > $LOGFILE"
cat $LOGFILEAdd launch rights
sudo chmod +x /etc/init.d/teamcity_agentand add a line /etc/init.d/teamcity_agent startto the file /etc/rc.local. Control reset, the agent has risen, we go further.
Install Android SDK and emulator
Download android sdk tools (Command line tools only) and unpack it in the correct directory. Create a directory to store future images of AVD (space should be enough). For me, the admins have connected the main repository to the directory
/var,there and I will add everything. Next, we change the owner of the files to our user and the next steps are best done under him.sudo chown tc_agent -R /var/opt/android-sdk
sudo mkdir /var/opt/.android
sudo chown tc_agent /var/opt/.androidAdd environment variables. Open the file for editing
/home/tc_agent/.bash_profileand prescribe:export ANDROID_HOME=/var/opt/android-sdk
export ANDROID_AVD_HOME=/var/opt/.android/avd
export PATH=$ANDROID_HOME/platform-tools:$PATHexport PATH=$ANDROID_HOME/tools:$PATHReboot and verify that the variables are correctly displayed in the teamcity web interface on the Agent Parameters tab .
We try to run sdkmanager: the command
$ANDROID_HOME/tools/bin/sdkmanager --listshould list the installed and available packages. If you get a view error Exception in thread "main" java.lang.NoClassDefFoundError, then try this solution . Install the necessary tula and virtualok image (s).
$ANDROID_HOME/tools/bin/sdkmanager emulator platform-tools tools
$ANDROID_HOME/tools/bin/sdkmanager 'system-images;android-25;google_apis;x86'
Creating and running AVD
So, downloaded the image
'system-images;android-25;google_apis;x86'(Android 7.1.1), create a virtual device based on it. I will not go into the details of all possible parameters of the avdmanager utility, I will show it in the smallest possible quantity:$ANDROID_HOME/tools/bin/avdmanager create avd -n avd_name -k "system-images;android-25;google_apis;x86"We transfer the name and the original image (must be downloaded in advance via sdkmanager). If the error returned, add a flag
-vto view the text. Go to the emulator. First, check for the presence of emulator, platforms, platform-tools, system-images folders in the SDK directory. I created the platforms with my hands, the rest were created when installing packages via sdkmanager. Next, check the hardware acceleration. There must be such an answer.
$ANDROID_HOME/emulator/emulator -accel-check
accel:
0
KVM (version 12) is installed and usable.
accel
If there is an access error
/dev/kvm, then add the rights:addgroup kvm
usermod -a -G kvm tc_agent
chown root:kvm /dev/kvm
Plus, I also needed to install QEMU:
sudo apt-get install qemu-kvmWe do relogon and check the emulator again.
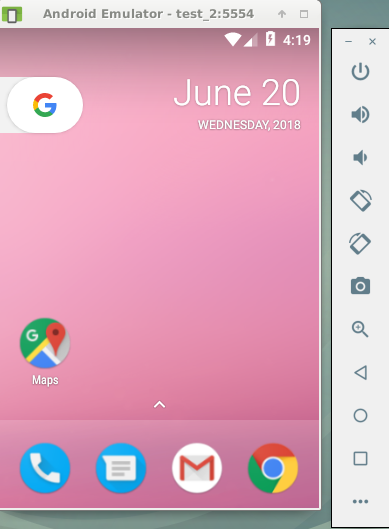
If everything is ok, then we try to run it. To see with our eyes, connect to the server via vnc. And run the emulator:
$ANDROID_HOME/emulator/emulator @avd_nameA window like this should appear:
During the tests we will run without graphics, so we add a parameter
-no-window.Customize build in TeamCity
We proceed to the final stage - setting up the autonomous launch of our tests. I have a 4 step build.
1. Run the emulator
nohup /var/opt/android-sdk/emulator/emulator @avd_name -no-snapshot-save -no-boot-anim -no-window -snapshot clean_snap_1 > start_emulator.log 2>&1&Since the emulator “locks” the terminal, you need to untie the process with the help of the nohup utility (it’s possible and differently - you decide). Just in case, save the emulator log to a file
start_emulator.log. To run the tests, I created a clean snapshot (how to do this, read here ) and added a key -no-snapshot-saveso that it would not be overwritten. 2. Waiting for the device to load.
adb wait-for-device shell 'while [[ -z $(getprop sys.boot_completed) ]]; do sleep 1; done;'We first wait for the status
wait-for-device, then wait in the loop when the variable sys.boot_completedreturns 1. 3. Run the tests. Here everything is individual, here is my example:
./gradlew clean connectedAndroidTest4. Close the emulator. Here, so far, a simple termination process has been made.
kill -s 2 `pgrep qemu-system`But it is better, of course, to memorize the process ID when creating an emulator. It will be necessary when we start running tests in several threads, which by chance does not “kill” the wrong process.
That's all, thank you for reading. If there are comments from more experienced colleagues, I will gladly make changes to the manual.