Collective farm macro lens or flip staffer
 Below I will tell you how to make a macro lens from a regular Canon 18-55 / 3.5-5.6 IS. To do this, the lens was turned upside down (with the front lens to the matrix) and a contact pad was taken out to control the lens from the carcass.
Introduction
An inverted lens gives a large increase, and a remote contact pad gives control over the lens - autofocus, aperture and stabilizer. I will flip my canon 18-55 / 3.5-5.6 IS. With other systems to transfer the contact pad is not a fact that will succeed. On Nikon, for example, pins sit on the lens instead of pads.
Prerequisites
1. The most important thing that we need is an adapter (aka a reverse ring), which allows you to connect an inverted lens to the carcass. You can buy a ready-made one (the “58mm Macro Reverse Adapter Ring for CANON EOS EF Mount” is easily located), order from a friend's turner, or completely distort the lens, and remove the entire back cover with the contacts from it and transfer it from above to the front lens.
2. A piece of IDE 80pin cable + old SD card. From the SD card, a contact pad will be used, which at the very least is suitable as a substitute for the original, Kenon. By the way, the SD-MicroSD adapter will not work. Inside there is just bare iron, it will be much harder to glue to the eos-58 adapter.
Process
In preparation for the preparation, I identified three stages for myself:
1. Unscrew the back of the lens, solder to the original site.
2. Increase the contact area on the EOS-58 adapter.
3. Solder to this site, put everything together.
So. First stage.
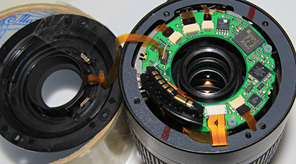
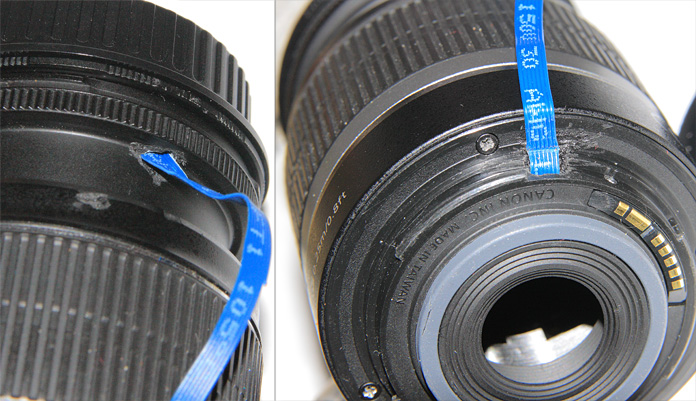
Unscrew the back cover. I study the contents. I find a place for the hole for the cable. I get drunk. He decided to melt the hole so that dust would not get inside when drilling. The green arrows indicate the screws that secure the contact pad to the back cover, they also need to be unscrewed.

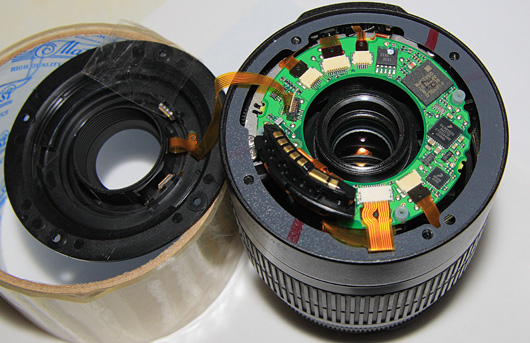
Separately, I note that during these works, the lens will stand on the front tube, respectively, it is impossible to put pressure on it.
Do not try to hang the lens on the carcass in this form (with a protruding wire)! The lens mount is iron and it will chew it.
Second phase.
I build up the pad on the adapter. To do this, cut a piece of plastic in the shape of an adapter. On one side he sawed off a file. I glued it with poxipole. It is quite tolerable.
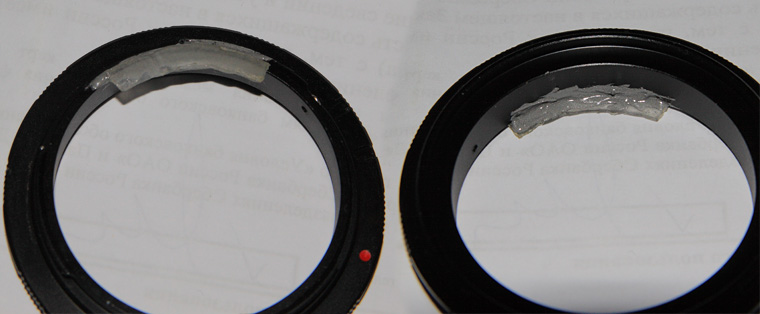
Now the hardest part. You need to glue a piece of SD card on top of the plastic plate. I had an EOS-m42 adapter, and although I tried on it the places of contacts, all the same, it was only possible to stick it 5 times. Glued with superglue. Holds tight enough if you don’t make an effort. Each time I soldered the contacts, screwed them on the camera and checked whether it worked. If the carcass gives out instead of the diaphragm - 00, then it’s out of luck. I note that the kenon contact area is not even. There is a bevel on one side. It is not necessary to make a bevel evenly, I got a smooth descent, not a bevel. Here is the end view, it is clearly visible (the ring has already been wound onto the lens):

Ready adapter (EOS-m42 adapter on the left):

The third stage.
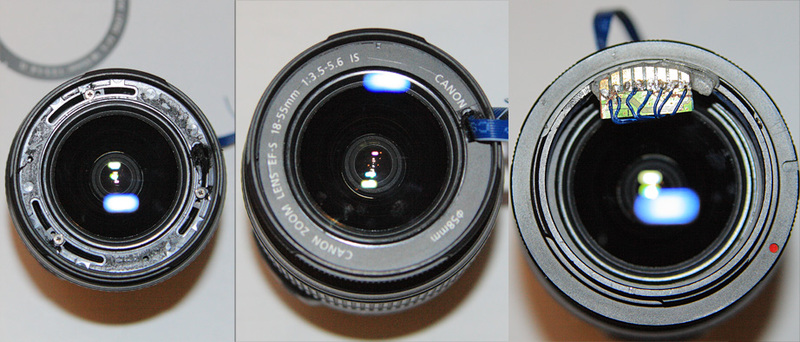
I tear off the plastic sticker from the front tube (the sticker is kept on glue), burn the hole for the wire. I insert a wire, I hang a sticker on top. I wind the adapter. I solder. The easiest part.
General notes:
- Although there are 8 contacts, there are really 7 wires. In photographs, this, in principle, is visible.
- I did not notice vignetting because of such a wide contact area. Maybe someday I’ll shorten it.
- In the process of work, the trace of the contacts on the carcass, which remains if you drag the adapter back and forth, unscrewing, twisting it, can help to align the contact pad.
Profit, or not all hopes are justified
This is what a collective farm macro lens looks like.

Results:
1. Autofocus works, only with such a small depth of field it is completely useless. We turn to manual.
2. Aperture is adjustable. And most importantly, it affects the depth of field here!
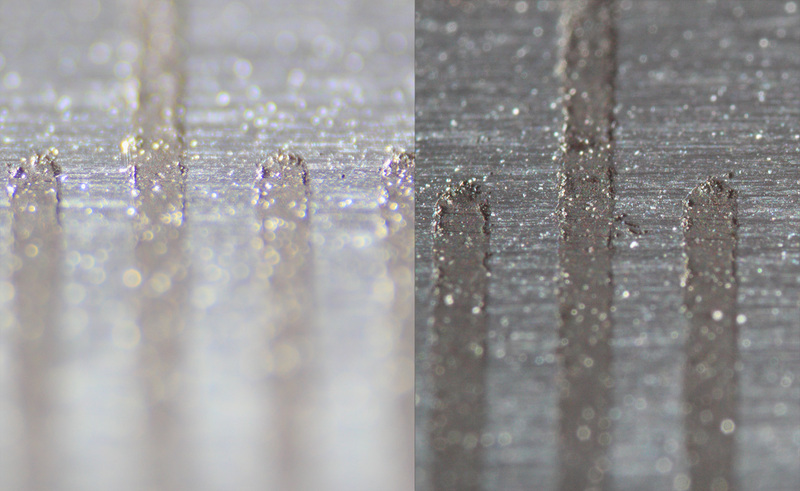
To check, I photographed a metal millimeter ruler. focal length - 18. On the left aperture 3.5, on the right 10.
3. The noticeable influence of the stabilizer is not noticeable. Either it is completely ineffective, or when disassembling the lens, I screwed it.
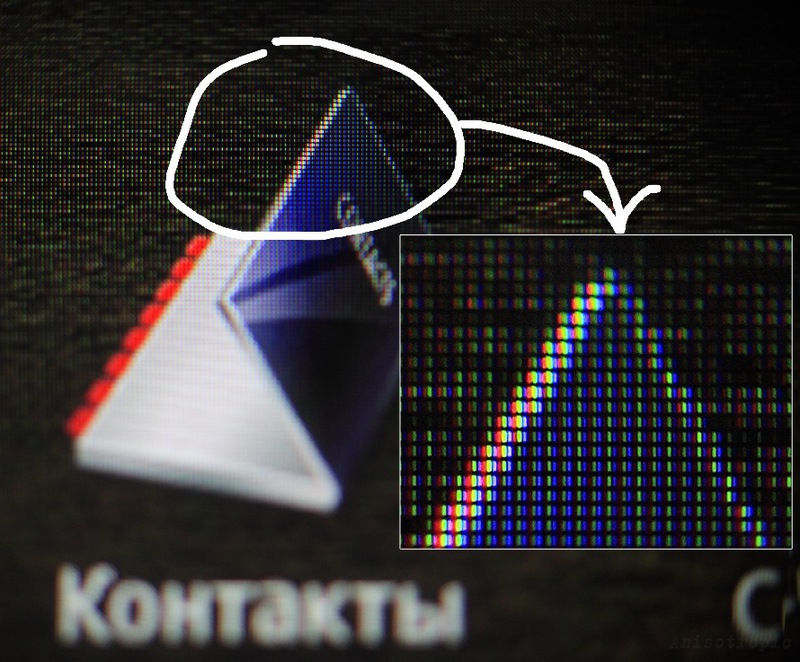
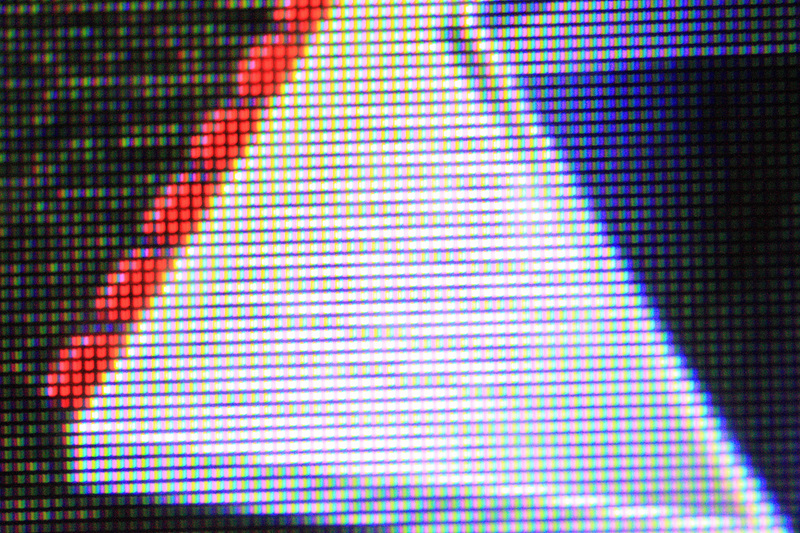
4. The increase is very large. For example, two screenshots of the WAVE2 smart. The first is made on a sandwich (canon 50 / 1.8 + inverted helios 44). And this is 100% crop. The second is made at the 18-55 changeling, this is not a cropped image, reduced by 4 times.
5. In theory, the resulting shifter should climb on full-frame carcasses, unfortunately I have nothing to check on.
6. Image quality is still so-so :)