What (not) you need to know to create games on Unity
Unity is a game engine with a far from zero entry threshold (comparing with the same Game Maker Studio), and in this article I will tell you what problems I encountered when starting to study it, and what solutions I found. I will describe such moments with the example of my 2d puzzle game for Android (which I hope will be released soon on the Play Market).
I do not pretend to be true, and I do not urge you to repeat after yourself, if you know the best way, I just show you how to do it yourself, and maybe someone who is just starting to get acquainted with Unity will create his own indie gamedev masterpiece with less labor.
I am a power plant design engineer, but coding has always interested me, and I am familiar with some programming languages. Therefore, we agree that to create games on Unity:
- You need to know a little C # or JavaScript (at least the C-shaped syntax).
All that will be written below is not a Unity tutorial, of which enough have been bred on the network without me. Below will be collected the difficult moments that may occur when creating your first project on Unity.
It is worth warning that the provided scripts omit most of the game logic (representing "commercial secret"), but their performance as examples has been verified.
Problem One - Orientation

Orientation Lock
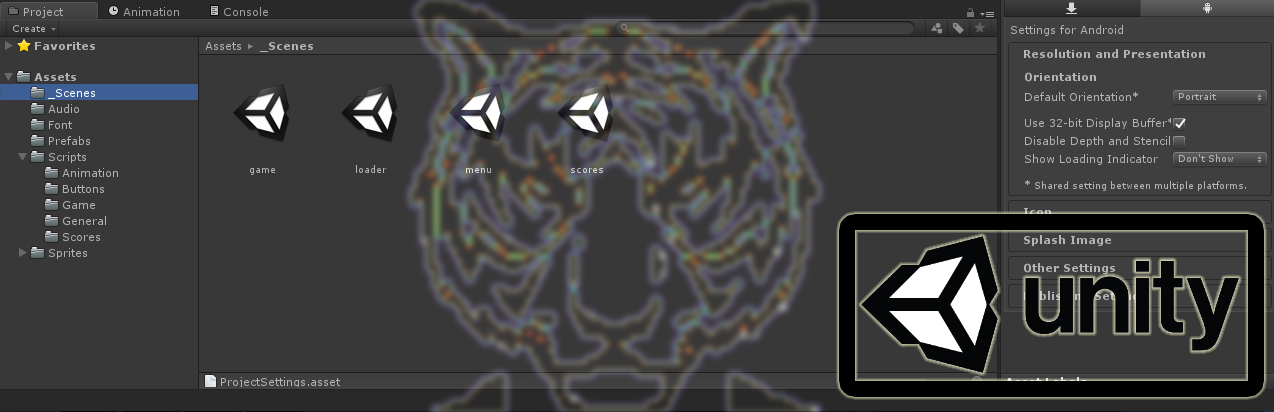
The first difficulty I had was that I did not pay enough attention to optimizing the visual interface for screen orientation. The solution is the simplest - if changing the screen orientation is not needed for gameplay, it is better to block it. No need for excessive flexibility, you are writing an indie game, not a project on the other side of a million dollars. Why tons of conditional transitions and change of anchors if the game looks better in Portrait (for example). You can lock the screen orientation here:
Edit> Project Settings> Player
Different resolutions.
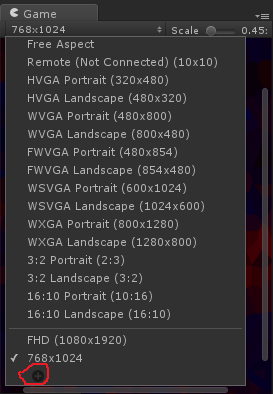
It is also important to test the visual interface at different resolutions in the selected orientation, and when testing, do not forget about the existence of devices with 4: 3 proportions (well, or 3: 4), so we’ll safely add 768x1024 (or 1024x768).
Better positioning
It’s best to use Rect Transform to adjust the positioning and scale of game objects.

Problem Two - COMMUNICATION
I had a similar problem due to the fact that I made the first acquaintance with the game dev via Game Maker Studio, where the script is a full-fledged part of the game object, and it immediately has full access to all components of the object. Unity has common scripts, and only instances of them are added to the object. Speaking simplistically-figuratively, the script does not know directly on which object it is currently executing. Therefore, when writing scripts, you must take into account the initialization of the interfaces for working with the components of an object or with the components of other objects.
We train on cats
In my game there is a GameField object, on the stage there is only one instance of it, there is also a script of the same name. The object is responsible for displaying the game score and for reproducing the entire game sound, so in my opinion it is more economical for memory (in general, the game has only three Audio Source - one Background Music, two other Sound Effects). The script solves the issues of storing a game account, choosing AudioClip to play sound, and for some game logic.
We will dwell on the sound in more detail, since with this example it is easy to show the interaction of the script with the components of the object.
 Naturally, the object should have the GameField.cs script itself and the AudioSource component, in my case two whole (later it will be clear why).
As mentioned earlier, the script is “not in the know” that the object has an AudioSource component, therefore we declare and initialize the interface (for now, we consider that there is only one AudioSource):
private AudioSource Sound;
voidStart(){
	Sound = GetComponent<AudioSource> ();
}
The GetComponent method <component_type> () will return the first component of the specified type from the object.
In addition to AudioSource, you will need several AudioClip:
[Header ("Audio clips")]
[SerializeField]
private AudioClip OnStart;
[SerializeField]
private AudioClip OnEfScore;
[SerializeField]
private AudioClip OnHighScore;
[SerializeField]
private AudioClip OnMainTimer;
[SerializeField]
private AudioClip OnBubbMarker;
[SerializeField]
private AudioClip OnScoreUp;
Hereinafter, the commands in square brackets are needed for Inspector`a, more details here .

Now the script in Inspector has new fields in which we drag the necessary sounds.
Next, create a SoundPlay method in the script that takes in AudioClip:
publicvoidPlaySound(AudioClip Clip = null){
	Sound.clip = Clip;
	Sound.Play ();
}
To play sound in the game, we call this method at the right time with the clip.
There is one significant minus of this approach, only one sound can be played at a time, but during the game it may be necessary to play two or more sounds, with the exception of background music playing constantly.
To prevent cacophony, I recommend avoiding the possibility of simultaneous playback of more than 4-5 sounds (2-3 maximum is better), I mean game short first-order sounds (jump, coin, player’s shot ...), for background noise it’s better to create your own source sound on the object that makes this noise (if you need 2d-3d sound) or one object responsible for all the background noise (if "volume" is not needed).
In my game, there is no need to simultaneously play more than two AudioClips. For guaranteed playback of both hypothetical sounds, I added two AudioSource to the GameField object. To determine the components in the script, we use the method
GetComponents<тип_компонента>()
which returns an array of all components of the specified type from the object.
The code will look like this:
private AudioSource[] Sound; // Добавились квадратные скобкиvoidStart(){
	Sound = GetComponents<AudioSource> (); // Теперь GetComponents
}
Most of the changes will affect the PlaySound method. I see two versions of this method: “universal” (for any number of AudioSource in an object) and “clumsy” (for 2-3 AudioSource, not the most elegant but less resource intensive).
A clumsy option for two AudioSource (I used it)
privatevoidPlaySound(AudioClip Clip = null){
	if (!Sound [0].isPlaying) {
		Sound [0].clip = Clip;
		Sound [0].Play ();
	} else {
		Sound [1].clip = Clip;
		Sound [1].Play ();
	}
}
You can stretch to three or more AudioSource, but the number of conditions will devour all the performance savings.
"Universal" option
privatevoidPlaySound(AudioClip Clip = null){
	foreach (AudioSource _Sound in Sound) {
		if (!_Sound.isPlaying) {
			_Sound.clip = Clip;
			_Sound.Play ();
			break;
		}
	}
}
Applying to a foreign component
There are several instances of Fishka prefab on the playing field, such as a game chip. It is built like this:
- Parent object with its SpriteRenderer;
- Child objects with their SpriteRenderer.
Child objects are responsible for drawing the body of the chip, its color, additional mutable elements. The parent draws a marker border around the chip (you must select the active chip in the game). The script is only on the parent object. Thus, to manage child sprites, the parent script needs to specify these sprites. I organized it like this - in the script I created interfaces for accessing the SpriteRenderer children:
[Header ("Graphic objects")]
public SpriteRenderer Marker;
[SerializeField]
private SpriteRenderer Base;
[Space]
[SerializeField]
private SpriteRenderer Center_Red;
[SerializeField]
private SpriteRenderer Center_Green;
[SerializeField]
private SpriteRenderer Center_Blue;
Now the script in Inspector has additional fields:
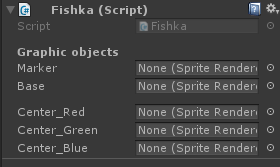
Dragging and dropping children into the corresponding fields gives the script access to them.
Usage example:
voidOnMouseDown(){  // Естественно не забываем добавить объекту компонент коллайдера
	Marker.enabled = !Marker.enabled;
}
Applying to a foreign script
In addition to manipulating foreign components, you can also access a script of a third-party object, work with its Public variables, methods, subclasses.
I will give an example on the already well-known GameField object.
The GameField script has a public method FishkiMarkerDisabled (), which is needed to “remove” a marker from all the chips on the field and is used in the process of setting a marker when clicking on a chip, since there can only be one active.
In the Fishka.cs script, SpriteRenderer Marker is public, that is, it can be accessed from another script. To do this, add a declaration and initialization of interfaces for all instances of the Fishka class in the GameField.cs script (when creating a script, the class of the same name is created in it) similar to how it is done for several AudioSource:
private Fishka[] Fishki;
voidStart(){
	Fishki = GameObject.FindObjectsOfType (typeof(Fishka)) as Fishka[];
}
publicvoidFishkiMarkerDisabled(){
	foreach (Fishka _Fishka in Fishki) {
		_Fishka .Marker.enabled = false;
	}
}
In the Fishka.cs script, add the declaration and initialization of the interface of the instance of the GameField class and when we click on the object, we will call the FishkiMarkerDisabled () method of this class:
private GameField gf;
voidStart(){
	gf = GameObject.FindObjectOfType (typeof(GameField)) as GameField;
}
voidOnMouseDown(){
	gf.FishkiMarkerDisabled();
	Marker.enabled = !Marker.enabled;
}
Thus, it is possible to interact between scripts (or rather classes) of different objects.
Problem Three - KEEPERS
Account keeper
As soon as something like an account appears in the game, the immediate problem is its storage, both during the game and outside it, I also want to keep a record in order to encourage the player to surpass it.
I will not consider options when the entire game (menu, game, account withdrawal) is built in one scene, because, firstly, this is not the best way to build the first project, and secondly, in my opinion, the initial loading scene should be . Therefore, we agree that there are four scenes in the project:
- loader - a scene in which the background music object is initialized (more will be later), and loading settings from the save;
- menu - a scene with a menu;
- game - game scene;
- score - the scene of the score, record, leaderboard.
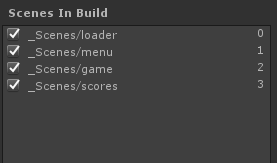
Note: The order of loading scenes is set in File> Build Settings. The
points accumulated during the game are stored in the Score variable of the GameField class. To have access to the data when going to the scores scene, create a public static class ScoreHolder, in which we declare a variable to store the value and a property to get and set the value of this variable (the method was spied on by apocatastas ):
using UnityEngine;
publicstaticclassScoreHolder{
	privatestaticint _Score = 0;
	publicstaticint Score	{
		get{
			return _Score;
		}
		set{
			_Score = value;
		}
	}
}
A public static class does not need to be added to any object, it is immediately available in any scene from any script.
An example of using the GameField class in the scene transition method scores:
using UnityEngine.SceneManagement;
publicclassGameField : MonoBehaviour {
	privateint Score = 0;
// В процессе игры счет увеличился, но игрок проигрывает и нужно перейти на сцену ScoresvoidGotoScores(){
		ScoreHolder.Score = Score; // новое значение ScoreHolder.Score доступно везде
		SceneManager.LoadScene (“scores”);
	}
}
In the same way, you can add a record account to the ScoreHolder during the game, but it will not be saved upon exit.
Keeper of settings
Let's consider the example of saving the value of the Boolean variable SoundEffectsMute, depending on the state of which the game has or not sound effects.
The variable itself is stored in the public static class SettingsHolder:
using UnityEngine;
publicstaticclassSettingsHolder{
	privatestaticbool _SoundEffectsMute = false;
	publicstaticbool SoundEffectsMute{
		get{
			return _SoundEffectsMute;
		}
		set{
			_SoundEffectsMute = value;
		}
	}
}
The class is similar to ScoreHolder, you could even combine them into one, but in my opinion this is bad manners.
As you can see from the script, by default _SoundEffectsMute is declared false, so each time the game starts, SettingsHolder.SoundEffectsMute will return false regardless of whether the user has changed it before or not (it is changed using the button on the menu stage).
Saving variables
The best option for an Android application is to use the PlayerPrefs.SetInt method for saving (more in the official documentation ). There are two options to keep the value of SettingsHolder.SoundEffectsMute in PlayerPrefs, let's call them “simple” and “elegant”.
The “simple” way (for me like that) is in the OnMouseDown () method of the class of the aforementioned button. The saved value is loaded in the same class but in the Start () method:
using UnityEngine;
publicclassButtonSoundMute : MonoBehaviour {
	voidStart(){
	// Все преобразование от того, что PlayerPrefs не работает с boolswitch (PlayerPrefs.GetInt ("SoundEffectsMute")) {
		case0:
			SettingsHolder.SoundEffectsMute = false;
			break;
		case1:
			SettingsHolder.SoundEffectsMute = true;
			break;
		default: // Прикрой тылы сделай default
			SettingsHolder.SoundEffectsMute = true;
			break;
		}
	}
	voidOnMouseDown(){
		SettingsHolder.SoundEffectsMute = !SettingsHolder.SoundEffectsMute;
// Все преобразование от того, что PlayerPrefs не работает с boolif (SettingsHolder.SoundEffectsMute)
			PlayerPrefs.SetInt ("SoundEffectsMute", 1);
		else
			PlayerPrefs.SetInt ("SoundEffectsMute", 0);
	}
}
The "elegant" way, in my opinion, is not the most correct, because complicate the maintenance of the code, but there is something in it, and I can not help but share it. A feature of this method is that the setter of the SettingsHolder.SoundEffectsMute property is called at a moment that does not require high performance, and it can be loaded (oh, horror) using PlayerPrefs (read - writing to a file). Change the public static class SettingsHolder:
using UnityEngine;
publicstaticclassSettingsHolder
{
	privatestaticbool _SoundEffectsMute = false;
	publicstaticbool SoundEffectsMute{
		get{
			return _SoundEffectsMute;
		}
		set{
			_SoundEffectsMute = value;
		if (_SoundEffectsMute)
			PlayerPrefs.SetInt ("SoundEffectsMute", 1);
		else
			PlayerPrefs.SetInt ("SoundEffectsMute", 0);
		}
	}
}
The OnMouseDown method of the ButtonSoundMute class will simplify to:
voidOnMouseDown(){
	SettingsHolder.SoundEffectsMute = !SettingsHolder.SoundEffectsMute;
}
It’s not worth loading the getter with reading from a file, since it is involved in a performance-critical process - in the PlaySound () method of the GameField class:
privatevoidPlaySound(AudioClip Clip = null){
	if (!SettingsHolder.SoundEffectsMute) {
	// Не забудь про возможность использовать “универсальный” метод (см. выше)if (!Sound [0].isPlaying) {
			Sound [0].clip = Clip;
			Sound [0].Play ();
		} else {
			Sound [1].clip = Clip;
			Sound [1].Play ();
		}
	}
}
In the above way, you can organize in-game storage of any variables.
Fifth Problem - ONE FOR ALL
This music will be eternal.
Sooner or later everyone faces such a problem, and I was no exception. As planned, background music starts playing in the menu scene, and if it is not turned off, it plays menu, game and scores on the scenes without interruption. But if the object “playing” background music is installed on the menu scene, when you go to the game scene, it is destroyed and the sound disappears, and if you put the same object on the game scene, then after the transition the music plays first. The solution turned out to be the use of the DontDestroyOnLoad (Object target) method placed in the Start () method of the class whose script instance the music object has. To do this, create the DontDestroyThis.cs script:
using UnityEngine;
publicclassDontDestroyThis: MonoBehaviour {
	voidStart(){
		DontDestroyOnLoad(this.gameObject);
	}
}
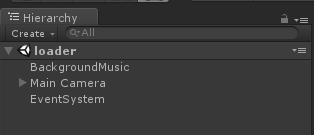 For everything to work, the “musical” object must be root (at the same hierarchy level as the main camera).
 Why background music in loader
The screenshot shows that the “musical” object is located not on the menu scene but on the loader scene. This is a measure caused by the fact that the menu scene can be loaded more than once (after the scores scene, the transition to the menu scene), and each time it is loaded, another “musical” object will be created, and the old one will not be deleted. It can be done as in the example of official documentation , but I decided to take advantage of the fact that the loader scene is guaranteed to load only once.
On this, the key problems that I encountered when developing my first game on Unity, before uploading to the Play Market (I have not yet registered a developer account), ended successfully.
PS
If the information was useful, you can support the author, and he will finally register an Android developer account.