Homemade magnetic cards for calculator Casio PRO fx-1
- Transfer
- Tutorial
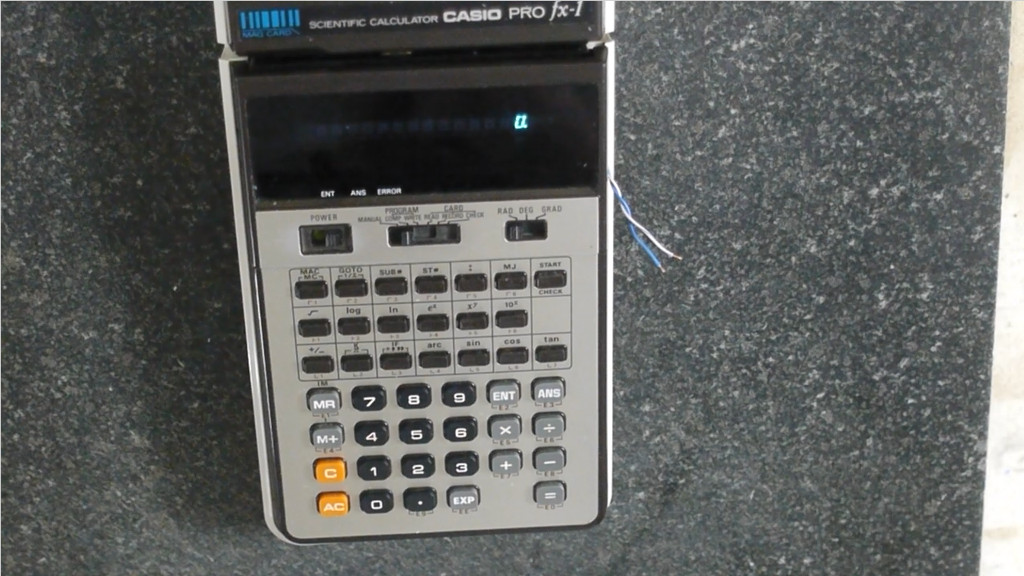
The author purchased the Casio PRO fx-1 calculator without the intended magnetic cards. How they look is shown here . According to the photographs, the author determined that they have a length of 93 mm, which is slightly larger than a bank card. Cards of this length exist, but are rare and expensive. But if you take a shorter card and draw it slower, then, according to the author’s calculations, everything should work out.
The problem turned out to be in the way of determining the speed of the manual pull when recording. The card is transparent, strokes are applied over the magnetic strip. When reading, they are not used; the “tape constant” is determined by software. Therefore, if you stick the strokes, the card will be write protected.
Transparent cards exist, but they are also rare. The author decided instead of strokes on a transparent map to make gaps in the opaque where there should be no strokes. It is not easy to make 85 slots with dimensions 3x0.5 mm, but the author has a CNC engraver.
The author made a DXF file, translated it into a G-code and conducted an experiment with an expired card. Nothing happened, because on modern maps the magnetic strip has a high coercive force - about 3000 Oersted. A calculator is needed with a low - about 300. Here, as with DD and HD diskettes.
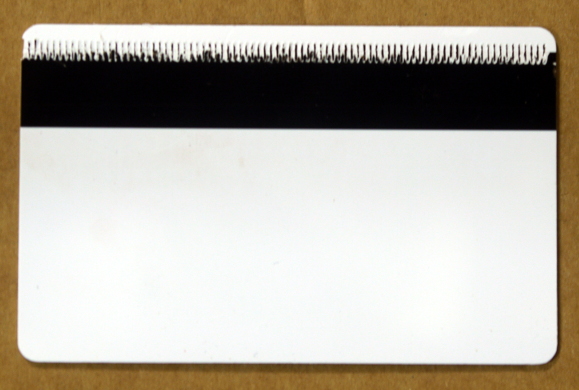
It turns out that there are CR80 cards that are similar in size, but with a strip with a low coercive force. At the Casio calculator forum, the author asked for a photograph of the original map next to the line. It turned out that he was wrong in the measurements, and in fact the card is the same in size as the CR80.
But by this moment the calculator had broken down - it stopped responding to keystrokes. It turned out that batteries used to leak in it. Cleaning the keyboard board fixed everything.
When the CR80 cards arrived, the author placed them in an engraver and got this:
The author engraved with a 20-degree cutter at low speeds so that the plastic does not melt. It is better to take a cutter 10- or 15-degree.
At first, nothing worked. The author soldered the wires to the magnetic head and connected it to the oscilloscope. This is how the signal looks when writing:

And so - when reading, it means everything was written:
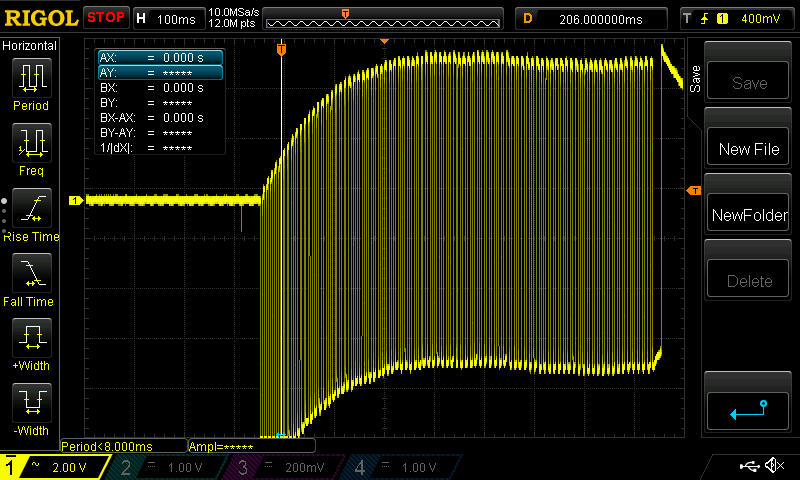
The author decided that it was all about speed, and decided to draw a card while reading a little slower. She read it. Then he tried to stretch both too fast and too slow - everything worked, and it is not clear why it did not work for the first time.
In general, the author has learned how to make cards for this calculator. The slits are cut out slowly, and even in two passes, but even after that it is necessary to bring them manually with a scalpel. But everything works:
To make the same cards, you need:
- Blank CR80 cards with a low coercive force strip on a PVC backing
- Tool for mounting a card in an engraver (CC-BY 3.0)
- A file with a G-code for cutting slots (ibid., In the file section)
- CNC3020 engraver