Config generation for nginx, history of one pull request
- Tutorial
Greetings, comrades. On my battle servers, beautiful nginx has been spinning since 2006 and over the years of its administration I have accumulated a lot of configs and templates. I praised nginx a lot and somehow it turned out that I also started a nginx hub on Habr, show off \ m /
Friends asked me to raise a developer farm for them and instead of dragging them with their specific templates, I remembered about an interesting project nginxconfig.io, which scatters configs and shelves and for lets encrypt everything is prepared, etc. I thought, why not? However, I was enraged by the fact that nginxconfig offers me to download the zip archive to the browser, not allowing me to merge it directly onto the server using wget / fetch / curl. What kind of nonsense, why do I need it in the browser, I need it on the server from the console. Angry, I climbed onto github to see the guts of the project, which led to its fork and, as a result, pull request. About which I would not write if it were not interesting;)

Of course, before picking the source, I looked from where the chrome pulls the generated zip archive with the configs, and there I was waiting for the address starting with "blob:", oppa. It has already become clear that in the process the service does not generate anything, in fact that js does all this. Indeed, the zip archive is generated by the client itself, browser, javascript. Those. the charm is that the nginxconfig.io project can simply be saved as an html page, uploaded to some narod.ruand it will work) This is a very funny and interesting solution, however, it is terribly inconvenient for setting up servers, in fact, precisely for what this project was created for. Download the generated archive by the browser, and then transfer it to the server using nc ... in 2019? I set myself the task of finding a way to download the resulting config directly to the server.
Having forked the project, I began to think what options I have. The task was complicated by the fact that I did not want to depart from the condition that the project should remain a clean front-end, without any back-end. Of course, the simplest solution would be to pull up nodejs, and make it generate an archive with configs via direct links.
In fact, there were not many options. More precisely, only one came to mind. We need to configure the configs and get a link that we can copy to the server console to get a zip archive.
Several text files in the resulting zip archive weighed quite a bit, literally a few kilobytes. The obvious solution was to get the base64 string from the generated zip archive and throw it into the buffer, while on the server with the command in the console
nginxconfig.io was written in AngularJS, I can’t even imagine what kilometers of code would be required if the author did not choose a reactive js framework. But I perfectly imagine how much easier and more beautiful it would be possible to implement all this on VueJS, although this is already a completely different topic.
In the project resources we see a method of generating a zip archive:
everything is quite simple, using the jszip library , a zip is created where the configuration files are placed. After creating the zip archive, js feeds it to the browser using the FileSaver.js library :
where content is the resulting blob zip archive object.
Ok, all I had to do was add another button next to it, and when I click on it, do not save the resulting zip archive to the browser, but get base64 code from it. After a bit of shamanism, I got 2 methods, instead of one downloadZip:
As you can see, I put the generation of the zip archive into the private generateZip method, well, because this is AngularJS, and the author himself adheres to callbacks, did not implement it through promises. downloadZip still did saveAs in the output, whereas downloadBase64 did a little different. We create a FileReader object that came to us in html5 and is already available for use. Which, in due time, knows how to make a base64 string from blob, more precisely it makes a DataURL string, but this is not so important for us, because DataURL contains exactly what we need. Bingo, a little catch was waiting for me when I tried to put all this in a buffer. The author used the clipboardjs library in the project, which allows you to work with the clipboard without flash objects, based on the selected text. Initially, I decided to put my base64 in an element with display: none ;, but in that case I could not put it on the clipboard, because no selection occurs. Therefore, instead of display: none; I did
which allowed me to hide the element from my eyes and in fact leave it on the page. Voila, the task is completed, when I clicked on my button, a line of the form was placed in the buffer:
which I simply inserted into the console on the server and immediately received a zip archive with all the configs.
Well, of course, I threw the pull request to the author, because the project is active and lively, I want to see updates from the author and have my own button) Who cares, here is my fork of the project and pull request itself , where you can see what I fixed / updated.
Peppy development :-)
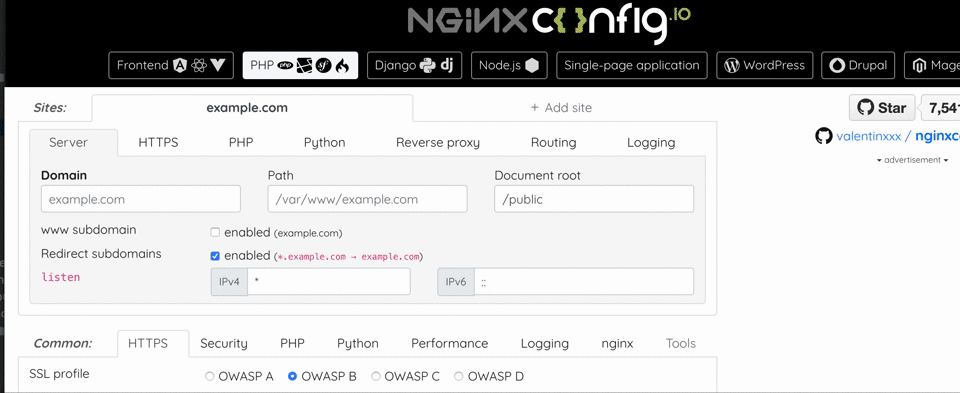
Friends asked me to raise a developer farm for them and instead of dragging them with their specific templates, I remembered about an interesting project nginxconfig.io, which scatters configs and shelves and for lets encrypt everything is prepared, etc. I thought, why not? However, I was enraged by the fact that nginxconfig offers me to download the zip archive to the browser, not allowing me to merge it directly onto the server using wget / fetch / curl. What kind of nonsense, why do I need it in the browser, I need it on the server from the console. Angry, I climbed onto github to see the guts of the project, which led to its fork and, as a result, pull request. About which I would not write if it were not interesting;)
Of course, before picking the source, I looked from where the chrome pulls the generated zip archive with the configs, and there I was waiting for the address starting with "blob:", oppa. It has already become clear that in the process the service does not generate anything, in fact that js does all this. Indeed, the zip archive is generated by the client itself, browser, javascript. Those. the charm is that the nginxconfig.io project can simply be saved as an html page, uploaded to some narod.ruand it will work) This is a very funny and interesting solution, however, it is terribly inconvenient for setting up servers, in fact, precisely for what this project was created for. Download the generated archive by the browser, and then transfer it to the server using nc ... in 2019? I set myself the task of finding a way to download the resulting config directly to the server.
Having forked the project, I began to think what options I have. The task was complicated by the fact that I did not want to depart from the condition that the project should remain a clean front-end, without any back-end. Of course, the simplest solution would be to pull up nodejs, and make it generate an archive with configs via direct links.
In fact, there were not many options. More precisely, only one came to mind. We need to configure the configs and get a link that we can copy to the server console to get a zip archive.
Several text files in the resulting zip archive weighed quite a bit, literally a few kilobytes. The obvious solution was to get the base64 string from the generated zip archive and throw it into the buffer, while on the server with the command in the console
echo 'base64string' | base64 --decode > config.zipnginxconfig.io was written in AngularJS, I can’t even imagine what kilometers of code would be required if the author did not choose a reactive js framework. But I perfectly imagine how much easier and more beautiful it would be possible to implement all this on VueJS, although this is already a completely different topic.
In the project resources we see a method of generating a zip archive:
$scope.downloadZip = function() {
	var zip = new JSZip();
	var sourceCodes = $window.document.querySelectorAll('main .file .code.source');
	for (var i = 0; i < sourceCodes.length; i++) {
		var sourceCode = sourceCodes[i];
		var name	= sourceCode.dataset.filename;
		var content	= sourceCode.children[0].children[0].innerText;
		if (!$scope.isSymlink() && name.match(/^sites-available\//)) {
			name = name.replace(/^sites-available\//, 'sites-enabled/');
		}
		zip.file(name, content);
		if (name.match(/^sites-available\//)) {
			zip.file(name.replace(/^sites-available\//, 'sites-enabled/'), '../' + name, {
				unixPermissions: parseInt('120755', 8),
			});
		}
	}
	zip.generateAsync({
		type: 'blob',
		platform: 'UNIX',
	}).then(function(content) {
		saveAs(content, 'nginxconfig.io-' + $scope.getDomains().join(',') + '.zip');
	});
	gtag('event', $scope.getDomains().join(','), {
		event_category: 'download_zip',
	});
};
everything is quite simple, using the jszip library , a zip is created where the configuration files are placed. After creating the zip archive, js feeds it to the browser using the FileSaver.js library :
saveAs(content, 'nginxconfig.io-' + $scope.getDomains().join(',') + '.zip');
where content is the resulting blob zip archive object.
Ok, all I had to do was add another button next to it, and when I click on it, do not save the resulting zip archive to the browser, but get base64 code from it. After a bit of shamanism, I got 2 methods, instead of one downloadZip:
$scope.downloadZip = function() {
	generateZip(function (content) {
		saveAs(content, 'nginxconfig.io-' + $scope.getDomains().join(',') + '.zip');
	});
	gtag('event', $scope.getDomains().join(','), {
		event_category: 'download_zip',
	});
};
$scope.downloadBase64 = function() {
	generateZip(function (content) {
		var reader = new FileReader();
		reader.readAsDataURL(content);
		reader.onloadend = function() {
			var base64 = reader.result.replace(/^data:.+;base64,/, '');
			// в переменной base64 как раз нужный мне zip архив в виде base64 строки
		}
	});
	gtag('event', $scope.getDomains().join(','), {
		event_category: 'download_base64',
	});
};
As you can see, I put the generation of the zip archive into the private generateZip method, well, because this is AngularJS, and the author himself adheres to callbacks, did not implement it through promises. downloadZip still did saveAs in the output, whereas downloadBase64 did a little different. We create a FileReader object that came to us in html5 and is already available for use. Which, in due time, knows how to make a base64 string from blob, more precisely it makes a DataURL string, but this is not so important for us, because DataURL contains exactly what we need. Bingo, a little catch was waiting for me when I tried to put all this in a buffer. The author used the clipboardjs library in the project, which allows you to work with the clipboard without flash objects, based on the selected text. Initially, I decided to put my base64 in an element with display: none ;, but in that case I could not put it on the clipboard, because no selection occurs. Therefore, instead of display: none; I did
position: absolute;
z-index: -1;
opacity: 0;
which allowed me to hide the element from my eyes and in fact leave it on the page. Voila, the task is completed, when I clicked on my button, a line of the form was placed in the buffer:
echo 'base64string' | base64 --decode > config.zipwhich I simply inserted into the console on the server and immediately received a zip archive with all the configs.
Well, of course, I threw the pull request to the author, because the project is active and lively, I want to see updates from the author and have my own button) Who cares, here is my fork of the project and pull request itself , where you can see what I fixed / updated.
Peppy development :-)