How the 3D scanner allowed to abandon the full-scale control assembly of the bridge

The Voronezhstalmost enterprise (formerly the Voronezh bridge factory) was founded in 1948 and is a leading Russian company producing metal span structures for bridges of any type, size and complexity. The production facilities of the plant and the available equipment allow us to produce up to 55 thousand tons of metal structures per year, more than 1800 workers and engineers work at the enterprise. The company widely uses computer technology in its work, the quality management system and welding production are certified in accordance with international standards.
Production tasks
Voronezhstalmost produces individual elements of bridges, spans of buildings that are sent to the site where the construction is carried out by builders. In the manufacture of such elements, it is necessary to make sure that all dimensions are precisely maintained, that there are no distortions, and that the assembly is carried out efficiently, so that problems do not appear during installation before sending it to the customer.
Classic working principle
Until recently, such a check was carried out in an open area on the territory of the plant. Workers did the control assembly - they mounted separate difficult, questionable places, after which the engineers measured out all the structures for compliance with the technical task. If inconsistencies were found, their causes were localized, and problematic structural elements were sent for revision.
“This process was long and complicated,” says Idayat Kuliev, chief technologist at Voronezhstalmost. - Despite the fact that we collected only certain parts of the structures, even they had impressive dimensions and required significant time and labor costs for their construction. “We needed a solution that would allow us to switch the control assembly into virtual mode, and made it possible to check for inconsistencies on the computer without physical installation.”
First, the company acquired a total station - an electronic geodetic instrument from the theodolite class, designed to measure distances. “He allowed us to determine the distance between the points,” says Idayat Kuliev. “We are still taking some measurements with it, but practice has shown that the control assembly after such measurements is not always successful, since there are a lot of data on distances, they are scattered, and the risk of errors in the calculations increases.”
It became clear that a more perfect solution was required, which would make it possible to take all the necessary data on the control points at a time and transfer the model of the necessary element to the software for the virtual control assembly.

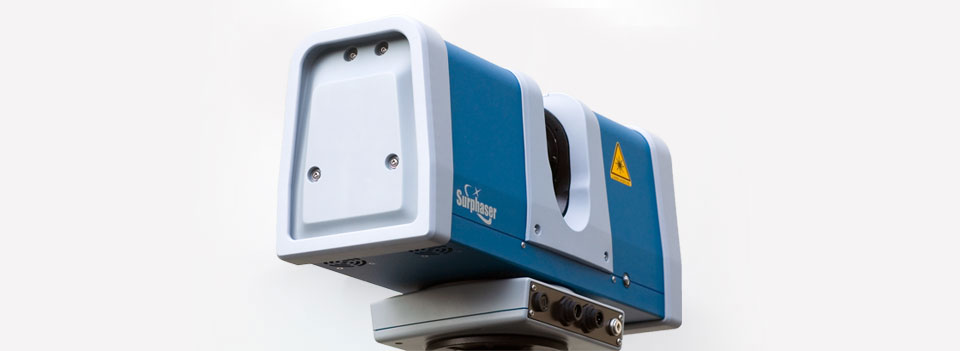
3D Laser Scanner Surphaser 25HSX
New principle of work with Surphaser 25HSX
This solution was the Surphaser 25HSX 3D laser scanner . This device implements the phase method of determining the distance, due to which a high scanning speed is achieved (up to 1.2 million points per second). Surphaser scanners are specially prepared to solve the problems of analysis and control of geometric parameters of large objects of complex shape, which fully meets the requirements of the Voronezhstalmost enterprise.
The inclusion of a three-dimensional laser scanner in the process allowed us to completely abandon the full-scale control assembly. Now the elements of the bridge (such as, for example, fifteen-meter blocks 3.5 meters wide and high) are scanned directly in the workshop. The resulting point clouds are checked for model compliance in the design software. In the virtual model, defects, mismatch of control points, deviations from drawing data are immediately visible. If they are detected, the item is sent for revision.
“Building blocks are scanned from several positions,” says Yevgeny Kuprin, head of the plant’s design bureau. - The resulting survey is stitched using the Geomagic programStudio is cropped, cleaned of “junk” data, scaled and converted to XYZ grid ”. Collected and cleaned clouds of individual structural elements in a 1: 1 scale are superimposed in Autodesk Revit on the 3D model of the bridge, which is provided by the customer. This allows not only to see possible shortcomings and check convergence, but also to take measurements for the manufacture of overlays.
“Bridges are made up of hundreds of elements,” says Idayat Kuliev. - With the full-scale control assembly, we did not have the physical ability to collect them all for verification, so we chose difficult places where engineers had concerns in terms of geometry. Now we have the opportunity to carry out a virtual control assembly of not only these complex elements, but also the entire structure. ” At the beginning of the use of the scanner, the company's specialists conducted several additional control assemblies of structures already tested on a virtual model created using the scanner. No new flaws were identified.

The digital model modified in the software and the practical result of the project
Benefits of Using a 3D Scanner
“Full-time control assembly is hard and long work,” says Idayat Kuliev. - Three or four people collect part of the bridge on the street, in any weather, they need a crane, pulling device, jacks, levels and a few days time. Scanning is also a difficult task, it takes two to four hours to clean and prepare one element, but this is the work of one engineer in the office at the computer. ”
3D scanreduces the likelihood of errors related to the human factor. “Previously, when we performed the control assembly, we drew up a protocol where we introduced all the deviations and shortcomings,” says Idayat Kuliev. - Then the assembly was dismantled, the necessary changes were made to the products, but sometimes at the installation it was suddenly discovered that someone had overlooked something, they missed some kind of error. And the control assembly has already been disassembled, there is nothing to identify the discrepancy, make sure that this is our mistake. Now we always have a ready-made model in our computer, we can study the problem on it, show it to the customer. In addition, the percentage of detection of problem areas has increased due to the high accuracy of the device and the ability to check all components of the structure, and not only those indicated by the engineers. ”
“We recently switched to this technology,” the expert sums up, “and until we have fully mastered it, there is something to strive for. However, now we can confidently say that it completely suits us and we are definitely not going to return to the method of control assemblies. ”
