Getting started with TI CC13xx-CC26xx and Contiki under Code Composer Studio
- Tutorial
Recently, the topic of the Internet of things has become more and more hot - however, in most cases, when it comes to working with some basic hardware solutions, the conversation comes down to either ready-made modules, or, more rarely, to the release chips of past years. Meanwhile, in 2015, Texas Instruments launched the next line of CC13xx-CC26xx crystals - extremely interesting in terms of performance, power consumption and capabilities. These VIPs have on board the main core of ARM Cortex-M3, the second core of Cortex-M0, exclusively serving the radio part, and ... yes, the third core also has its own 16-bit TI core for working with peripherals, the so-called Sensor Controller. At the same time, the harvester turned out to be extremely modest in terms of energy consumption - even the radio part was significantly reduced compared to the previous generation chips,
We have already written a review of existing communication standards, in which we focused on the most modern standard 6loWPAN. This standard describes the network and transport layers of the OSI model, and the physical and link layers are standardized by IEEE 802.15.4. Texas Instruments took care of us, and gave the processing of the MAC level to a separate core Cortex-M0. The remaining levels need to be processed on the Cortex-M3. And here Contiki comes to our aid, which implements support for the 6loWPAN stack.
However, the traditional problem with new chips is the lack of “collective experience”, that is, detailed descriptions of working with them, bypassing bugs and the like.
Well, we will make up for it. Let's start with the basic one - building and debugging the Contiki operating system for CC2650 chips. Let's say we still love beautiful graphical environments and debugging in them. Therefore, we will build Contiki for TI Code Composer Studio 6. I use Ubuntu 14.04 X86_64 for development, the steps for Windows will be very similar, except for installing the toolchain. There are some goodies in the end ...
First you need to build a bare Contiki repository . Deflate:
We will assemble using the GNU Make + GCC build system native to the project. It is assumed that you already have Make, Windows users can put it as part of CygWin. Download gcc-arm-none-eabi for the appropriate operating system and unpack wherever convenient. Do not forget to register in PATH!
Install the utility for gluing the SRecord firmware needed for assembly.
Now let's try to compile the code. We go in sorts and try to collect.
Gathered, excellent, move on.
One way to upload firmware to the chip itself is to use separate flashers. Texas offers Uniflash software for Linux , download and install. The installation process is well described in this document , section 4.9 .
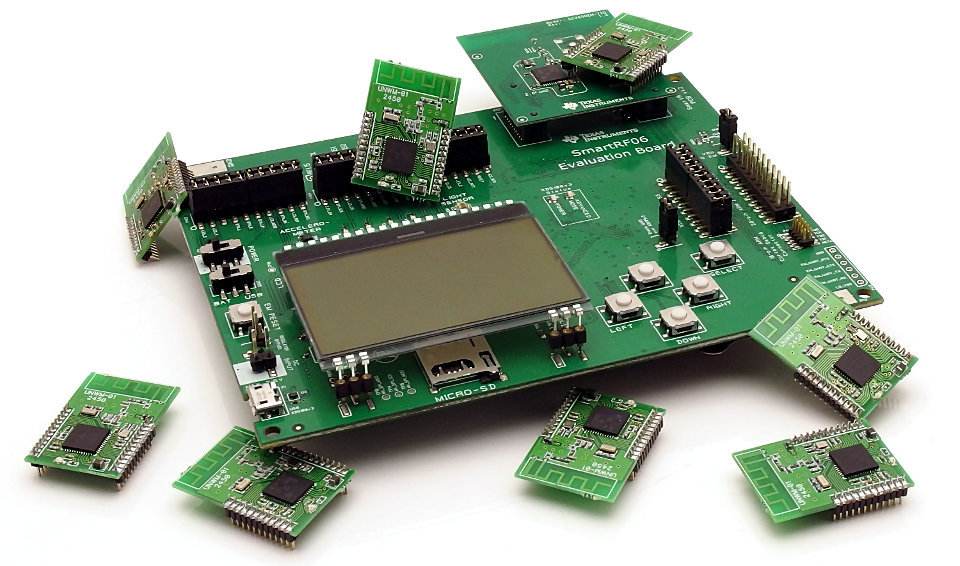
For debugging, I used the TI SRF06EB + CC2650 kit, so I’ll show it using its example. We will create a new target configuration. A programmer with a chip must already be connected.
We go into Programs , open the Add firmware file and click Program .
That’s all, we could finish here, but sometimes you need to use debugging in development, so let's move on.
Download TI Code composer Studio for Wireless Connectivity for your platform. For installation, I highly recommend using the installation guide from the TI website.
The described sequence of actions is almost the only working one. On the way to this, a lot of time and nerves were spent, up to contacting TI tech support. There is still the opportunity to use bare Eclipse as a medium, but my research has shown that this is a conditionally working solution. I still could not start debugging in Eclipse, the problem was in the GDB server, which does not want to load the possibility of using hardware-breakpoints. If anyone wants to try, the path is described in TI SWRA446 .
On February 27, an offline meeting of the Catethysis.ru blog will be held , at which this time I will talk and show how to program MESH networks. We ask everyone who has read to the end!
We have already written a review of existing communication standards, in which we focused on the most modern standard 6loWPAN. This standard describes the network and transport layers of the OSI model, and the physical and link layers are standardized by IEEE 802.15.4. Texas Instruments took care of us, and gave the processing of the MAC level to a separate core Cortex-M0. The remaining levels need to be processed on the Cortex-M3. And here Contiki comes to our aid, which implements support for the 6loWPAN stack.
However, the traditional problem with new chips is the lack of “collective experience”, that is, detailed descriptions of working with them, bypassing bugs and the like.
Well, we will make up for it. Let's start with the basic one - building and debugging the Contiki operating system for CC2650 chips. Let's say we still love beautiful graphical environments and debugging in them. Therefore, we will build Contiki for TI Code Composer Studio 6. I use Ubuntu 14.04 X86_64 for development, the steps for Windows will be very similar, except for installing the toolchain. There are some goodies in the end ...
Toolchain
First you need to build a bare Contiki repository . Deflate:
git clone --recursive https://github.com/contiki-os/contiki.gitWe will assemble using the GNU Make + GCC build system native to the project. It is assumed that you already have Make, Windows users can put it as part of CygWin. Download gcc-arm-none-eabi for the appropriate operating system and unpack wherever convenient. Do not forget to register in PATH!
wget https://launchpad.net/gcc-arm-embedded/4.9/4.9-2015-q3-update/+download/gcc-arm-none-eabi-4_9-2015q3-20150921-linux.tar.bz2
tar xz gcc-arm-none-eabi-4_9-2015q3-20150921-linux.tar.bz2
cd gcc-arm-none-eabi-4_9-2015q3
export PATH=$PATH:`pwd`/bin
arm-none-eabi-gcc –v
Install the utility for gluing the SRecord firmware needed for assembly.
sudo add-apt-repository ppa:pmiller-opensource/ppa
sudo apt-get update
sudo apt-get install srecord
Now let's try to compile the code. We go in sorts and try to collect.
$CONTIKI_DIRreplace on your way. I usually collect in 4 flows, the quantity is regulated by the parameter-jNcd $CONTIKI_DIR/examples/cc26xx
make -j4 TARGET=srf06-cc26xx BOARD=srf06/cc26xx cc26xx-demo
ls cc26xx-demo.srf06-cc26xxGathered, excellent, move on.
Firmware
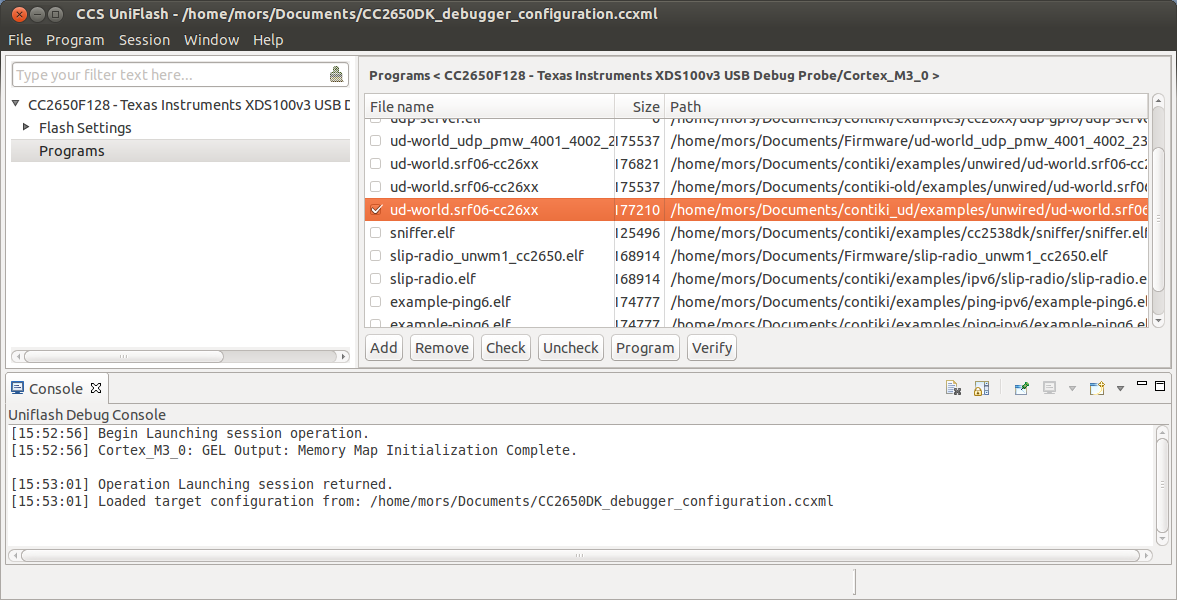
One way to upload firmware to the chip itself is to use separate flashers. Texas offers Uniflash software for Linux , download and install. The installation process is well described in this document , section 4.9 .
For debugging, I used the TI SRF06EB + CC2650 kit, so I’ll show it using its example. We will create a new target configuration. A programmer with a chip must already be connected.
We go into Programs , open the Add firmware file and click Program .
That’s all, we could finish here, but sometimes you need to use debugging in development, so let's move on.
Code Composer Studio
Download TI Code composer Studio for Wireless Connectivity for your platform. For installation, I highly recommend using the installation guide from the TI website.
- We launch

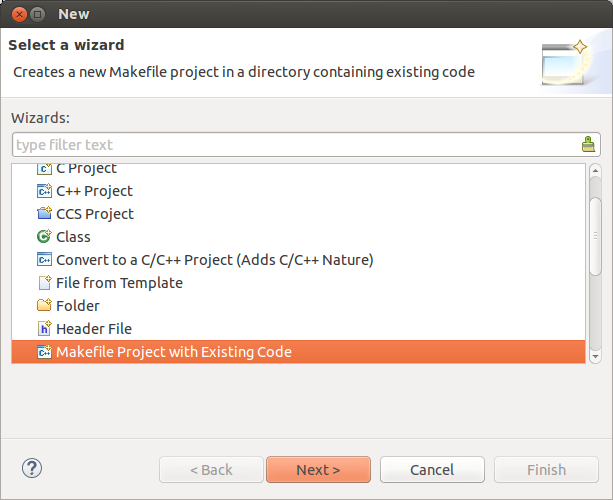
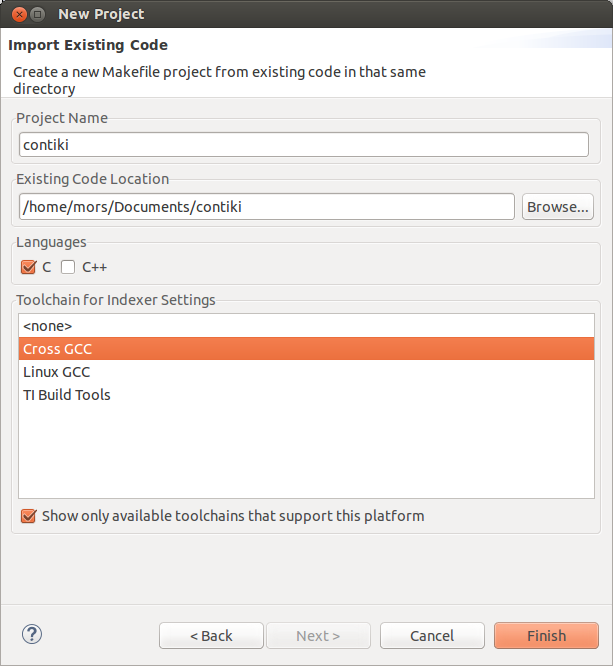
- Go Files -> New -> Other ...
- Choose Makefile Project With Existing Code
- Fill in the names, the path to the directory with Contiki and select Crocc GCC
- We go into the project settings -> C / C ++ Build , prescribe the build command
make -j4 TARGET=srf06-cc26xx BOARD=srf06/cc26xxand the path to the directory by clicking the Workspace ... button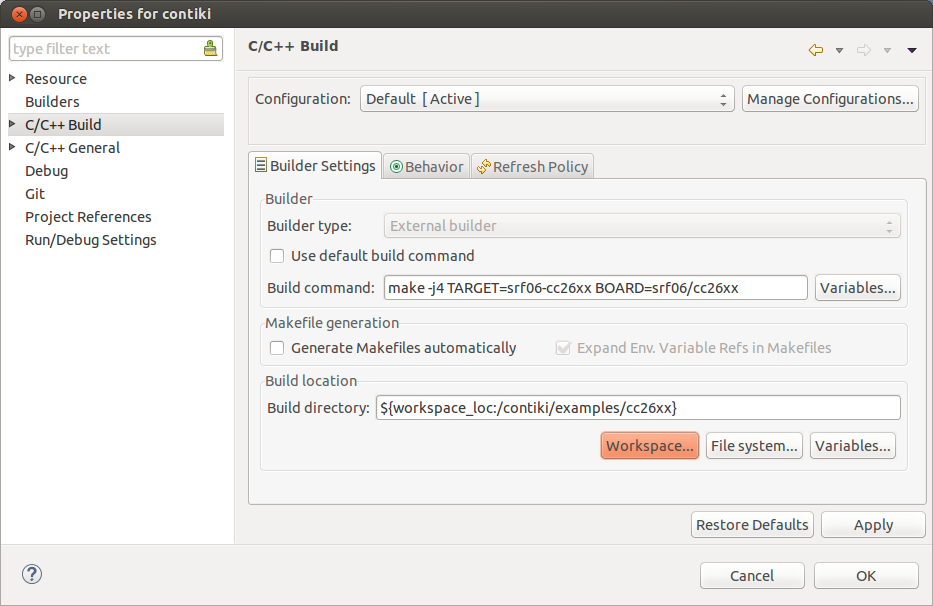
- Build - Gathered, Interim Victory!
- Not
collected Perhaps CCSv6 did not pick up the PATH variable and cannot find the toolchain. We fix:vim /etc/profile.d/env_vars.shexport ARM_TOOLCHAIN_HOME=/home/$USER/soft/gcc-arm-none-eabi/gcc-arm-none-eabi-4_9-2015q3 export PATH=$PATH:$ARM_TOOLCHAIN_HOME/bin
- Not
Configure debugging
For debugging, it is necessary that the Contiki sorts folder be in the CCSv6 working directory
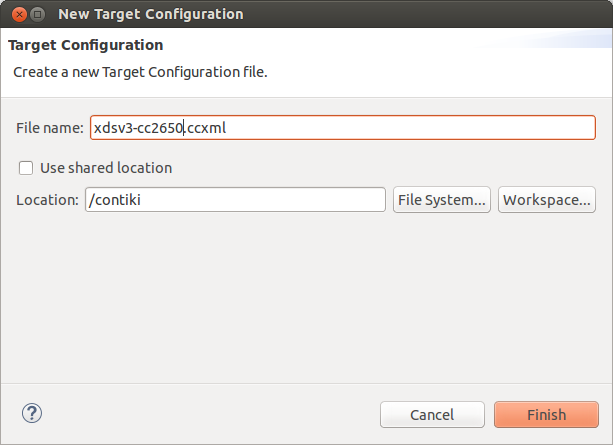
- Right click on the project -> add file -> Target Configuration File
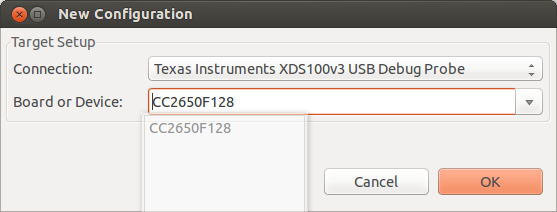
- We select the XDS100v3 debugger and the CC2650 chip as on the screen
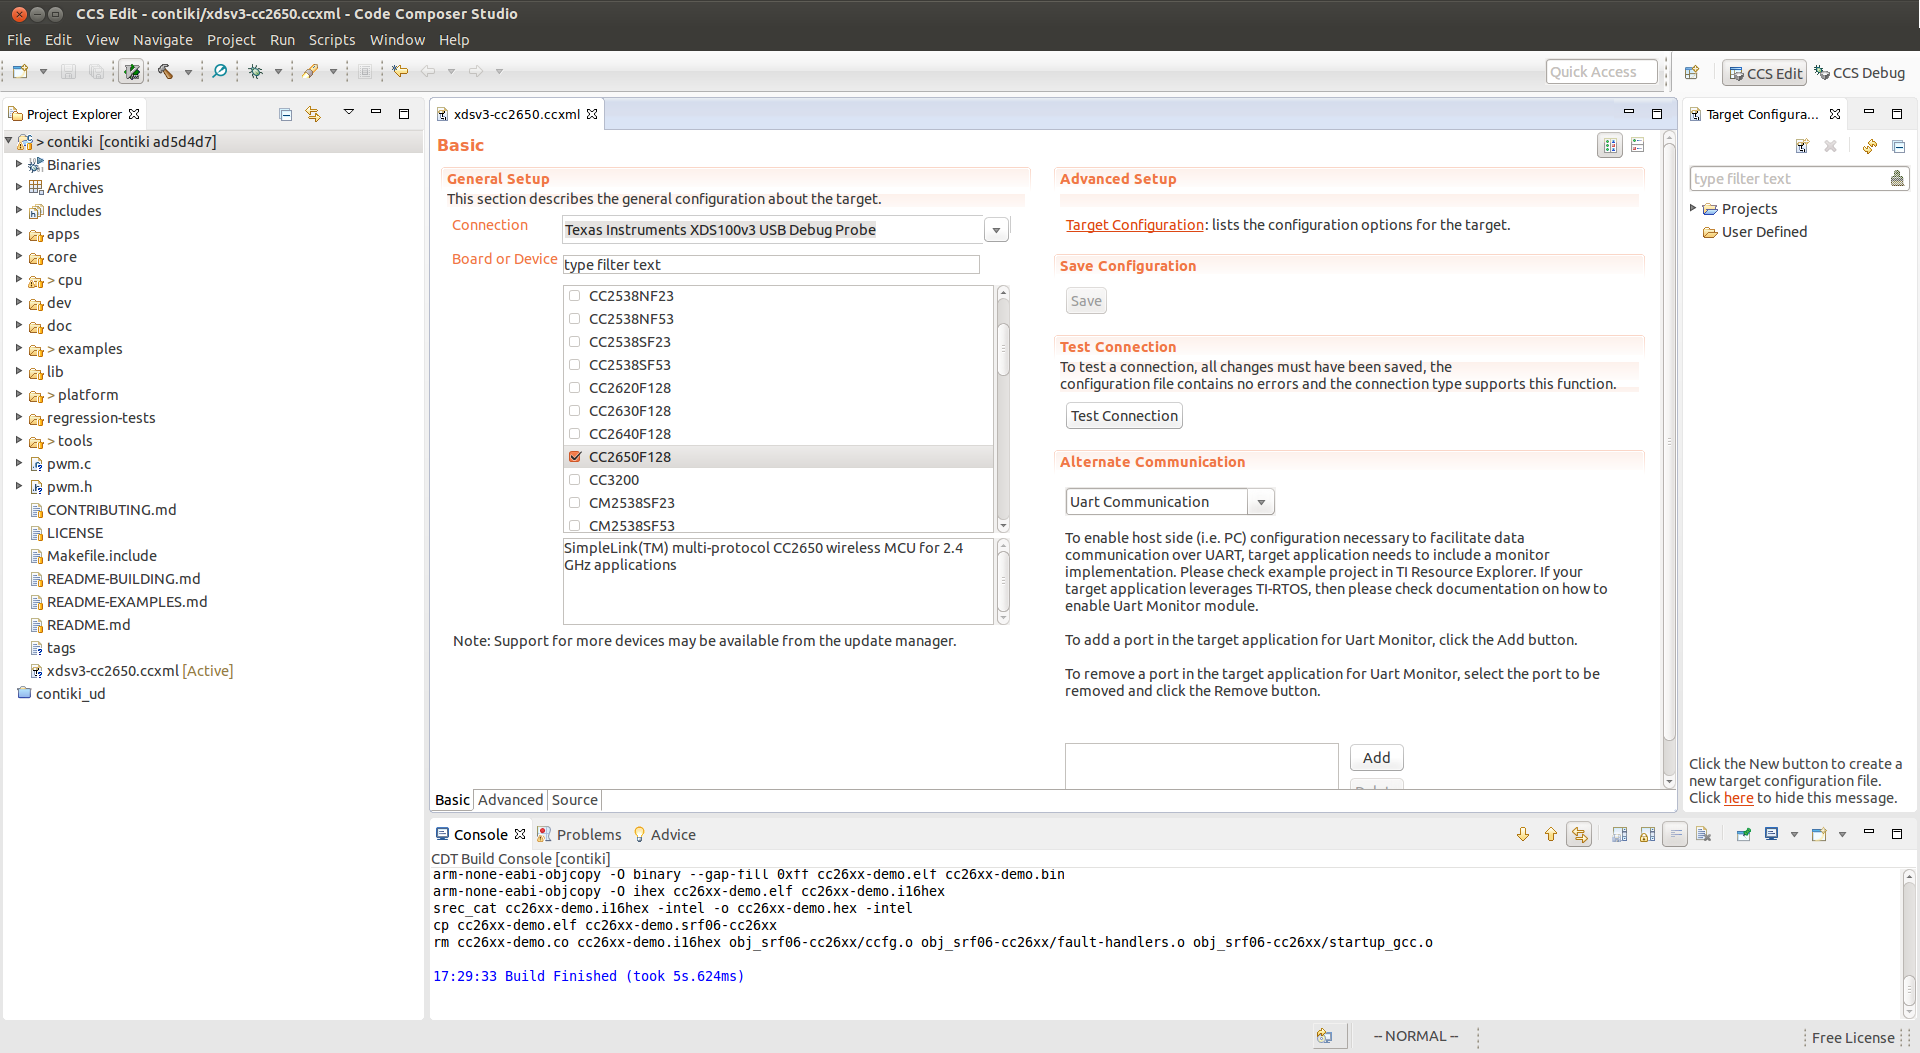
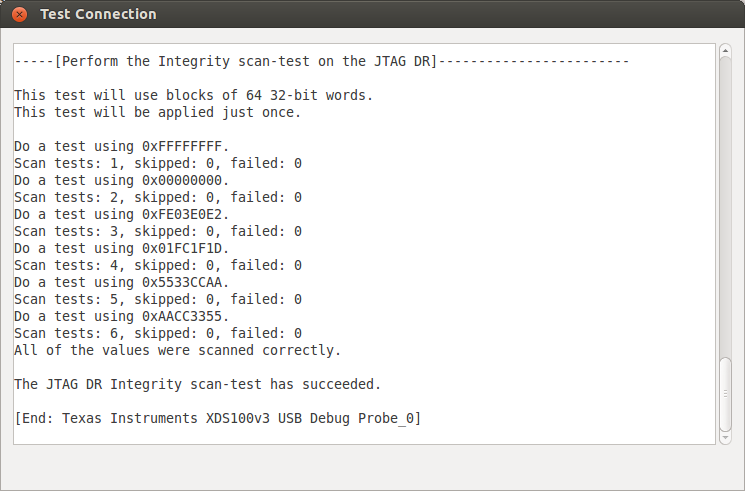
- Click on the Save and Test Connection form
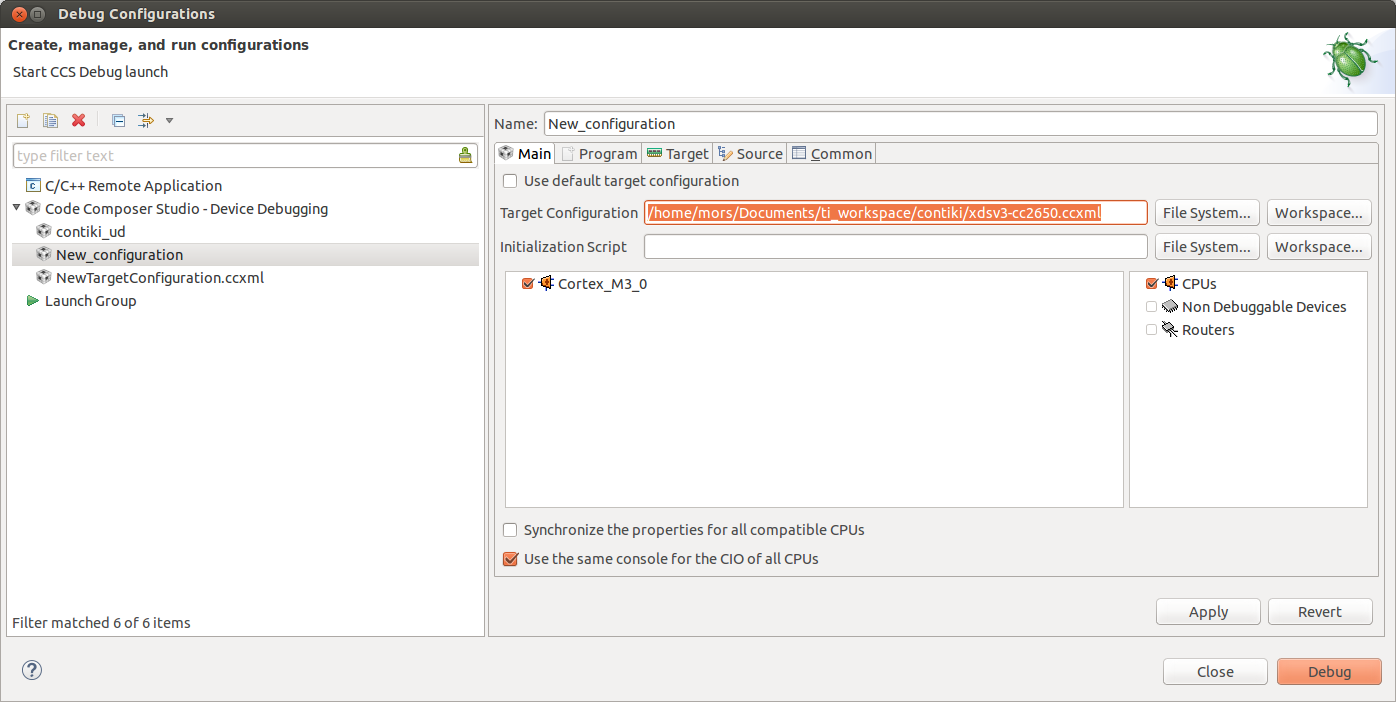
- Right click on the newly created configuration -> Debug As -> Debug Configurations
- On the left we create a new configuration
- Fill the path to the newly created Target Configuration
- Apply
- In the Program tab, fill in the Project and Program fields - the path to the assembled firmware
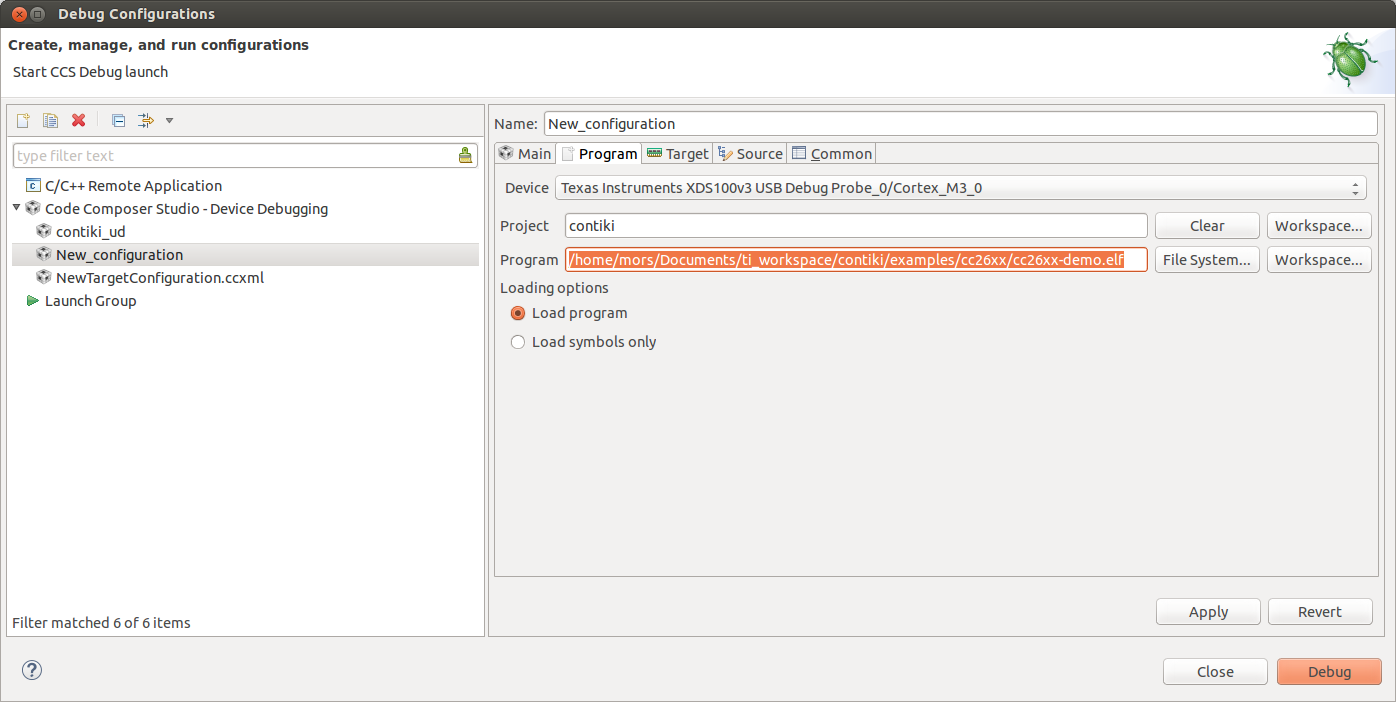
- Apply
- Debug
- Gathered, sewn, but says No source available
- Open contiki / cpu / cc26xx-cc13xx / Makefile.cc26xx-cc13xx
- Add assembly key with debugging symbols
CFLAGS += -g - Remove optimization: change
-O2and-Osto-O0 - Save
- Going back to Debug Configurations
- Click Debug
- Voila
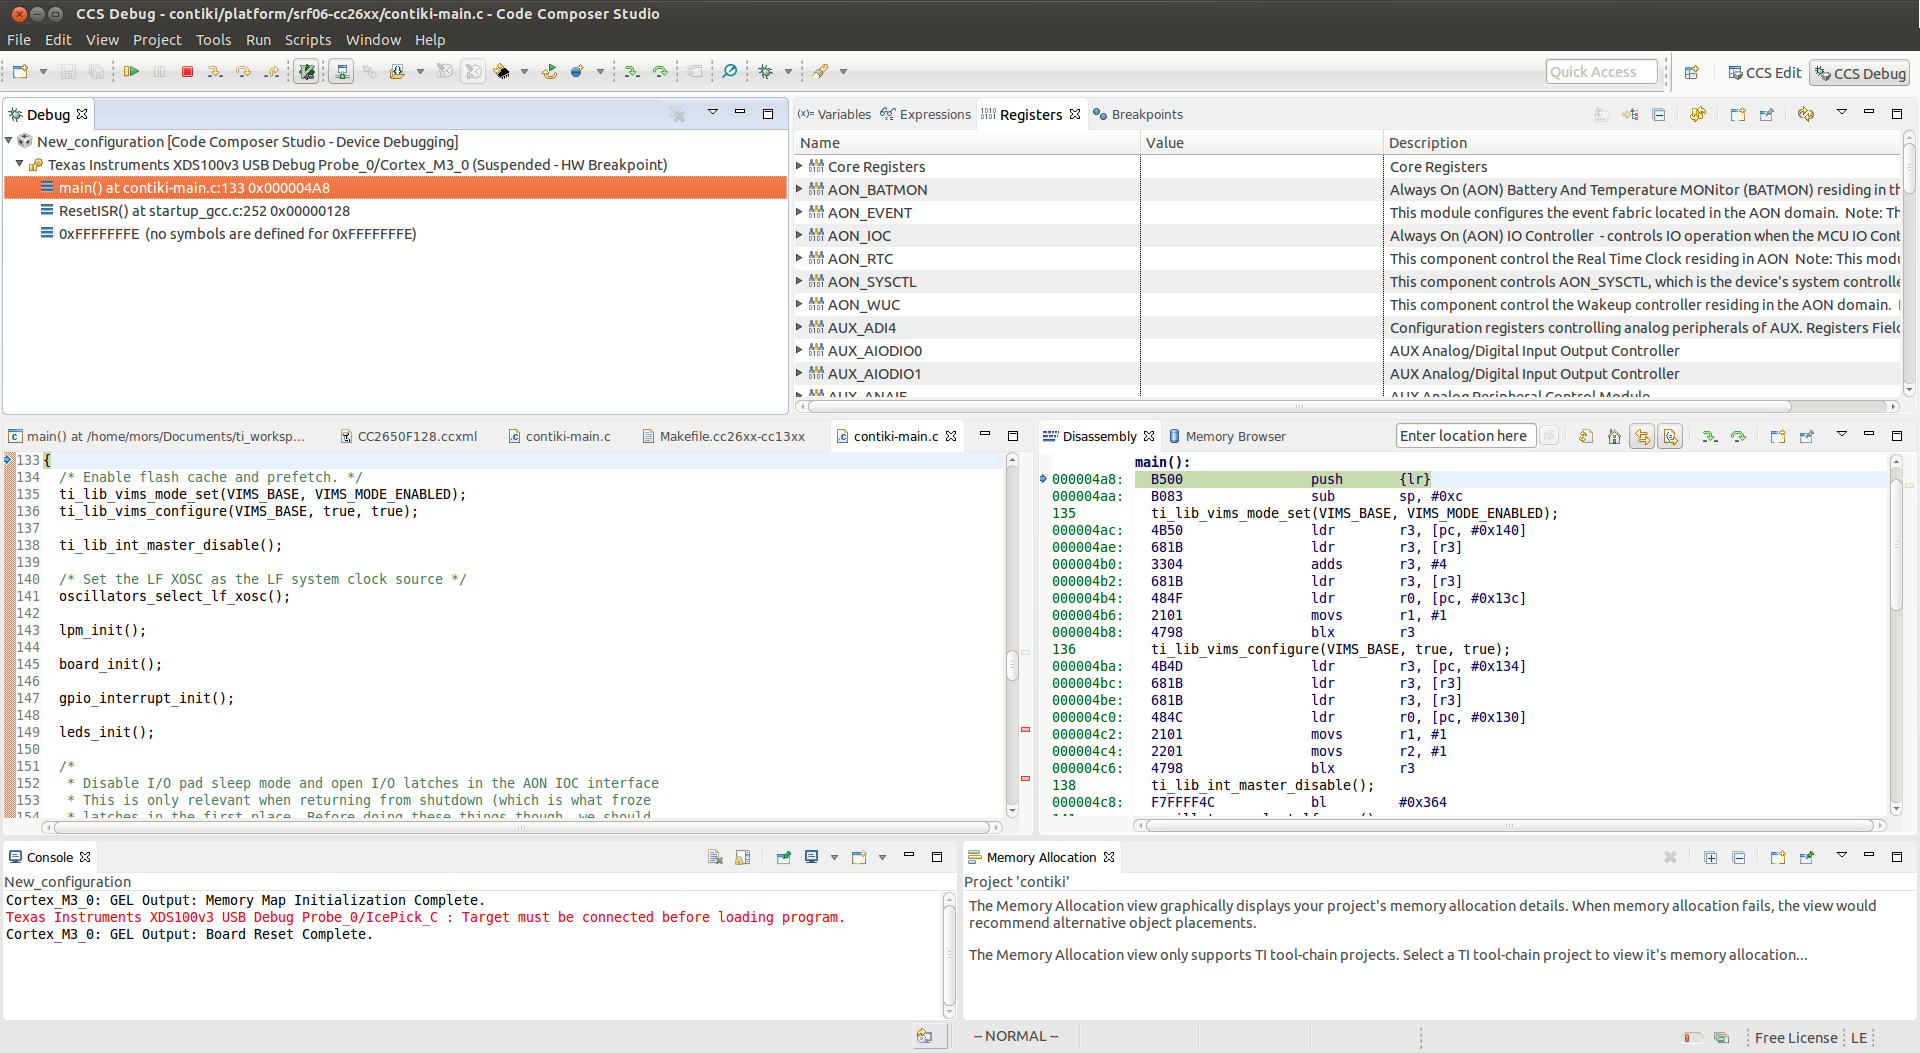
Now we have the opportunity to fully debug Contiki in Code Composer Studio under CC2650!
Conclusion
The described sequence of actions is almost the only working one. On the way to this, a lot of time and nerves were spent, up to contacting TI tech support. There is still the opportunity to use bare Eclipse as a medium, but my research has shown that this is a conditionally working solution. I still could not start debugging in Eclipse, the problem was in the GDB server, which does not want to load the possibility of using hardware-breakpoints. If anyone wants to try, the path is described in TI SWRA446 .
See through the eyes
On February 27, an offline meeting of the Catethysis.ru blog will be held , at which this time I will talk and show how to program MESH networks. We ask everyone who has read to the end!