Mini PC remodeling experience
I want to tell a story about how I turned a Chinese semi-finished product (MeeGoPad t02) into a desktop device that I’m not ashamed to use.
And I want to start with the fact that I am a beginner radio amateur (15 years old, still small), not particularly advanced in the field of building computers and motherboards, I wanted a device on which I can browse the Internet, write for Arduino and even make simple videos for Youtube .
The first thought is to assemble a desktop pc. And where to get the money? I sold the tablet on Windows. He warmed himself up like crazy, and he always throttled. Not a lot of money, but it appeared. What's next - go to Ali. There I saw a miracle named MeeGoPad (model t02). Estimated the price of analogues, compared with intel core m. like nothing - took it, waited a month, and lo! The device is on hand, I spin the video, proteus, customize windows, and then the shell starts to behave strangely, the programs slow down, I'm nervous. Installed SpeedFan and saw a temperature of 84 degrees. Actually, after that I wanted to straighten the hands of the developers of this device a bit.
So, the first plans for the alteration:
Primary type of device:
We take out the motherboard, the case to the side. The photo shows how small it is (I did not make a photo of the process, there will be photos from the finished device).
Nevertheless, it has everything the same as in a conventional computer, just several times smaller and more compact.
I took the case from old home-made watches. Not a very good option, since its height is much more than I need, because of which a small flash drive turned into such a real nettop.
On the bottom edge, cuts are visible, into which buttons for setting the clock were previously inserted. As you can see, on the back side (on the front there was a slot for the dial, I glued it) a circle is cut through, there is a cooler with a diameter of 50 mm, and next to it is a power button.
The first item has been completed - a 50 mm cooler completely cools the 10-watt system.
It’s not difficult to guess that for this a cheap USB hub for 50 hryvnias was used, which I put in the same slot for the dial:
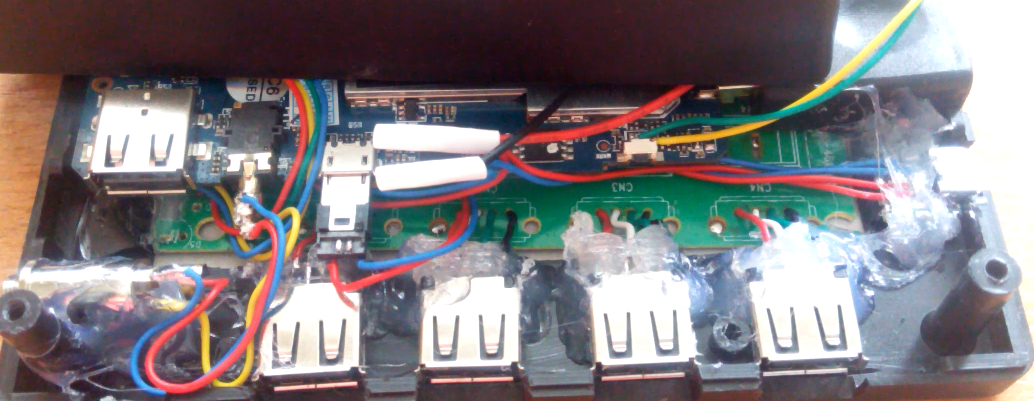
Everything was fixed exclusively on burning glue (do you know something better?), So the view is not very good. But we won’t look inside, and the glue performs its function perfectly.
For each port, I cut a groove into which I fixed, but not quite successfully. The fact is that the ports are too close to the bottom, which is why high devices (programmer with a loop, for example) rest on the table, which puts emphasis on the port, which contributes to its wear.
The second point has been completed - we added 2 more ports, and if you wish, you can output another one (the first one remained on the board, the hub took the second).
This item was fulfilled by itself, since the case is large, but you can’t put it into the TV anymore, you need a cable. But how to connect it, if the flash drive is “dad”, but you need a “mom” plug? Here comes to the rescue ... no, the "dollar" adapter "mother-mother" is bought. We insert a “flash drive" and a cable into it:
And the third point has already been completed! Left alone, give everything a look.
What can I say. This did not work out very well, since the manual work of a ninth-grader cannot, in principle, be beautiful (well, except that printed circuit boards are not bad at all). This is what my creation has now:
It’s not that the eye pleases, but you must agree, it didn’t turn out so badly. The plans for the future are to transfer to a thinner case (I even looked at one at a local store), transfer the hub to my own printed circuit board to fit into the smaller dimensions of the case.
By the way, about stuffing and tasks. Most of the programs that the average user uses work well on this “nettop,” and here are those that I personally checked and remained satisfied with:
Paint.net, Photoshop CC, BASCOM AVR, Arduino IDE, Proteus 8.1, Opera, Chrome.
A number can be continued, but I did not run other programs. What struck me - “this” was able to edit the video in SONY Vegas Pro 11 (x86)! I can’t say that I received great pleasure from the editing process (although it went smoothly, the picture quality on the preview was embarrassing), but the 3-minute HD video, cobbled together from 20 pieces, a couple of overlays and two audio tracks rendered in 29 minutes. At the same time, the temperature was kept at 50 degrees, which is quite the norm for such a task.
Even the games started, and you could play! But this is not here and not now.
Who cares to watch this video. Do not consider this a PR, because the purpose of writing an article is not to promote a blog on YouTube, but to show that perhaps most people should not buy an expensive and overly powerful PC, but buy something like I bought, and having the skill to work with with a soldering iron, turn this into a suitable device, which many, like me, can replace the working tool that we all use - a computer.
The article is written “From and to” on this nettop. I hope that you, reader, will find this information useful and you will make the right choice.
Background
And I want to start with the fact that I am a beginner radio amateur (15 years old, still small), not particularly advanced in the field of building computers and motherboards, I wanted a device on which I can browse the Internet, write for Arduino and even make simple videos for Youtube .
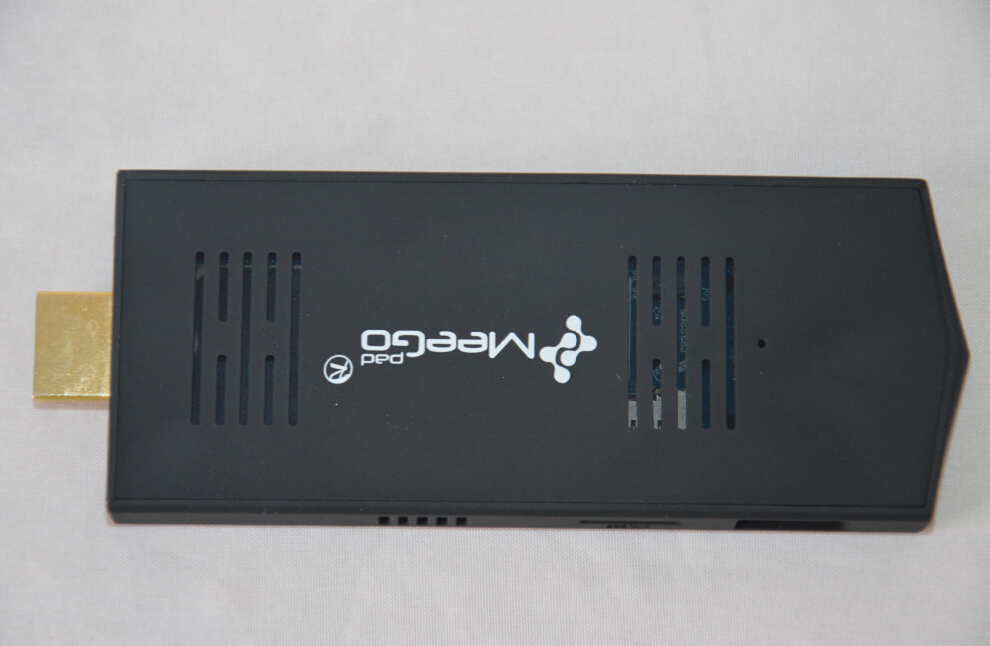
The first thought is to assemble a desktop pc. And where to get the money? I sold the tablet on Windows. He warmed himself up like crazy, and he always throttled. Not a lot of money, but it appeared. What's next - go to Ali. There I saw a miracle named MeeGoPad (model t02). Estimated the price of analogues, compared with intel core m. like nothing - took it, waited a month, and lo! The device is on hand, I spin the video, proteus, customize windows, and then the shell starts to behave strangely, the programs slow down, I'm nervous. Installed SpeedFan and saw a temperature of 84 degrees. Actually, after that I wanted to straighten the hands of the developers of this device a bit.
The story itself
So, the first plans for the alteration:
- Make suitable cooling (well, or close to it);
- Add USB ports (there are only 2 on the case);
- Transfer from the "flash drive" form factor to "nettop";
- Give an original look that would please the eye).
To business!
Primary type of device:
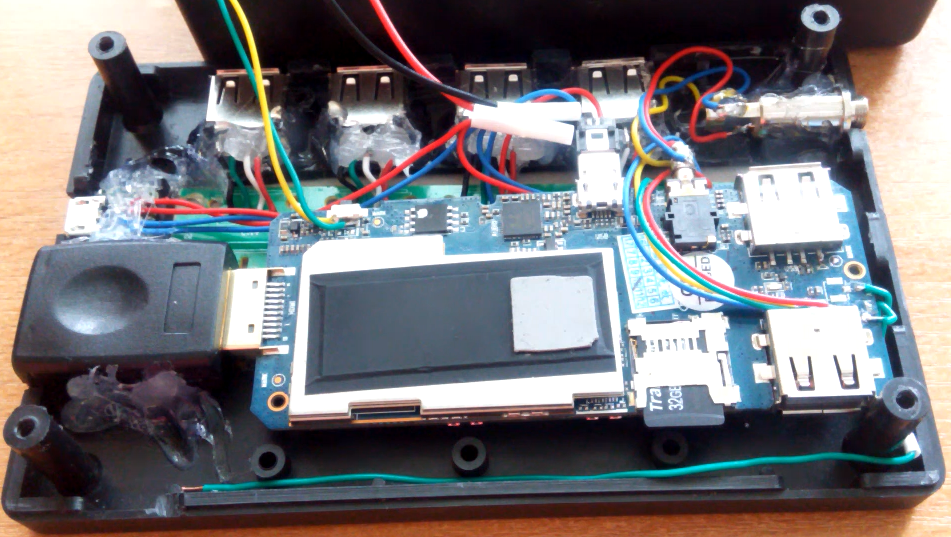
We take out the motherboard, the case to the side. The photo shows how small it is (I did not make a photo of the process, there will be photos from the finished device).
Nevertheless, it has everything the same as in a conventional computer, just several times smaller and more compact.
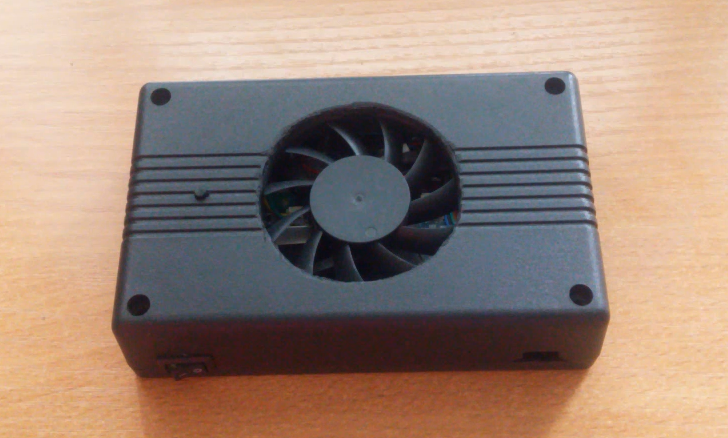
I took the case from old home-made watches. Not a very good option, since its height is much more than I need, because of which a small flash drive turned into such a real nettop.
On the bottom edge, cuts are visible, into which buttons for setting the clock were previously inserted. As you can see, on the back side (on the front there was a slot for the dial, I glued it) a circle is cut through, there is a cooler with a diameter of 50 mm, and next to it is a power button.
The first item has been completed - a 50 mm cooler completely cools the 10-watt system.
The second point is to add a pair of USB
It’s not difficult to guess that for this a cheap USB hub for 50 hryvnias was used, which I put in the same slot for the dial:
Everything was fixed exclusively on burning glue (do you know something better?), So the view is not very good. But we won’t look inside, and the glue performs its function perfectly.
For each port, I cut a groove into which I fixed, but not quite successfully. The fact is that the ports are too close to the bottom, which is why high devices (programmer with a loop, for example) rest on the table, which puts emphasis on the port, which contributes to its wear.
The second point has been completed - we added 2 more ports, and if you wish, you can output another one (the first one remained on the board, the hub took the second).
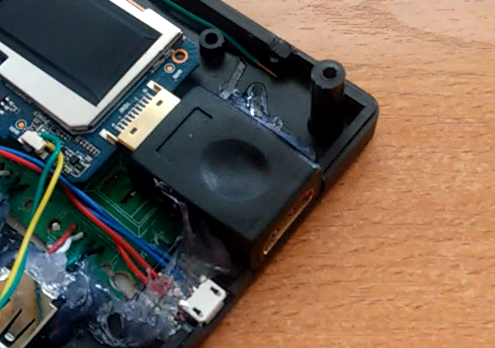
Point three - transfer from the "flash drive" form factor to "nettop"
This item was fulfilled by itself, since the case is large, but you can’t put it into the TV anymore, you need a cable. But how to connect it, if the flash drive is “dad”, but you need a “mom” plug? Here comes to the rescue ... no, the "dollar" adapter "mother-mother" is bought. We insert a “flash drive" and a cable into it:
And the third point has already been completed! Left alone, give everything a look.
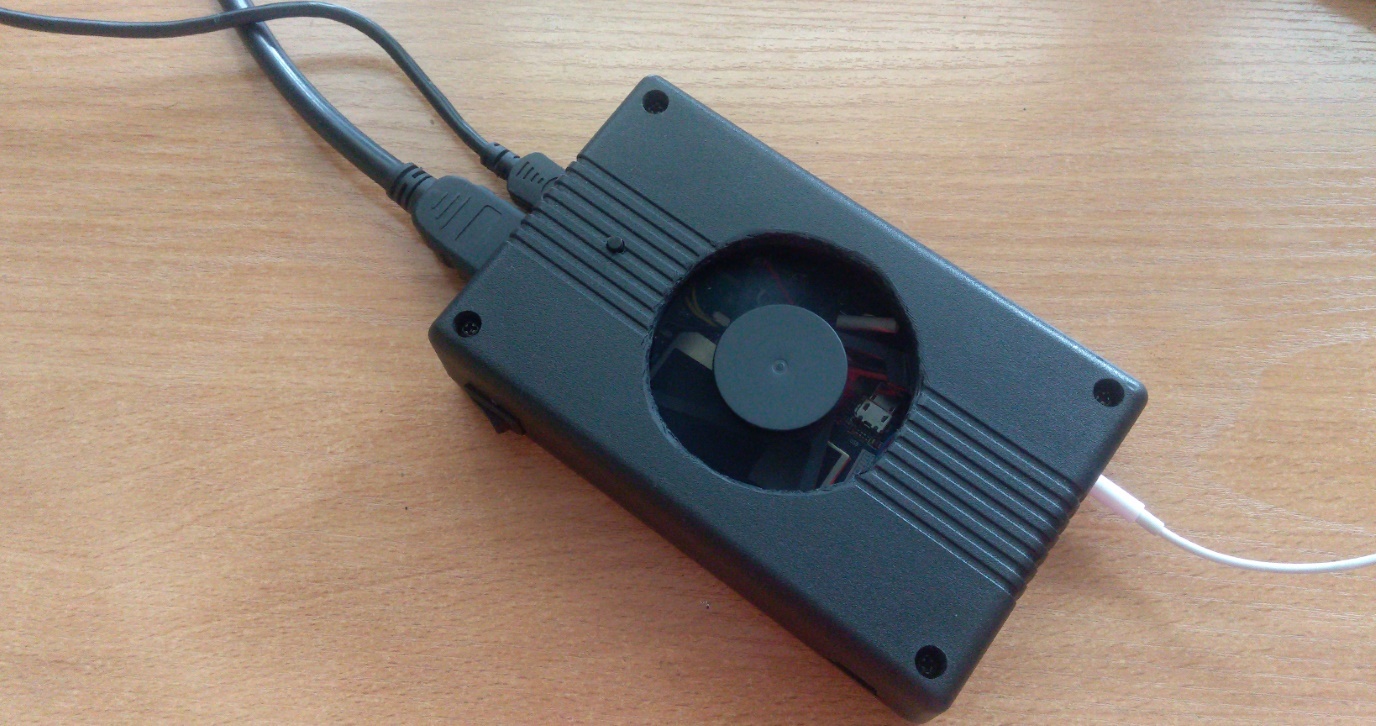
Item 4. Original view
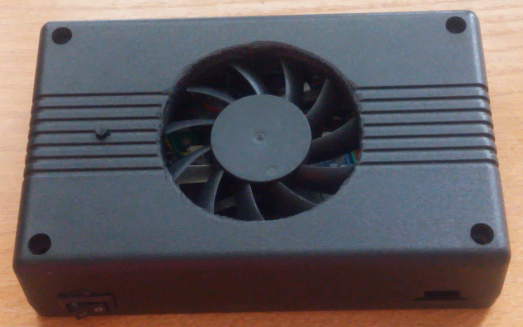
What can I say. This did not work out very well, since the manual work of a ninth-grader cannot, in principle, be beautiful (well, except that printed circuit boards are not bad at all). This is what my creation has now:
It’s not that the eye pleases, but you must agree, it didn’t turn out so badly. The plans for the future are to transfer to a thinner case (I even looked at one at a local store), transfer the hub to my own printed circuit board to fit into the smaller dimensions of the case.
By the way, about stuffing and tasks. Most of the programs that the average user uses work well on this “nettop,” and here are those that I personally checked and remained satisfied with:
Paint.net, Photoshop CC, BASCOM AVR, Arduino IDE, Proteus 8.1, Opera, Chrome.
A number can be continued, but I did not run other programs. What struck me - “this” was able to edit the video in SONY Vegas Pro 11 (x86)! I can’t say that I received great pleasure from the editing process (although it went smoothly, the picture quality on the preview was embarrassing), but the 3-minute HD video, cobbled together from 20 pieces, a couple of overlays and two audio tracks rendered in 29 minutes. At the same time, the temperature was kept at 50 degrees, which is quite the norm for such a task.
Even the games started, and you could play! But this is not here and not now.
Who cares to watch this video. Do not consider this a PR, because the purpose of writing an article is not to promote a blog on YouTube, but to show that perhaps most people should not buy an expensive and overly powerful PC, but buy something like I bought, and having the skill to work with with a soldering iron, turn this into a suitable device, which many, like me, can replace the working tool that we all use - a computer.
The article is written “From and to” on this nettop. I hope that you, reader, will find this information useful and you will make the right choice.