Automation of hoods in the bathroom
The bathroom is a room constantly exposed to high humidity and temperature changes - as a result, mold and fungus can easily settle in it. The main way of struggle is the ventilation of the room. Ventilation can be both natural and forced. If natural ventilation is installed at the stage of building construction, then a forced ventilation system can be implemented at any time.

Today we will talk about how, through simple manipulations, to make the automatic inclusion of ventilation in the bathroom so that it does not turn into a steam bath and continues to delight us with cleanliness and freshness.
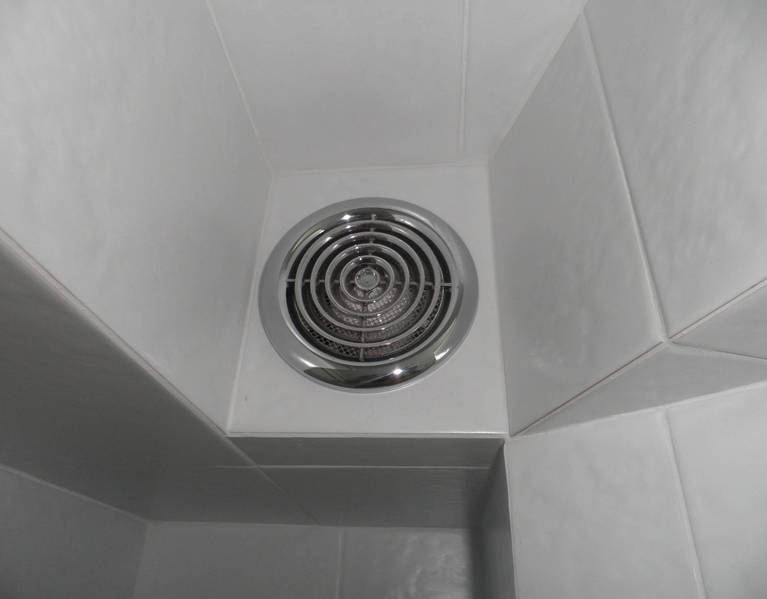
In fact, the exhaust hood in the bathroom is an elementary ventilation system of the compulsory principle of action. It consists of a maximum of two parts - an air duct that connects to the ventilation riser of the house, as well as directly to the fan itself.
Usually the forced inclusion of ventilation in the bathroom is implemented in two of the simplest ways:
1. Turns on together with the light in the bathroom with one common switch. But the hood is usually needed only during showering, when the humidity in the bathroom is increased. So, the rest of the time, energy is wasted. To ventilate the bathroom after a shower, you also have to leave the light on. Again, excess power consumption
2. Manually turn on the exhaust fan during or after taking a shower. Need a separate switch. Inconveniently. You may forget to turn off the fan if you leave it turned on to ventilate the bathroom after taking a shower.
In general, this approach to business is not very correct, since in this case the room is ventilated only when a person is in the room.
Is it possible to automate ventilation control in a bathroom and save energy? Can.
An automatic extractor hood differs from an ordinary one only in the presence of electronics that control its operation. Such devices are either equipped with an off timer (they are turned on, like an ordinary hood, using the switch key), or with special sensors that control the humidity in the bathroom. As soon as it exceeds the permissible value, the fan turns on, after the humidity returns to normal, it turns off. Such hoods are ready, but you can modify the already installed. As an example, we give a solution based on modules from Master Kit.
To solve this problem, the following modules were selected:
MP590 - digital humidity sensor;
MP8037ADC - digital protection and control module with measurement function;
BOX-BM8037- housing for amateur constructions with installation dimensions in the * .PCB
PW1245 format - switching power supply 12V 0.5A.
The necessary equipment can be seen in the photo below:

Digital temperature and humidity sensor DHT11 1WIRE interface is a module built on a digital humidity sensor DHT11 working on the 1Wire interface.
Module The digital protection and control module with measurement function is a universal board with one ADC channel having three HYSTERESIS, TRIGGER, PROTECT relay modes. The module is very versatile and can be useful for almost any automation.
The case for amateur constructions with installation dimensions in the * .PCB format is a universal case inside which the MP8037R and MP8037ADC modules can be placed. Also on the website, download the PCB file with the installation dimensions of the LED display and buttons to place your own developments in this device.
AC / DC Switching power supply 12V 0.5A is a built-in power supply voltage of 12V, with an operating current of 500 mA. The module is equipped with all types of protection, which indicates its reliability.
I think this information can be useful to many when selecting devices for their task.
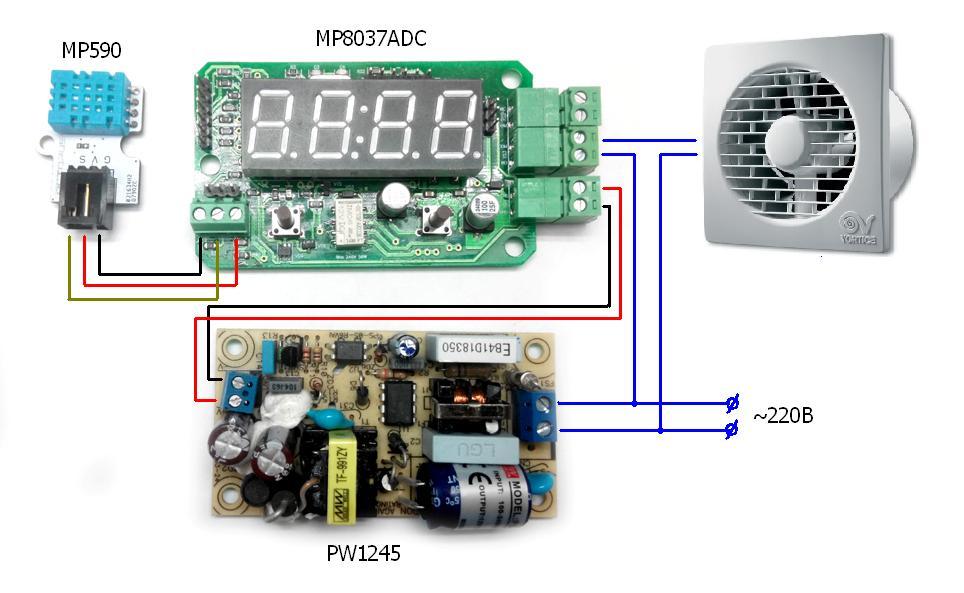
The connection scheme turned out to be simple. It can be seen in the sketch below:

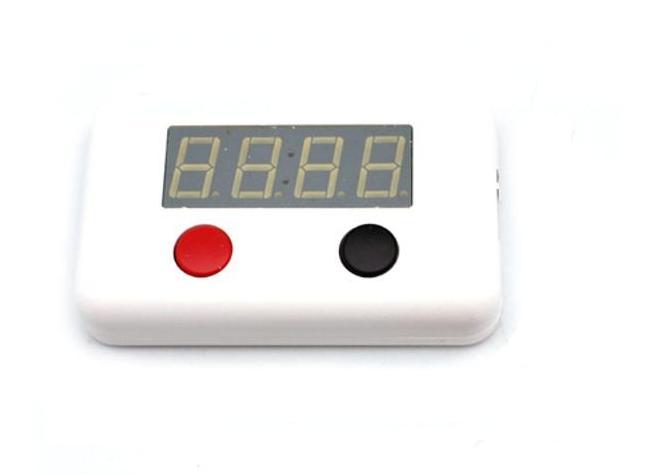
This is how the module looks in the case:

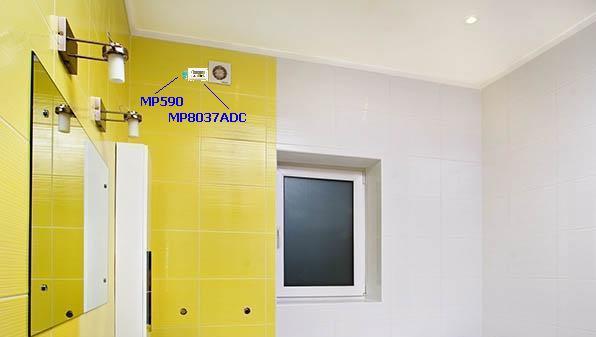
The MP590 humidity sensor is located on the left side, flush with the control module housing. To make everything look aesthetically pleasing, the module leads can be located directly at the decorative fan cover. The power and control wires must be soldered directly to the module terminals. Due to this, in close proximity, the fan control wires and MP8037ADC power wires are invisible.
An example of installing a module with a sensor:

After installation, you will need to configure. First, according to the instructions, put the relay control in trigger mode. Then configure the inclusion and shutdown of the exhaust fan. Let's say the module showed humidity in the region of 40%. Holding the right button of the module for more than five seconds, go to the power menu and set it to 100. After waiting for three seconds, the module will exit the menu. Then holding the left button of the module for more than five seconds, go to the shutdown menu and set the value to 50. Wait, after five seconds the module will return to operating mode.
How to check the operation of the whole system: using a hot shower, raise the humidity in the bathroom, controlling the readings on the display, at 41% the exhaust fan should turn on. Turn off the shower. After a few minutes, when the humidity drops, the fan will turn off.
Demonstration of the circuit in humidity control mode:
Now the bathroom has a fearless fungus, mold and there will be no excessive consumption of electricity.
Maybe someone wants to implement this solution. Or maybe he will offer his own?
Author Rublev Vladimir (UA4LOU).

Today we will talk about how, through simple manipulations, to make the automatic inclusion of ventilation in the bathroom so that it does not turn into a steam bath and continues to delight us with cleanliness and freshness.
In fact, the exhaust hood in the bathroom is an elementary ventilation system of the compulsory principle of action. It consists of a maximum of two parts - an air duct that connects to the ventilation riser of the house, as well as directly to the fan itself.
Usually the forced inclusion of ventilation in the bathroom is implemented in two of the simplest ways:
1. Turns on together with the light in the bathroom with one common switch. But the hood is usually needed only during showering, when the humidity in the bathroom is increased. So, the rest of the time, energy is wasted. To ventilate the bathroom after a shower, you also have to leave the light on. Again, excess power consumption
2. Manually turn on the exhaust fan during or after taking a shower. Need a separate switch. Inconveniently. You may forget to turn off the fan if you leave it turned on to ventilate the bathroom after taking a shower.
In general, this approach to business is not very correct, since in this case the room is ventilated only when a person is in the room.
Is it possible to automate ventilation control in a bathroom and save energy? Can.
An automatic extractor hood differs from an ordinary one only in the presence of electronics that control its operation. Such devices are either equipped with an off timer (they are turned on, like an ordinary hood, using the switch key), or with special sensors that control the humidity in the bathroom. As soon as it exceeds the permissible value, the fan turns on, after the humidity returns to normal, it turns off. Such hoods are ready, but you can modify the already installed. As an example, we give a solution based on modules from Master Kit.
To solve this problem, the following modules were selected:
MP590 - digital humidity sensor;
MP8037ADC - digital protection and control module with measurement function;
BOX-BM8037- housing for amateur constructions with installation dimensions in the * .PCB
PW1245 format - switching power supply 12V 0.5A.
The necessary equipment can be seen in the photo below:

Digital temperature and humidity sensor DHT11 1WIRE interface is a module built on a digital humidity sensor DHT11 working on the 1Wire interface.
Module The digital protection and control module with measurement function is a universal board with one ADC channel having three HYSTERESIS, TRIGGER, PROTECT relay modes. The module is very versatile and can be useful for almost any automation.
The case for amateur constructions with installation dimensions in the * .PCB format is a universal case inside which the MP8037R and MP8037ADC modules can be placed. Also on the website, download the PCB file with the installation dimensions of the LED display and buttons to place your own developments in this device.
AC / DC Switching power supply 12V 0.5A is a built-in power supply voltage of 12V, with an operating current of 500 mA. The module is equipped with all types of protection, which indicates its reliability.
I think this information can be useful to many when selecting devices for their task.
The connection scheme turned out to be simple. It can be seen in the sketch below:

This is how the module looks in the case:

The MP590 humidity sensor is located on the left side, flush with the control module housing. To make everything look aesthetically pleasing, the module leads can be located directly at the decorative fan cover. The power and control wires must be soldered directly to the module terminals. Due to this, in close proximity, the fan control wires and MP8037ADC power wires are invisible.
An example of installing a module with a sensor:

After installation, you will need to configure. First, according to the instructions, put the relay control in trigger mode. Then configure the inclusion and shutdown of the exhaust fan. Let's say the module showed humidity in the region of 40%. Holding the right button of the module for more than five seconds, go to the power menu and set it to 100. After waiting for three seconds, the module will exit the menu. Then holding the left button of the module for more than five seconds, go to the shutdown menu and set the value to 50. Wait, after five seconds the module will return to operating mode.
How to check the operation of the whole system: using a hot shower, raise the humidity in the bathroom, controlling the readings on the display, at 41% the exhaust fan should turn on. Turn off the shower. After a few minutes, when the humidity drops, the fan will turn off.
Demonstration of the circuit in humidity control mode:
Now the bathroom has a fearless fungus, mold and there will be no excessive consumption of electricity.
Maybe someone wants to implement this solution. Or maybe he will offer his own?
Author Rublev Vladimir (UA4LOU).
