New life for XMPP. We make a messenger that can’t block
- Tutorial

The idea of making a P2P messenger independent of corporations is not new, but developing a new protocol and client applications for it is quite an expensive and lengthy process. But what if you use the good old XMPP , in which everything has already been thought out and washed down for a long time?
But this is not a real peer-to-peer, you say, XMPP needs its own server and domain to work. This is so, but we can start the server on the localhost, and use the hidden service in the I2P virtual network to communicate with the servers of other users . Using I2P saves us from having to pay for a hosting domain, and also protects our communications from criminal online surveillance .
Thus, we obtain:
- Hybrid P2P messenger that can be run both on user devices and on a full-fledged server.
- Features that other P2P messengers lack: offline messages, storing contacts and history "in the cloud", the work of several clients with one account.
- Ready-made client applications for every taste.
- Through the use of I2P, it is invulnerable to various * supervision (litter for the mat).
Let's proceed to the implementation ...
Install I2P and create a server tunnel
In this guide, we will use the lightweight C ++ i2pd client as an I2P router . Installation instructions are in the documentation .
After installation, we create the server I2P tunnel - this is the virtual address at which our XMPP server will be available to the rest of the world. In the tunnels.conf file , add the following lines:
[prosody-s2s]
type=server
host=127.0.0.1
port=5269
inport=5269
keys=prosody.dat
[prosody-c2s]
type=server
host=127.0.0.1
port=5222
inport=5222
keys=prosody.dat
If you plan to use only on a localhost, the prosody-c2s section can be omitted. Reboot i2pd to apply the settings. We are looking for the I2P address of the created tunnel in the web console http://127.0.0.1:7070/ on the page I2P tunnels.
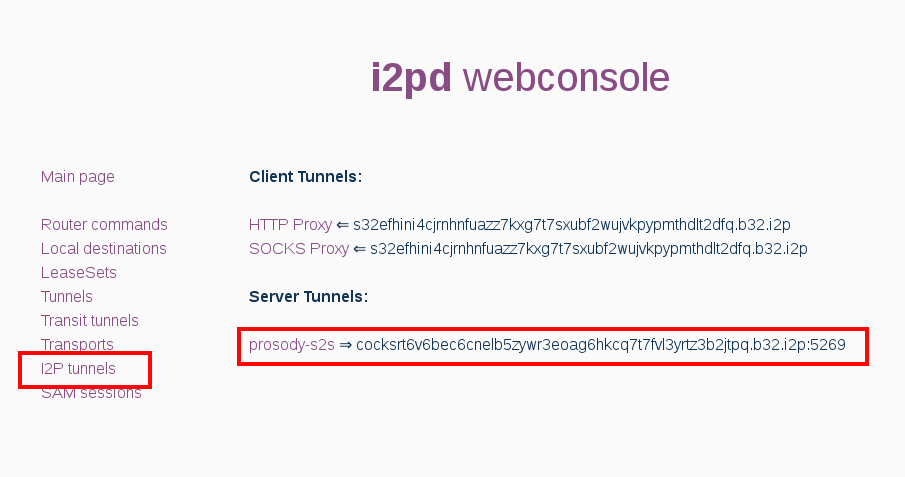
You can also find out the b32 address of the new tunnel by bogging down the logs:
grep "New private keys file" /var/log/i2pd/i2pd.log | grep -Eo "([a-z0-9]+).b32.i2p" | tail -n1Save this xxx.b32.i2p address, this will be the domain for your XMPP server.
Install and configure XMPP server
We will use prosody as the XMPP server , it is the lightest and there is a ready-made module for working through I2P for it. The installation is described in the official documentation , in Ubuntu it is done elementarily apt install prosody.
To work, you mod_darknetneed the lua bit32 library. If you have lua version less than 5.2 (most likely), do it apt install lua-bit32.
Install the module mod_darknet. It is needed for prosody to make outgoing connections through the Socks5 i2pd server. Download this file to the prosody modules directory, usually this /usr/lib/prosody/modules.
Now edit the config /etc/prosody/prosody.cfg.lua. Replace xxx.b32.i2pwith your address:
interfaces = { "127.0.0.1" };
admins = { "admin@xxx.b32.i2p" };
modules_enabled = {
    "roster"; "saslauth"; "tls"; "dialback"; "disco"; "posix"; "private"; "vcard";  "ping";  "register"; "admin_adhoc"; "darknet";
};
modules_disabled = {};
allow_registration = false;
darknet_only = true;
c2s_require_encryption = true;
s2s_secure_auth = false;
authentication = "internal_plain";
-- On Debian/Ubuntu
daemonize = true;
pidfile = "/var/run/prosody/prosody.pid";
log = {
    error = "/var/log/prosody/prosody.err";
    "*syslog";
}
certificates = "certs";
VirtualHost "xxx.b32.i2p";
ssl = {
    key = "/etc/prosody/certs/xxx.b32.i2p.key";
    certificate = "/etc/prosody/certs/xxx.b32.i2p.crt";
}
The last step in setting up prosody is to generate encryption certificates. In nixes it is done like this:
openssl genrsa -out /etc/prosody/certs/xxx.b32.i2p.key 2048
openssl req -new -x509 -key /etc/prosody/certs/xxx.b32.i2p.key -out /etc/prosody/certs/xxx.b32.i2p.crt -days 3650
chown root:prosody /etc/prosody/certs/*.b32.i2p.{key,crt}
chmod 640 /etc/prosody/certs/*.b32.i2p.{key,crt}
Restart prosody server to apply the settings.
Here you need a small digression. On the I2P network, any connections are encrypted with end-to-end encryption, and it would seem that additional encryption is unnecessary here. But, in practice, it turned out to be easier to generate keys than trying to configure all programs to use plain text. You can try, but I warned you.
Creating accounts and connecting clients
Add admin account:
prosodyctl adduser admin@xxx.b32.i2pNow configure the XMPP client (for example, Pidgin ).
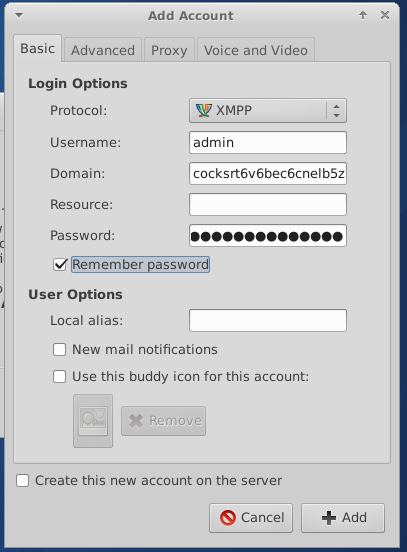
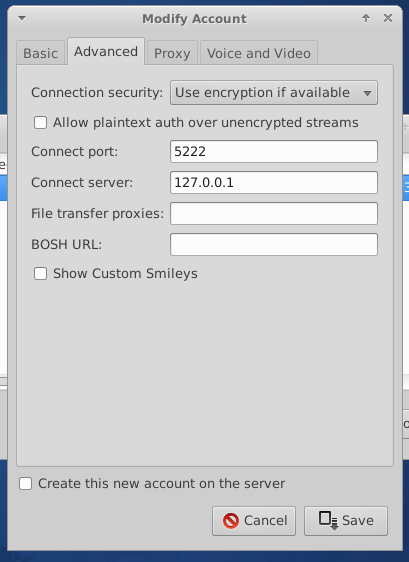
If you connect to the localhost, then in the client settings indicate the connection to the server 127.0.0.1 port 5222.
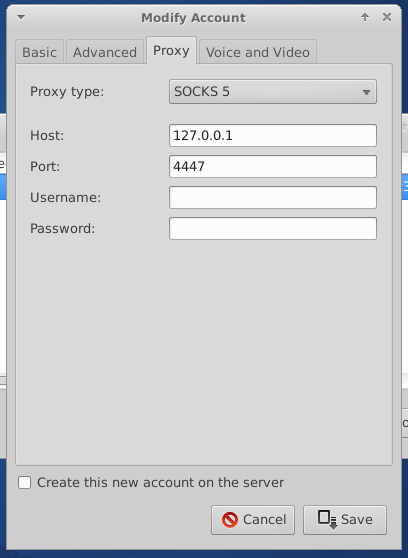
If you connect to the server remotely via I2P, specify 127.0.0.1:4447 in the Socks5 proxy settings.
If everything is done correctly, you can add other users to the I2P federation and correspond with them. It is also possible to configure your existing server on the regular Internet to correspond with servers inside I2P. To do this, all other users will need to add prosody mapping for your domain to their config. For example, this is how I did it to communicate with the server i2p.rocks:
darknet_map = {
    ["i2p.rocks"] = "ynkz7ebfkllljitiodcq52pa7fgqziomz4wa7tv4qiqldghpx4uq.b32.i2p";
    ["muc.i2p.rocks"] = "ynkz7ebfkllljitiodcq52pa7fgqziomz4wa7tv4qiqldghpx4uq.b32.i2p";
}
That's all. Happy chatting!