Node.js + face-recognition.js: simple and reliable face recognition through deep learning
- Transfer
Translation of Node.js + face-recognition.js: Simple and Robust Face Recognition using Deep Learning .
In this article, we will tell you how to implement a reliable face recognition system using face-recognition.js . We were looking for a suitable Node.js library that would be able to accurately recognize faces, but could not find anything. I had to write on my own!
This npm package uses the dlib library , which provides Node.js binders for the very well-recognized recognition tools inside this library. Dlib uses the methods of deep learning, and comes pre-trained models, which have demonstrated the accuracy of recognition at the level of99.38% when running the LFW benchmark .
What for?
Recently, we have been trying to create a face recognition application based on Node.js, which would distinguish and recognize the faces of characters from the series The Big Bang Theory. At first, it was planned to make an application using OpenCV recognition tools, as described in Node.js + OpenCV for Face Recognition .
However, despite the high speed, the quality of work of these tools was insufficient. More precisely, they coped well with full-face faces, but as soon as a person turned away a little from the camera, the quality of recognition decreased.
In search of a solution, C ++ came to hand - dlib library; we tinkered with the Python API, were impressed with the result, and finally decided: we will use this library together with Node.js! So this npm package came into being, providing a simplified Node.js API for face recognition.
And what is face-recognition.js?
I wanted to make a package based on face-recogntion.js, which:
- allows you to quickly start recognizing faces thanks to a simple API;
- if necessary, allows you to make fine adjustments;
- easy to install (ideally, to write enough
npm install).
Although the package is not yet complete, you can already download some tools.
Face Detection
For quick and not very reliable determination of faces in the image, you can use a deep learning neural network or a simple front-end recognizer:
Face Recognizer
A recognizer is a deep learning neural network that uses the models mentioned above to compute unique face descriptors. The recognizer can be trained on an array of tagged images of faces, after which it will be able to mark faces on the input image:
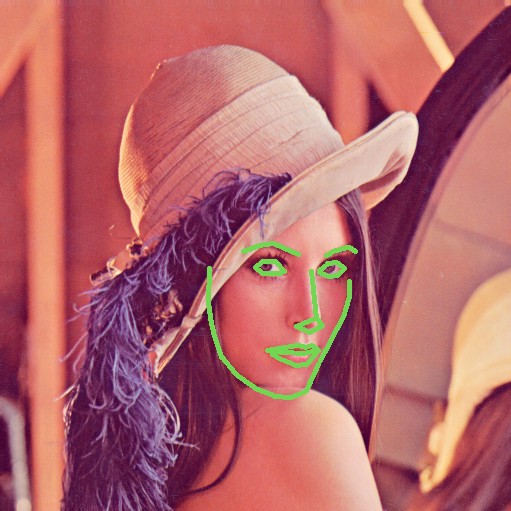
Face Landmarks
With this package you can also determine from 5 to 68 reference points on faces:
Great story, now show how it works!
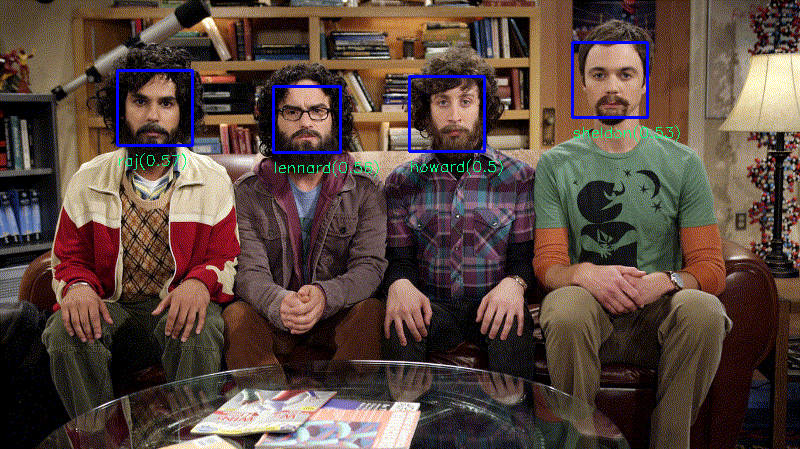
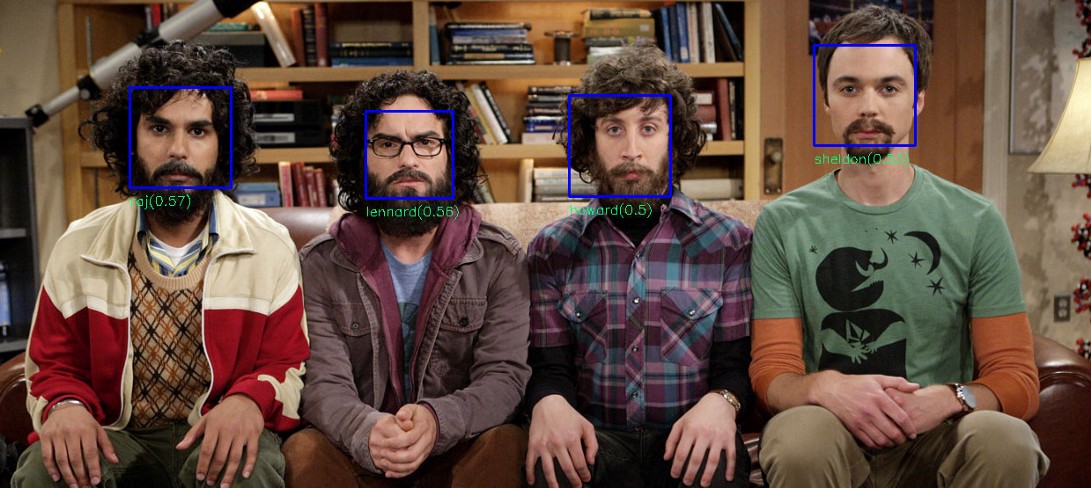
So, it was not possible to solve the problem using OpenCV. We still have a pack of faces of Sheldon, Rajesh, Leonard, Howard and Stewart each measuring 150 x 150 pixels. Using this data, you can easily teach Face Recognizer to recognize new faces. The code for this example is in the repository.
Data preparation
We collected about 20 faces of each character from different angles:
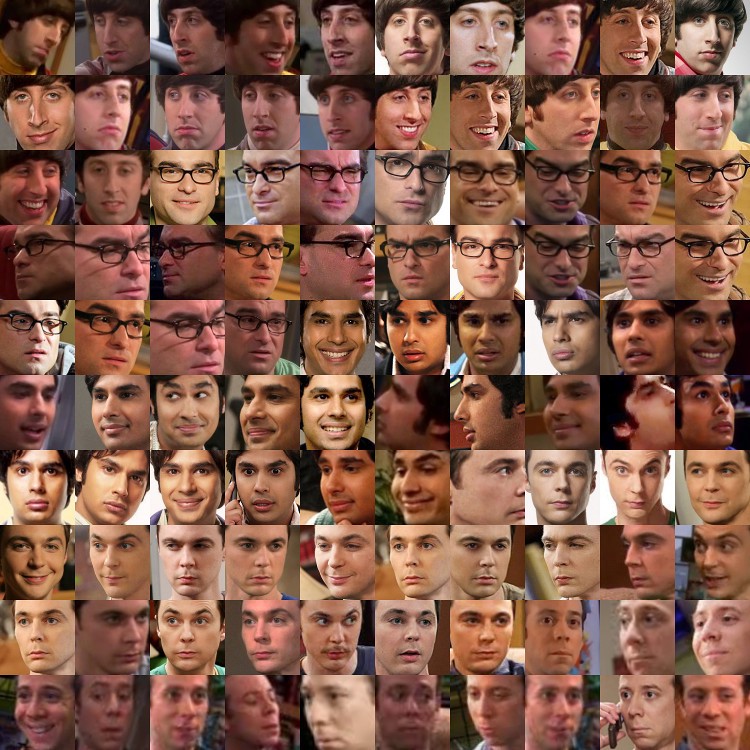
Take 10 faces for training, and use the rest to evaluate recognition accuracy:
const path = require('path')
const fs = require('fs')
const fr = require('face-recognition')
const dataPath = path.resolve('./data/faces')
const classNames = ['sheldon', 'lennard', 'raj', 'howard', 'stuart']
const allFiles = fs.readdirSync(dataPath)
const imagesByClass = classNames.map(c =>
  allFiles
    .filter(f => f.includes(c))
    .map(f => path.join(dataPath, f))
    .map(fp => fr.loadImage(fp))
)
const numTrainingFaces = 10
const trainDataByClass = imagesByClass.map(imgs => imgs.slice(0, numTrainingFaces))
const testDataByClass = imagesByClass.map(imgs => imgs.slice(numTrainingFaces))
Each file name
['sheldon', 'lennard', 'raj', 'howard', 'stuart'] contains a character’s name, so we can easily compare our class names: with arrays of images for each class. With the help of,
fr.loadImage(fp)you can read the image specified in the file path.Identification of persons
Face images 150 x 150 pixels in size were pre-cut using opencv4nodejs. But you can identify faces, cut, save and label them this way:
const image = fr.loadImage('image.png')
const detector = fr.FaceDetector()
const targetSize = 150
const faceImages = detector.detectFaces(image, targetSize)
faceImages.forEach((img, i) => fr.saveImage(img, `face_${i}.png`))
Recognizer Training
Now you can start learning:
const recognizer = fr.FaceRecognizer()
trainDataByClass.forEach((faces, label) => {
  const name = classNames[label]
  recognizer.addFaces(faces, name)
})
This code feeds the faces of the neural network, which produces a descriptor for each face and stores it in the appropriate class. By specifying the third argument
numJitters, you can apply rotation , scaling, and mirroring , creating different versions of each of the input faces. An increase in the number of modifications can increase recognition accuracy, but the neural network learns longer. You can also save the state of the recognizer so as not to train it again each time, but simply load it from a file:
Saving:
const modelState = recognizer.serialize()
fs.writeFileSync('model.json', JSON.stringify(modelState))
Loading:
const modelState = require('model.json')
recognizer.load(modelState)
Face Recognition
Now, using the control data, check the recognition accuracy and save the results to the log:
const errors = classNames.map(_ => [])
testDataByClass.forEach((faces, label) => {
  const name = classNames[label]
  console.log()
  console.log('testing %s', name)
  faces.forEach((face, i) => {
    const prediction = recognizer.predictBest(face)
    console.log('%s (%s)', prediction.className, prediction.distance)
    // count number of wrong classifications
    if (prediction.className !== name) {
      errors[label] = errors[label] + 1
    }
  })
})
// print the result
const result = classNames.map((className, label) => {
  const numTestFaces = testDataByClass[label].length
  const numCorrect = numTestFaces - errors[label].length
  const accuracy = parseInt((numCorrect / numTestFaces) * 10000) / 100
  return `${className} ( ${accuracy}% ) : ${numCorrect} of ${numTestFaces} faces have been recognized correctly`
})
console.log('result:')
console.log(result)
Now recognition is performed as follows: first, the Euclidean distance of the descriptor vector to each class descriptor is calculated at the input face, and then the average value of all distances is calculated . You may argue that k-means clustering or the SVM classifier is best suited for this task . Perhaps in the future they will also be realized, but the speed and efficiency of the Euclidean distance is still quite enough.
When called,
predictBest we get the result with the smallest Euclidean distance, that is, with the greatest similarity. Something like this: { className: 'sheldon', distance: 0.5 }If you need to obtain the distances of descriptors of all classes for a particular person, then you can simply use
recognizer.predict(image), which for each class will produce arrays of distances:[
{ className: 'sheldon', distance: 0.5 },
{ className: 'raj', distance: 0.8 },
{ className: 'howard', distance: 0.7 },
{ className: 'lennard', distance: 0.69 },
{ className: 'stuart', distance: 0.75 }
]results
If you execute the above code, then we get such results.
Train on 10 faces of each character:
sheldon ( 90.9% ) : 10 of 11 faces have been recognized correctly
lennard ( 100% ) : 12 of 12 faces have been recognized correctly
raj ( 100% ) : 12 of 12 faces have been recognized correctly
howard ( 100% ) : 12 of 12 faces have been recognized correctly
stuart ( 100% ) : 3 of 3 faces have been recognized correctly
We will train only on 5 faces of each character:
sheldon ( 100% ) : 16 of 16 faces have been recognized correctly
lennard ( 88.23% ) : 15 of 17 faces have been recognized correctly
raj ( 100% ) : 17 of 17 faces have been recognized correctly
howard ( 100% ) : 17 of 17 faces have been recognized correctly
stuart ( 87.5% ) : 7 of 8 faces have been recognized correctly
And here is how it looks on the video:
Conclusion
Judging by the results, even a small sample of training data allows for fairly accurate recognition. And this is despite the fact that some of the input images are very blurry due to the small size.