We are developing the game on SVG + React. Part 1
- Transfer
- Tutorial
TL; DR: In these episodes, you'll learn how to get React and Redux to control SVG elements to create a game. The knowledge gained in this series will allow you to create animations not only for games. You can find the final version of the source code developed in this part on GitHub .
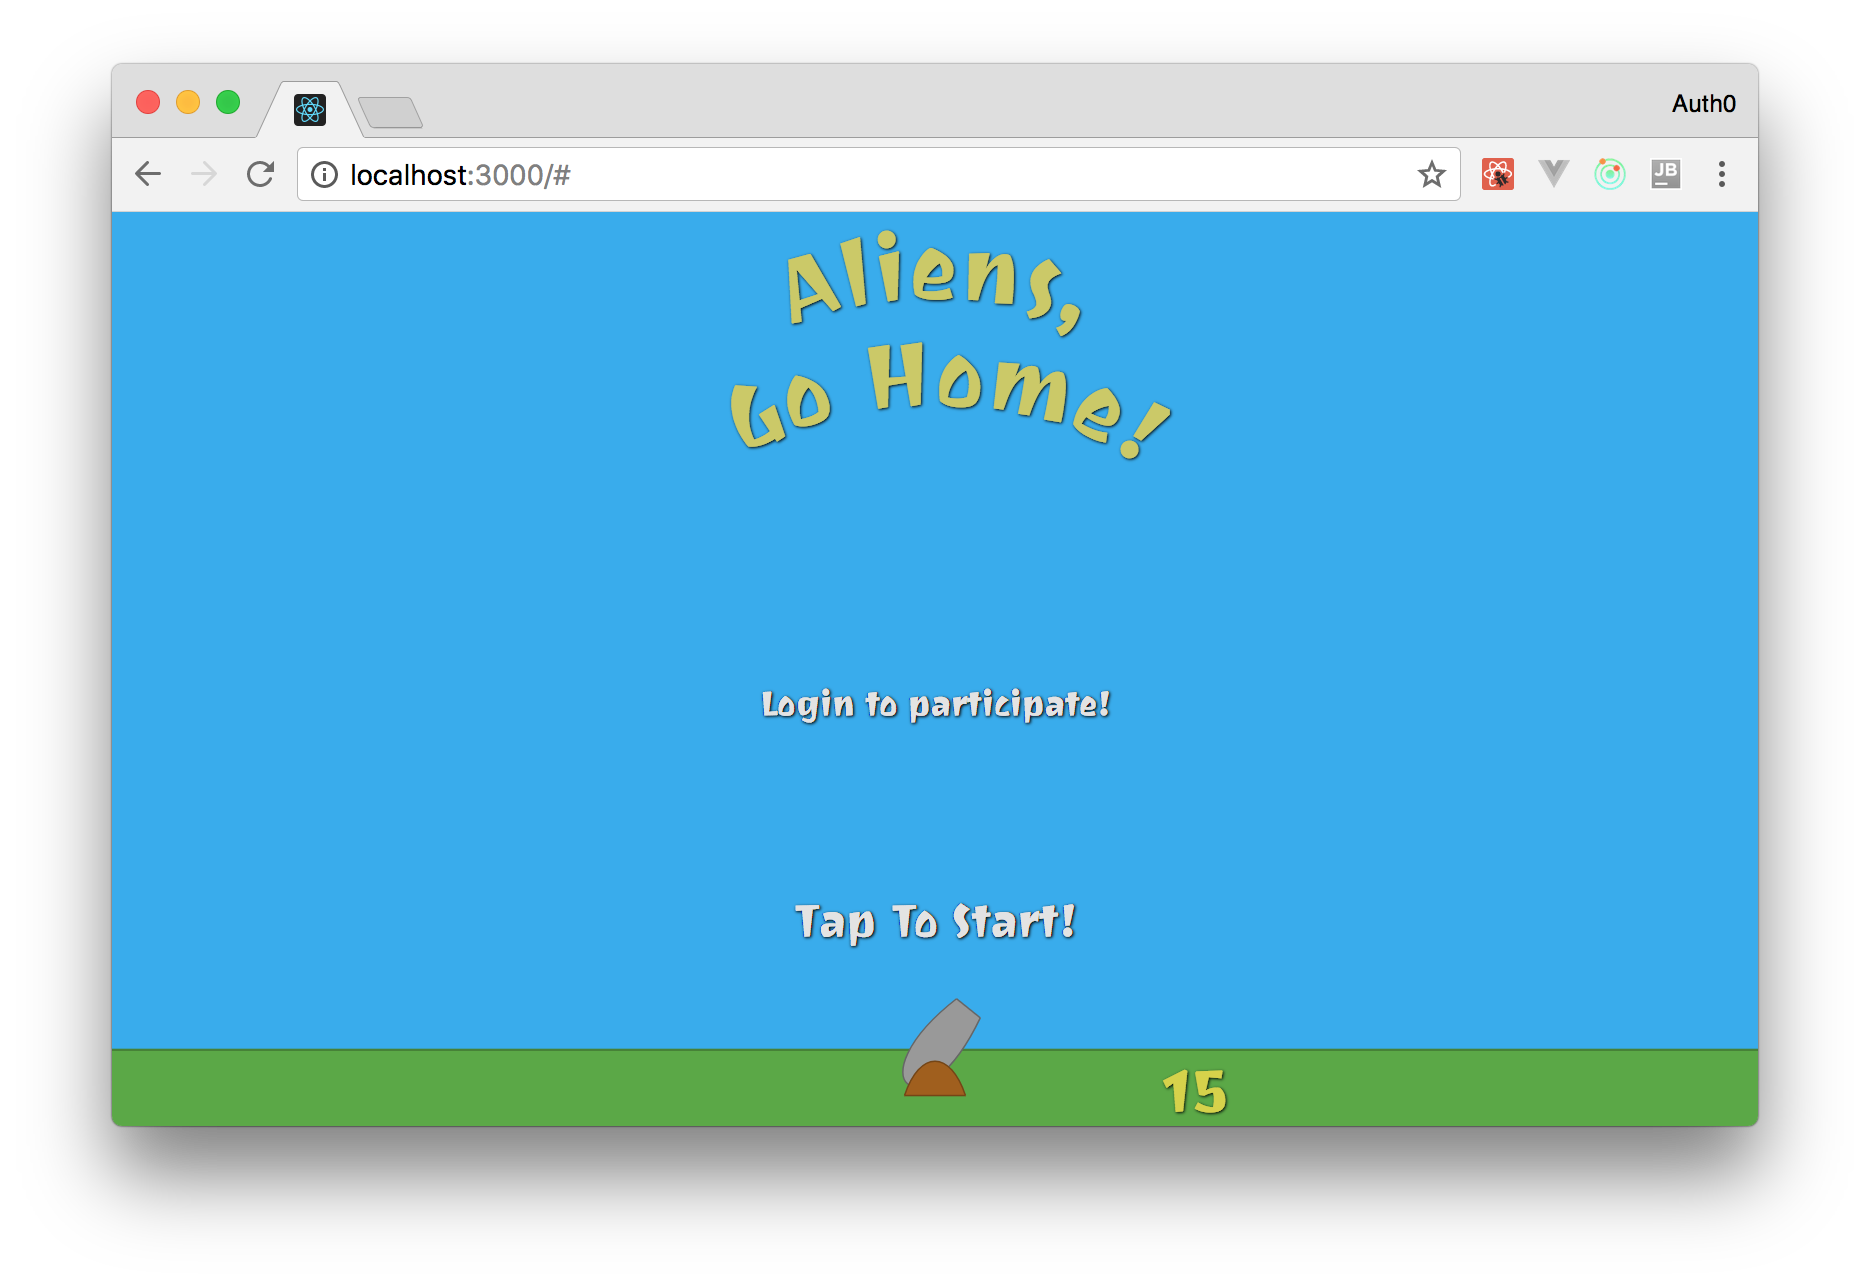
Name of the game: "Aliens, get home!"
The game you’ll be developing in this series is called Aliens, Get Away Home! The idea of the game is simple: you will have a gun with which you will shoot down the "flying discs" that are trying to invade Earth. To destroy these UFOs, you need to fire a cannon by hovering over the mouse and clicking on it.
If you are interested, you can find and run the final version of the game here ( link dead - translator's comment ). But do not get involved in the game, you have a job!
Preconditions
To successfully read the article, you need to have a certain level of knowledge about web development (mainly about JavaScript) and a computer with Node.js and NPM preinstalled . You won’t need in-depth knowledge of JavaScript, React, Redux, and SVG to successfully complete this tutorial series. However, if you are in the subject, it will be easier for you to understand some parts and their correspondence to each other.
Nevertheless, the series contains links to relevant articles, posts and documents that will help better explain topics that deserve increased attention.
Before you start
Although there was no mention of Git in the previous section , it is worth noting that this is a good tool to solve some problems. All professional developers use Git (or another version control system, for example, Mercurial or SVN) in the course of their activities, even during "home" projects.
Why create a project without backup? You don’t even have to pay for it. You can use services such as GitHub (the best!) Or BitBucket (not bad, to be honest) and save your code in reliable cloud infrastructures.
Using such tools will give you confidence in the safety of your code and will facilitate the development process directly. For example, when you create a new version of the application with "bugs", you can easily return to the previous version of the code with just a few simple steps using Git.
Another significant advantage is the ability to keep track of each section in this series and commit code developed in stages. This will easily allow you to see changes in the code after each section . Make your life easier right now while you go through this tutorial.
In general, do yourself a favor and install Git. Also create an account on GitHub (if you don’t already have one) and a repository to save your project. Then, after completing each section, commit the changes to the repository. Oh, and don't forget to push your changes .
Quick start of the project using Create-React-App
Your very first step in creating a game with React, Redux, and SVG is to use it create-react-appto quickly start your project. As you probably already know (no big deal if it’s not), create-react-app is an open source tool supported by Facebook that helps developers get started with React instantly. Having Node.js and NPM installed (the version of the latter should be 5.2 and higher), you can use create-react-app without even installing it:
# npx скачает (если нужно)
# create-react-app и запустит
npx create-react-app aliens-go-home
# перейдите в директорию с проектом
cd aliens-go-home
This "tool" will create a structure similar to the one below:
|- node_modules
|- public
  |- favicon.ico
  |- index.html
  |- manifest.json
|- src
  |- App.css
  |- App.js
  |- App.test.js
  |- index.css
  |- index.js
  |- logo.svg
  |- registerServiceWorker.js
|- .gitignore
|- package.json
|- package-lock.json
|- README.md
The create-react-app tool is popular, well documented, and has good community support. If you are interested in delving into the details, you can check the create-react-app repository on the github and read the user guides .
Right now you can get rid of the files listed below, because in the future they will not be useful to us:
App.css: although the component isAppimportant, styles will be defined in other components;App.test.js: tests may be the topic for another article. You don’t have to use them now.logo.svg: The React logo is not used in this game.
Deleting these files may result in an error if you try to start a project. This can be easily fixed by removing two “imports” from the file ./src/App.js:
// удалите обе линии из ./src/App.jsimport logo from'./logo.svg';
import'./App.css';
And also by refactoring the method render():
// ... описание импортов и создание компонента через класс (опущено в коде)
render() {
  return (
    <divclassName="App"><h1>We will create an awesome game with React, Redux, and SVG!</h1></div>
  );
}
// ... (закрывающая скобка и экспорт - аналогично, опущено)
Do not forget to commit!
Install Redux and PropTypes
After you deploy the project and remove unnecessary files from it, you should configure Redux as the only true data source in your application . PropTypes should also be installed , this will help to avoid some common errors . Both tools can be installed with one command:
npm i redux react-redux prop-typesAs you can see, the above command includes third NPM package: react-redux. Using Redux directly with React is not recommended. The react-redux package does some cumbersome manual processing of performance optimization.
Configuring Redux and Using PropTypes
Using the packages described, you can configure your application to use Redux. This is easy, you just need to create a container (smart component), presentation component (stupid component) and reducer. The difference between smart and stupid components is that the former simply connects ( connect) the stupid components to Redux. The third element you create, the reducer, is the main component in the Redux store. This component is responsible for executing "actions" (actions) caused by various events in your application, and for applying functions to change the "store" (data source) based on these actions.
If you have no idea about all this, you can read this article , which describes components (dull) and containers (smart) components in more detail, as well as open the Redux practical guide to familiarize yourself with action games , reducer and stor . Although learning these concepts is highly recommended, you can continue to study without bothering yourself with additional reading.
It is more convenient to start the process with the creation of a reducer, since this element is independent of others (in fact, the opposite is true). To maintain structure, you can create a new directory under the name reducers, place inside it srcand add a file with the name there index.js. This file may contain the following source code:
const initialState = {
  message: `React и Redux легко интегрируются, не так ли?`,
};
functionreducer(state = initialState) {
  return state;
}
exportdefault reducer;
Thus, your reducer simply initializes the state of the application сообщением( message ), which React and Redux integrate easily. Soon in this file, you will begin to define actions and process them.
You can then refactor the component Appto display this message to users. It's time to take advantage PropTypes. To do this, open the file ./src/App.jsand replace its contents with the following text:
import React, {Component} from'react';
import PropTypes from'prop-types';
classAppextendsComponent{
  render() {
    return (
      <divclassName="App"><h1>{this.props.message}</h1></div>
    );
  }
}
App.propTypes = {
  message: PropTypes.string.isRequired,
};
exportdefault App;
As you can see, using is PropTypesvery simple to determine the types that your component expects. You only need to set the PropTypesproperties of the component Appwith the necessary parameters. There are cheat sheets on the network (for example, this one , this one, and this one ) that describe how to create basic and advanced PropTypesdefinitions. Check them out if necessary.
After determining the initial state of your store( store ) and what your component Appshould display, you need to link these elements together. This is what containers are for . To create a container in our structure you need to create a directory with a name сontainersinside the directory src. After that, in the new directory, create a component with the name Gameinside the file Game.js. This container will use the function connectfrom react-reduxto pass state.messageto the component message parameters App:
import { connect } from'react-redux';
import App from'../App';
const mapStateToProps = state => ({
  message: state.message,
});
const Game = connect(
  mapStateToProps,
)(App);
exportdefault Game;
We pass to the final stage. The last step to linking everything together will be to refactor the file ./src/index.jsto initialize the Redux store and transfer it to the container Game(which will then receive a message and send it (will throw it ) to App). The following code shows what the file will look like ./src/index.jsafter refactoring:
import React from'react';
import ReactDOM from'react-dom';
import { Provider } from'react-redux';
import { createStore } from'redux';
import'./index.css';
import Game from'./containers/Game';
import reducer from'./reducers';
import registerServiceWorker from'./registerServiceWorker';
/* eslint-disable no-underscore-dangle */const store = createStore(
    reducer, /* preloadedState, */window.__REDUX_DEVTOOLS_EXTENSION__ && window.__REDUX_DEVTOOLS_EXTENSION__(),
);
/* eslint-enable */
ReactDOM.render(
    <Providerstore={store}><Game /></Provider>,
    document.getElementById('root'),
);
registerServiceWorker();
You did it! To evaluate how everything works, in the terminal, go to the root of the project and execute npm start. Thus, you run the application in development mode ( in dev-mode ), and it will open in the default browser.
Creating SVG Components with React
In this series, you will appreciate the ease of creating SVG components using React. In fact, there is practically no difference between creating React components with HTML or with SVG. The main difference is that new elements are introduced into the SVG and these elements are drawn on the SVG canvas.
Before starting to create your own components with SVG and React, it will be useful to briefly familiarize yourself with SVG.
SVG Overview
SVG is one of the coolest and most flexible web standards. SVG, which stands for Scalable Vector Graphics, is a markup language that allows developers to describe two-dimensional vector graphics. SVG is quite similar to HTML. Both are XML-based markup languages and work well together with other web standards such as CSS and DOM. It follows that CSS rules apply equally to both SVG and HTML, including animation.
Over the course of this series, with React, you will create more than a dozen SVG components. You’ll even have to compose (group) SVG elements to form game objects (a cannon firing cannonballs).
A more detailed study of SVG is not possible within the framework of our article; it will make it too long. If you want to learn more about the SVG markup language, you can read the tutorial presented by Mozilla , as well as the material about the SVG coordinate system presented in this article .
However, before you start creating your own components, it is important to learn a few characteristics of SVG. First, using SVG in conjunction with the DOM allows developers to "do things." Using SVG with React is very simple.
Secondly, the SVG coordinate system is similar to a Cartesian plane, turned upside down. Accordingly, by default, negative vertical values will be displayed above the X axis. At the same time, horizontal values are located in the same way as in the Cartesian plane, that is, negative values are located to the left of the Y axis. This behavior can be easily changed by applying a transformation to the SVG canvas . However, it would be better to stick with the default settings in order to avoid confusion among developers. You will quickly get used to it.
And finally, remember that SVG introduces a lot of new elements (such as circle, rectand path). To use these elements, it is not enough just to define them inside the HTML element. First you need to define svgan element (your canvas) where you will draw all your SVG components.
SVG, path elements and cubic Bezier curves
Drawing SVG elements can be done in three ways. First, you can use basic elements such as rect, circleand line. However, these elements are not particularly flexible. They allow you to draw simple shapes according to their name (rectangle, circle and line).
The second way is to combine the basic elements to obtain more complex shapes. For example, you can use a rectangle ( rect) with the same sides (you get a square) and two lines in order to draw a house. However, this approach is still quite severely limiting.
The third and most flexible way is to use path elements . This option allows developers to create fairly complex forms. Drawing a figure occurs by specifying certain commands to the browser. For example, to draw “L”, you can create pathan element that contains three commands:
M 20 20: command to the browser to move its “pen” to the X and Y coordinates defined afterM(ie20, 20);V 80: command to the browser to draw a line from the previous point to the position80along the Y axis;H 50: command to the browser to draw a line from the previous point to the position50along the X axis;
<svg>
<pathd="M 20 20 V 80 H 50"stroke="black"stroke-width="2"fill="transparent" /></svg>Pathelements accept many other commands. One of the most important is the team of cubic Bezier curves. It allows you to add any “smoothed” curves using two reference points and two control points.
"A cubic Bezier curve for each point takes two control points. Thus, to create a cubic Bezier curve, you need to specify three sets of coordinates. The last set of coordinates describes the point at which the curve ends. The other two sets are control points. [...]. In essence, control points describe the slope of your line at a given point. The Bezier function creates a smooth curve directed from the slope you set at the beginning of the line to the slope set at the end. " - Mozilla Developer Network
For example, to draw "U", do the following:
<svg>
  <pathd="M 20 20 C 20 110, 110 110, 110 20"stroke="black"fill="transparent"/></svg>
In this case, the commands passed to the pathelement tell the browser:
- Start drawing from point
20,20; - The coordinates of the first control point
20, 110:; - The coordinates of the second control point
110, 110:; - Coordinates of the end point of curve
110 20;
Do not despair if you still do not understand the principle of operation of cubic Bezier curves. You will have the opportunity to practice in this series. In addition, you can find many guides about this feature on the Internet, where you can always practice in tools such as JSFiddle and Codepen .
Creating a Canvas Component
(this is not about the tag <canvas></canvas>, but about the Canvas react component (Canvas in Russian) - translator comment)
Once you have created the structure of your project and learned the basics of SVG, you can start creating the game. The first element to create is an SVG canvas, which is used to draw game elements.
This component is characterized as presentation (stupid). Thus, you can create a directory componentsinside the directory ./srcfor storing a new component and its "siblings" ( neighboring / child elements - comment translator ). Since this will be your canvas, it is difficult to come up with a more natural name for it than Canvas. Create a new file with a name Canvas.jsxinside the directory ./src/components/and add the following code:
import React from'react';
const Canvas = () => {
  const style = {
    border: '1px solid black',
  };
  return (
    <svgid="aliens-go-home-canvas"preserveAspectRatio="xMaxYMax none"style={style}
    ><circlecx={0}cy={0}r={50} /></svg>
  );
};
export default Canvas;
Rewrite the component Appso that it uses the component Canvas:
import React, {Component} from'react';
import Canvas from'./components/Canvas';
classAppextendsComponent{
  render() {
    return (
      <Canvas />
    );
  }
}
export default App;
If you run the project ( npm start) and test your application, you will see that the browser draws only a quarter of this circle. This is due to the fact that, by default, the origin is located in the upper left corner of the screen. In addition, you will see that the svgitem does not occupy the entire screen.
For more interesting and convenient controls, make your canvas ( <Canvas/>) suitable for drawing in full screen. You can move its beginning to the center of the X axis and make it closer to the bottom (later you will add your gun to the original). To fulfill both conditions you need to change two files: ./src/components/Canvas.jsxand ./src/index.css.
You can start by replacing the content Canvas, apply the following code:
import React from'react';
const Canvas = () => {
  const viewBox = [window.innerWidth / -2, 100 - window.innerHeight, window.innerWidth, window.innerHeight];
  return (
    <svgid="aliens-go-home-canvas"preserveAspectRatio="xMaxYMax none"viewBox={viewBox}
    ><circlecx={0}cy={0}r={50} /></svg>
  );
};
export default Canvas;
In this version of the component, you set the viewBox attribute for the tag svg. This attribute allows you to determine that your canvas and its contents must correspond to a specific container (in this case, the inner area of the window / browser). As you can see, the viewBox attribute consists of four numbers:
min-x: this value defines the leftmost point that users can see. Thus, in order to get the axis (and circle) displayed in the center of the screen, the screen width is divided by 2 with a “-" sign (window.innerWidth / -2) to get the value of the attribute (min-x). Please note that it is necessary to divide it by (-2) so that your canvas shows the same number of points on both sides of the coordinate origin.min-y: determines the topmost point of the canvas. Here you need to subtract the valuewindow.innerHeightfrom100to set a specific area (100points) from the beginning of Y.widthandheight: determine the number of points along the X and Y axes, which the user will see on his screen.
In addition to defining an attribute viewBox, the new version also sets an attribute called preserveAspectRatio . You used xMaxYMax noneon it to force uniform scaling of your canvas and its elements.
( my installation preserveAspectRatiocaused a warning from react - translator comment )
After refactoring your canvas, you need to add the following rule to the file ./src/index.css:
/* ... body definition ... */
html, body {
  overflow: hidden;
  height: 100%;
}
This is to ensure that the elements (tags) htmland bodyhidden (and disabled) scrolling. In addition, the items will be displayed in full screen.
If you check the application right now, you will find that the circle is located at the bottom of the screen in the center horizontally.
Creating the Sky Component
After your canvas is set to full screen resolution and the origin is placed in its center, you can start creating real game elements. You can start with the design of the background element for your game - the sky. To do this, create a new file called Sky.jsxin the directory ./src/components/using the following code:
import React from'react';
const Sky = () => {
  const skyStyle = {
    fill: '#30abef',
  };
  const skyWidth = 5000;
  const gameHeight = 1200;
  return (
    <rectstyle={skyStyle}x={skyWidth / -2}
      y={100-gameHeight}
      width={skyWidth}height={gameHeight}
    />
  );
};
export default Sky;
You may be wondering why such a large area (width 5000and height 1200) is specified for the game . In fact, the width in this game does not matter. You just need to set it by a number sufficient to cover any screen size.
In turn, height is important. Since you set 1200 points on the canvas regardless of the resolution and orientation of the user's screen, this will give your game consistency and all users will see the same area. Thus, you can determine where the flying disks appear and how long they will go through the given points.
To display the sky (component Sky) on the canvas , open the file Canvas.jsxin your editor and correct it like this:
import React from'react';
import Sky from'./Sky';
const Canvas = () => {
  const viewBox = [window.innerWidth / -2, 100 - window.innerHeight, window.innerWidth, window.innerHeight];
  return (
    <svgid="aliens-go-home-canvas"preserveAspectRatio="xMaxYMax none"viewBox={viewBox}
    ><Sky /><circlecx={0}cy={0}r={50} /></svg>
  );
};
export default Canvas;
If you check the application ( npm start) now, you will see that the circle is still centered below, and your background has turned blue.
Note : if you add an item Skyafter the item circle, you will no longer see your circle. This is because SVG does not support z-index. SVG determines which of the elements is "higher", in accordance with the order in which they are listed. That is, you need to describe the element circleafter Sky, so that web browsers display it over a blue background.
Creating the Ground component
After creating the component Sky, proceed to creating the component Ground. To do this, create a new file Ground.jsxin the directory ./src/components/and add the following code:
import React from'react';
const Ground = () => {
  const groundStyle = {
    fill: '#59a941',
  };
  const division = {
    stroke: '#458232',
    strokeWidth: '3px',
  };
  const groundWidth = 5000;
  return (
    <g id="ground">
      <rect
        id="ground-2"
        data-name="ground"
        style={groundStyle}
        x={groundWidth / -2}
        y={0}
        width={groundWidth}
        height={100}
      />
      <line
        x1={groundWidth / -2}
        y1={0}
        x2={groundWidth / 2}
        y2={0}
        style={division}
      />
    </g>
  );
};
export default Ground;
There is nothing fantastic about this element. This is just the composition of the element rect(rectangle) and line(line). However, as you noticed, this element also contains a constant with a value 5000that determines its width. Therefore, it would be nice to create a file to save global constants like this.
Since we have come to this conclusion, create a new directory with a name utilsinside the directory ./src/and inside this new directory create a file with the name constants.js. At the moment, we have only one constant to store in this file:
// очень широко, чтобы наверняка занять весь экранexportconst skyAndGroundWidth = 5000;After that, you can refactor both components and Skyand Groundso that this constant is used in them.
Remember to add a component Groundto your canvas (remember that you need to place it between the sky and the circle element (i.e. between Skyand circle)). If you have any doubts about the last steps, please take a look at this commit .
Creating a Cannon Component
Elements have already been created in your game that define heaven and earth. As a next step, I want to add something more interesting. It might be worth adding components that will draw your gun. These elements will be a little more complicated than the elements described earlier. They contain a lot more lines of source code, but this is because you need to use cubic Bezier curves to draw them.
As you remember, cubic Bezier curves are defined by four points: the start, end and two control. These points are defined by the property ditem pathare as follows: M 20 20 C 20 110, 110 110, 110 20.
So that when creating curves in your code there is no repetition of such patterns, it is recommended to create a new file with a name formula.jsin the directory ./src/utils/and add a function that will return this line based on some parameters:
exportconst pathFromBezierCurve = (cubicBezierCurve) => {
  const {
    initialAxis, initialControlPoint, endingControlPoint, endingAxis,
  } = cubicBezierCurve;
  return`
    M${initialAxis.x}${initialAxis.y}
    c ${initialControlPoint.x}${initialControlPoint.y}${endingControlPoint.x}${endingControlPoint.y}${endingAxis.x}${endingAxis.y}
  `;
};
It is fairly simple code, it simply retrieves (destructuring) four attributes ( initialAxis, initialControlPoint, endControlPoint, endAxis) of the argument of the function called cubicBezierCurveand passes them to the template literal that will build the necessary cubic Bezier curve.
Using this file, you can start creating your gun. To maintain the structure, it is possible to conditionally divide the gun into two parts: CannonBase(base) and CannonPipe(muzzle).
To describe, CannonBasecreate a new file CannonBase.jsxinside ./src/componentsand add the following code to it:
import React from'react';
import { pathFromBezierCurve } from'../utils/formulas';
const CannonBase = (props) => {
  const cannonBaseStyle = {
    fill: '#a16012',
    stroke: '#75450e',
    strokeWidth: '2px',
  };
  const baseWith = 80;
  const halfBase = 40;
  const height = 60;
  const negativeHeight = height * -1;
  const cubicBezierCurve = {
    initialAxis: {
      x: -halfBase,
      y: height,
    },
    initialControlPoint: {
      x: 20,
      y: negativeHeight,
    },
    endingControlPoint: {
      x: 60,
      y: negativeHeight,
    },
    endingAxis: {
      x: baseWith,
      y: 0,
    },
  };
  return (
    <g>
      <path
        style={cannonBaseStyle}
        d={pathFromBezierCurve(cubicBezierCurve)}
      />
      <line
        x1={-halfBase}
        y1={height}
        x2={halfBase}
        y2={height}
        style={cannonBaseStyle}
      />
    </g>
  );
};
export default CannonBase;
With the exception of the cubic Bezier curve, this element is nothing new. As a result, the browser displays this element as a curve with a dark brown ( #75450e) border and “fills” its area with a light brown color ( #a16012).
The code to create CannonPipewill be similar to the code CannonBase. The differences are in other colors and in that it passes other points to the formula pathFromBezierCurveto draw a pipe. In addition, this element uses an attribute transformto simulate the rotation of a gun.
To create this item, add the following code to a new file CannonPipe.jsxinside the directory ./src/components/:
import React from'react';
import PropTypes from'prop-types';
import { pathFromBezierCurve } from'../utils/formulas';
const CannonPipe = (props) => {
  const cannonPipeStyle = {
    fill: '#999',
    stroke: '#666',
    strokeWidth: '2px',
  };
  const transform = `rotate(${props.rotation}, 0, 0)`;
  const muzzleWidth = 40;
  const halfMuzzle = 20;
  const height = 100;
  const yBasis = 70;
  const cubicBezierCurve = {
    initialAxis: {
      x: -halfMuzzle,
      y: -yBasis,
    },
    initialControlPoint: {
      x: -40,
      y: height * 1.7,
    },
    endingControlPoint: {
      x: 80,
      y: height * 1.7,
    },
    endingAxis: {
      x: muzzleWidth,
      y: 0,
    },
  };
  return (
    <g transform={transform}>
      <path
        style={cannonPipeStyle}
        d={pathFromBezierCurve(cubicBezierCurve)}
      />
      <line
        x1={-halfMuzzle}
        y1={-yBasis}
        x2={halfMuzzle}
        y2={-yBasis}
        style={cannonPipeStyle}
      />
    </g>
  );
};
CannonPipe.propTypes = {
  rotation: PropTypes.number.isRequired,
};
export default CannonPipe;
After that, wipe the circumference of the element to your canvas and add to it CannonBaseand CannonPipe. After refactoring the canvas, you will receive the following code:
import React from'react';
import Sky from'./Sky';
import Ground from'./Ground';
import CannonBase from'./CannonBase';
import CannonPipe from'./CannonPipe';
const Canvas = () => {
  const viewBox = [window.innerWidth / -2, 100 - window.innerHeight, window.innerWidth, window.innerHeight];
  return (
    <svgid="aliens-go-home-canvas"preserveAspectRatio="xMaxYMax none"viewBox={viewBox}
    ><Sky /><Ground /><CannonPiperotation={45} /><CannonBase /></svg>
  );
};
export default Canvas;
Running and checking the application will display the following vector graphics:
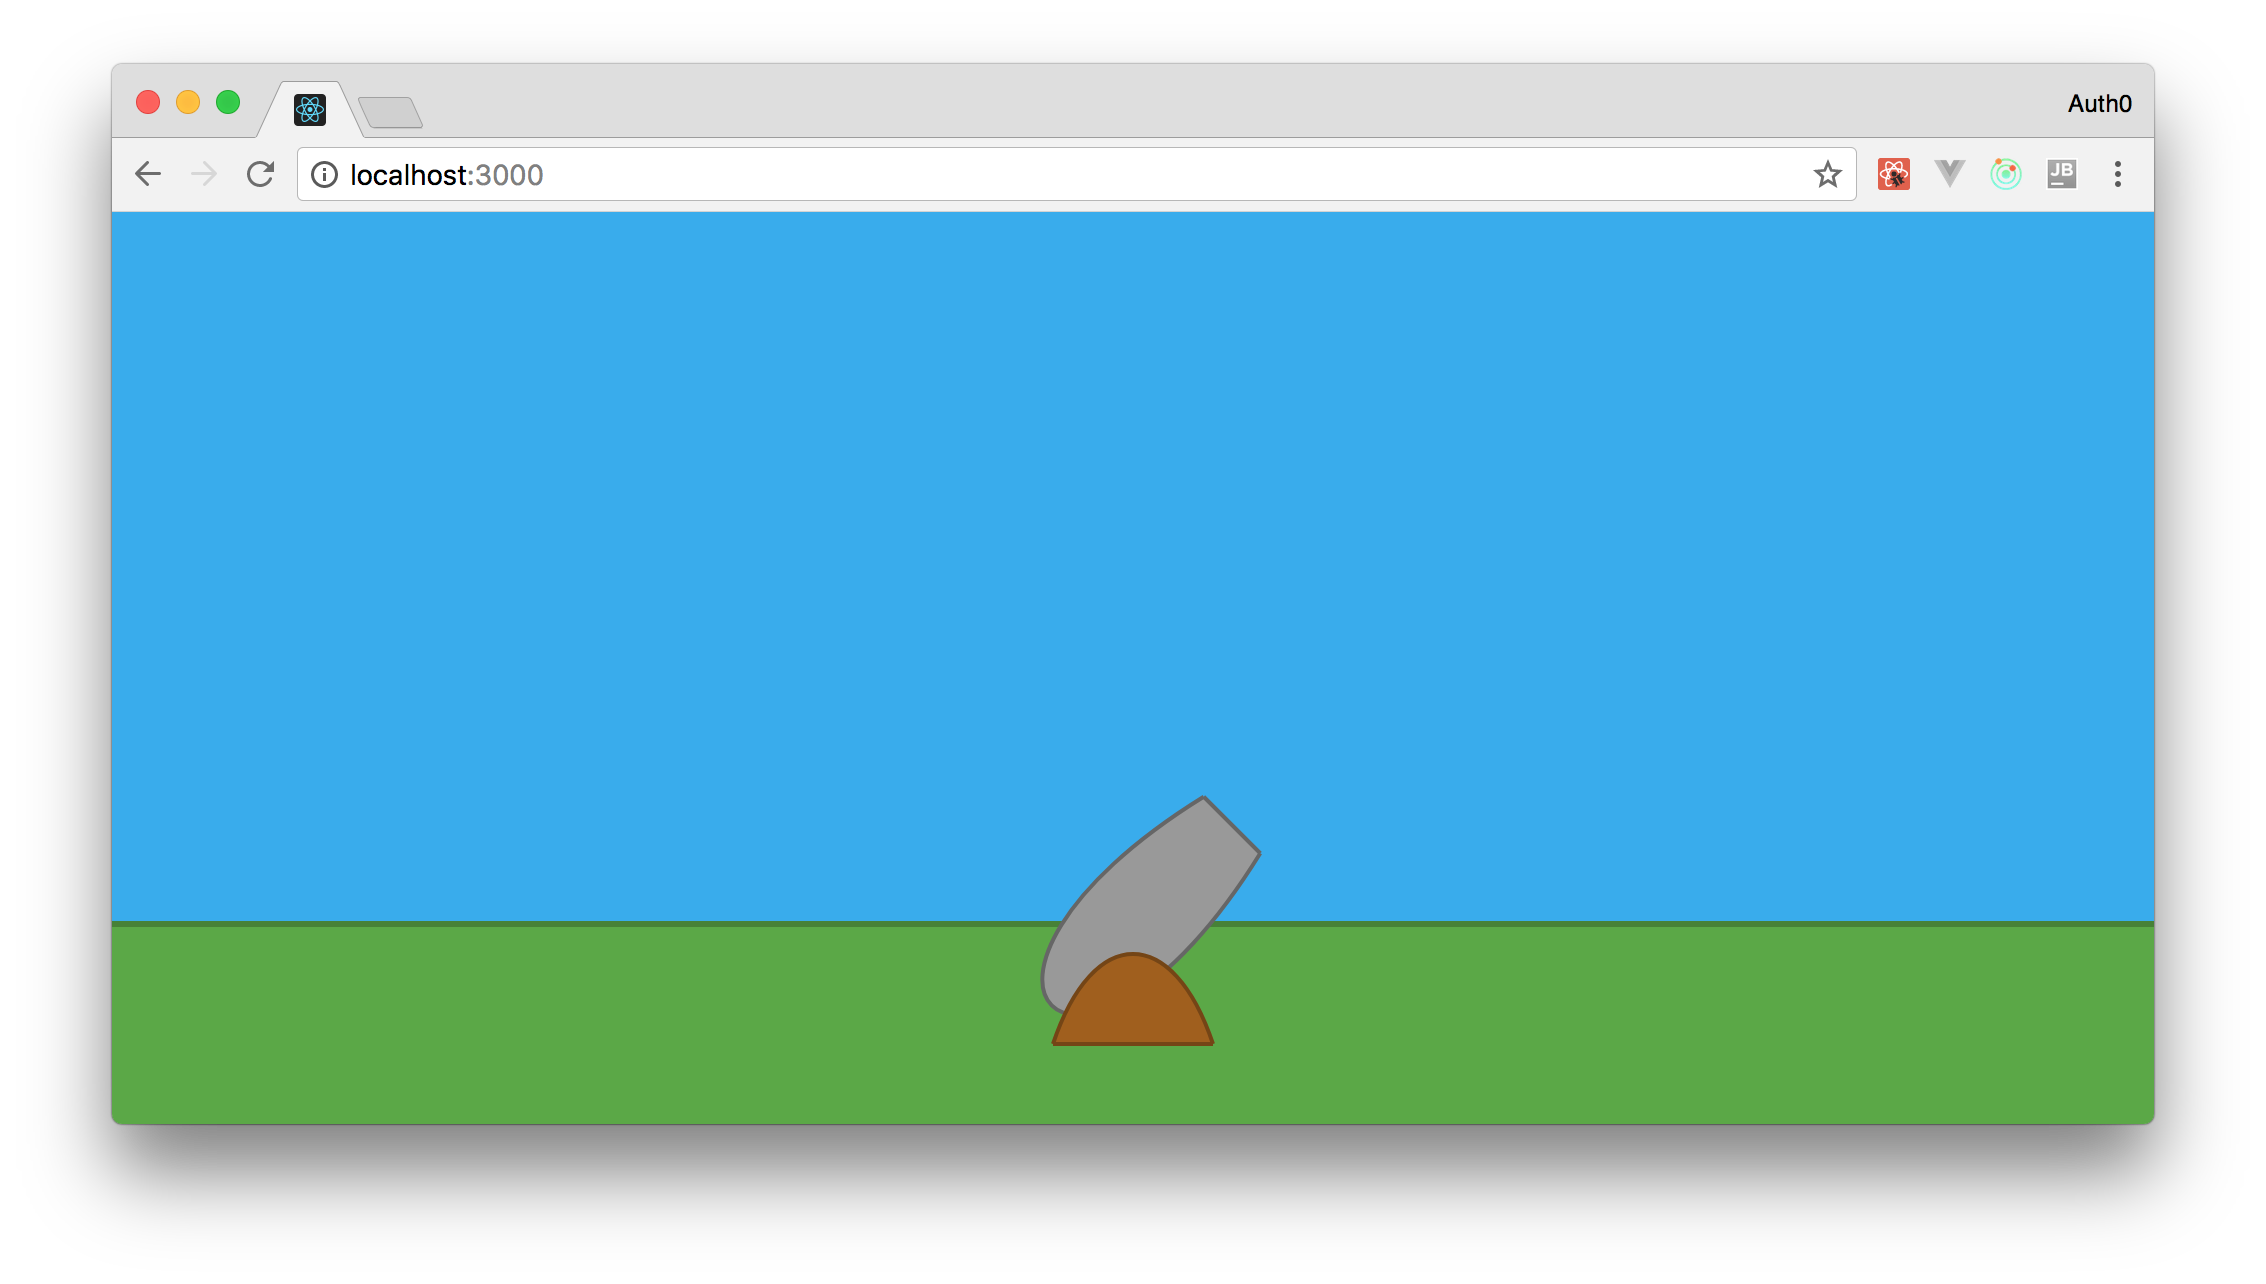
We train a gun to aim
Our process is gaining momentum! You have already created background elements ( Skyand Ground) and your gun ( CannonBase+ CannonPipe). At this stage, the problem is the lack of animation. Therefore, to do something interesting, you can focus on creating a sight. To do this, you can add an event listener onmousemoveto your canvas and configure it to be updated every time an event occurs, i.e. every time the user moves the mouse, however, this will affect the performance of your game.
To avoid this situation, you can set the interval at which you will check the last mouse position to update the angle of your element CannonPipe. In this case, you use a listener onmousemovewith the only difference being that these events will not cause frequent re-renderings (redrawings) of the entire canvas. Only the desired property in your game will be updated (gun angle), and the specified interval will use this property to start reprocessing (by updating the Redux repository).
In this case, for the first time you will need to use the Redux action ( action, action ) to update the state of your application (or, more precisely, the angle of inclination of your gun). Based on this, you create a directory with a name Actionsinside the directory ./src/. In this new directory you will need to create a file called index.jscontaining the following code:
exportconst MOVE_OBJECTS = 'MOVE_OBJECTS';
exportconst moveObjects = mousePosition => ({
  type: MOVE_OBJECTS,
  mousePosition,
});
Note: name this action MOVE_OBJECTS , as it will not only be used to update the gun. The following parts of this series talk about using this action to animate cannon balls and flying objects.
After determining this action, you need to fix the reducer (file index.jsinside ./src/reducers/):
import { MOVE_OBJECTS } from'../actions';
import moveObjects from'./moveObjects';
const initialState = {
  angle: 45,
};
functionreducer(state = initialState, action) {
  switch (action.type) {
    case MOVE_OBJECTS:
      return moveObjects(state, action);
    default:
      return state;
  }
}
exportdefault reducer;
The new version of this file checks the action, and if it has a type MOVE_OBJECTS, the function is called moveObjects. You should still set this function, but note that this version also defines the initial state of your application, containing a property called anglevalue 45. It is from this angle that your gun will be aimed after launching the application.
As you already noticed, the function is moveObjectsalso a reducer. In order to keep the project adequately supported and structured, it is recommended to save this function in a new file, since there will be a sufficient number of reducers in your game. So create a file moveObjects.jsinside ./src/reducers/and add the following code to it:
import { calculateAngle } from'../utils/formulas';
functionmoveObjects(state, action) {
  if (!action.mousePosition) return state;
  const { x, y } = action.mousePosition;
  const angle = calculateAngle(0, 0, x, y);
  return {
    ...state,
    angle,
  };
}
exportdefault moveObjects;
This code is quite simple, it only extracts the properties xand yfrom mousePositionand passes them to the functions calculateAngleto obtain a new angle. Then, finally, it generates a new state (new object) with a new angle value.
You probably noticed that you did not define a function calculateAnglein the file formula.js, right? Learning a mathematical expression for calculating a two-point angle of inclination is beyond the scope of this series, but if you're interested, follow the StackExchange link to understand how this happens. Finally, you need to add the following functions to the file formula.js( ./src/utils/formulas):
exportconst radiansToDegrees = radians => ((radians * 180) / Math.PI);
// https://math.stackexchange.com/questions/714378/find-the-angle-that-creating-with-y-axis-in-degreesexportconst calculateAngle = (x1, y1, x2, y2) => {
  if (x2 >= 0 && y2 >= 0) {
    return90;
  } elseif (x2 < 0 && y2 >= 0) {
    return-90;
  }
  const dividend = x2 - x1;
  const divisor = y2 - y1;
  const quotient = dividend / divisor;
  return radiansToDegrees(Math.atan(quotient)) * -1;
};
Note : the function atanperformed by the object Mathreturns the result in radians. You need to convert this value to degrees. For this, the function is applied radiansToDegrees.
After the new action and the new reducer have been defined, you need to use them. Since the state management of your game is based on Redux, you need to map the action ( action ) moveObjectsto the props ( properties ) of your component App. This is done by refactoring the container Game. Open the file Game.js( ./src/containers) and replace its contents with the following:
import { connect } from'react-redux';
import App from'../App';
import { moveObjects } from'../actions/index';
const mapStateToProps = state => ({
  angle: state.angle,
});
const mapDispatchToProps = dispatch => ({
  moveObjects: (mousePosition) => {
    dispatch(moveObjects(mousePosition));
  },
});
const Game = connect(
  mapStateToProps,
  mapDispatchToProps,
)(App);
exportdefault Game;
With this mapping in place ( mapStateToPropsand mapDispatchToProps) you can use the necessary data in the component Appas props. You need to open the file App.js(located at the address ./src/) and replace it with the following:
import React, {Component} from'react';
import PropTypes from'prop-types';
import { getCanvasPosition } from'./utils/formulas';
import Canvas from'./components/Canvas';
classAppextendsComponent{
  componentDidMount() {
    const self = this;
    setInterval(() => {
        self.props.moveObjects(self.canvasMousePosition);
    }, 10);
  }
  trackMouse(event) {
    this.canvasMousePosition = getCanvasPosition(event);
  }
  render() {
    return (
      <Canvasangle={this.props.angle}trackMouse={event => (this.trackMouse(event))}
      />
    );
  }
}
App.propTypes = {
  angle: PropTypes.number.isRequired,
  moveObjects: PropTypes.func.isRequired,
};
export default App;
Please note that the new version is significantly different. The following is a summary of the changes:
componentDidMount: You asked this method lifecycle ( lifecycle of method ) to start the interval ( the setInterval ), which causes the actionmoveObjects;trackMouse: set to updatecanvasMousePositioncomponent propertiesApp. This property is involved in actionmoveObjects. Note that this property is not related to the position of the mouse over the HTML document. The mouse position is calculated relative to the canvas . A function was also definedcanvasMousePosition.render: Required to pass the properties of the angle and the methodtrackMouseto your componentCanvas. This component usesangleto update the rotation of your gun andtrackMouseto attach to the SVG element as an event listener.App.propTypes: two properties are now defined here:angleandmoveObjects. The first sets the angle at which your gun aims. Second, moveObjects is a function that updates the position of the gun during the interval.
Update your Appcomponent and add the following function to the file formula.js:
exportconst getCanvasPosition = (event) => {
  // mouse position on auto-scaling canvas// https://stackoverflow.com/a/10298843/1232793const svg = document.getElementById('aliens-go-home-canvas');
  const point = svg.createSVGPoint();
  point.x = event.clientX;
  point.y = event.clientY;
  const { x, y } = point.matrixTransform(svg.getScreenCTM().inverse());
  return {x, y};
};
If you are wondering why this is necessary, check out StackOverflow .
To complete the development of the gun sight, you need to update the last part of the code - the Canvascomponent. Open the file Canvas.jsx(located in ./src/components) and replace its contents with the following:
import React from'react';
import PropTypes from'prop-types';
import Sky from'./Sky';
import Ground from'./Ground';
import CannonBase from'./CannonBase';
import CannonPipe from'./CannonPipe';
const Canvas = (props) => {
  const viewBox = [window.innerWidth / -2, 100 - window.innerHeight, window.innerWidth, window.innerHeight];
  return (
    <svgid="aliens-go-home-canvas"preserveAspectRatio="xMaxYMax none"onMouseMove={props.trackMouse}viewBox={viewBox}
    ><Sky /><Ground /><CannonPiperotation={props.angle} /><CannonBase /></svg>
  );
};
Canvas.propTypes = {
  angle: PropTypes.number.isRequired,
  trackMouse: PropTypes.func.isRequired,
};
export default Canvas;
Differences from the previous version:
CannonPipe.rotation: Now this property is programmed more flexibly. It is tied to the state of the Redux store by mapping ( those functions (mapStateToProps and mapDispatchToProps) inside the connect function, inside the Game container - translator comment ).svg.onMouseMove: This event listener has been added to the canvas to determine mouse position.Canvas.propTypes: for complete happiness, this component is necessaryangleandtrackMouse.
It happened! You can look through the sight at your enemy. Go to the root of the project in the terminal and enter npm start(if it is not already running). Then openhttp: // localhost: 3000 / in a web browser and move your mouse. This will set your gun in motion.
And how do you have fun ?!
Conclusion and next steps
In the first part of this series, you got acquainted with some important topics, the knowledge of which will help you in creating the full version of the game. You also used the application create-react-appto quickly start your project and created some game elements, such as a cannon, sky and earth. In the end, you equipped your gun with a sight. With these elements, you can create the rest of the elements and make them animated.
In the next article in this series, you will create these elements and make flying disks appear randomly in predetermined positions. After that, you will teach your cannon to shoot nuclei.
It'll be cool!
Stay in touch!
From translator
I think that sometimes it’s useful to distract from “serious” projects. What do you think?
Only registered users can participate in the survey. Please come in.