Connecting Fanvil phones to 3CX via the L2TP tunnel on Mikrotik
- Tutorial
- Recovery mode
Introduction
In this article, I will describe my experience in connecting Fanvil X2, X3S, X4, X5S, and X6 phones (the new line of Fanvil IP phones) to the 3CX server through the L2TP VPN tunnel built into the phone firmware.
First of all, I will explain why this is necessary. Suppose you have a remote employee (or even several) working from home. You can connect his “home office” via VPN, however, this requires VPN support from his home router and setting various restrictions on access to corporate resources from this employee’s home network. You can also connect the phone directly through the RPS server, as described in this guide . However, the drawback of this approach is that you have to open the 5060 SIP port for the whole world. Although in 3CXa very thorough system of its own security , use this configuration with caution. The second problem is that not all routers “allow” IP phones to work correctly through NAT . In addition, you will not be able to quickly connect to the web interface of the IP phone (because it is located in the user's home network).
A good way to connect remote users is implemented by the proprietary 3CX Tunnel technology in the 3CX SBC utility . But in this case, you have to install the device like Raspberry Pi or install the utility on the user's PC . The disadvantage is that communication will be only when the computer is running.
Connecting the phone via the L2TP VPN tunnel eliminates almost all of these disadvantages:
- The phone looks local to 3CX - no need to open the SIP port and you can easily connect to the device’s web interface
- No need to use 3CX SBC
- Very easy setup
Note! According to Fanvil documentation , the L2TP tunnel does not encrypt traffic. The OpenVPN tunnel can do this, but its configuration is rather laborious and is beyond the scope of this article. Also, traffic encryption is implemented in 3CX Tunnel technology.
Connection setup consists of three steps:
- Modification of the stock template Fanvil
- Phone auto-tuning with a modified template
- Configure L2TP tunnel on the Mikrotik router and create users
- Connection check
Modification of the stock template Fanvil
Modification of the template is needed to automate the configuration of the L2TP tunnel on phones (so as not to configure the address and tunnel credentials manually on each phone). The easiest way is to use the same credentials for the L2TP user as for the SIP account. These parameters will be automatically inserted into the template through 3CX auto-tuning variables .
To understand what exactly needs to be changed, we will do two things.
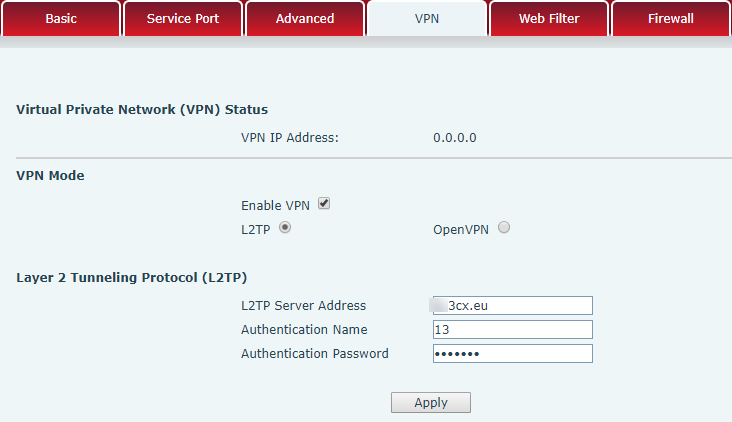
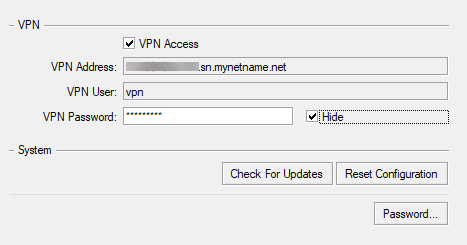
Configure L2TP manually as you need (Network Section - VPN).
Open your phone’s configuration (System - Configurations) and search for vpn for it.
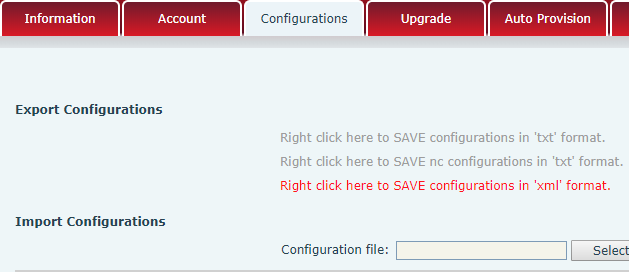
Here's what you need to change in the 3CX stock template.

Copy the template, call it fanvil_l2tp and specify the following variables:
- VPN Mode - 1 (L2TP)
- L2TP_LNS_IP - external address / name of the 3CX server
- L2TP_User_Name - SIP username
- L2TP_Password - SIP user password
- Enable_VPN_Tunnel - 1 (On)

Click OK and the template is ready.
Phone auto-tuning with a modified template
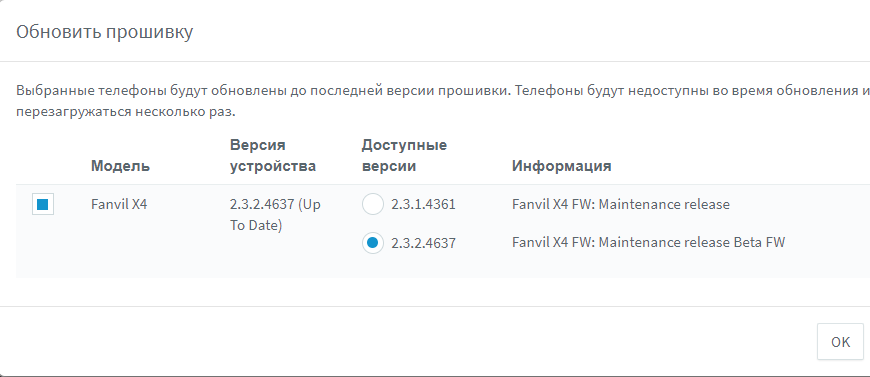
Now the template can be configured phones. However, before doing this, be sure to manually flash them with officially supported 3CX firmware so that 3CX auto-tuning templates can be correctly applied to them.
After manual firmware, configure the phone on the local network with the stock template from 3CX, as indicated here . You can then re-update the firmware, if available. But now this is already done automatically from the section of the 3CX Phones management interface - the Firmware button.
After the phone has been successfully flashed, configured and connected, go to the Users - User - Auto phone settings section, delete the attached phone (stock template) and replace it with the modified template.
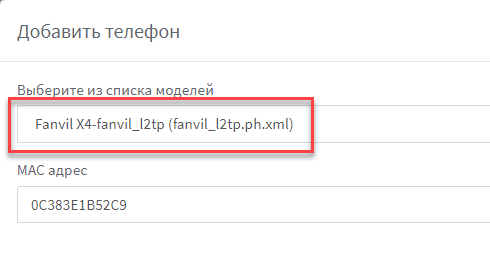
After that, go to the Phones section, select the user and click the Reconfigure button.
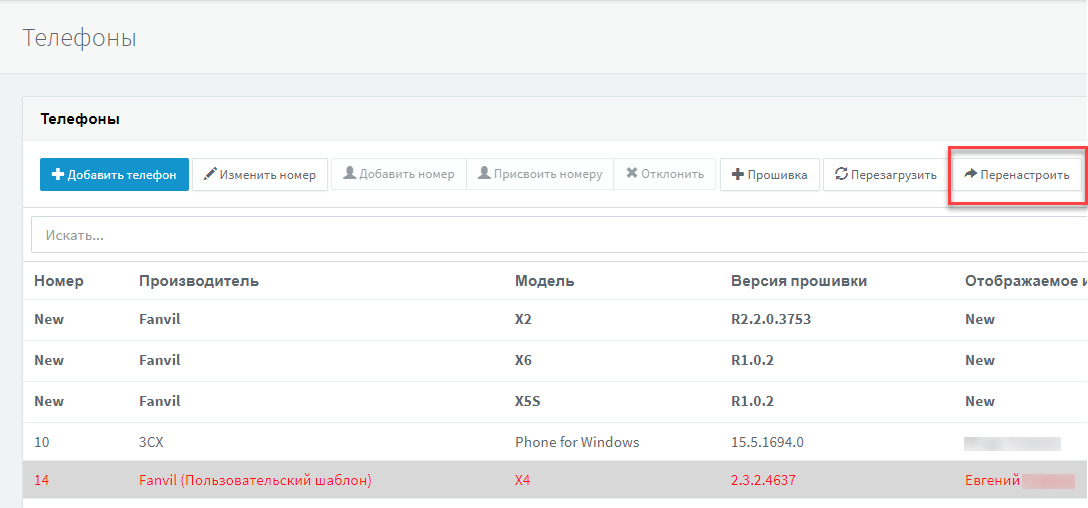
The phone will update the template and enable the L2TP tunnel.
Note! Modified templates are not officially supported by 3CX.
Note! When the updated 3CX stock template is released, you should again create a modified version of it and reconfigure the phones.
Configure L2TP tunnel on a Mikrotik router
There are many similar guides to setting up an L2TP tunnel in Mikrotik. I will describe the fastest way, which, however, requires some modifications.
If you have a new router, configure it through the Quick Set menu and enable VPN access.
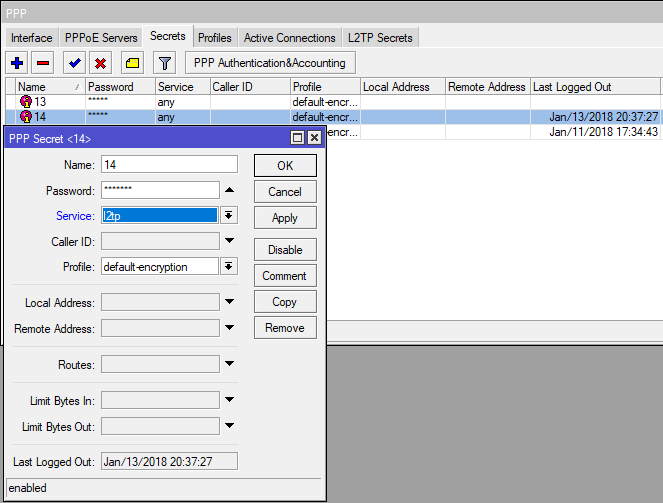
Note! On the router, go to the PPP - Profiles - default-encryption section and be sure to specify the DNS server that will be issued to the phones. Without this setting, Fanvil phones will not connect.

In the screenshot above, the local address of the L2TP server is 192.168.89.1, the addresses for phones are issued from the vpn address pool, and the DNS server is the IP address of the Mikrotik local network interface (or bridge).
Now, in the PPP - Secrets section, add the phone authorization credentials. As said, they match the SIP credentials. If you want to automate this, export users from 3CX, edit the export file and create users with a script in Mikrotik. We will omit this process.
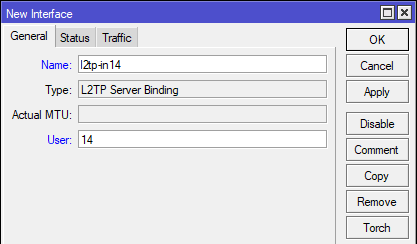
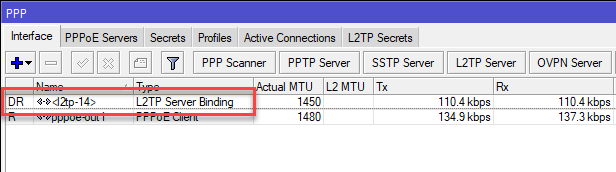
If you want to use IP phone connections (L2TP interfaces) in different router rules, I recommend creating an L2TP Server Binding for each phone (PPP - Interface - L2TP Server Binding). This allows you to create static interfaces that will not disappear from the rules when you disconnect the VPN client.
This completes the setup of the Mikrotik L2TP server.
Connection check
Turn on the phone on the remote network. It should get the IP address from your L2TP server.

And successfully register for 3CX.

The corresponding dynamic L2TP interface should also appear on Mikrotik.
Dial * 777 on the telephone (3CX echo test). Talk into the phone - you should hear yourself. This means that the connection is working correctly.
Conclusion
While testing various Fanvil models, I noticed that the X2, X3S, and X4 phones connect and work correctly. At the same time, the X5 and X6 models do not connect via VPN. Perhaps the matter is in the firmware of the phone. We are currently working on this issue with Fanvil technical support.