Create the simplest VR demo with Unreal Engine
- Transfer
As virtual reality becomes mainstream, more and more game developers are expressing a desire to create new content for devices like HTC Vive and Oculus Rift. Of the available engines, two stand out especially: Unreal Engine and Unity3D. In this article, we will look at the process of developing a small demo based on the Unreal Engine. We are making a level at which it will be possible to move freely, as well as take or destroy objects.
What is Unreal Engine?
This is a game engine created at Epic Games in 1998. At first it was used to create the Unreal shooter, and since then the engine has created a number of large and complex games (including Unreal Tournament, Bioshock, Mortal Kombat X and many others ) Unreal Engine provides programmers with two sets of tools: traditional C ++ and the Blueprints visual scripting system , which allows you to quickly develop game logic.
VR support has appeared since the fourth version, in 2012. The first supported device is the Oculus Rift DK1. Today, the engine already works with all major devices.
Until March 2015, developers had to buy a license, but then the engine became free. The only condition is that if the profit from a game created on the Unreal Engine exceeds $ 3,000, you need to pay 5% of the royalties .
Alternative
Alternatively, you can use the Unity3D engine to create VR games. It is younger and was originally sharpened for mobile games, although its 2D functionality is very developed. And due to its popularity and flexibility, the engine is actively used to create desktop games and VR content. You can create games in Unity3D using C # , JavaScript, or Boo . As is the case with Unreal, the engine is free.
For this article, I chose Unreal Engine to show the process of creating a desktop game that will work on the most advanced VR devices. Also, this engine allows you to make prototypes very quickly.
Why is it worth developing VR products?
In recent years, VR technology has reached new levels of immersion. So users will be much more interested in VR games than in 3D and 2D. And since we have the opportunity to create new impressive content, we need to take a logical step and do it.
From the point of view of the developer, VR poses a number of new challenges related to the interaction and management of various elements of the game. This includes storytelling, sound design, movement, and more. Given that future games will be created with VR in mind, we already have a chance to change the world of games and entertainment.
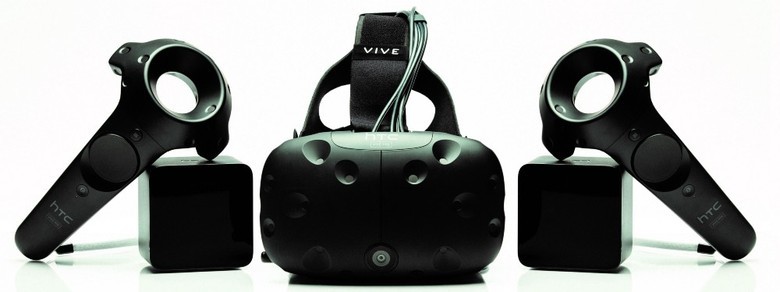
Device selection
I chose HTC Vive because:
- We are creating a demo for desktops (this automatically excludes from consideration mobile devices like Samsung Gear VR, Google Daydream, and so on).
- HTC Vive allows you to use roomscale (Oculus Rift will also soon get this opportunity).
- HTC Vive already has two motion controllers (Oculus Rift Touch needs to be bought separately)
Since we want to use controllers to interact with objects, the choice of HTC Vive is obvious.
VR setting
We take the glasses HTC Vive, a powerful computer and go through the checklist:
- Check that everything is connected correctly. Instructions .
- Install Steam and SteamVR.
- Check that the firmware on the glasses and all controllers is updated.
- Run “Room setup” and “Tutorial” to configure roomscale. Check that everything is working correctly.
- Download and install Unreal Engine (version 4.13.2).
Now you can start the demo.
Demo implementation
Before starting development, you need to arm yourself with knowledge on how to work with Blueprint. We will take a step-by-step process of creating a new project, adjusting the level and creating simple game logic, so that you can point to an object, press the shutter and destroy it.
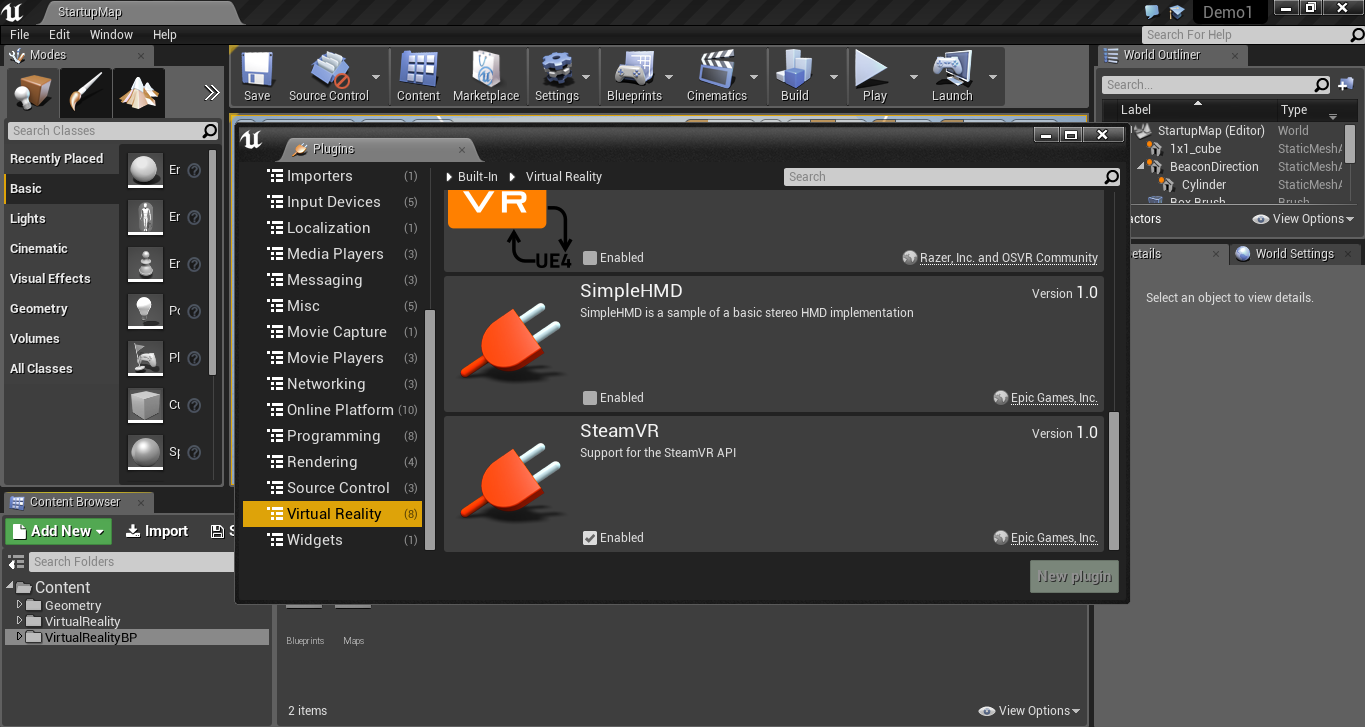
Launch Unreal Engine and go to the New project tab . In the Blueprint section, select Virtual Reality . In the project settings ( Project setup ), select Desktop / console , Maximum Quality and No starter content (without initial data), and in the Location (location), specify the path to the project files.

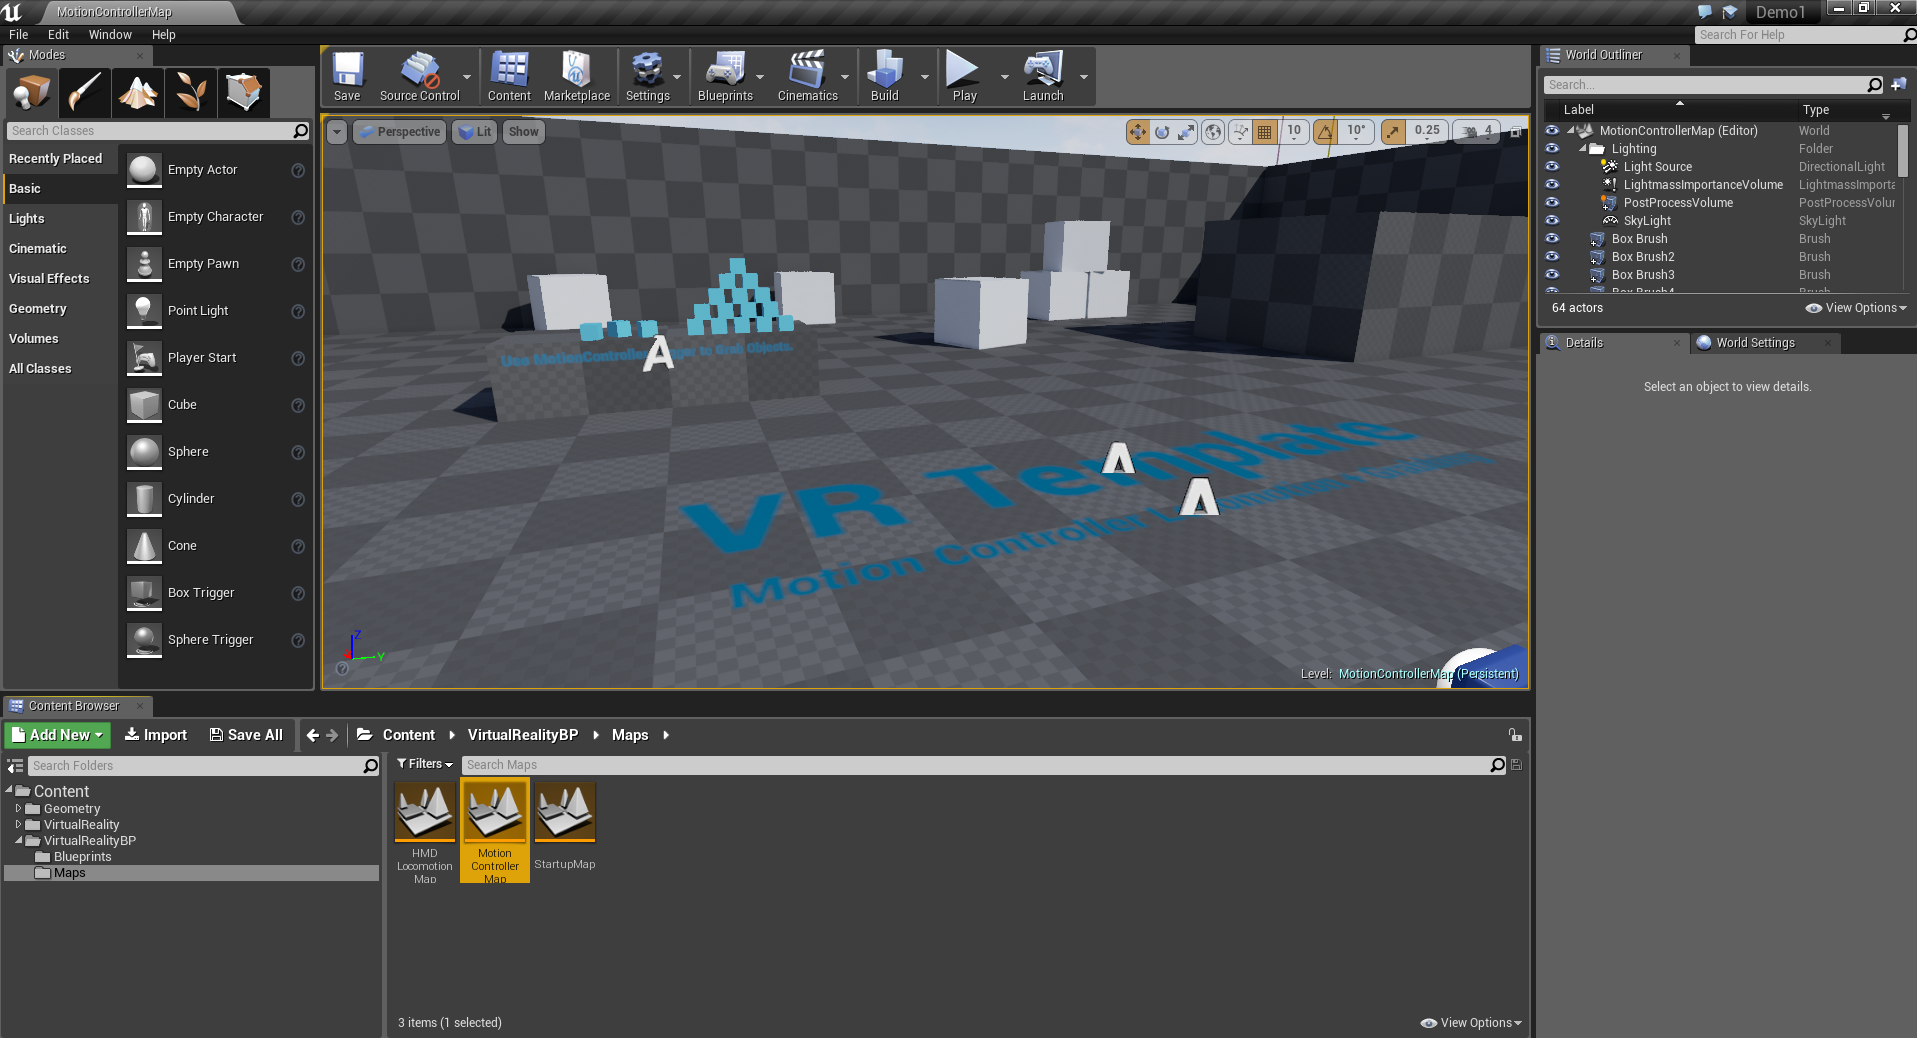
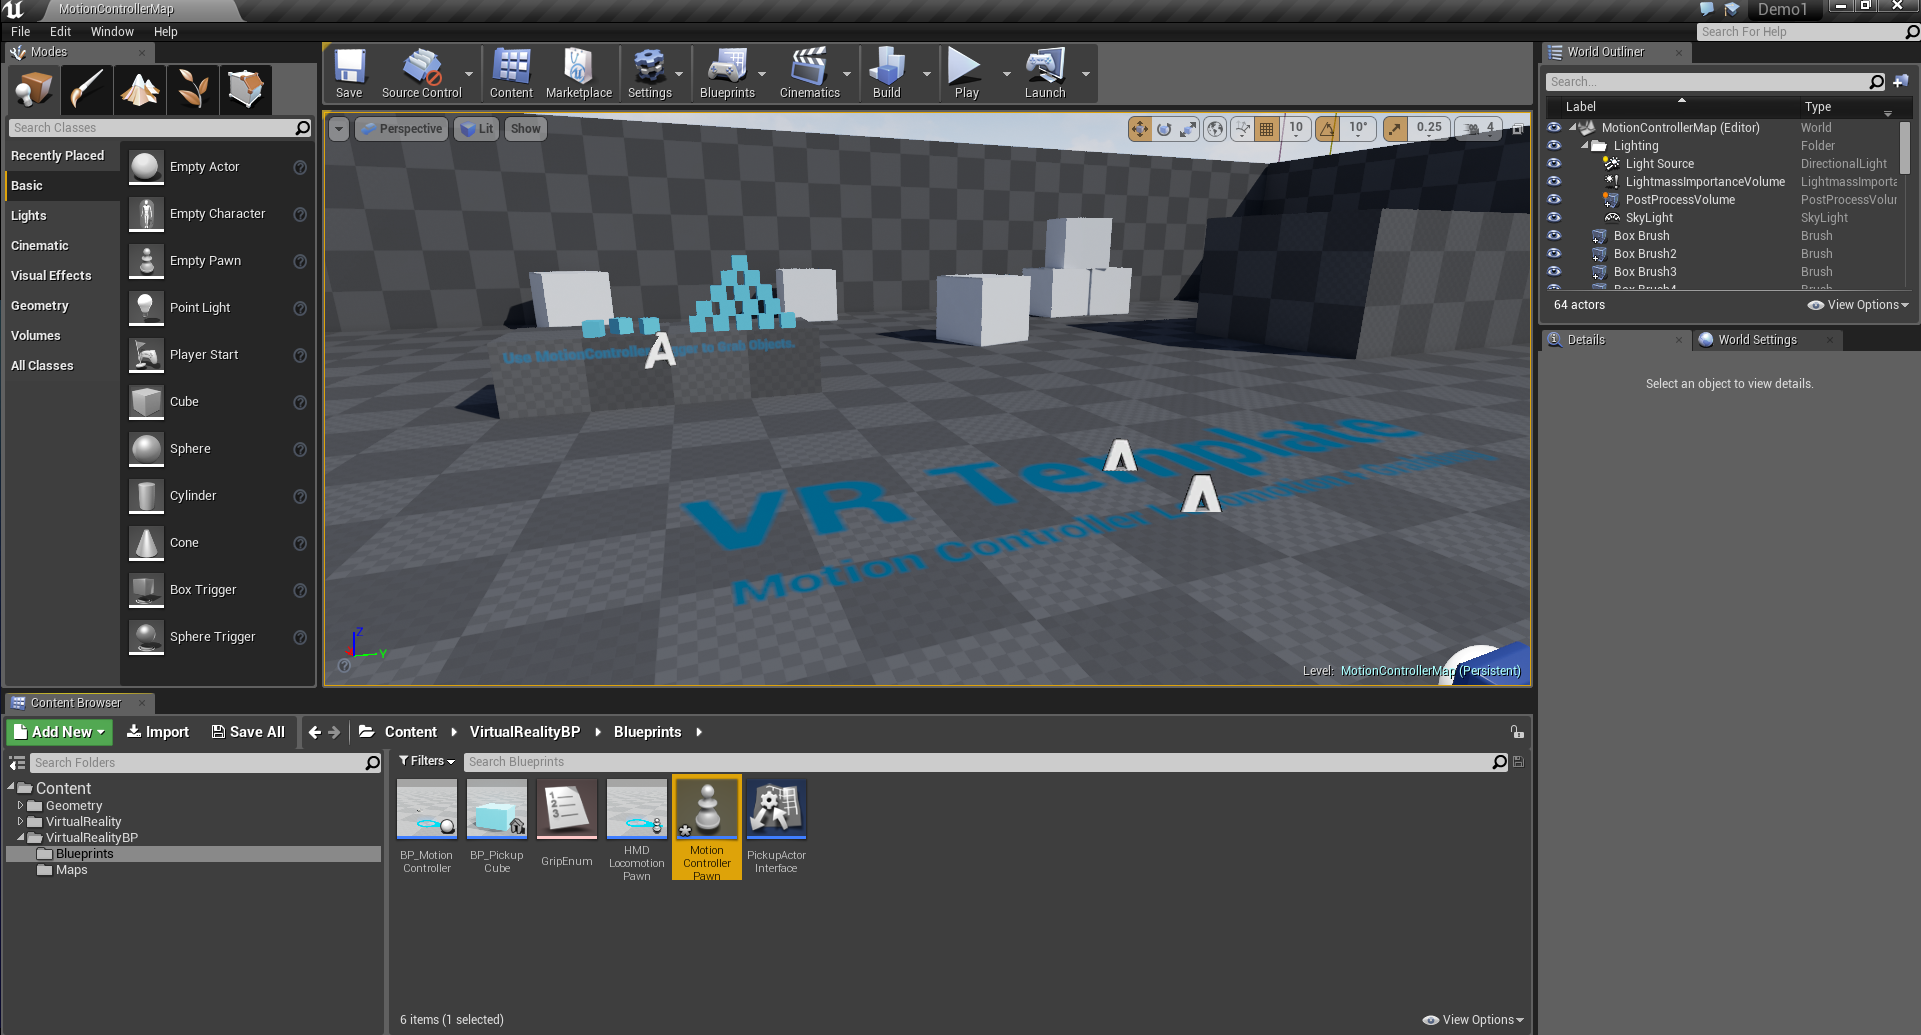
Go to the plugins menu and confirm in Virtual Reality that we have the “SteamVR” plugin enabled. In the content browser, go to the VirtualRealityBP / maps folder and open “MotionControllerMap”. We will see a pre-generated level that you can use. Here we can apply a variety of actions. For example, grab objects and teleport a player by level. Experiment to make sure everything is working correctly. Now let's introduce the logic of destroying an object when we hover over it and press the shutter. To do this, in VirtualRealityBP / Blueprints, open the Blueprint “MotionControllerPawn”.

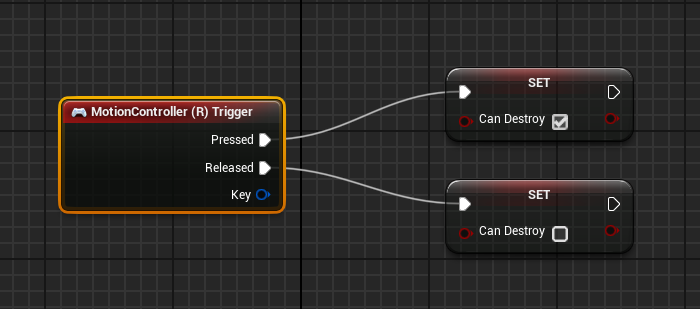
Raise the “MotionController ® Trigger” event for the right hand and set a Boolean value (true / false) to press and release the shutter button:
For the Tick event, create a line of sight (linetrace) to know which object we are aiming at. To do this, set the start and end points. For the starting point, we bind Right Controller , Motion Controller and get GetWorldLocation .
We also connect Get Forward Vector with Motion Controller . Thus we will receive the direction of aiming by the controller. We multiply this vector by the required distance (say, by 1000 = 10 meters) and add to the starting location, thereby obtaining the end point.
Add the LineTraceByChannel module , connect the start and end points, in the Draw Debug Type tab, select One Frame . This option means drawing a line between the start and end points. Next, go to the output of Break Hit Result , for Hit Actor we make the transition Cast to BP_PickupCube . This means that at the level we can only select blue cubes. Now we throw the branch and check the Boolean value for the previously created Can Destroy . If it is false, then we do nothing. If true, then call the DestroyActor module to destroy the selected object.


Done. You can click the Play button, select VRpreview and try your creation.
Final word
As you can see, everything is simple. The engine offers us content prefixes that greatly facilitate the first steps for beginners. Moreover, Unreal allows us to distance ourselves from equipment (for example, we do not need to think about tracking devices or how to render an image with glasses). This allows you to focus on the content itself.
In my experience, Blueprints are a great way to create game mechanics in a few clicks. Based on the demo we created, you can easily understand the process of VR development on the Unreal engine, mastering increasingly complex schemes and game activities. It's time to create the future of virtual reality.