Creating materials for Unity in Substance Designer
- Transfer

Terrible torment
Texturing and creating game materials has always been interesting ... and painful work at the same time. Before switching to Substance Designer, I used to create all the necessary Photoshop and xNormal maps. I had to switch between these two applications many times, and it bothered me. Now I got rid of this problem.
Substance Designer (SD) is software that allows you to create materials and textures on the fly. It uses a surprisingly simple node system. I am an artist, and usually I was very scared of working with nodes (and generally everything except the brush). Honestly, when I first saw SD, I flinched slightly. Fortunately, the authors of the program have videos that demonstrate its capabilities. They give such a motivating “kick” that you have to make a “leap of faith”.
Why SD?
First, let’s decide why we decided on Substance Designer? The first reason is that Unity switched to a new material system called PBS, Physically Based Shading, which is well described in this amazing post . We wanted to use this new technology to the maximum.
The second reason is that in Antegods we wanted to explore the area of procedural generation. SD has surprisingly fast algorithms that allow you to create materials almost instantly. With one click or adding a new node, you can significantly change the appearance of the entire material.
The final reason is that the workflow for migrating materials to Unity is simply flawless. You can export all the material to Unity, change it already there ... and everything works without problems!
Examples
Here are examples of materials we created in Substance Designer.

The SD learning process never ends. There are so many ways to achieve the same result, and some are better or faster than others.
Looking for gold!
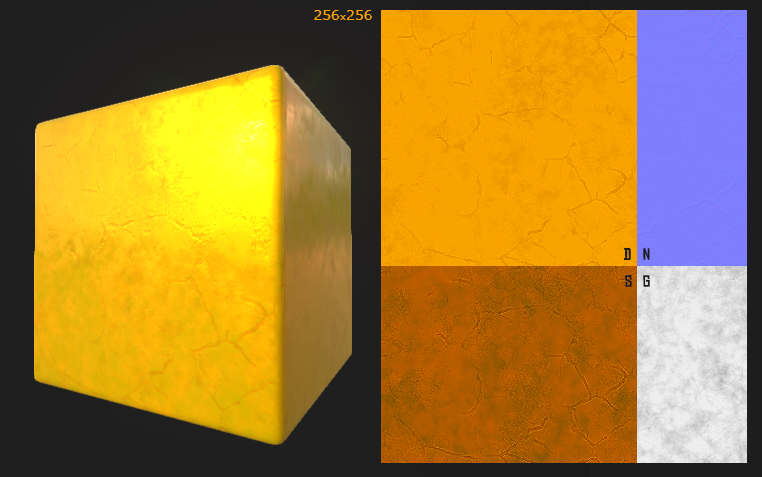
Now I will show you a small example of creating gold. Alchemists have tried to get it for centuries, and this is very important material for our game, based on an ancient Latin American culture.
If you know Substance Designer perfectly, you'll probably see a way to make the material much better. If so, then tell us! On the other hand, if you are a complete newbie to this software, I suggest you first watch the very useful Allegorithmic instructional videos .
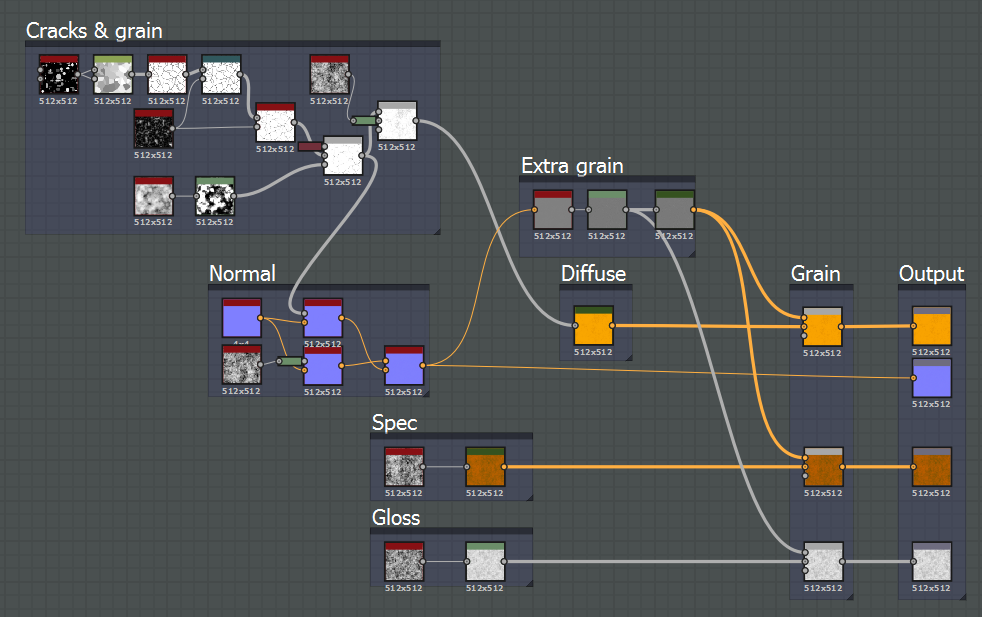
Material "gold" is actually quite simple to create, but it still requires a lot of settings. Here's what the final graph looks like in Substance Designer.
I usually start by specifying Specular / Glossiness. Mostly because I'm more used to them than to Metallic / Roughness. This may already be strange, because Metallic / Roughness is the standard in Unity.
Secondly, I needed a beautiful metal or stone structure with cracks and dents.

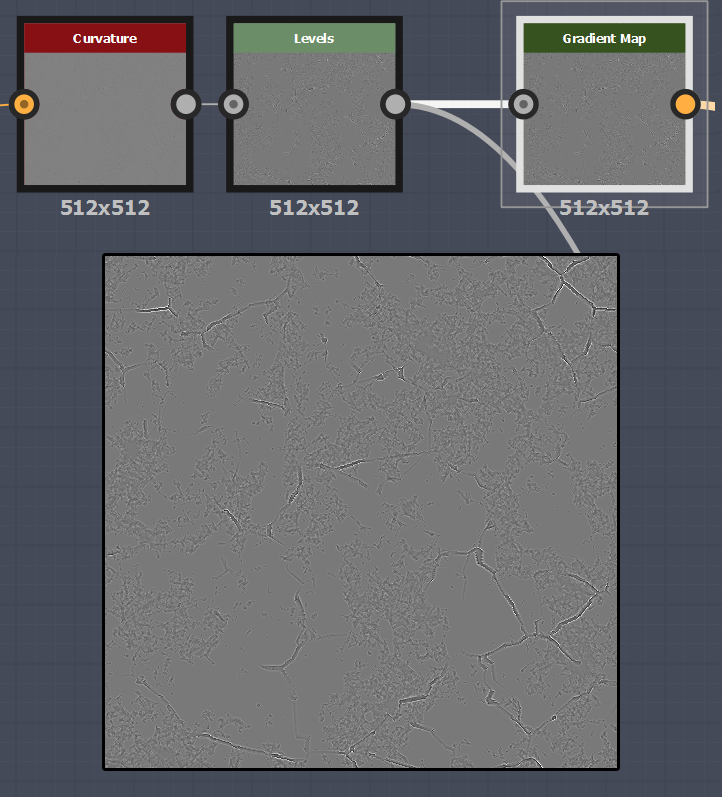
Cracks & Grain is a very subtle structure that is mostly visible on the Normal map, and very little on the Diffuse map. I started with a mosaic pattern and connected it with the Clouds nodes to get a subtle structure here.

I wanted the cracks to appear more in Normal than in Diffuse, so I placed the node right in front of the exit so that it was in the part with the normal maps.

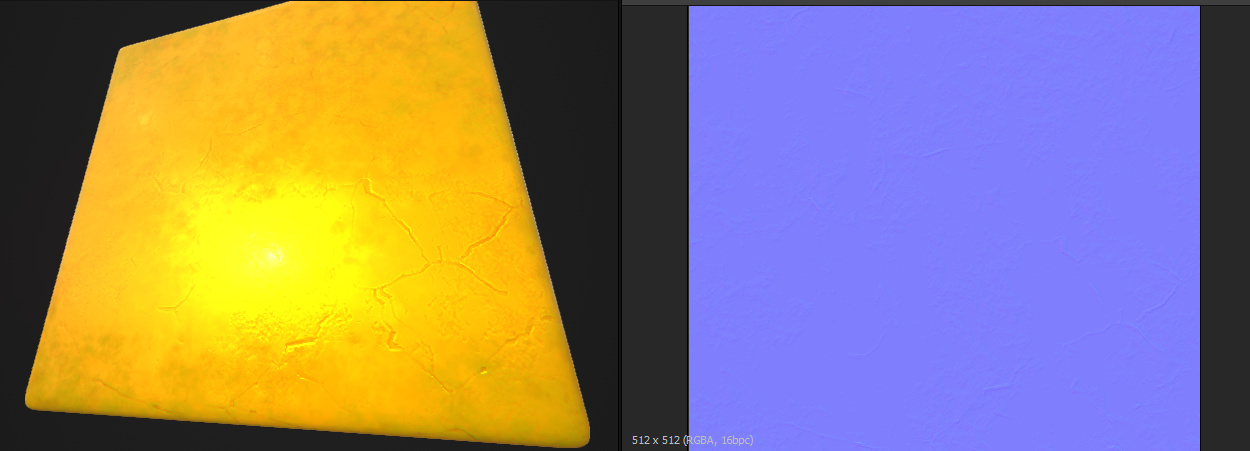
For credibility, the gold should be as smooth as possible, otherwise we will get a yellow foil. Therefore, the normal map is very poorly expressed, but it is still visible.
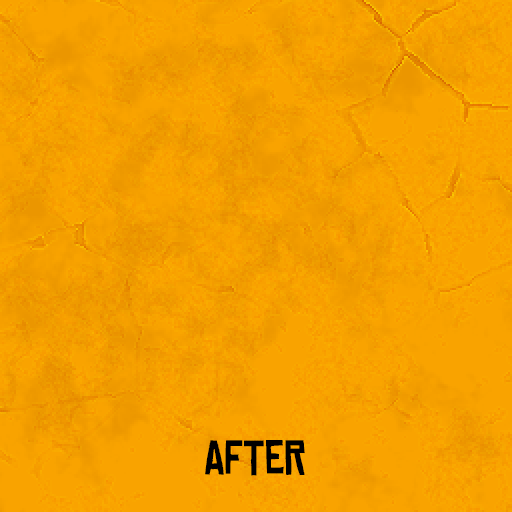
By adding a simple gradient map to the Cracks & Grain map, I can quickly create a Diffuse map.
But we are missing something. It’s convenient in Substance Designer that you can work with previously created cards. Here I took a normal map, turned it into a Curvature map, increased the values and turned it all into a color map. (Grayscale and Color maps do not mix.)
Mixing them on top of an existing Diffuse map gives us a slightly more interesting texture.
And finally, for reflection (Specular) I used a simple Clouds node. Using a gradient map, I applied slightly darker colors than in a diffuse map, and added details on top using curvature with increased values.
For Glossiness, I used the same Clouds node, brightened the result (the brighter, the more gloss), added enlarged Curvature details, and that’s it!

It remains to export the material by simply clicking on Export. SD exports the .sbsar file to Unity, and it works exactly like the material. It automatically places the cards in the right places, after which it allows you to configure. I must say that the materials in Unity look a little different than in the Substance Designer itself, but maybe the software developers fixed it in the latest update.
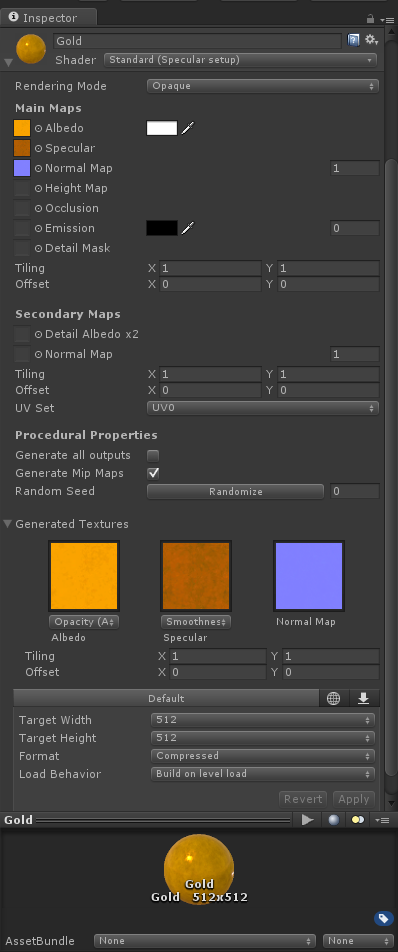
That's all, the material is already in Unity. As you can see, there are settings below. For example, you can quickly change the size of the texture, which is very convenient if you need to reduce the scale of the project.
There is also a Randomize button. When it is pressed, the material changes all the generated values. Now my gold does not look the best, because it always uses small values for clouds and cracks. However, if you slightly increase the value of cracks and click the Randomize button, the following will happen:

This is close to the procedural generation we need. Each time the material will look a little different.
But SD is capable of more: you can reveal the necessary nodes and functions. After that, they become visible in Unity, and they can be customized. In my example, I uncovered two functions: the number of cracks along the X and Y axes. In the editor, you can drag the sliders, adjusting the material to your taste.

Recommended!
In conclusion, I recommend Substance Designer to anyone who works with textures and materials. This software provides great freedom and allows you to quickly achieve amazing results. It has so many functions that it seems to me that you can create almost everything.
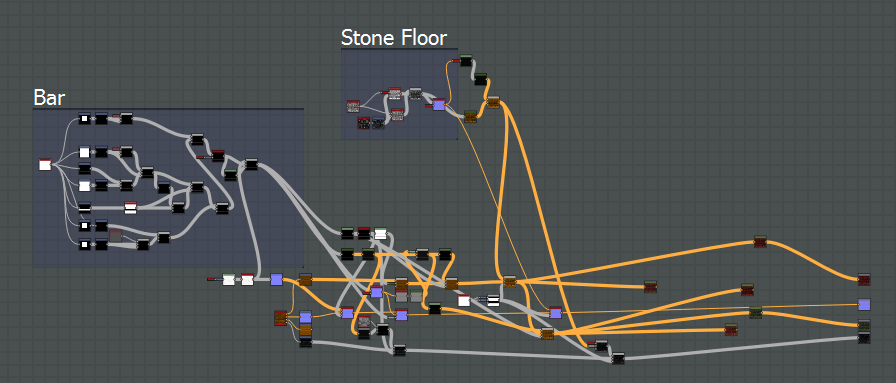
And goodbye, here are a few graphs that we created while mastering the program. Good luck in job!

Game Antegods supported Dutch Cultural Media Fund (Dutch Cultural Media Collection), Cultural Industries Fund NL (the Dutch Foundation for Cultural Industries) and the European Union Program MEDIA.