AWS ElasticBeanstalk: Tips and Tricks
AWS ElasticBeanstalk - PaaS based on AWS infrastructure. In my opinion, a significant advantage of this service is the ability to directly access infrastructure elements (balancers, instances, queues, etc.). In this article I decided to collect some tricks to solve typical problems when using ElasticBeanstalk. I will complement as new ones are found. Questions and suggestions in the comments are welcome.

In my opinion, the obvious drawback of the platform is the indistinct mechanism of configuration storage. Therefore, I use the following methods to add configuration.
The most obvious and native for ElasticBeanstalk is setting through environment variables. Inside the instance, these environment variables are not accessible as usual, but exclusively in the application environment. To set these parameters, it is most convenient to use the eb setenv command from the awsebcli package, which is used to deploy the application (suitable for small projects), or the AWS API.
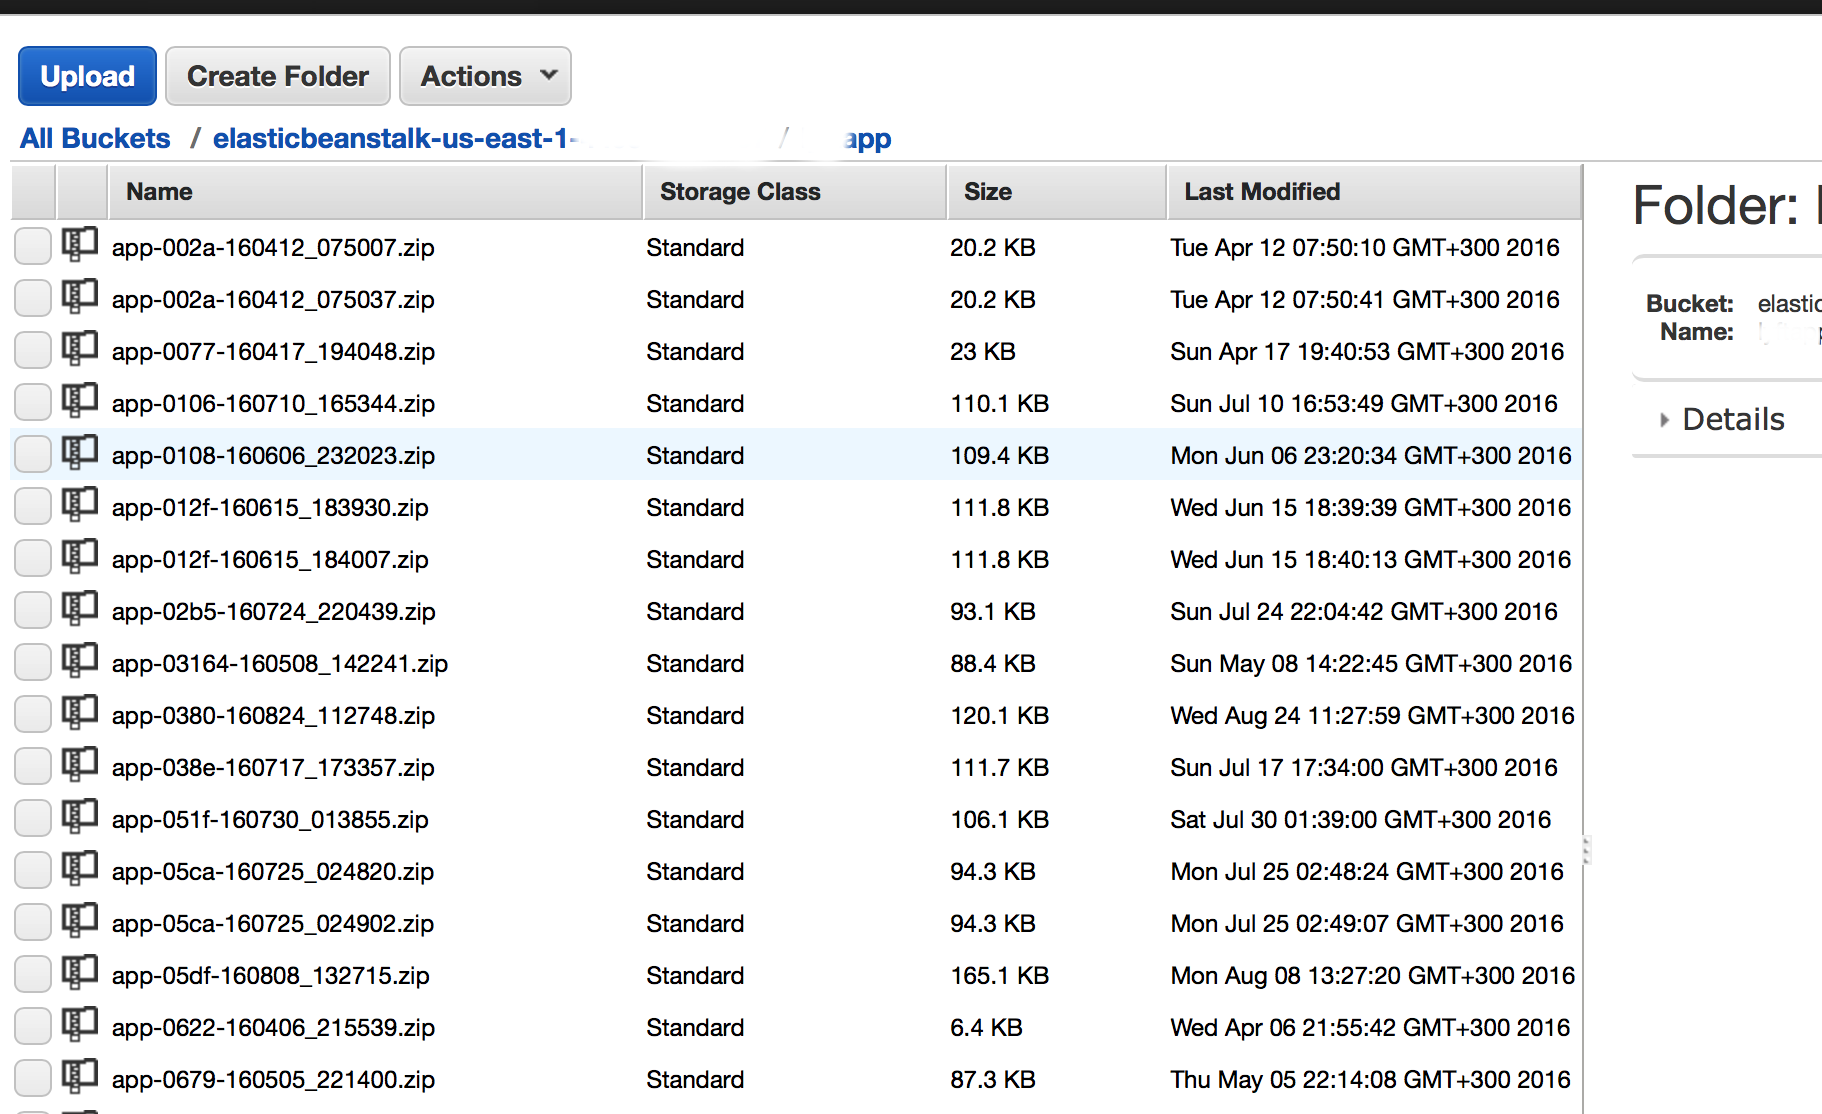
The second option is when the config is injected into the created version of the application. To do this, you need to explain how the deployment process takes place. Manually or with a script, a zip archive is created that contains the application code, is laid out on a special S3 bucket, unique for each region (of the type elasticbeanstalk- <region_name> - <my_account_id> - do not try to use another, it won’t work - it’s checked). You can create this package manually or edit it programmatically. I prefer to use an alternative deployment option when instead of awsebcli I use my own version package creation code.

The third option is to load the configuration remotely during the deployment phase from an external configuration database. IMHO the most correct approach, however, is beyond the scope of this article. I use a scheme with storing configs on S3 and proxying requests to S3 through the Gateway API - this allows the most flexible configuration management. S3 also supports versioning.
ElasticBeanstalk supports creating tasks for the scheduler using the cron.yaml file. However, this config only works for the worker environment — the configuration used to process the task queue / periodic tasks. To solve this problem in the WebServer environment, add a file with the following contents to the project directory .ebextensions:
Add to the config file in .ebextensions:
Similarly apply alembic migrations; in order to avoid applying migrations on each instance of an autoscaling group, the leader_only parameter is specified
By creating scripts in the / opt / elasticbeanstalk / hooks / directory, you can add various control scripts, in particular, modify the application deployment process. Scripts that run before deployment are in the / opt / elasticbeanstalk / hooks / appdeploy / pre / * directory, during / opt / elasticbeanstalk / hooks / appdeploy / enact / *, and after that in / opt / elasticbeanstalk / hooks / appdeploy / post / *. Scripts are executed in alphabetical order, so you can build the correct sequence of application deployment.
By the way, I used the experimental opportunity to take as a broker for Celery SQS and it justified itself; True, flower does not yet have support for such a scheme.
Used such an addition to the Apache config inside ElasticBeanstalk
Amazon provides domain owners the opportunity to use SSL certificates for free, including wildcard, but only inside AWS. To use several domains with SSL on one environment, we obtain a certificate through AWS Certificate Manager, add another ELB balancer and configure SSL on it. You can use certificates obtained from another supplier.

UPDATE Below, in the commentary, respected darken99 brought a couple of useful features, let me add them here with some explanations
Turn off the environment as scheduled
In this case, depending on the specified time range, the number of instances in the autoscaling group decreases from 1 to 0.
Replacing Apache with Nginx
Not working for python

Options for adding application configuration
In my opinion, the obvious drawback of the platform is the indistinct mechanism of configuration storage. Therefore, I use the following methods to add configuration.
The most obvious and native for ElasticBeanstalk is setting through environment variables. Inside the instance, these environment variables are not accessible as usual, but exclusively in the application environment. To set these parameters, it is most convenient to use the eb setenv command from the awsebcli package, which is used to deploy the application (suitable for small projects), or the AWS API.
eb setenv RDS_PORT=5432 PYTHONPATH=/opt/python/current/app/myapp:$PYTHONPATH RDS_PASSWORD=12345 DJANGO_SETTINGS_MODULE=myapp.settings RDS_USERNAME=dbuser RDS_DB_NAME=appdb RDS_HOSTNAME=dbcluster.us-east-1.rds.amazonaws.comThe second option is when the config is injected into the created version of the application. To do this, you need to explain how the deployment process takes place. Manually or with a script, a zip archive is created that contains the application code, is laid out on a special S3 bucket, unique for each region (of the type elasticbeanstalk- <region_name> - <my_account_id> - do not try to use another, it won’t work - it’s checked). You can create this package manually or edit it programmatically. I prefer to use an alternative deployment option when instead of awsebcli I use my own version package creation code.

The third option is to load the configuration remotely during the deployment phase from an external configuration database. IMHO the most correct approach, however, is beyond the scope of this article. I use a scheme with storing configs on S3 and proxying requests to S3 through the Gateway API - this allows the most flexible configuration management. S3 also supports versioning.
Turn on jobs in crontab
ElasticBeanstalk supports creating tasks for the scheduler using the cron.yaml file. However, this config only works for the worker environment — the configuration used to process the task queue / periodic tasks. To solve this problem in the WebServer environment, add a file with the following contents to the project directory .ebextensions:
files:
  "/etc/cron.d/cron_job":
    mode: "000644"
    owner: root
    group: root
    content: |
       #Add comands below
       15 10 * * * root curl  www.google.com >/dev/null 2>&1<code>
  "/usr/local/bin/cron_job.sh":
    mode: "000755"
    owner: root
    group: root
    content: |
      #!/bin/bash
      /usr/local/bin/test_cron.sh || exit
      echo "Cron running at " `date` >> /tmp/cron_job.log
      # Now do tasks that should only run on 1 instance ...
  "/usr/local/bin/test_cron.sh":
    mode: "000755"
    owner: root
    group: root
    content: |
      #!/bin/bash
      METADATA=/opt/aws/bin/ec2-metadata
      INSTANCE_ID=`$METADATA -i | awk '{print $2}'`
      REGION=`$METADATA -z | awk '{print substr($2, 0, length($2)-1)}'`
      # Find our Auto Scaling Group name.
      ASG=`aws ec2 describe-tags --filters "Name=resource-id,Values=$INSTANCE_ID" \
        --region $REGION --output text | awk '/aws:autoscaling:groupName/ {print $5}'`
      # Find the first instance in the Group
      FIRST=`aws autoscaling describe-auto-scaling-groups --auto-scaling-group-names $ASG \
        --region $REGION --output text | awk '/InService$/ {print $4}' | sort | head -1`
      # Test if they're the same.
      [ "$FIRST" = "$INSTANCE_ID" ]
commands:
  rm_old_cron:
    command: "rm *.bak"
    cwd: "/etc/cron.d"
    ignoreErrors: true
Automatically apply Django migrations and build statics during deployment
Add to the config file in .ebextensions:
container_commands:
  01_migrate:
    command: "python manage.py migrate --noinput"
    leader_only: true
  02_collectstatic:
      command: "./manage.py collectstatic --noinput"
Similarly apply alembic migrations; in order to avoid applying migrations on each instance of an autoscaling group, the leader_only parameter is specified
Using hooks when deploying applications
By creating scripts in the / opt / elasticbeanstalk / hooks / directory, you can add various control scripts, in particular, modify the application deployment process. Scripts that run before deployment are in the / opt / elasticbeanstalk / hooks / appdeploy / pre / * directory, during / opt / elasticbeanstalk / hooks / appdeploy / enact / *, and after that in / opt / elasticbeanstalk / hooks / appdeploy / post / *. Scripts are executed in alphabetical order, so you can build the correct sequence of application deployment.
Adding a Celery daemon to an existing supervisor config
files:
  "/opt/elasticbeanstalk/hooks/appdeploy/post/run_supervised_celeryd.sh":
    mode: "000755"
    owner: root
    group: root
    content: |
      #!/usr/bin/env bash
      # Get django environment variables
      celeryenv=`cat /opt/python/current/env | tr '\n' ',' | sed 's/export //g' | sed 's/$PATH/%(ENV_PATH)s/g' | sed 's/$PYTHONPATH//g' | sed 's/$LD_LIBRARY_PATH//g'`
      celeryenv=${celeryenv%?}
      # Create celery configuraiton script
      celeryconf="[program:celeryd]
      ; Set full path to celery program if using virtualenv
      command=/opt/python/run/venv/bin/celery worker -A yourapp -B --loglevel=INFO -s /tmp/celerybeat-schedule
      directory=/opt/python/current/app
      user=nobody
      numprocs=1
      stdout_logfile=/var/log/celery-worker.log
      stderr_logfile=/var/log/celery-worker.log
      autostart=true
      autorestart=true
      startsecs=10
      ; Need to wait for currently executing tasks to finish at shutdown.
      ; Increase this if you have very long running tasks.
      stopwaitsecs = 600
      ; When resorting to send SIGKILL to the program to terminate it
      ; send SIGKILL to its whole process group instead,
      ; taking care of its children as well.
      killasgroup=true
      ; if rabbitmq is supervised, set its priority higher
      ; so it starts first
      priority=998
      environment=$celeryenv"
      # Create the celery supervisord conf script
      echo "$celeryconf" | tee /opt/python/etc/celery.conf
      # Add configuration script to supervisord conf (if not there already)
      if ! grep -Fxq "[include]" /opt/python/etc/supervisord.conf
          then
          echo "[include]" | tee -a /opt/python/etc/supervisord.conf
          echo "files: celery.conf" | tee -a /opt/python/etc/supervisord.conf
      fi
      # Reread the supervisord config
      supervisorctl -c /opt/python/etc/supervisord.conf reread
      # Update supervisord in cache without restarting all services
      supervisorctl -c /opt/python/etc/supervisord.conf update
      # Start/Restart celeryd through supervisord
      supervisorctl -c /opt/python/etc/supervisord.conf restart celeryd
By the way, I used the experimental opportunity to take as a broker for Celery SQS and it justified itself; True, flower does not yet have support for such a scheme.
Auto Forwarding HTTP to HTTPS
Used such an addition to the Apache config inside ElasticBeanstalk
files:
    "/etc/httpd/conf.d/ssl_rewrite.conf":
        mode: "000644"
        owner: root
        group: root
        content: |
            RewriteEngine On
            <If "-n '%{HTTP:X-Forwarded-Proto}' && %{HTTP:X-Forwarded-Proto} != 'https'">
            RewriteRule (.*) https://%{HTTP_HOST}%{REQUEST_URI} [R,L]
            </If>
Using multiple SSL domains
Amazon provides domain owners the opportunity to use SSL certificates for free, including wildcard, but only inside AWS. To use several domains with SSL on one environment, we obtain a certificate through AWS Certificate Manager, add another ELB balancer and configure SSL on it. You can use certificates obtained from another supplier.

UPDATE Below, in the commentary, respected darken99 brought a couple of useful features, let me add them here with some explanations
Turn off the environment as scheduled
In this case, depending on the specified time range, the number of instances in the autoscaling group decreases from 1 to 0.
option_settings:
  - namespace: aws:autoscaling:scheduledaction
    resource_name: Start
    option_name: MinSize
    value: 1
  - namespace: aws:autoscaling:scheduledaction
    resource_name: Start
    option_name: MaxSize
    value: 1
  - namespace: aws:autoscaling:scheduledaction
    resource_name: Start
    option_name: DesiredCapacity
    value: 1
  - namespace: aws:autoscaling:scheduledaction
    resource_name: Start
    option_name: Recurrence
    value: "0 9 * * 1-5"
  - namespace: aws:autoscaling:scheduledaction
    resource_name: Stop
    option_name: MinSize
    value: 0
  - namespace: aws:autoscaling:scheduledaction
    resource_name: Stop
    option_name: MaxSize
    value: 0
  - namespace: aws:autoscaling:scheduledaction
    resource_name: Stop
    option_name: DesiredCapacity
    value: 0
  - namespace: aws:autoscaling:scheduledaction
    resource_name: Stop
    option_name: Recurrence
    value: "0 18 * * 1-5"
option_settings:
  aws:elasticbeanstalk:environment:proxy:
    ProxyServer: nginx
