How to install Windows Server 2012 R2 and not get 200 updates after it
- Tutorial
 Windows Server 2012 R2 was released on October 18, 2013. Since then, several hundred updates have been released on this Microsoft server operating system to fix product vulnerabilities and defects, as well as improve functionality.
 A huge number of updates - a source of headache . The most current server distribution, the so-called “Update2”, into which updates for November 2014 are integrated, is hopelessly outdated. Having installed the operating system from it, you will get after it another 200+ updates that will be installed 2-4 hours.
In this short instruction, we will refresh the November distribution by integrating all cumulative update packages and security updates into it.
In addition to the distribution kit, we will refresh the administrator’s memory by recalling how the installation media is updated, why each step is performed, and what tricks can await us at different stages.
We will do it as simple as possible using standard tools.
All work is best done on a server with Windows Server 2012 R2 already deployed so that there are no overlays with the version of the DISM utility . It is also convenient to connect ISO files on it without unpacking them.
We prepare working directories
To work, the following directories will be required:
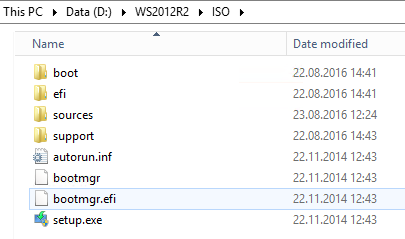
ISO - distribution files are copied to this directory. In it, copy the contents of the distribution kit SW_DVD9_Windows_Svr_Std_and_DataCtr_2012_R2_64Bit_English_-4_MLF_X19-82891.ISO into it, after mounting the image and then unmounting it.
MOUNT - an empty directory, images from the wim-file will be mounted in it.
CU - we will place cumulative
SU updates in this directory - in this directory there will be security updates and other updates
mkdir D:\WS2012R2\ISO
mkdir D:\WS2012R2\MOUNT
mkdir D:\WS2012R2\CU
mkdir D:\WS2012R2\SU
Download cumulative updates
Tip & Trick # 1. Microsoft releases cumulative service packs for Windows Server 2012 R2, but they only include updates that fix bugs and improve functionality. Security updates are not included. At the same time, the updates are not particularly cumulative. Some do not include previous updates, and you need to put “cumulative” for each month. Mess. In October, this situation will change for the better.
You can find the list of cumulative updates on this wiki page .
From November 2014, we will need to integrate the following updates:
1. December 2014 Windows RT 8.1, Windows 8.1, and Windows Server 2012 R2. KB3013769, download .
2. July 2016Windows RT 8.1, Windows 8.1, and Windows Server 2012 R2. KB3172614, download .
Packages for May and June are absorbed by this July package. But before installing, the April 2015 servicing stack update for Windows 8.1 and Windows Server 2012 R2 must be updated . KB3021910, download .
3. August 2016 Windows RT 8.1, Windows 8.1, and Windows Server 2012 R2. KB3179574, download .
Updated Update Center Client May Not Integrate
Fresh Windows Update Client for Windows 8.1 and Windows Server 2012 R2: June 2016 entered KB3161606
KB3161606 absorbed by KB3172614.
KB3161606 absorbed by KB3172614.
UPD: I have somewhat exaggerated how well Microsoft prepared the distribution. The April 2014 and November 2014 updates are truly integrated. But all the intermediate ones are not. Therefore, we add the
May 2014 update rollup for Windows RT 8.1, Windows 8.1, and Windows Server 2012 R2. KB2955164, download
June 2014 update rollup for Windows RT 8.1, Windows 8.1, and Windows Server 2012 R2. KB2962409 download .
July 2014 update rollup for Windows RT 8.1, Windows 8.1, and Windows Server 2012 R2. KB2967917, download .
August 2014 update rollup for Windows RT 8.1, Windows 8.1, and Windows Server 2012 R2. KB2975719, download .
September 2014update rollup for Windows RT 8.1, Windows 8.1, and Windows Server 2012 R2. KB2984006, download .
October 2014 update rollup for Windows RT 8.1, Windows 8.1, and Windows Server 2012 R2. KB2995388, download .
Tip & Trick # 2. In various articles, to integrate updates, it is proposed to extract a cab file from msu. Doing this for an offline image is optional - integrate msu without unpacking.
In the CU folder, place the above msu files - Windows8.1-KB3013769-x64.msu, Windows8.1-KB3021910-x64.msu, Windows8.1-KB3138615-x64.msu, Windows8.1-KB3172614-x64.msu, Windows8 .1-KB3179574-x64.msu.
Download Security Updates
In addition to cumulative updates, we integrate updates that the WSUS Offline Update utility can download.
For this:
- Download the program download.wsusoffline.net
- Choosing Updates for Windows Server 2012 R2

- After downloading, open the wsusoffline \ client \ w63-x64 \ glb directory and * .cab files we copy to the C: \ WS2012R2 \ SU directory
CAUTION: If KB2966828 or KB2966827 are in the list, delete them, otherwise after installation it will not be possible to add the Net Framework 3.5 component ( details ).
Updates are ready, let's start integration.
Update integration
To integrate updates, we need:
- Mount the contents of one of the images in install.wim
dism /mount-wim /wimfile:{путь к wim файлу} /Index:{N} /mountdir:{путь к директории монтирования} - Integrate every update into offline installation
dism /image:{путь к директории монтирования} /add-package /packagepath:{путь к *.msu или *.cab файлу} - Save changes
dism /Unmount-WIM /MountDir:{путь к директории монтирования} /Commit
This process is easily automated by the following batch file:
for /l %%N in (1,1,4) do (
dism /mount-wim /wimfile:"D:\WS2012R2\ISO\sources\install.wim" /Index:%%N /mountdir:D:\WS2012R2\MOUNT
for %%f in (D:\WS2012R2\CU\*.*) DO (dism /image:D:\WS2012R2\MOUNT /add-package /packagepath:%%f)
for %%f in (D:\WS2012R2\SU\*.*) DO (dism /image:D:\WS2012R2\MOUNT /add-package /packagepath:%%f)
dism /unmount-WIM /MountDir:D:\WS2012R2\MOUNT /Commit
)
Tip: When running a batch file, redirect the output to the log
UpdateWIM.cmd >>log.txt 2>>&1
As a result, we get the file D: \ WS2012R2 \ ISO \ sources \ install.wim with a size of 6.15Gb. Can we reduce it? Yes, using export you can get an optimized file of 5.85Gb in size.
The savings are small, in addition, after that, the dialog for choosing the operating system during installation does not look very nice, so the next step is optional.
What need to do?
To obtain a compressed image, you must:
Automate the script:
Remove the original install.wim, and rename the created install1.wim to install.wim
- Export the first image from the original wim file to a new file
dism /export-image /sourceimagefile:{путь к исходному файлу wim} /sourceindex:1 /destinationimagefile:{путь к новому файлу wim} /compress:max - Mount the next image from the original wim file to the mount point
dism /mount-wim /wimfile:"D:\WS2012R2\ISO\sources\install.wim" /Index:2 /mountdir:{директория для монтированния образа} - Add the following image to the new file using the “capture” method
dism /append-image /imagefile:{путь к новому файлу wim} /captureDir:{директория с смонтированным образом} /name:{оригинальное имя} /description:{оригинальное описание} - Unmount the image, iterate the add for each additional image
dism /unmount-WIM /MountDir:{директория с смонтированным образом} /Discard
Automate the script:
dism /export-image /sourceimagefile:D:\WS2012R2\ISO\sources\install.wim /sourceindex:1 /destinationimagefile:D:\WS2012R2\ISO\sources\install1.wim  /compress:max
dism /mount-wim /wimfile:"D:\WS2012R2\ISO\sources\install.wim" /Index:2 /mountdir:D:\WS2012R2\MOUNT
dism /append-image /imagefile:D:\WS2012R2\ISO\sources\install1.wim /captureDir:mount /name:"Windows Server 2012 R2 SERVERSTANDARD" /description:"Windows Server 2012 R2 SERVERSTANDARD"
dism /unmount-WIM /MountDir:D:\WS2012R2\MOUNT /discard
dism /mount-wim /wimfile:"D:\WS2012R2\ISO\sources\install.wim" /Index:3 /mountdir:D:\WS2012R2\MOUNT
dism /append-image /imagefile:D:\WS2012R2\ISO\sources\install1.wim /captureDir:mount /name:"Windows Server 2012 R2 SERVERDATACENTERCORE" /description:"Windows Server 2012 R2 SERVERDATACENTERCORE"
dism /unmount-WIM /MountDir:D:\WS2012R2\MOUNT /discard
dism /mount-wim /wimfile:"D:\WS2012R2\ISO\sources\install.wim" /Index:4 /mountdir:D:\WS2012R2\MOUNT
dism /append-image /imagefile:D:\WS2012R2\ISO\sources\install1.wim /captureDir:mount /name:"Windows Server 2012 R2 SERVERDATACENTER" /description:"Windows Server 2012 R2 SERVERDATACENTER"
dism /unmount-WIM /MountDir:D:\WS2012R2\MOUNT /discard
Remove the original install.wim, and rename the created install1.wim to install.wim
Create a compact install.esd image
On the advice of D1abloRUS , if you want to get a minimum installation disk that fits on DVD5, you can export one (and only one) of the images to an esd file. For example, to export Windows Server 2012 R2 Standard, use the command
The original install.wim can be removed.
dism /export-image /sourceimagefile:D:\WS2012R2\ISO\sources\install.wim /sourceindex:2 /destinationimagefile:D:\WS2012R2\ISO\sources\install.esd /compress:recovery
The original install.wim can be removed.
Build ISO File
To build, we need the oscdimg.exe utility from the Windows ADK . If you didn’t have it, you can simply download the utility from the link (do not use anything other than the utility from this kit).
Tip & Trick # 3. In order to avoid problems with downloading from the image, you should arrange the boot files within the first 4 gigabytes of the image . To do this, use the file bootorder.txt
boot \ bcd
boot \ boot.sdi
boot \ bootfix.bin
boot \ bootsect.exe
boot \ etfsboot.com
boot \ memtest.exe
boot \ en-us \ bootsect.exe.mui
boot \ fonts \ chs_boot.ttf
boot \ fonts \ cht_boot.ttf
boot \ fonts \ jpn_boot.ttf
boot \ fonts \ kor_boot.ttf
boot \ fonts \ wgl4_boot.ttf
sources \ boot.wim The
paths in this file are relative to the root directory with the image, so you do not need to adjust the paths to your actual ones.
Tip & Trick # 4. If install.wim is larger than 4700Mb, then the installer will crash with the error “Windows cannot open the required file D: \ sources \ install.wim. Error code: 0x8007000D ".
We were taught that life is a battle, so we split the original install.wim into two with the command
dism /split-Image /imagefile:D:\WS2012R2\ISO\sources\install.wim /swmfile:D:\WS2012R2\ISO\sources\install.swm /filesize:4096
The original install.wim file can be deleted.
Tip & Trick # 5. In general, Microsoft says that you can’t
In Windows 8.1 and Windows 8, Windows Setup does not support installing a split .wim file.
We say we will! The installer picks up the swm file perfectly. There will be no problems with the installation.
Putting the image of the team:
Dear ildarz suggests that To create an image that works equally well with BIOS and EFI, you should be guided by KB947024 and create an image like this:
oscdimg -m -u2 -udfver102 -yoD:\WS2012R2\bootorder.txt -bootdata:2#p0,e,bD:\WS2012R2\ISO\BOOT\Etfsboot.com#pEF,e,bD:\WS2012R2\ISO\EFI\microsoft\BOOT\efisys.bin -lIR5_SSS_X64FREV_EN-US_DV9 D:\WS2012R2\ISO en_windows_server_2012R2_August_2016.iso
Performance tested in ESXi with any type of boot (BIOS / EFI).
Everything worked out? Congratulations!

But is the problem completely resolved? For the ideal, you need to integrate a hundred more “optional” and “recommended” updates, but let's not rush into this. We will give Microsoft a chance to figure out the mess they made with the updates themselves.
PS. Why did we all do this? In order to refresh the memory, make the work a little more convenient and get a few simple batch files, with the help of which you can later automatically integrate updates into the server distribution, saving server commissioning time. Moreover, there is hope that starting in October it will become much easier to integrate updates .
In the same way, you can integrate Windows 7 convenience rollup and not step on the rake of unpacking updates, inability to download from an image, exceeding the size of install.wim.
Thank you and see you soon, friends.
If there is an opportunity to share experience - I am waiting for you in the comments.