How to make DJI Phantom 3 mobile
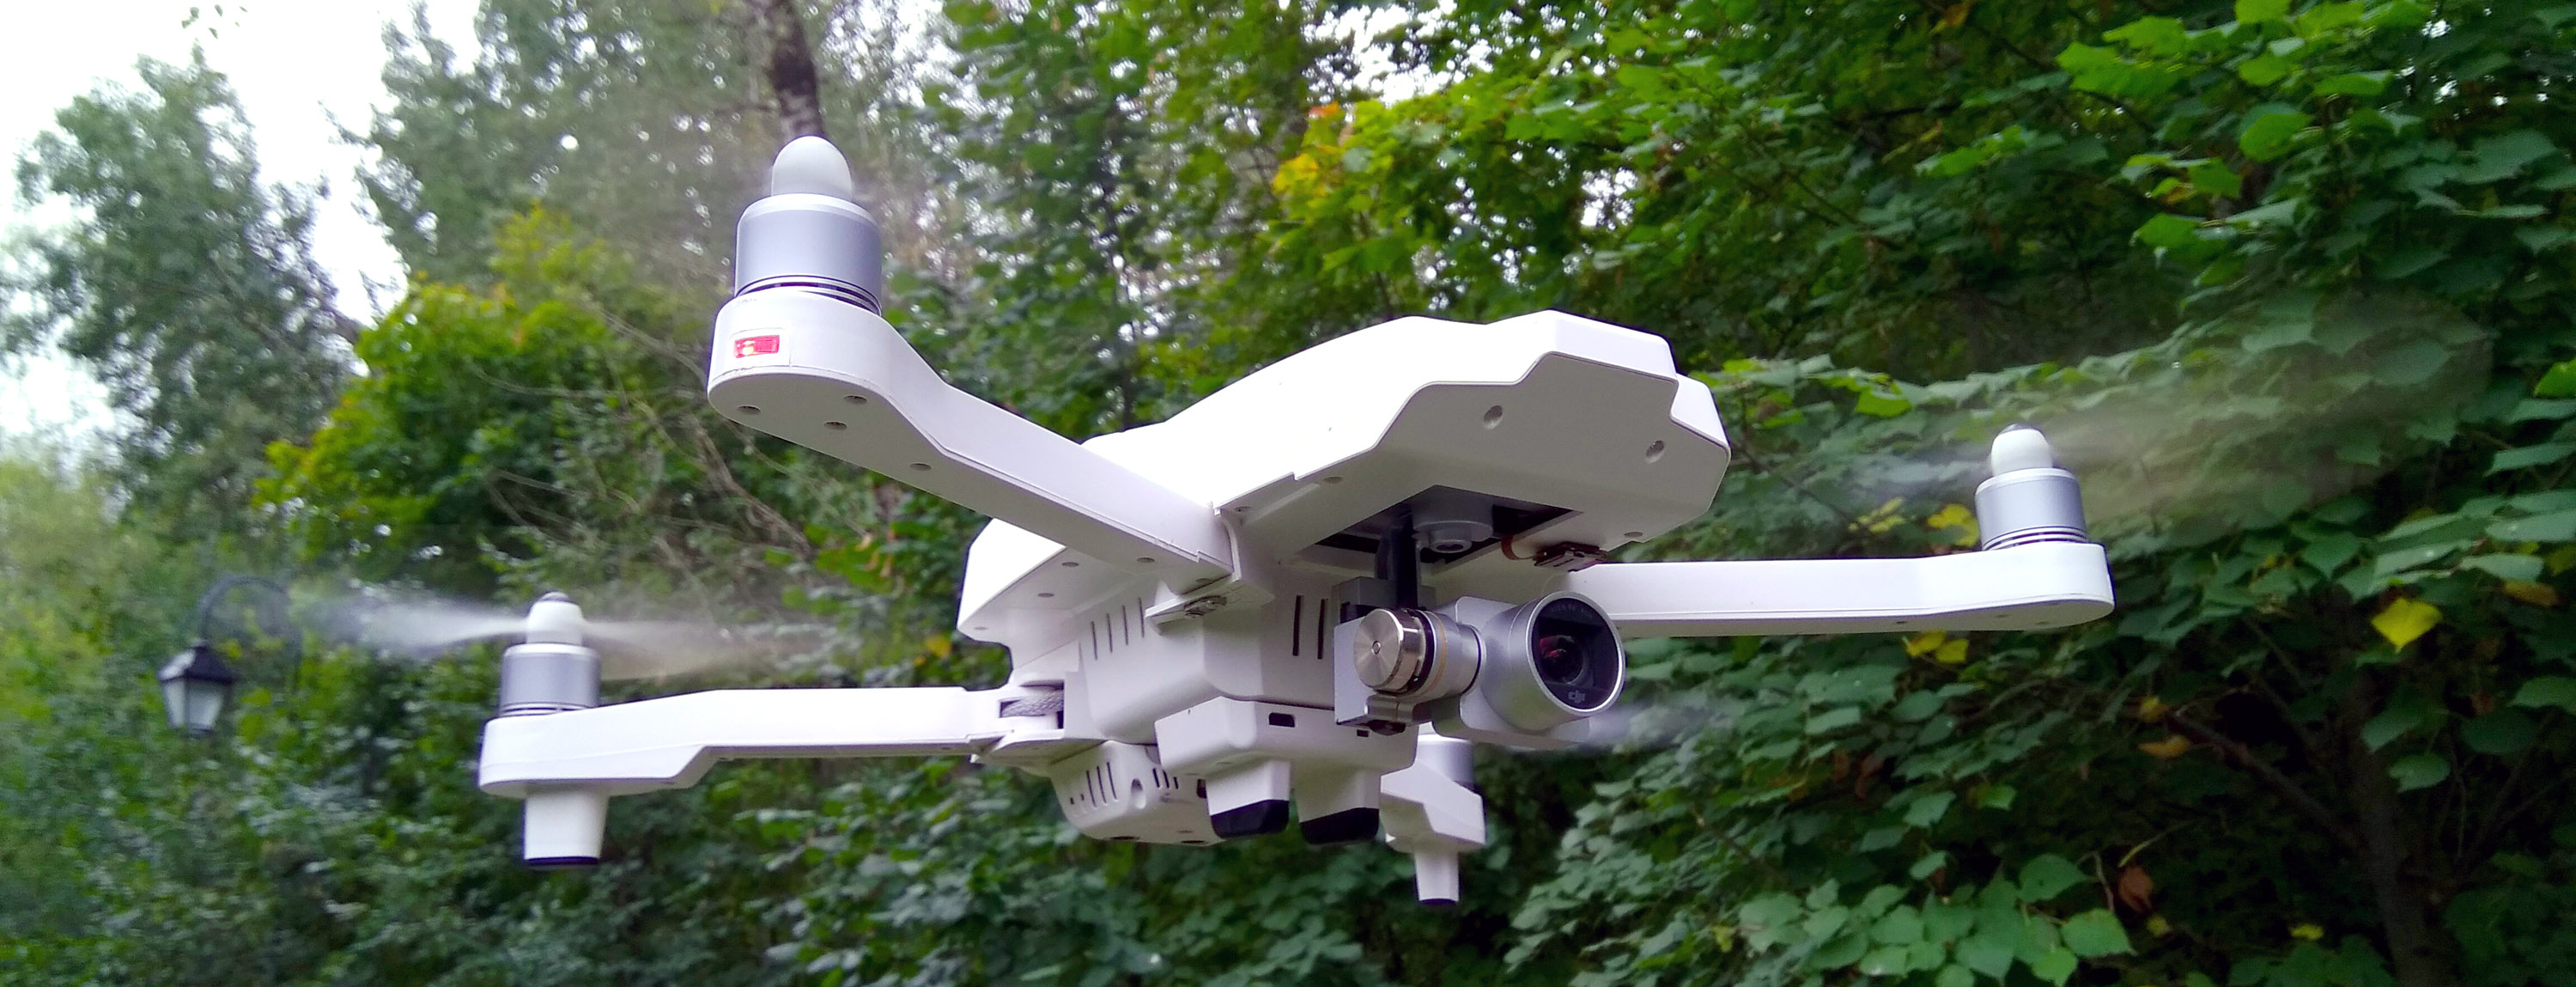
Now, when there is a great mavic and an even more brilliant mavic 2 has already appeared, the question “which drone to buy for traveling” is not worth it. But still, if you still have phantom 3, which, for one reason or another, you do not want to change to mavic, and you are tired of carrying an awkward case / box with you, there is an interesting solution - a folding case that allows you to make a phantom almost the same mobile like mavic. It is called, unexpectedly, Phavic. I tried turning on my phantom, about this - under the cut.
Initially, the body is designed by some guys who call themselves DJIYSJL. Now it can be found on banggood, amazon, ebay, etc. according to the phantom to mavic conversion kit, or from different sellers on aliexpress, according to the phantom 3 Adv Pro ghost to convert foldable drone stockings like a DJI is a big mavic or something. The cost is approximately 4500-5000 rubles.
According to my impressions and reviews of other users, the average flight time with this body has decreased quite a bit. Maybe for a couple of minutes. Motors in the position of the spread rays dispersed slightly more than the original. When folded, it now fits in a box measuring 32x18x12 cm (without remote control)
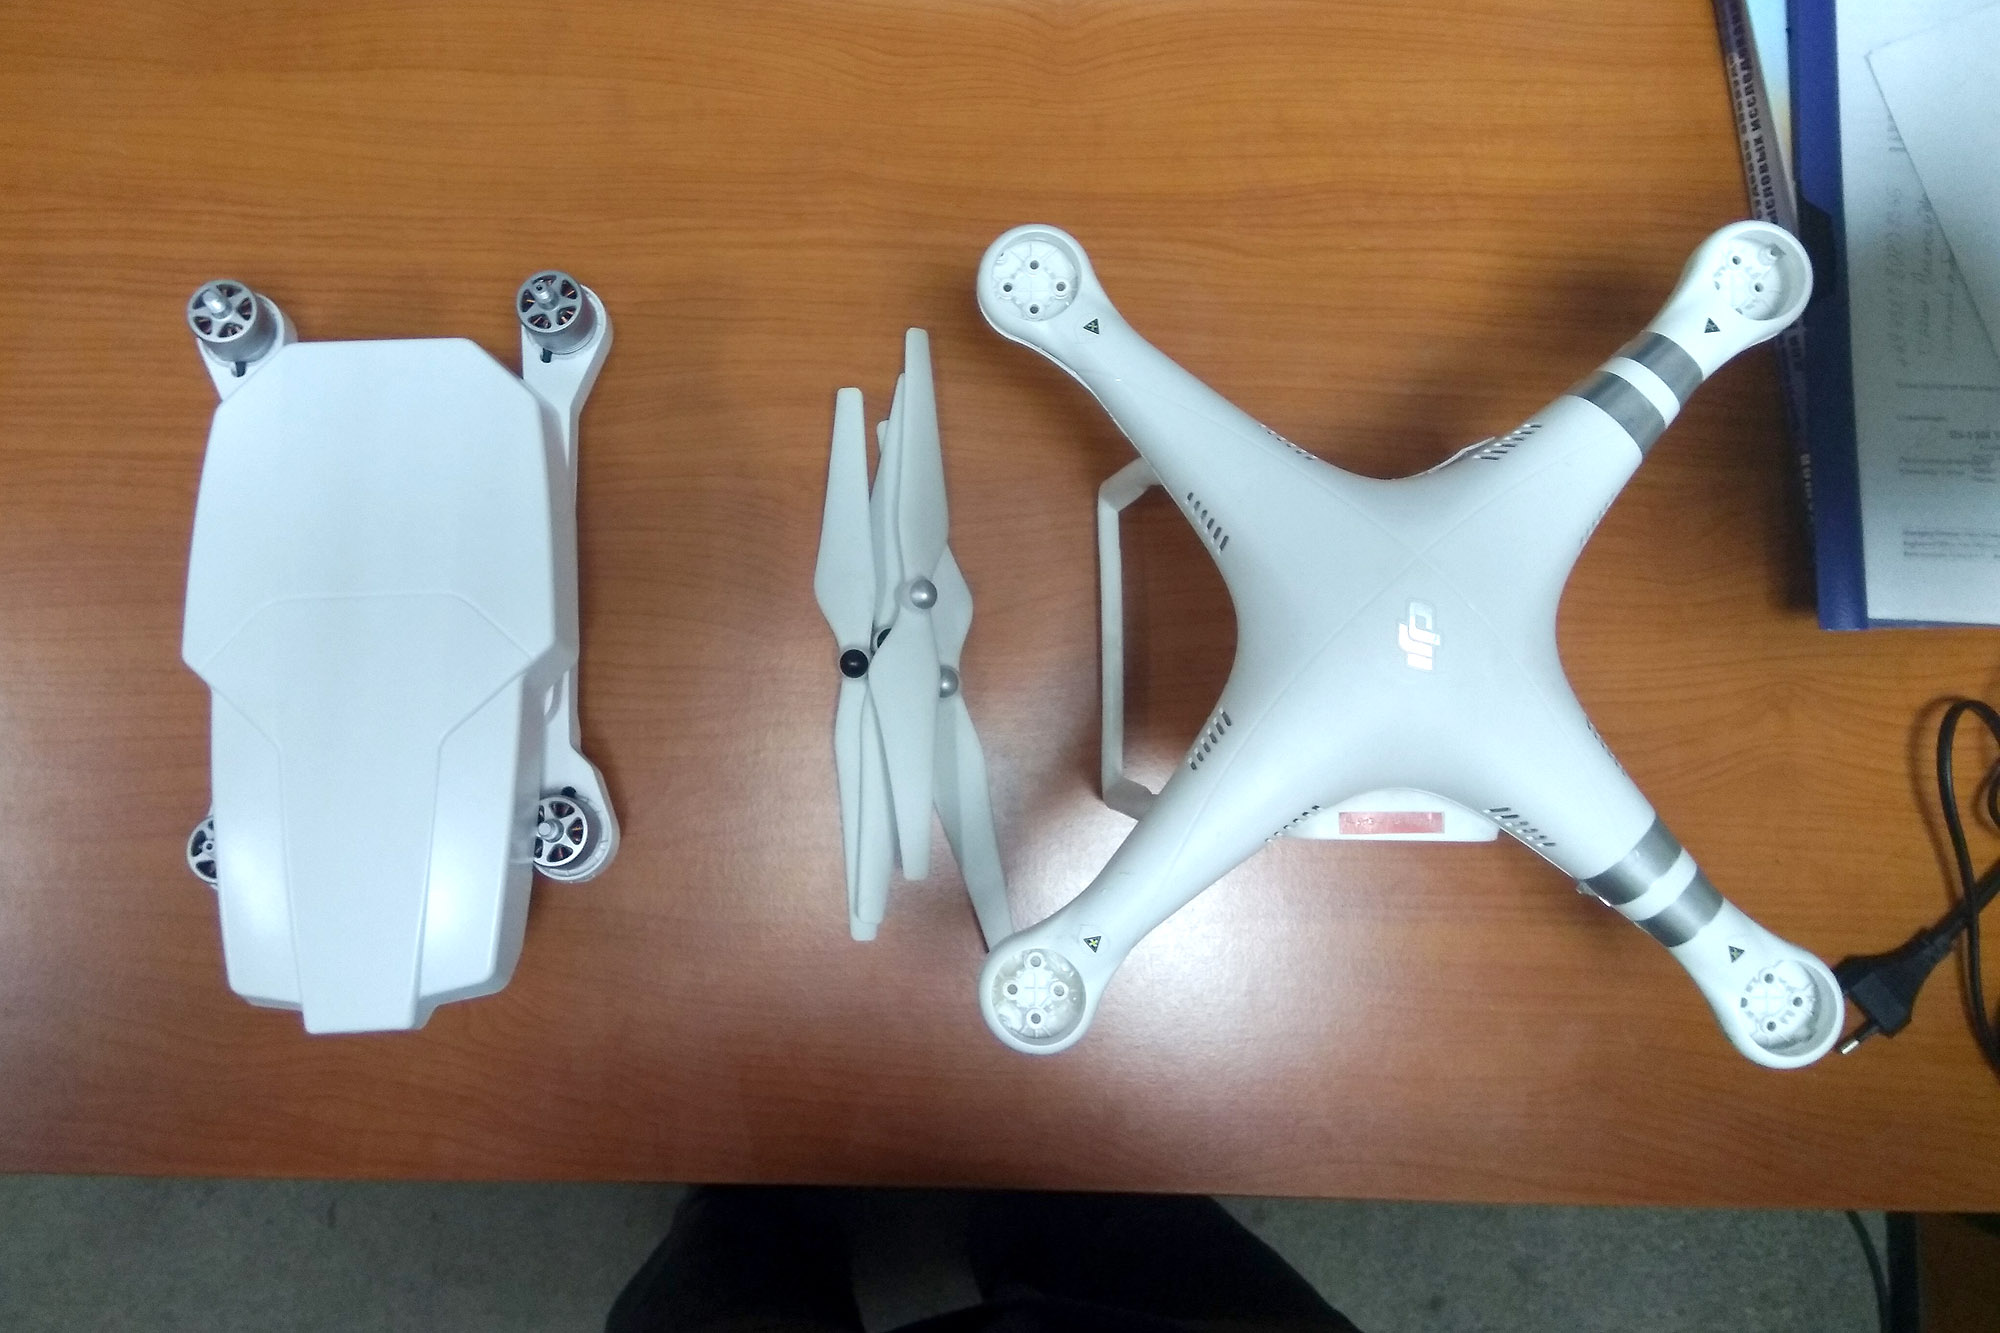
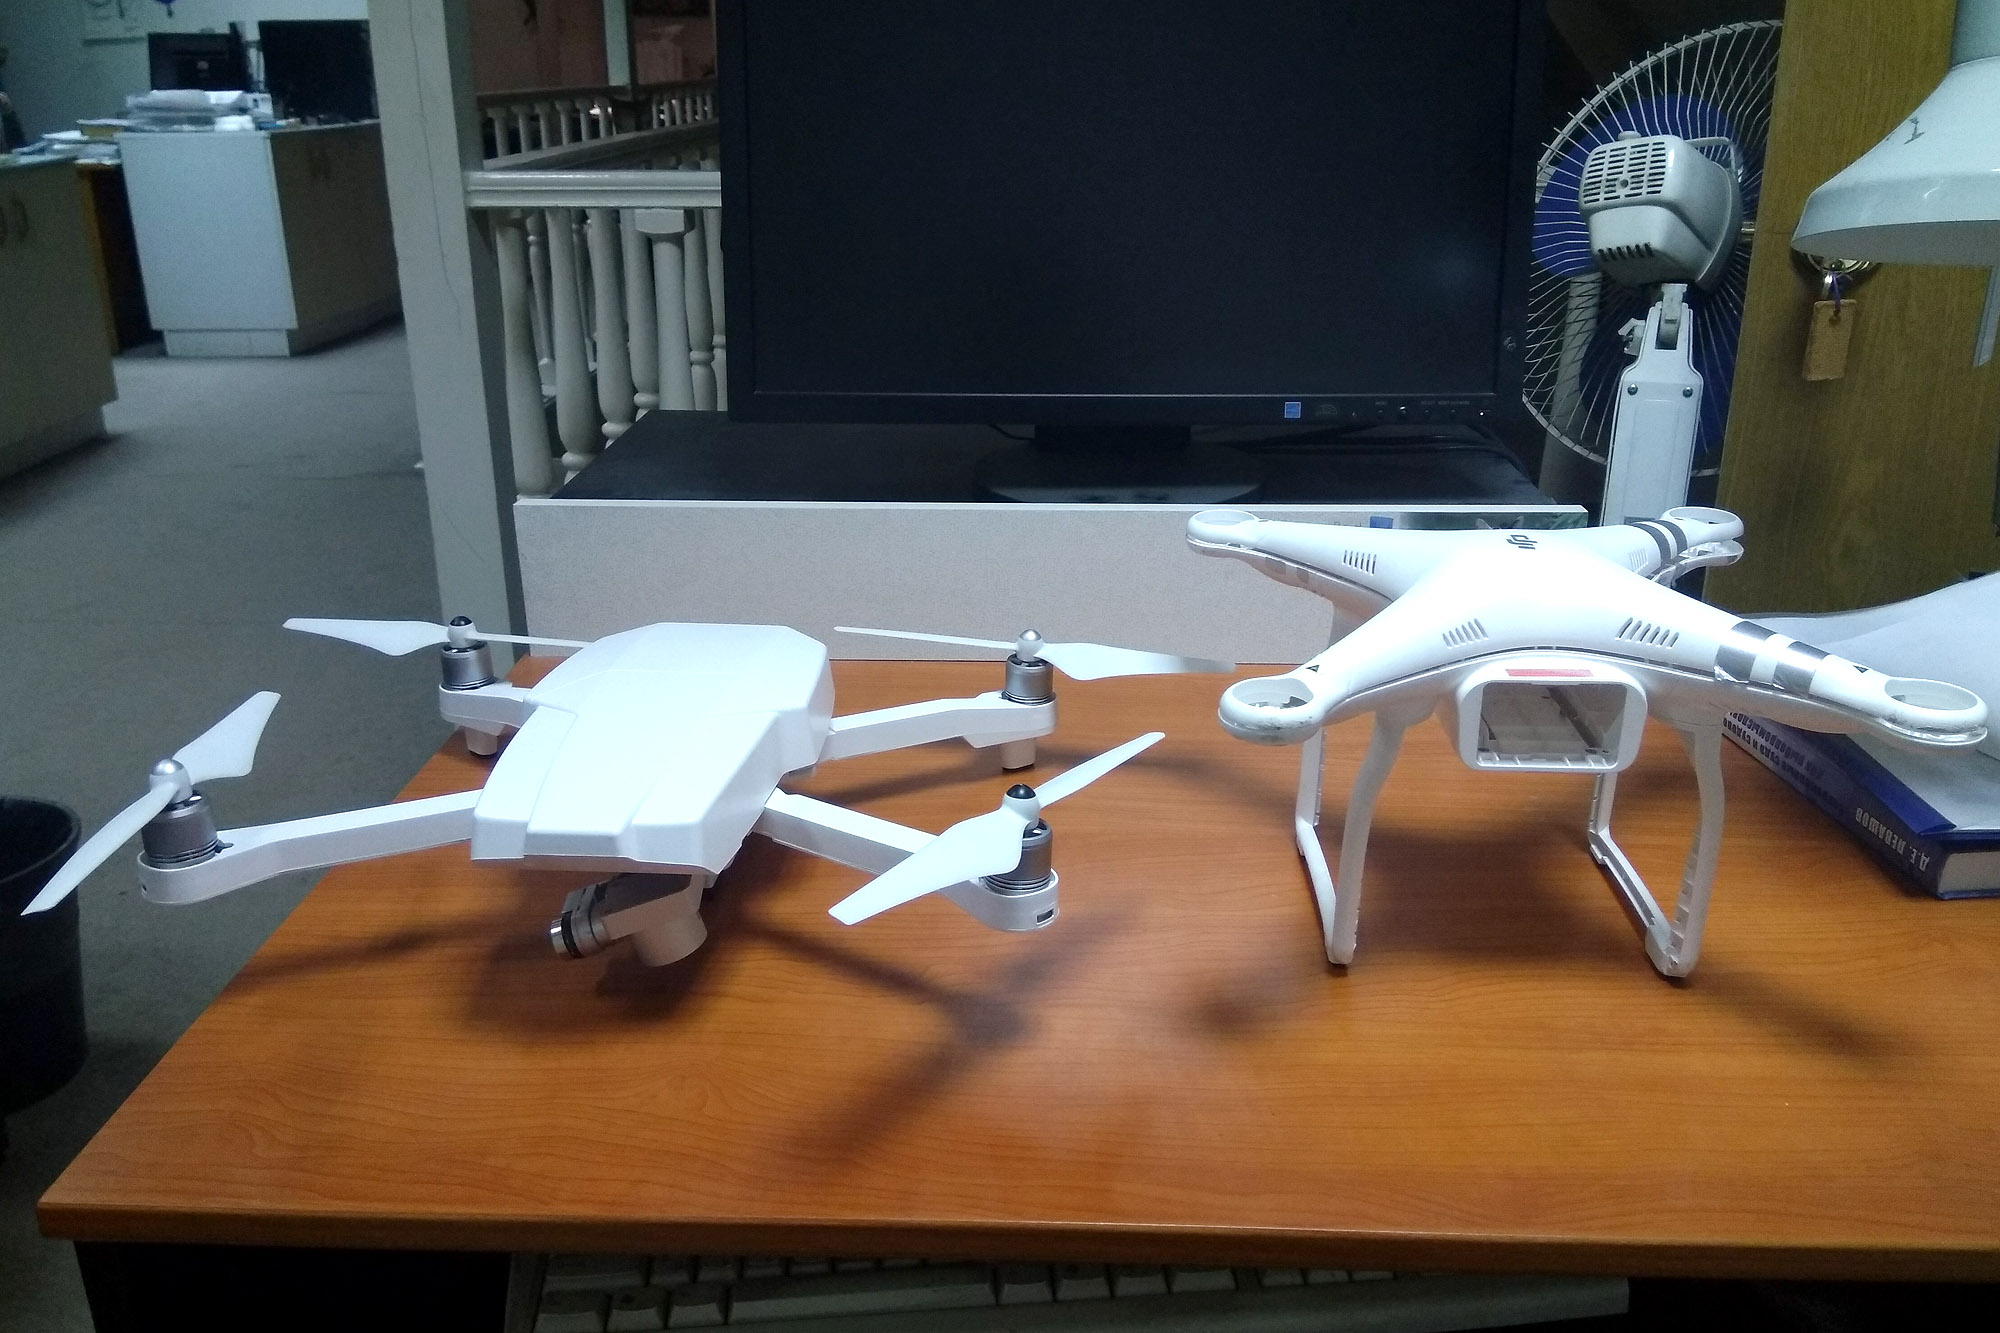
One of the differences from the original body is the lack of large legs. The layout resembles Mavik, which means the camera is close to the ground and this must be taken into account when choosing the take-off location.
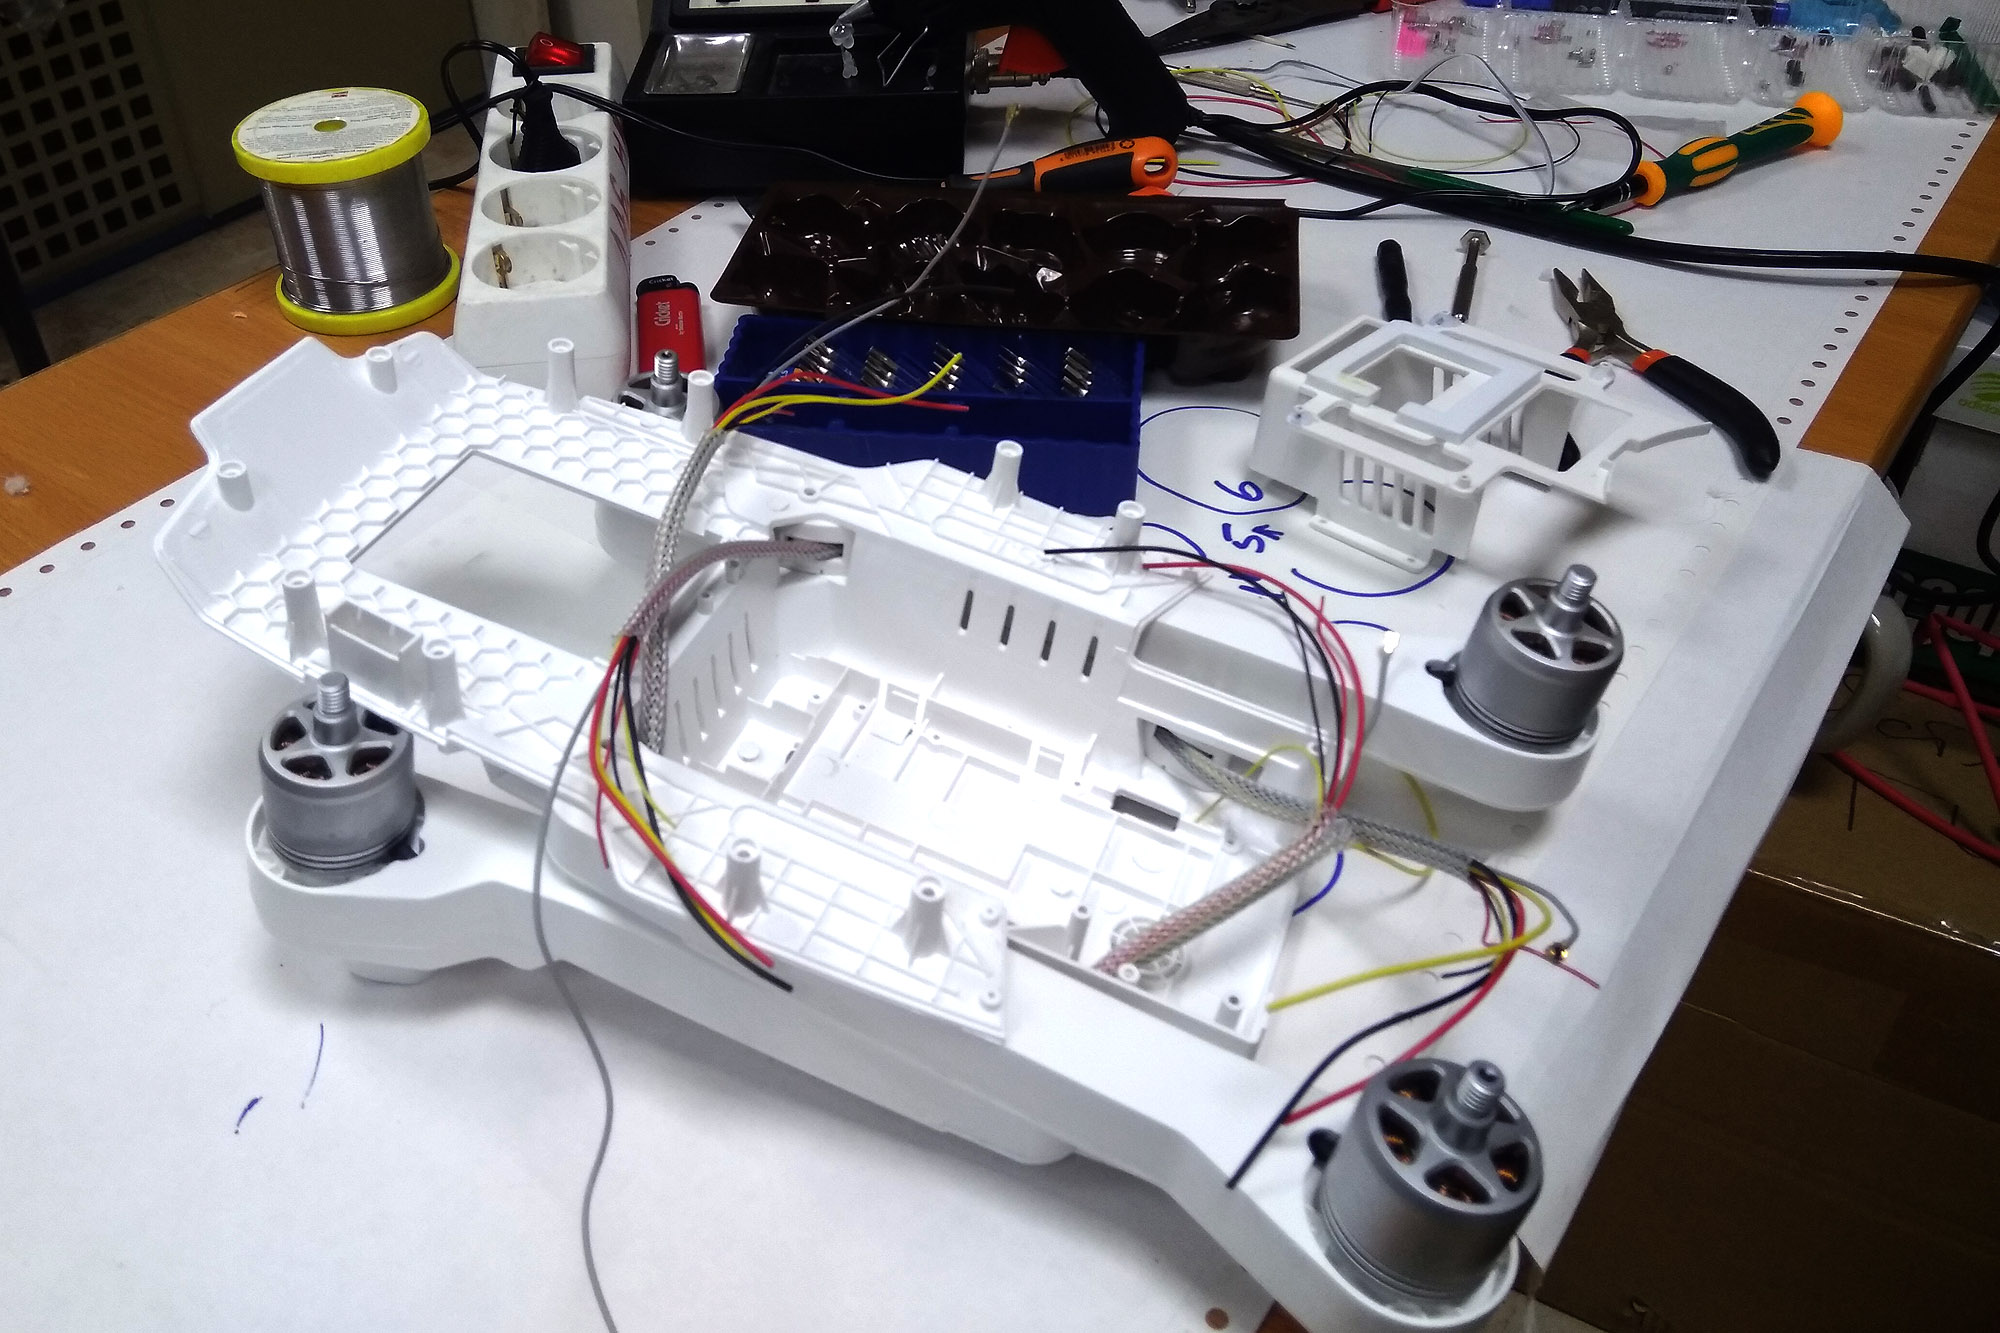
The case is thought out so that all the stuffing from the phantom can be gently pulled out and rearranged in the prepared places. The main difficulty is that the wires of the motors and LEDs from the rays must be carefully soldered from the board, ramped up, inserted into the new rays and soldered back. Also inside these rays will have to insert the antenna, which were located at the feet of the original case. If you have done this, consider that two thirds of the work has been done.
Cases for Pro / Advanced and Standart versions are expected to differ. The fact is that in the standart version, the SD card is inserted into the camera itself, and not into the base of the camera suspension. And since the suspension hides inside the case in favico, for accessibility of a microSD card on Pro / Advanced comes a small extension cable attached to the special slot on the favic case. For the Std version, such a cable is not needed, since the microSD slot on the camera is already available. Another difference between Std and Adv / Pro in the presence of a positioning block. One of the loops connects the gimbal and positioning unit. The layout is different on the favic, the distance between the suspension and the positioning unit has increased, so the Adv / Pro bundle additionally includes an elongated version of this loop.

* The photo shows that the suspension unit is hidden inside the case. The cable from the kit can be hidden inside so that the card can be inserted through the slot in the case. Who is more convenient.
Detailed and detailed instructions for assembling a phantom in Russian or English do not exist, but on youtube there is a video where a Chinese citizen fully performs all the actions, telling them in detail in Chinese. Unfortunately, the translation in subtitles is more than laconic. However, the video is already visible.
If you are not interested in the assembly details, then at the end of the article there is a short video about the process in general. And for those who are thinking about such a mess, I will describe what was not mentioned in the translation of Chinese video and other places.
The first thing to keep in mind is the correct choice of housing from the seller. If you have a Pro or Advanced, then if you get a case for Standart, you will miss the provided extension cables. From personal experience, sellers themselves do not really understand the difference, if the description is clearly not written, it is worth clarifying.
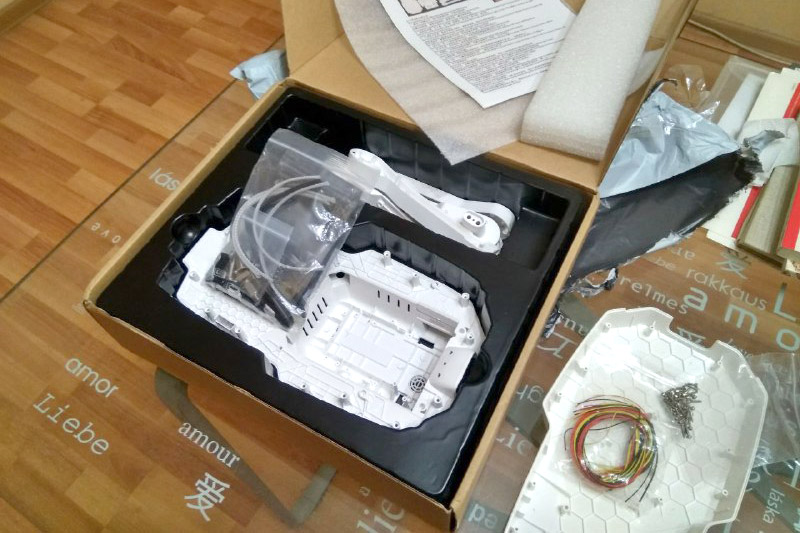
When the case is delivered, you should carefully inspect all the parts and clean the oblo from the edges and holes. Otherwise, it will not be possible to carefully assemble. The quality of the parts is not at the highest level, but fortunately, everything is decided by a file and a sharp knife. I recommend to try on the folding beams hinges in advance so that they can stand up without problems when assembling (this can be seen in a short video at the end of the article)
Included are 6 types of screws for assembling a new case. If they are arranged in small groups, it becomes clear what is needed for what. Their purpose is also mentioned in the original Chinese video. But if doubts remain, then numbers 3 and 4 are used to assemble the beams.
Phantom compass is also in one of the legs. When you reach it, the first thing is to make sure that you don’t put it near a magnet. When you put it inside the favik case, then relative to the position in the phantom case, it will be rotated 90 degrees around the horizontal axis. This means that when calibrating a compass, at the first turn, the favic should be held vertically, and at the second turn, the favic should be held horizontally (whereas the phantom should be held horizontally, and the second turn should be done by turning it 90 degrees around the horizontal axis). This is an important point, but I have never met a mention of it anywhere.
Regulators for phantom motors are on the main board, and the wires are heavily soldered. This means that you have to try to unsolder them and then solder them back elongated, do not overheat anything.

At the feet of the phantoms are hidden four antennas. Favik has no such elegant and disturbing legs. Therefore, the antennas are placed in the same folding rays. When you disconnect them from the connectors when disassembling the phantom, note that the numbers on the board are from 1 to 4. The same numbers are written on the antennas themselves so as not to be confused.
With antennas there is a small nuance and I hope that they will correct me in the comments if I describe it incorrectly. Standard antennas on the phantom console have a circular pattern and vertical polarization (with vertical orientation), which is well combined with vertically oriented antennas at the feet of the phantom. The only situation for which this is inconvenient is the vertical takeoff exactly up. Since the antenna can be directed horizontally, but the polarization will not coincide. In this regard, many people notice that for a stable connection at maximum height it is useful to take the phantom slightly away from you. In the case of the favicus and its horizontally placed antennas in the rays, the situation should theoretically be reversed - confident communication to the very top and reduction of the range radius at a small height. In practice, I, frankly, Not noticeable difference in range. Perhaps someone has something to add.
Here is the basic information, I hope, after this article, someone's phantom will be less likely to gather dust on the shelf when the owner leaves for the trip :)
Perhaps I missed something, I am ready to answer all the questions in the comments.
