Broadcast conferences and webinars using the SIP protocol
The article is devoted to possible options for organizing interaction between software for integration between content delivery networks and content sources using the SIP protocol.
When conducting corporate training webinars, conferences or public meetings, rallies, existing services and solutions that support the SIP protocol are used. However, such services, as a rule, do not have solutions aimed at mass broadcasting (broadcasting) on the Internet. Existing services, such as Zoom.us, InterCall, Twilio, Vidyo, iMeet and so on, as well as other software and hardware solutions and products of other manufacturers, do not provide the functionality of converting a conference organized using the SIP protocol to mass broadcast on the Internet .
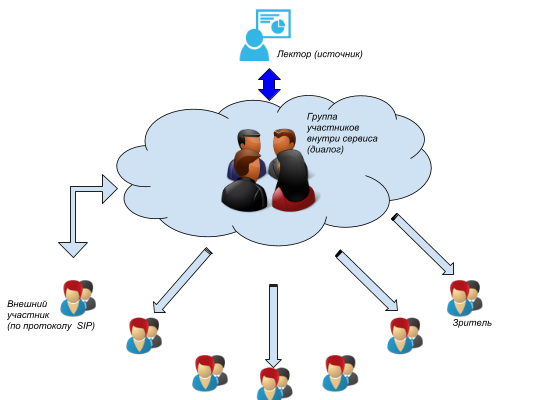
We set ourselves the goal of deciding which of the solutions we chose (by which we mean the combination of software products and services) will allow us to expand the audience of the event with minimal labor, as shown in the diagram above.
Below, we will consider possible integration options between the two streaming video servers Adobe Media Server and Wowza Streaming Engine, Twilio, Zoom.us, Vidyo, Lifesize, Blue Jeans, iMeet, CounterPath Bria 4 softphone and Flashphoner Web Call Server 4 platforms in various combinations.
Having decided to test various services and software products for mutual compatibility and the ability to mass broadcast on the Internet, we selected services and products according to several criteria.
The basic requirements for a server that integrates between other services and software:
When choosing services, the main criterion was that: a) the service could provide a test period for using the software; b) the service must declare or imply that there is support for connecting participants via SIP. We made a number of exceptions to this rule with the zoom.us service and with Bria, since we are well acquainted with this softphone and its features and usage features, and the zoom.us service is a fairly new startup with declared great features, that's why we decided to test it (even though the SIP connection for this service is paid).
Based on the selection criteria formulated, our experience with various integration software and the convenience of using this or that software, we decided to use Web Call Server 4 for our experiments, although other software is also possible.
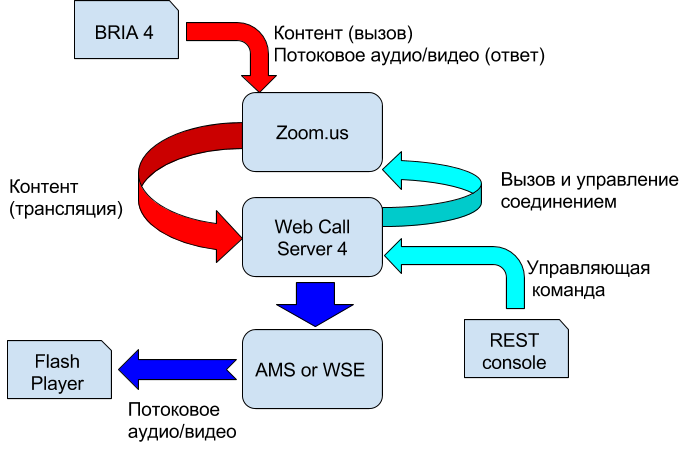
One of the most common options for interaction between the source (on the right) and the recipient of the content (on the left) is shown in the diagram below:
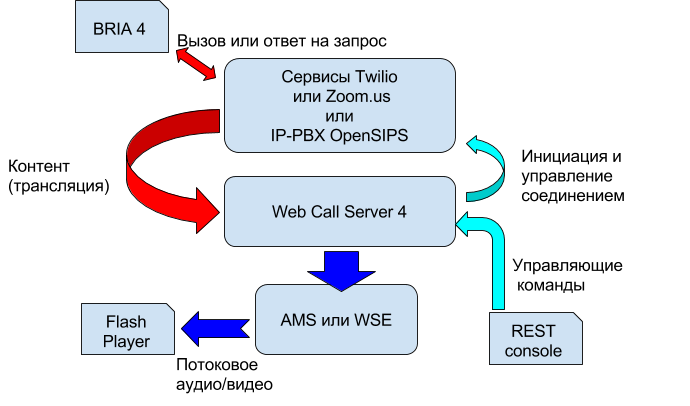
It should be noted that when checking various options for organizing interactions through the integration platform, we rearranged the indicated scheme depending on the needs of the experiment.
Streaming servers used in the experiment:
Integration platform:
Broadcast Sources:
Programs for viewing broadcasts (or content):
Programs for sending RTMP stream to the server:
A prerequisite for the experiment is the presence of correctly installed and configured software products described above.
The screenshot below shows the setup of Adobe Flash Media Live Encoder, which was installed on the local client (outside the local network in which the CDN platforms were launched).
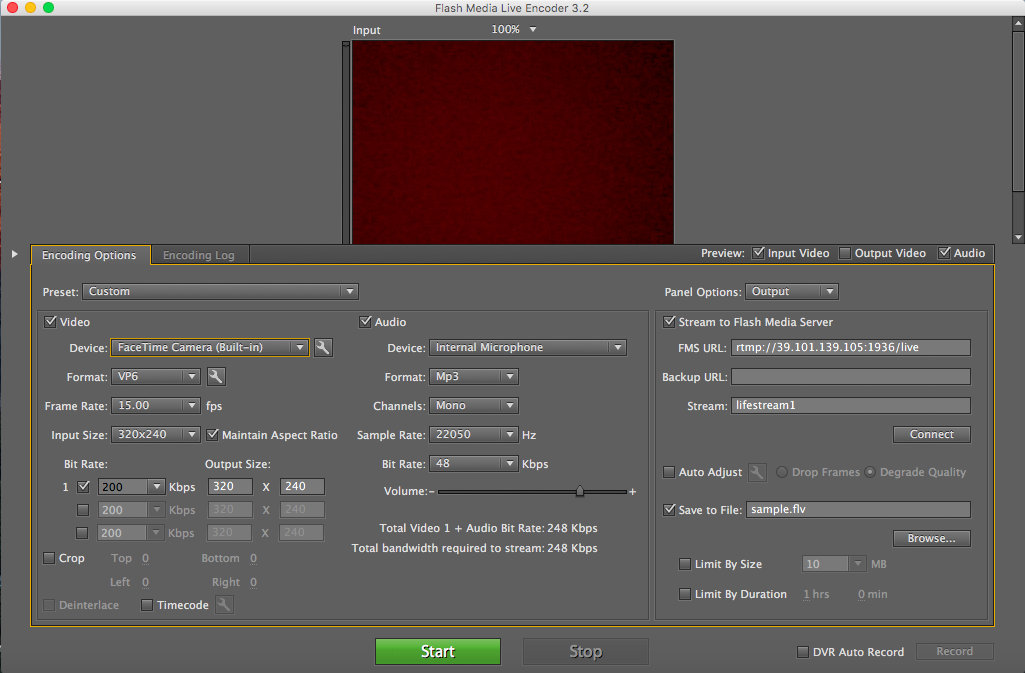
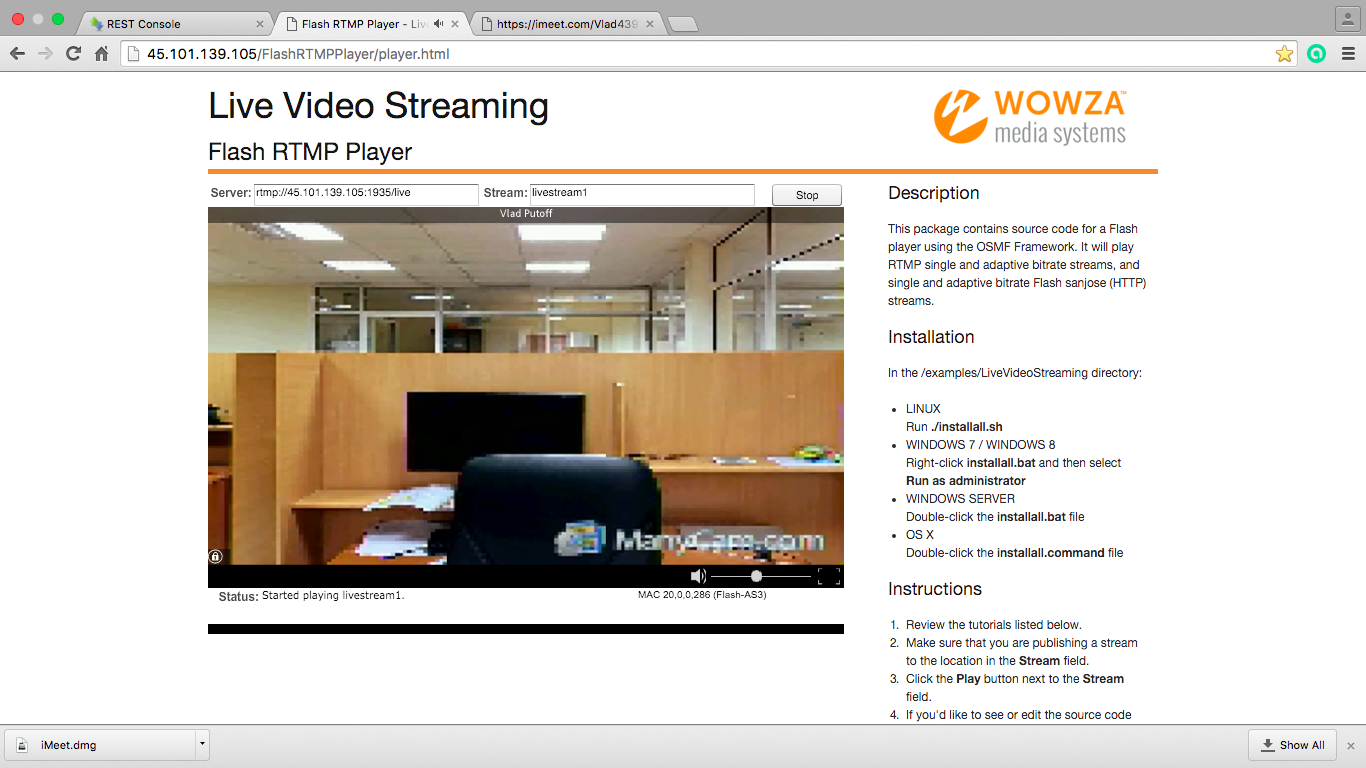
We used the broadcast from Adobe Flash Media Live Encoder as a verification source for the audio / video stream through the streaming video server. The resulting stream (after the streaming video server) was checked using Flash Player (shown in the screenshot below).
It is imperative to carefully check the stream settings (IP address, port, stream name) both at the source and at the receiver (player).
The translation verification scheme (health of streaming video servers) is presented below:

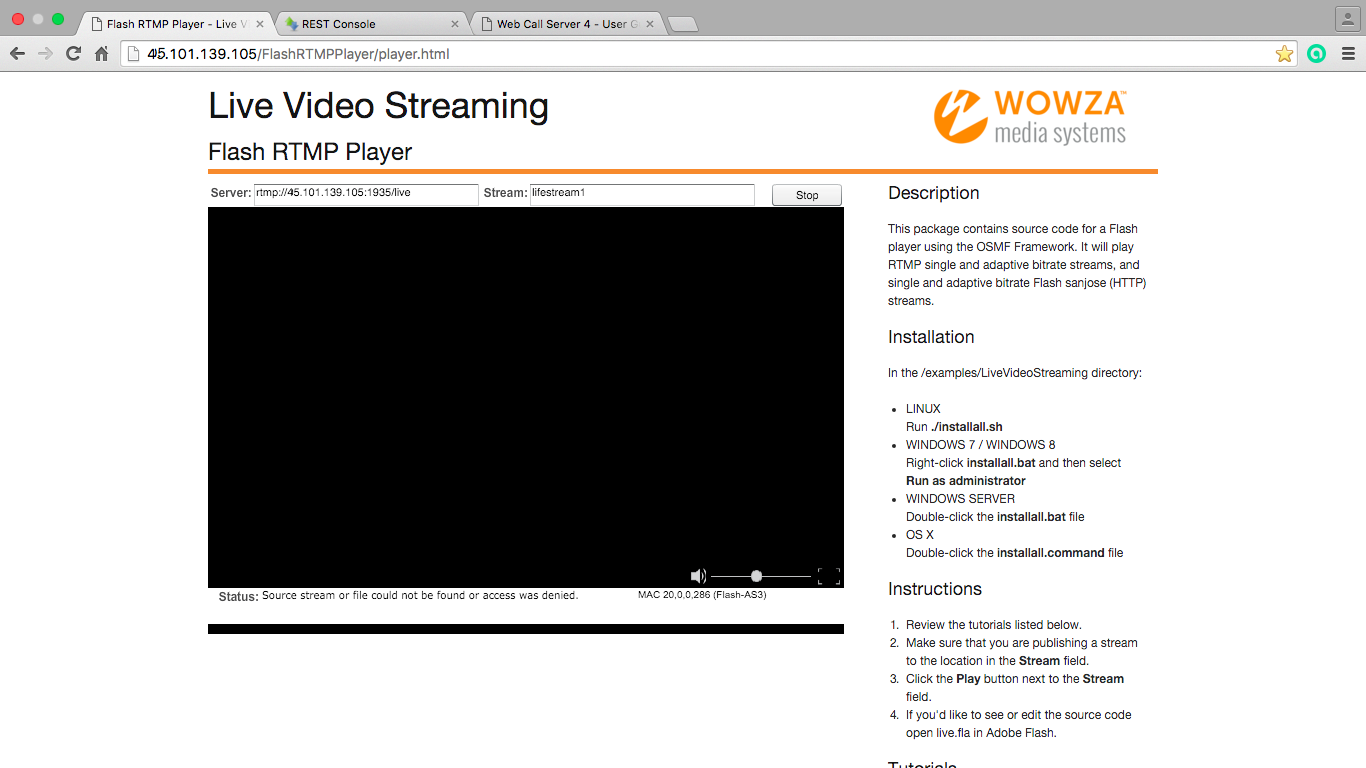
After checking the fact that the audio / video stream reaches the RTMP server, which we see through the player, you can go directly to testing.
Also, at the time of testing Web Call Server with the Twilio service, it is necessary to establish what public IP address is assigned by the service provider for Web Call Server access to the Internet and register this address in the SIP domain settings. The same operation must be done for the public IP address, which is used to test the Twilio service with Bria (installed on the local computer).
With the growing interest in distance learning and the spatially distributed exchange of audio / video information in real time, various services providing the necessary functionality are gaining popularity. One such service is zoom.us.
The organization of testing using this service is described below:
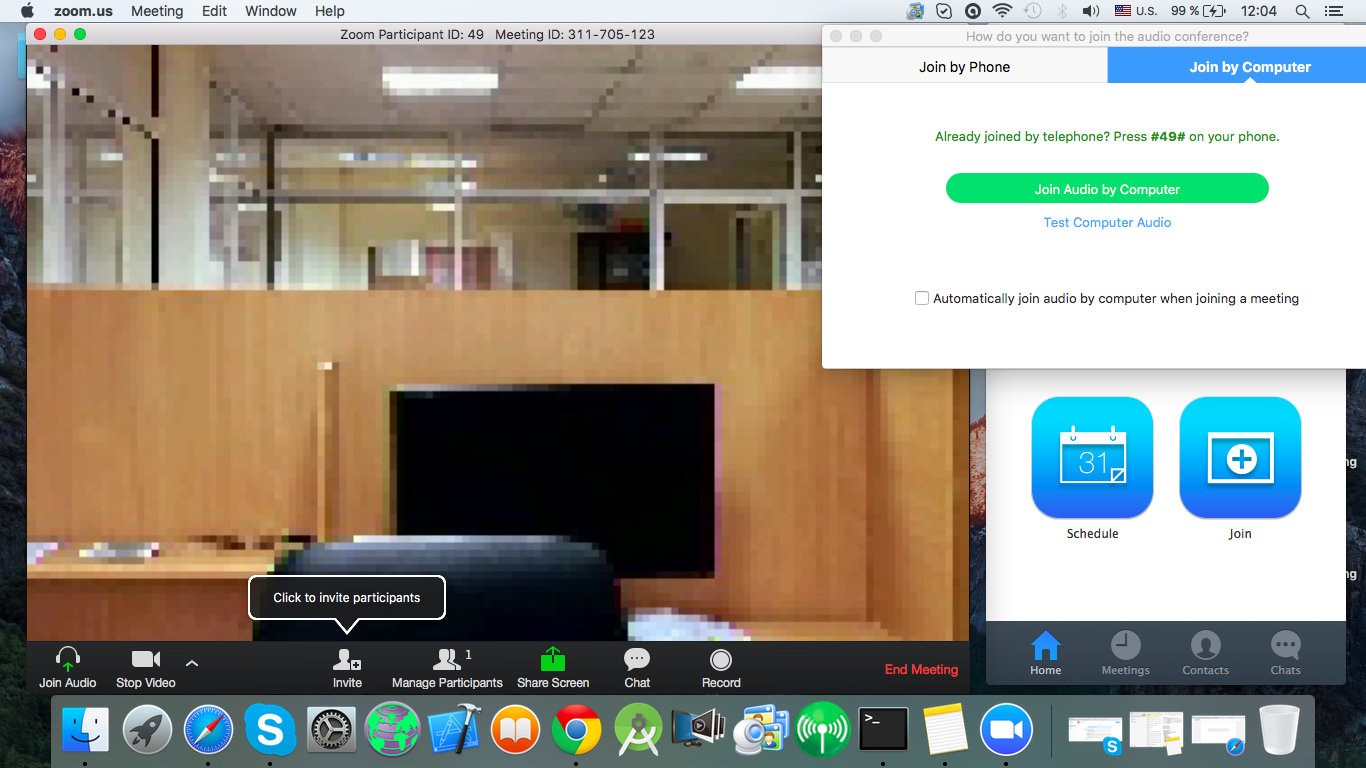
First you need to set up your account and follow the steps to “initiate” the virtual classroom (see screenshot).

After initiation, the software provided by the service will be launched on the local computer, which will capture voice from the microphone and video from the computer’s camera.
Each meeting is assigned a unique nine-digit ID, informing which, together with the IP address of the service that is being broadcast, you can invite third-party participants to the meeting. The sequence of actions is shown in the following screenshots.
Ultimately, with the IP address and meeting ID provided by zoom.us, we can configure Web Call Server 4 and the viewer to participate in the “meeting.”
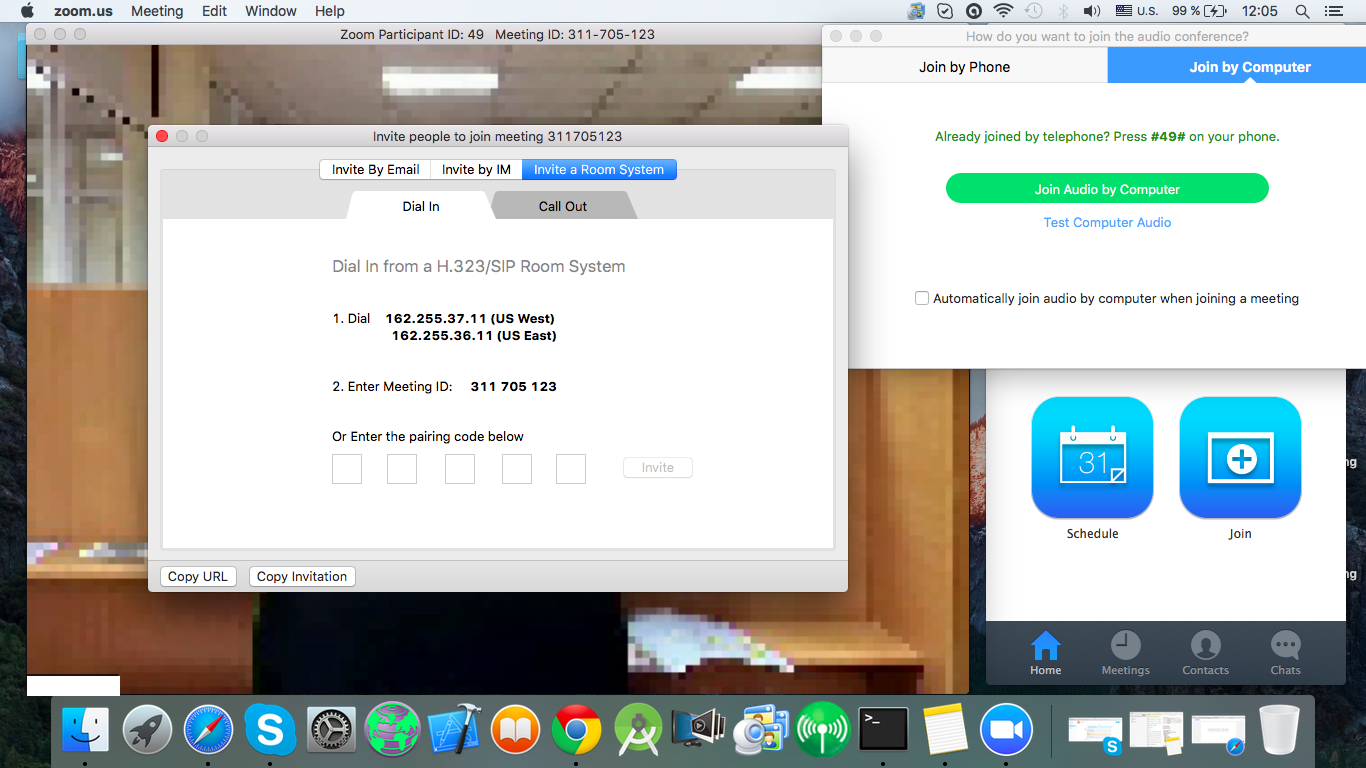
Despite the fact that Web Call Server 4 is an integration tool between different content sources and streaming servers, each conference (or other source) can have individual settings, features and undocumented requirements for implementing standard SIP, RTMP protocols.
In our particular case, both streaming servers are installed on the same device, so the first step is to make sure that only one of the servers (AMS or WSE) is working simultaneously - otherwise (when there is a separate device for each software) the next operation is not necessary.
We needed to force stop one of them streaming servers, as shown below:
In this particular example, AMS is stopped (we know in advance that it worked on port 1936), and the Wowza Streaming Engine works on port 1935 at address 45.101.139.105.
Next, you need to make sure that the configuration of the Web Call Server 4 server matches the parameters of the content source used (in our example, zoom.us), for this, for example, through ssh, you can access the server on which Web Call Server 4 is deployed and find the file in the ./conf directory configuration, as shown in the screenshot below:
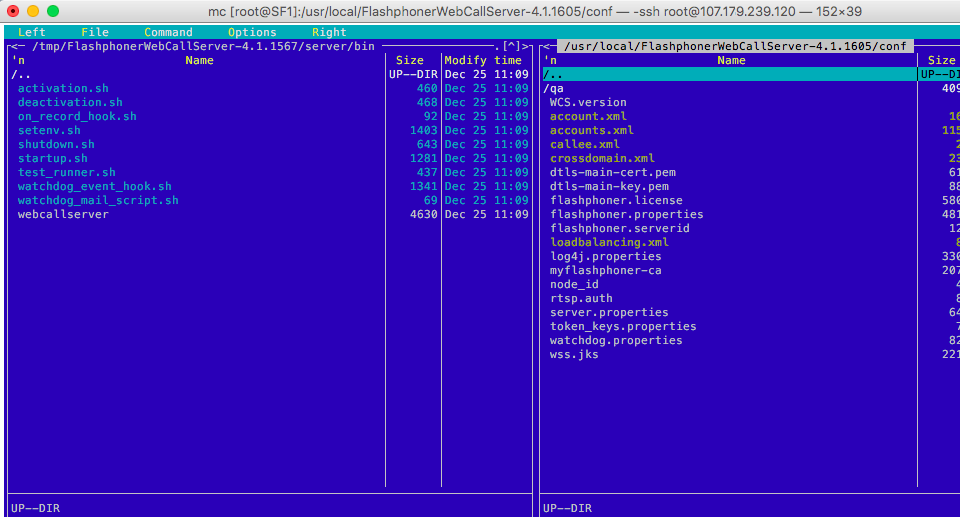
In the file itself, you need to change the codecs parameters and a number of others, as indicated in the screenshot (in this case, the parameters that are applicable to other services can simply be “commented out”):
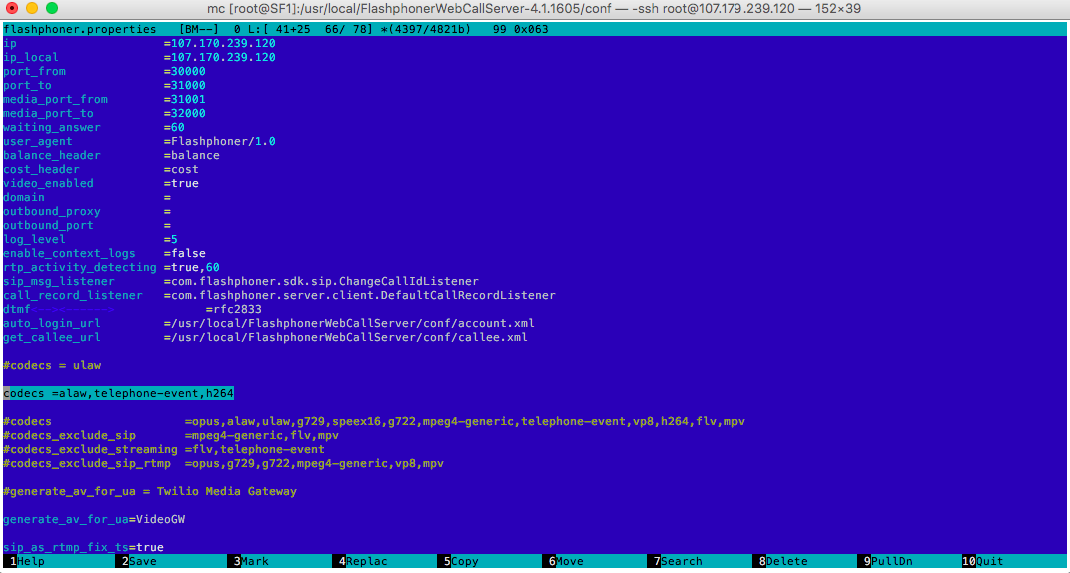
After saving the new settings in the configuration file, restart Web Call Server 4 (as shown below):
As a result of all the above actions, we are guaranteed to have correctly functioning streaming video server and Web Call Server 4, and you can proceed to direct control of Web Call Server 4 and the broadcast source.
Having installed and configured, correctly working Web Call Server 4, we must bear in mind that in general, this software product acts as an intermediary between the content source and the streaming server. In the general case, mediation consists in initiating a SIP call to a content source, receiving a response from the content source, receiving the content itself and broadcasting this received content to the streaming server.
The Web Call Server itself requires management tools, the implementation of which is organized through the REST / JSON API commands. Such a management mechanism can be integrated into any existing software product and provide automatic management of Web Call Server.
For our specific case, we use a REST console through which requests with parameters are sent to the Web Call Server, which in turn depend on which content source needs to be integrated with the CDN.
For example, to join a meeting organized on zoom.us, you need to send the following request (which we will do through the Google Chrome REST console):
A request with the above parameters is sent to a special Web Call Server URI, as indicated below in the screenshot:
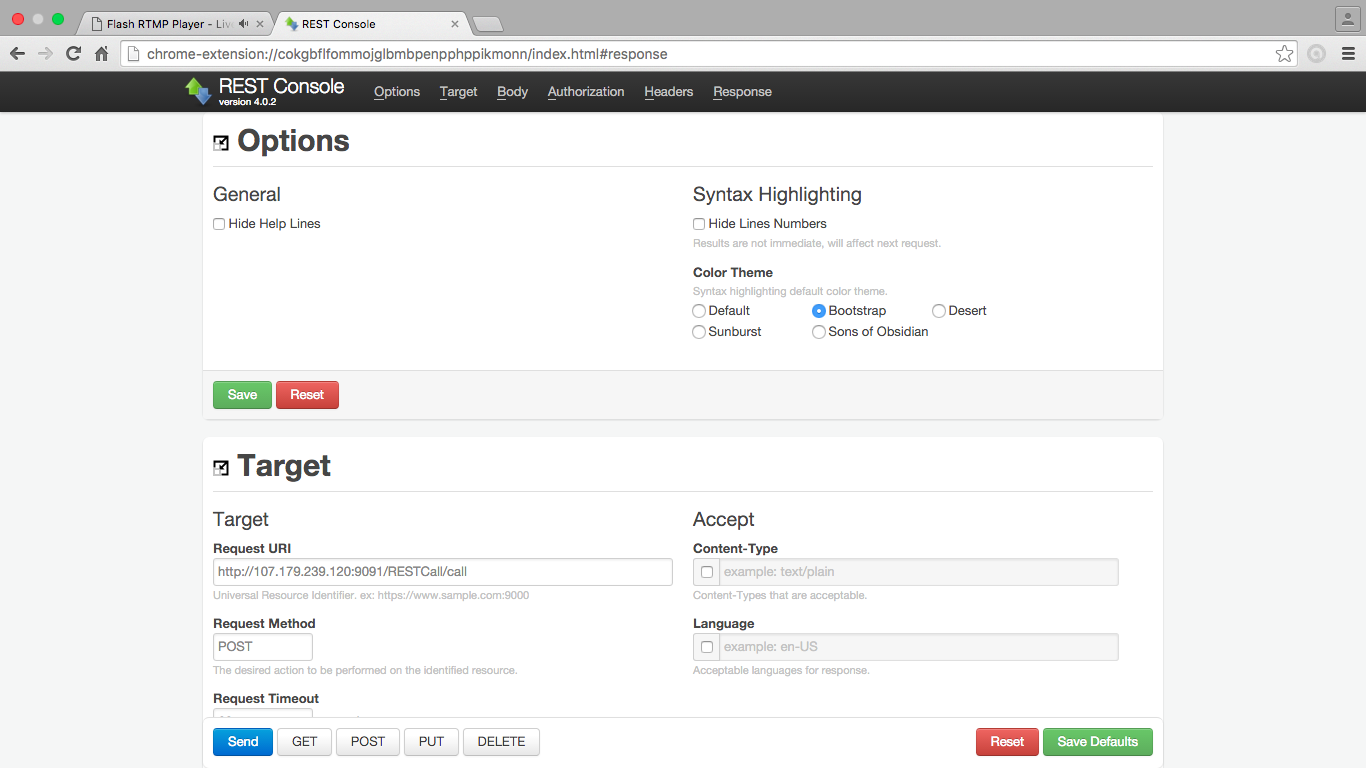
After the request from Web Call Server 4 is completed, WebCallServer will be connected to the meeting organized by zoom.us (in this case, Web Call Server 4 will act as one of the “listeners”), at the same time the response (content of the zoom.us service) received by Web Call Server 4 - Web Call Server 4 will be redirected further to the streaming video server (as we see in the screenshots below):
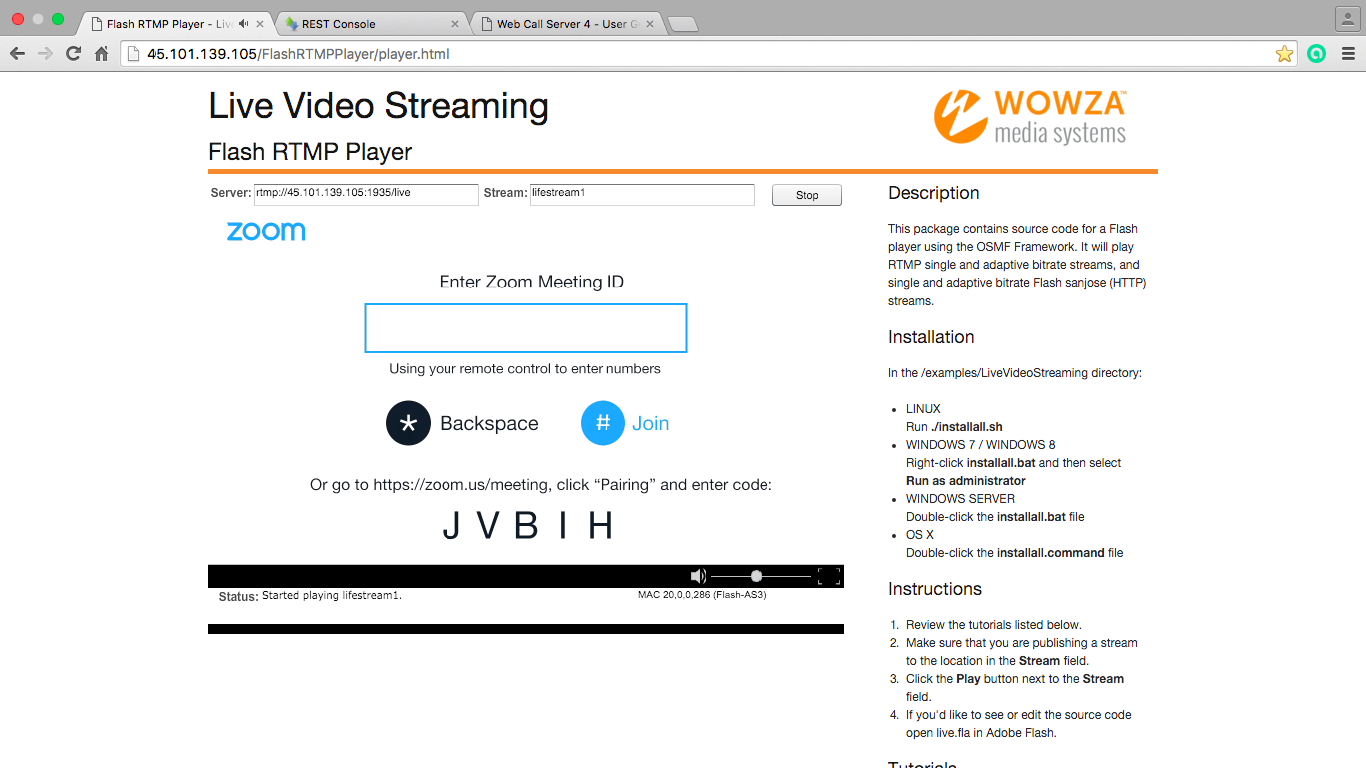
In this particular case, with the zoom.us service, it is necessary to additionally connect to a specific “meeting” by sending to the zoom.us server a specific identifier (provided by the service) of the “meeting” (in our case it is 311 705 123). One way is DTMF tone dialing (for example, on a softphone keyboard). Web Call Server 4 can perform the same operation, as shown in the screenshot:
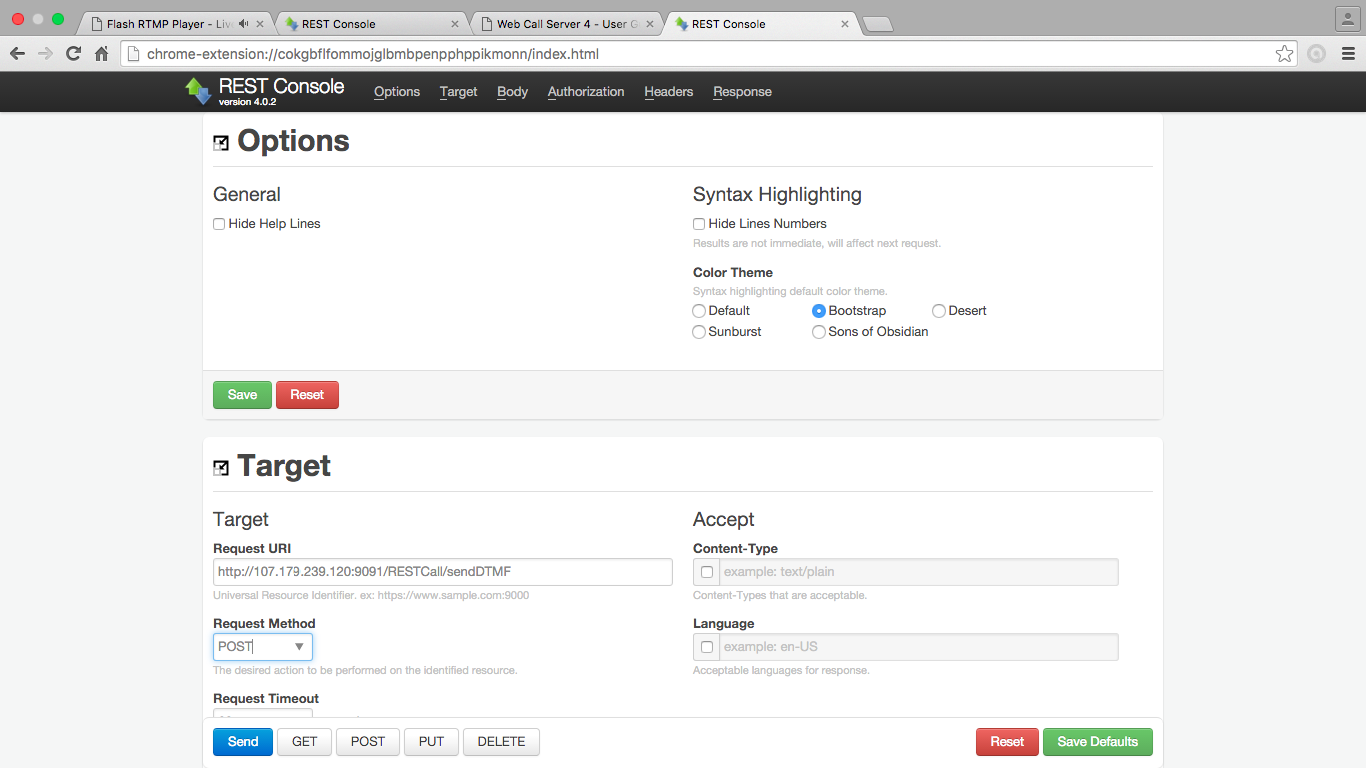
You can also send such a request via the REST console through the following command:
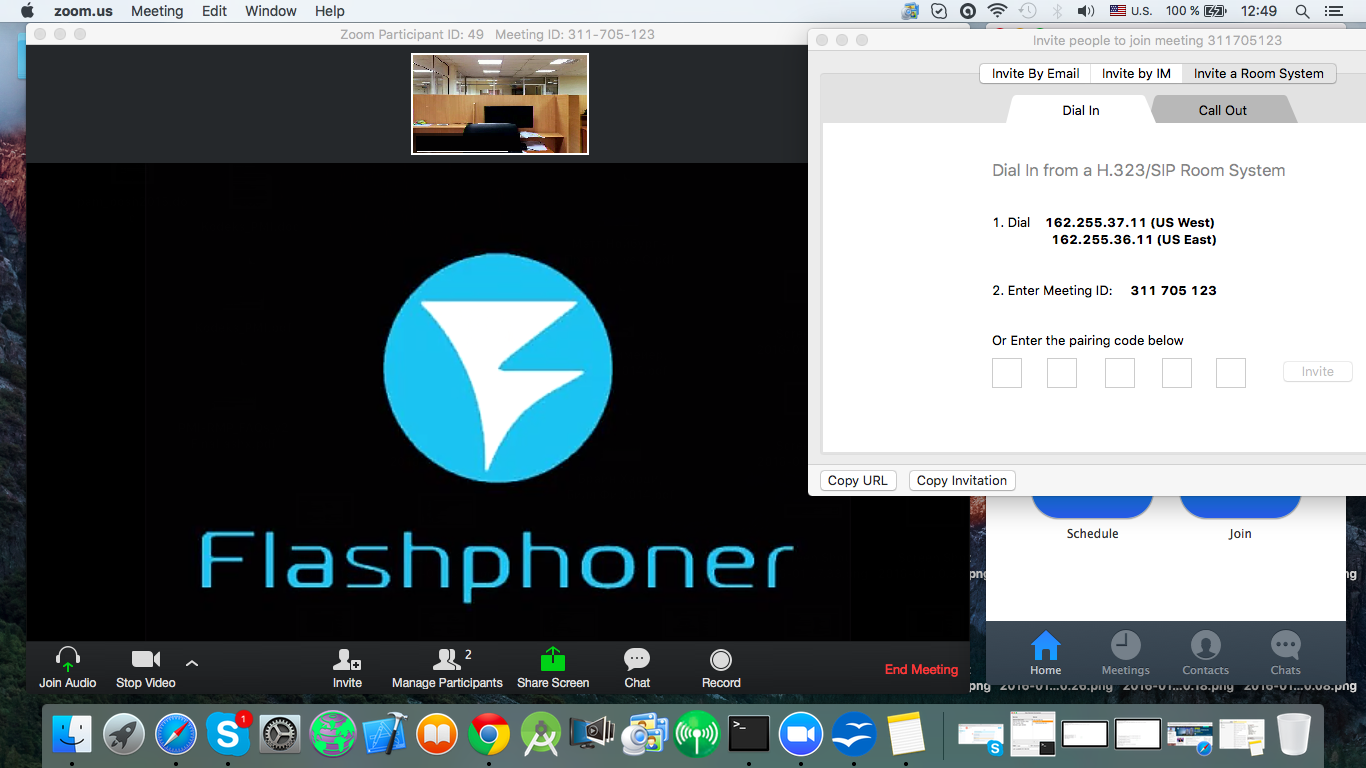
As a result, a specific “subscriber” will be connected to the broadcast of a specific “meeting”, as shown in the screenshot below. As you can see in the screenshot, in the window of the zoom.us interface the Web Call Server logo is visible, which in this case is one of the “listeners” of the launched “rally”.
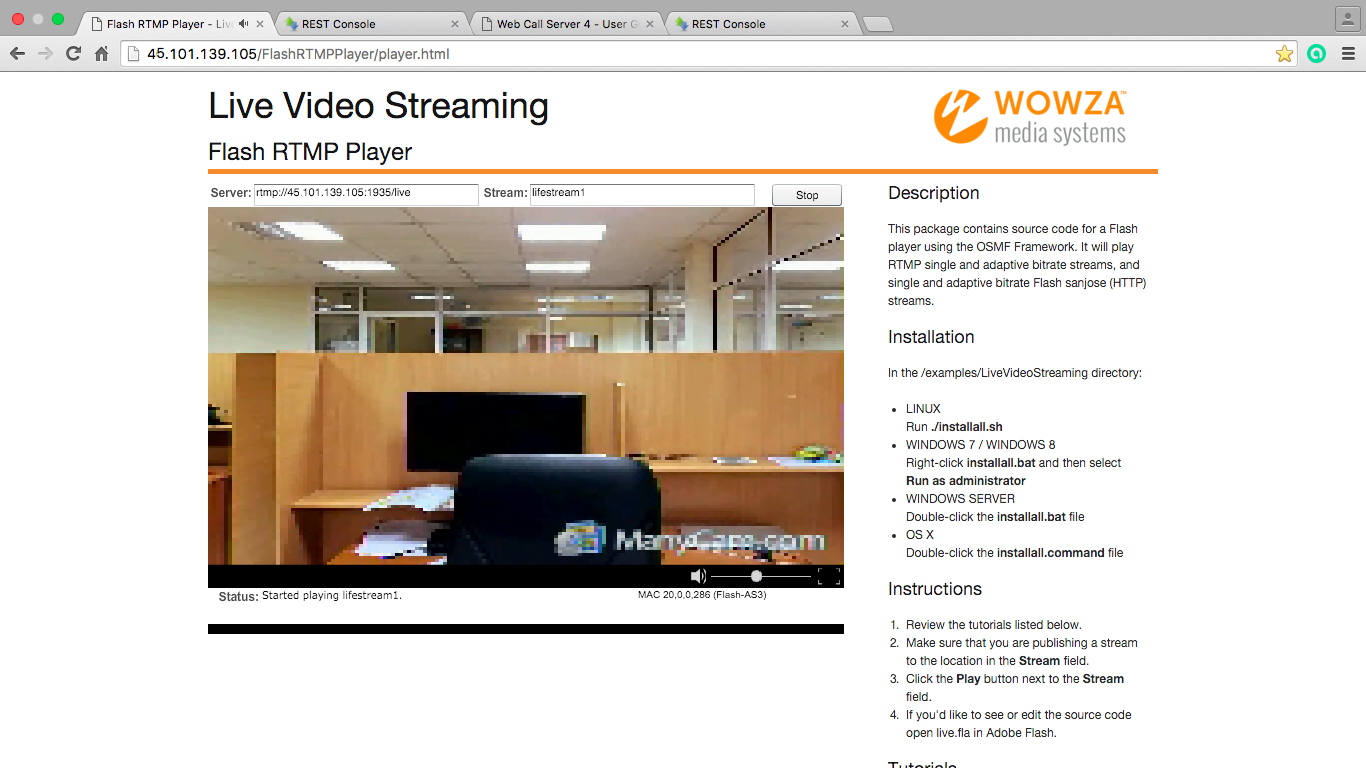
At the same time, in the Wowza Flash Player window we see a broadcast that was redirected from zoom.us to the Wowza Streaming Engine server via Web Call Server 4 (see screenshot).
Thus, by means of two commands transmitted through the REST console to Web Call Server 4, we managed to initiate participation in the meeting (“rally”) on zoom.us and redirect the content (“picture” and audio stream) to the Wowza Streaming Engine server for subsequent broadcasting through CDN network.
Web Call Server 4 can provide translation of any number of connections from the zoom.us service, which we tested in practice.
To do this, you need to configure your Bria account as shown in the screenshots below:


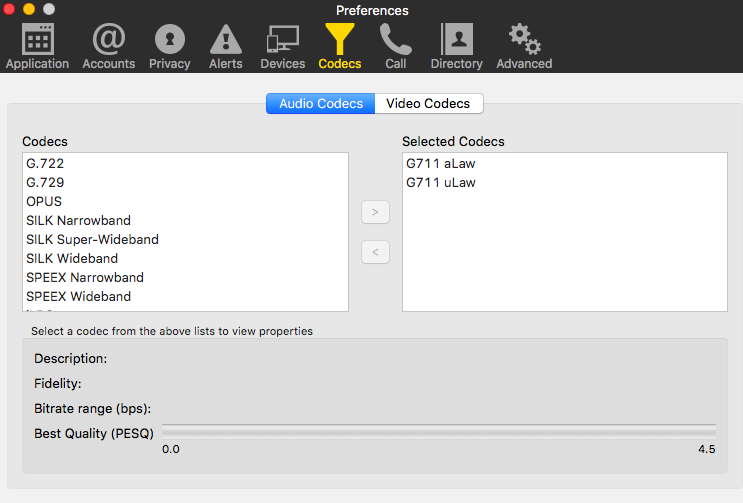
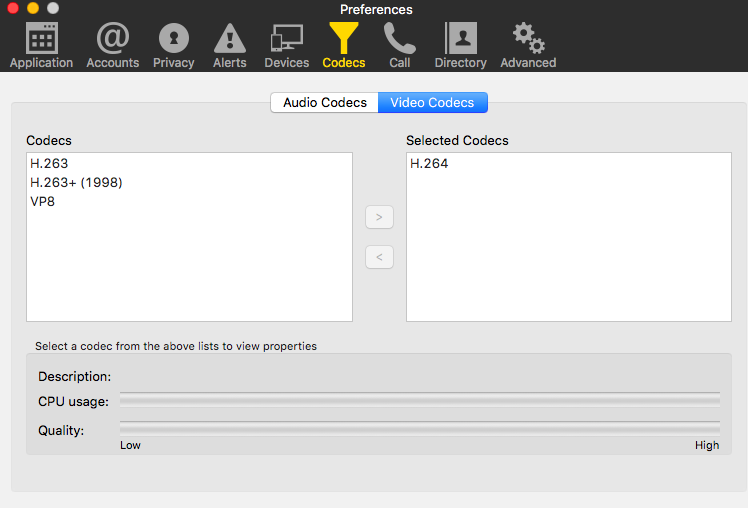
And you need to install sufficient codecs for audio and video:
Further, when dialing a unique ID of the room in which the rally takes place, a connection will be made to the general conference with the broadcast of the common content via the CDN server.

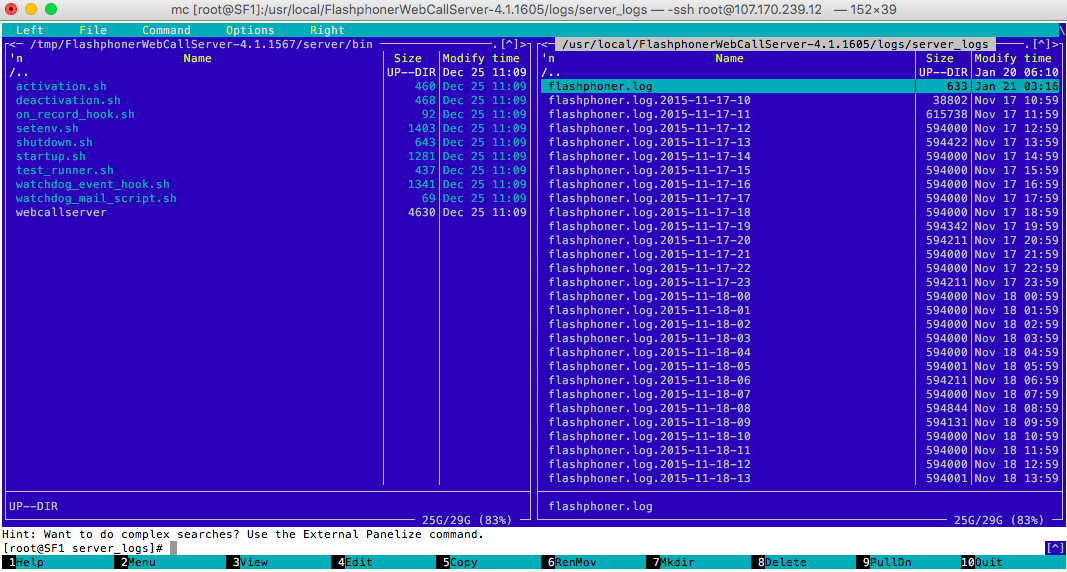
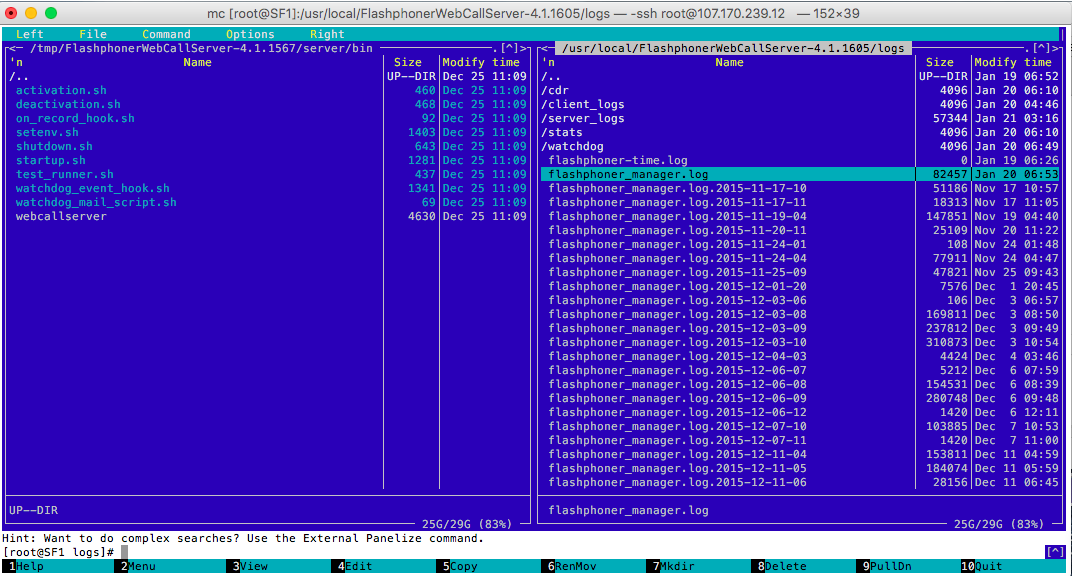
As a source of knowledge about the possible causes of failures in the interaction between Web Call Server 4 and other software products and services, it is recommended to refer to the log files on the server where Web Call Server 4 is installed, as shown in the screenshots:
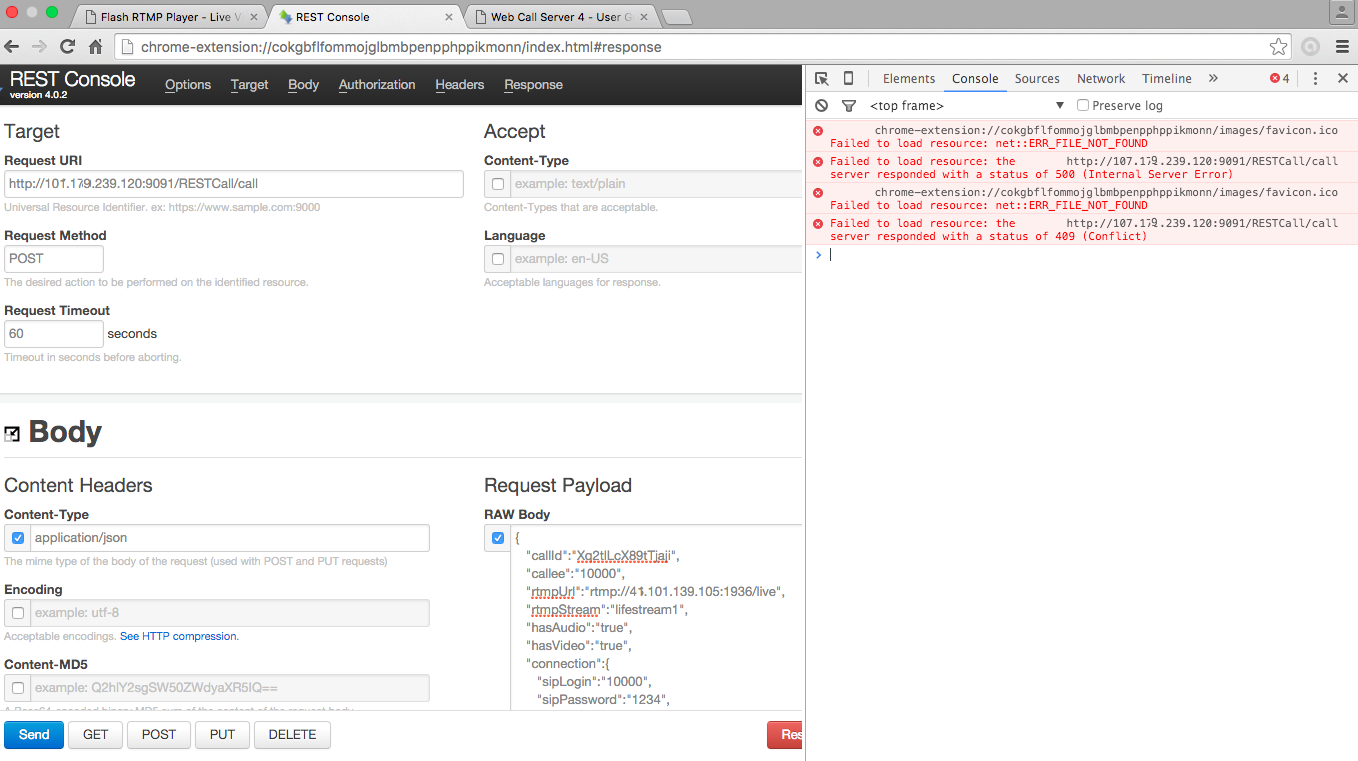
The results of query execution through the REST console can also be viewed through the tools provided by Google Developer Tools, as shown in the screenshot:
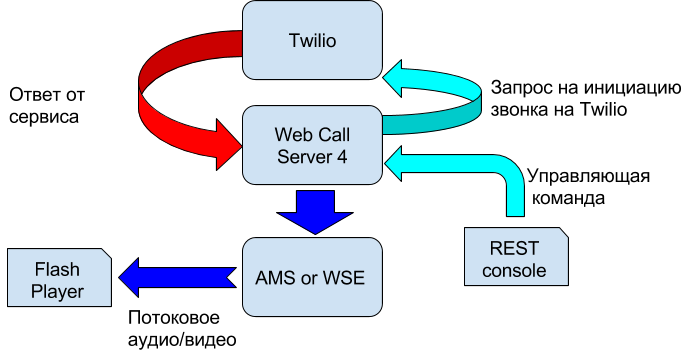
To test the flexibility of the Web Call Server 4 integration platform, we also tested the interaction with the Twilio service.
The organization of the experiment is shown in the diagram:
To start using the Twilio service, you need to set up an account on the service and create a domain to which softphones will connect. The sequence of these actions is shown in the following screenshots:
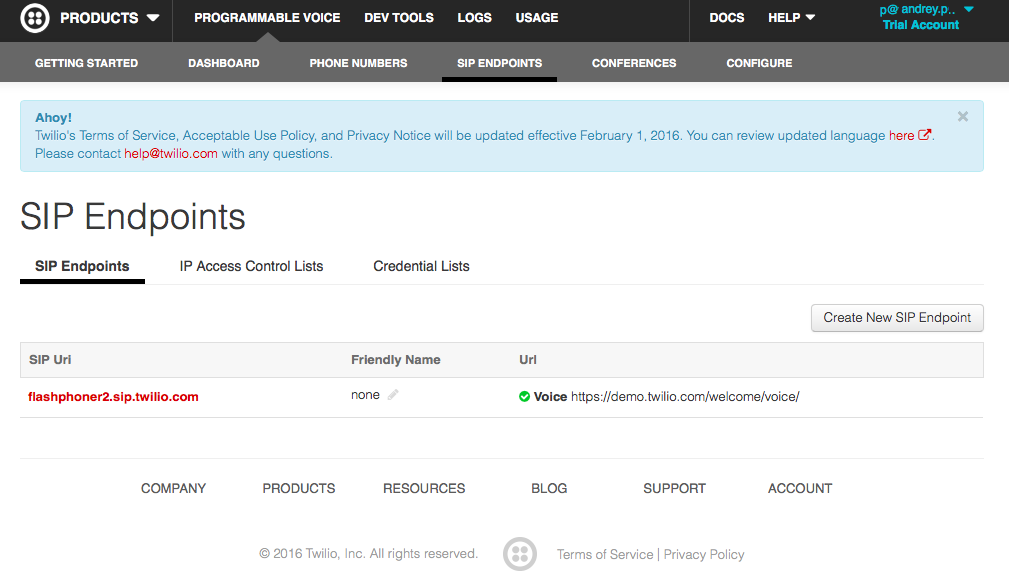
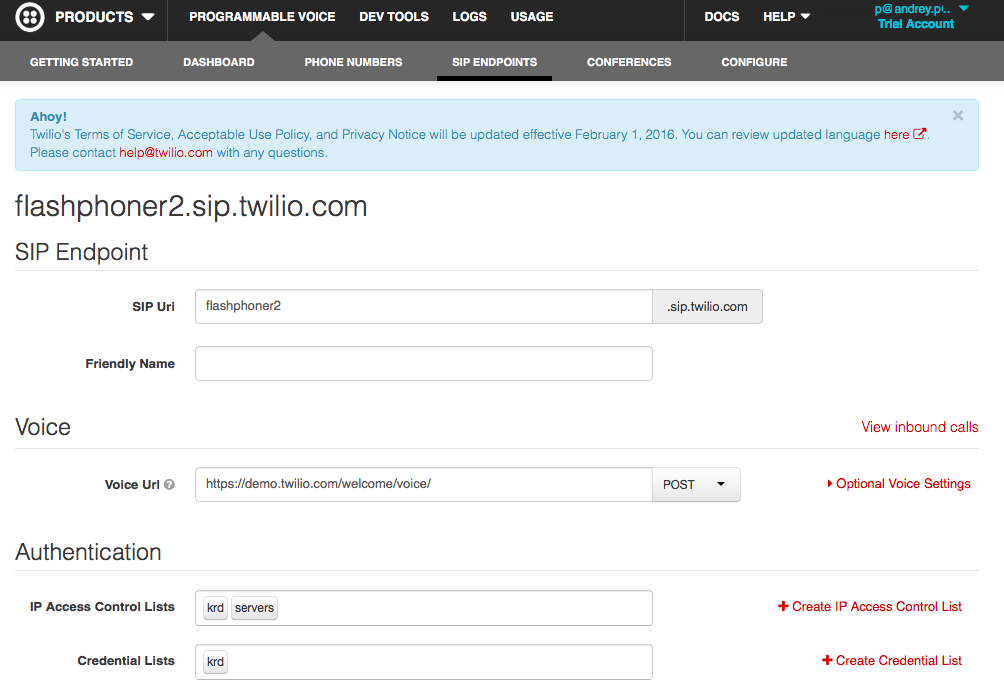
It is important to include in this list both the IP addresses of subscriber devices (softphones) and the IP address of Web Call Server 4.
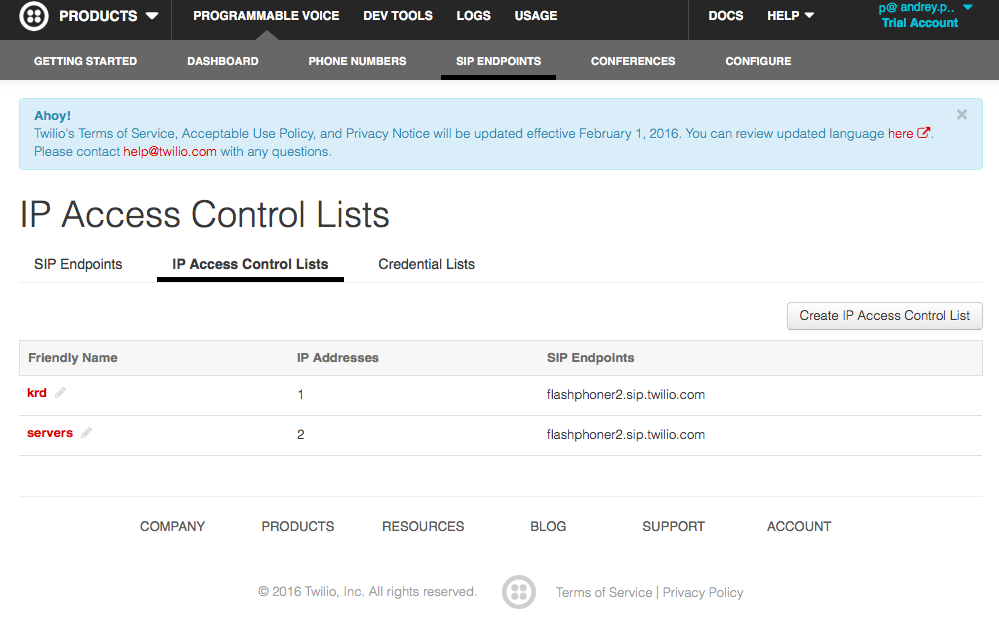
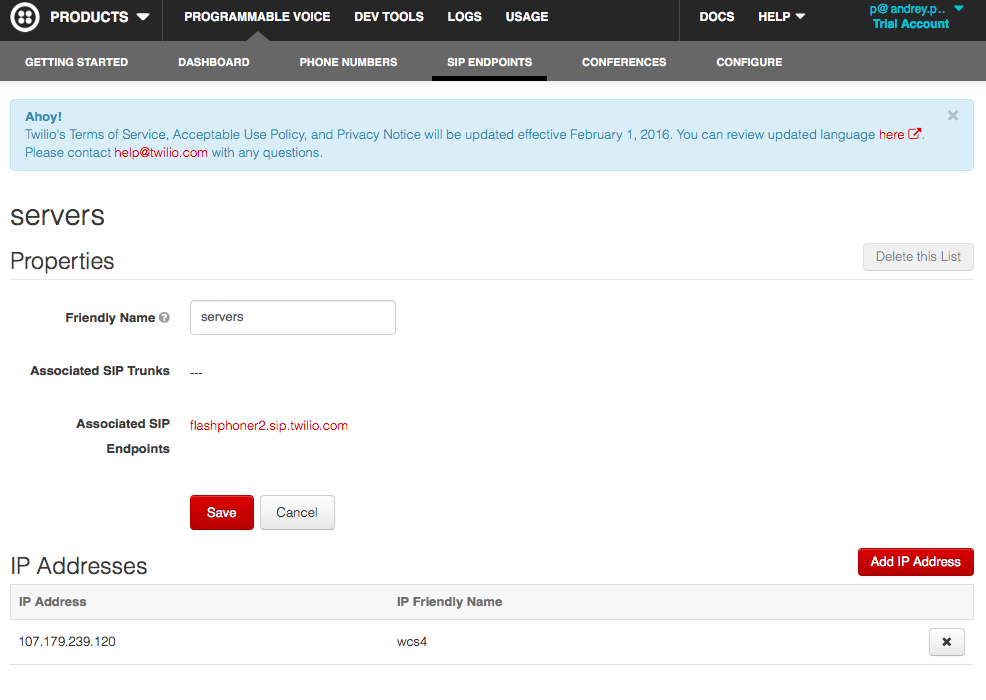
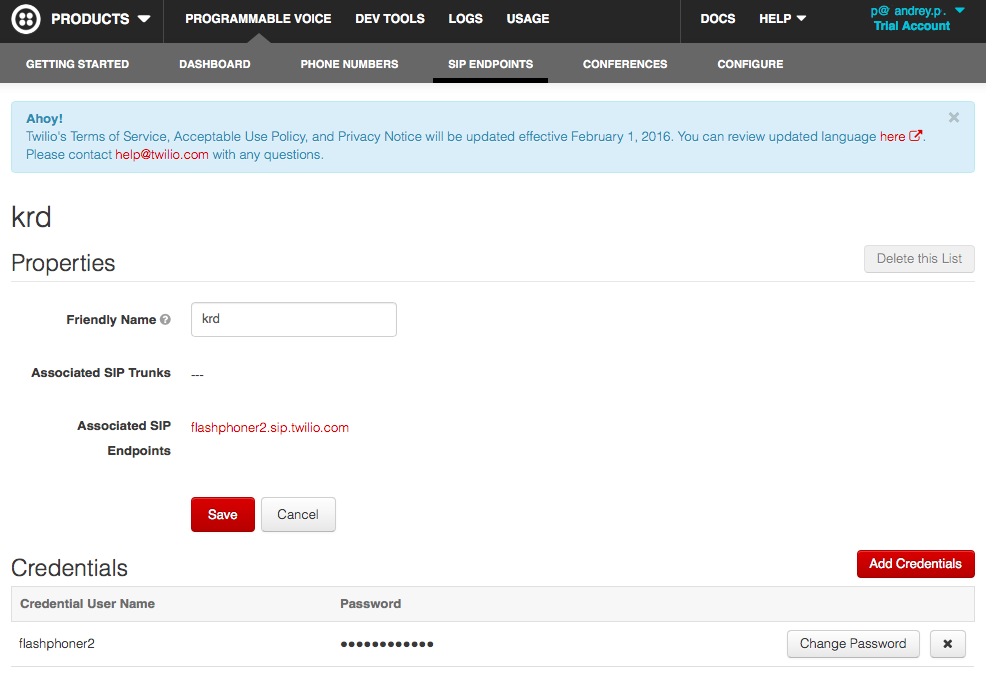
After the domain is created in the Twilio service, the access rights and the list of IP addresses for which access is allowed are generated - you can start configuring the softphone, in our case, Bria 4.
In Bria settings you need to create an account (account) to access Twilio, as shown in the screenshots below:

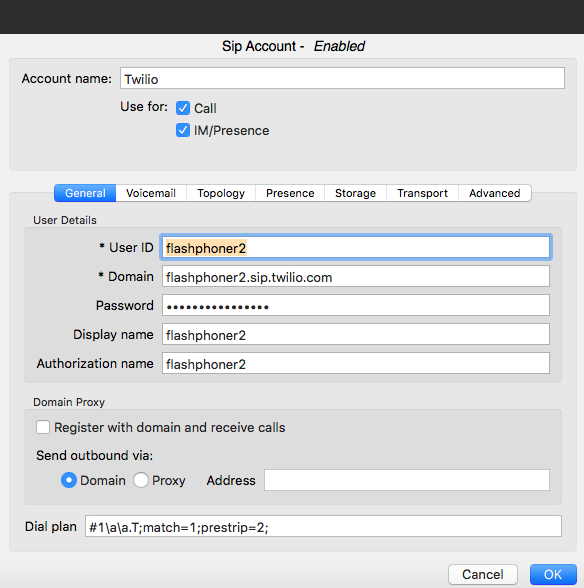
In the same place in Bria settings it is necessary to configure the use of audio codecs: G711 aLaw, uLaw as well as the H.264 video codec.


After that, you can make a test call through Bria and listen through the softphone to an answering machine record provided by Twilio.
If the domain on the service is configured correctly (and the answering machine is audible in Bria), you can start creating a control command for Web Call Server.
When testing the Twilio service with Web Call Server 4, you need to change the server settings. Such changes are made to the flashphoner.properties configuration file.
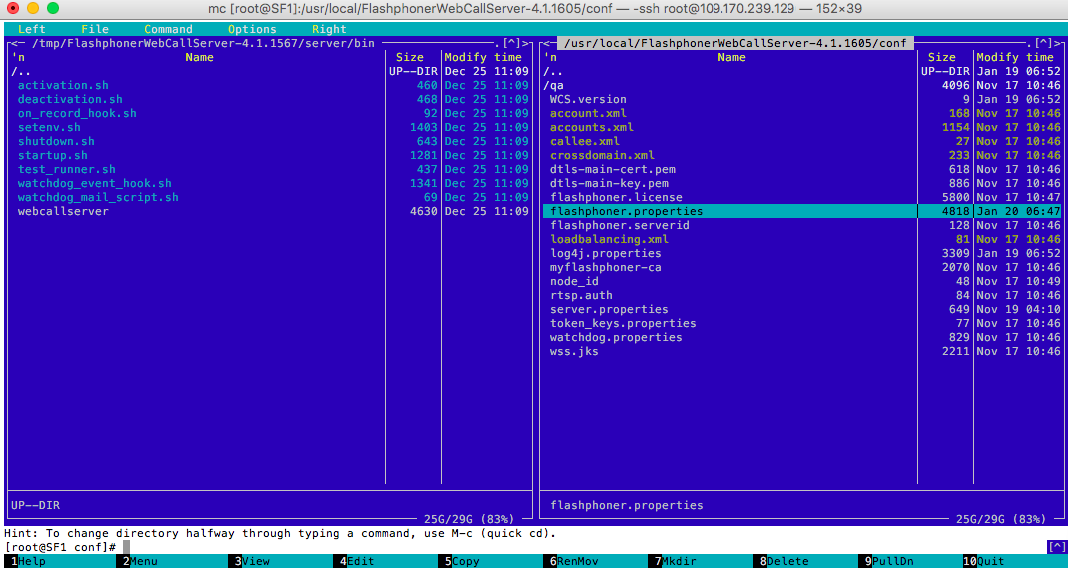
In particular, the set of used codecs and a number of other parameters are changing.
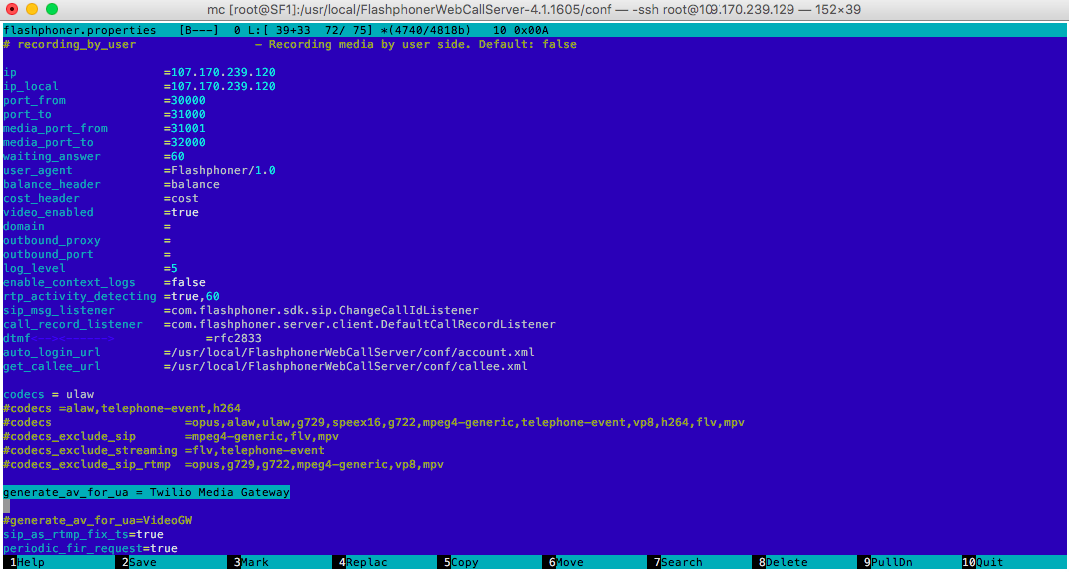
What and how to change in the configuration file is indicated in the documentation for Web Call Server 4 provided by the manufacturer of the integration server.
After changing the configuration of Web Call Server, it is necessary to reboot the server so that the changes take effect:
As in the previous experiment, Web Call Server is controlled by sending a REST command through the Google Chrome REST console, as shown below:
The request is sent to the Web Call Server address: http: //107.179.239.129:9091/RESTCall/call.
As a result of executing the request, a call is generated to the Twilio SIP domain of the service and in Flash Player you can listen to the response received from the Twilio service - or rather, you can hear the message from the Twilio answering machine playing.
Thus, as a result of testing the operation of Web Call Server 4 as an integration solution between Twilio and Bria, we were convinced that the integration server is able to interact with the Twilio service and the softphones connected to this service.
To test the possibility of interaction with IP-PBX solutions, a test was conducted with the IP-PBX OpenSIPS server.
The layout of the test site is shown below:
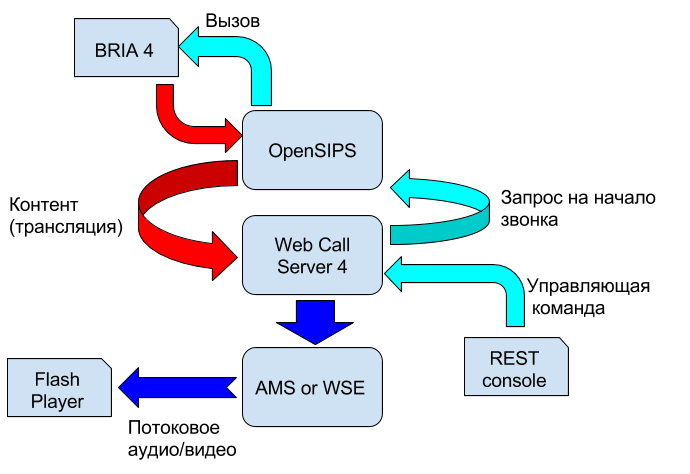
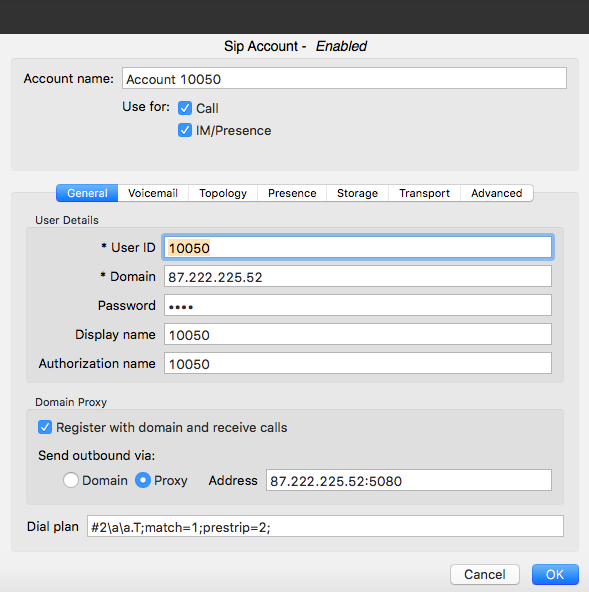
In this case, Bria acts as a “service” that receives calls from third-party subscribers and answers calls with content. In connection with this other role, in which Bria acts in this particular case, it is necessary to change the settings as shown in the screenshots below. In particular, you need to create an account to make calls to IP-PBX OpenSIPS:
As in previous cases, to demonstrate the ability to control Web Call Server, we send a request:
It should be noted that the call is made through the account 10051 created on the OpenSIPS server, and the “number” of the called subscriber is indicated in the “callee” field.
As a result, a call made to Web subscriber 4 to the “subscriber” 10050 was redirected to the streaming server and subsequently listened via Flash Player.
Another service we tested with is Vidyo.com. The need for mass broadcasting is related to the fact that this service has a limited number of participants in each broadcast (rally) and, accordingly, there may be a need to use the usual service (Vidyo) to hold an event with 50, 100 or more number of participants.
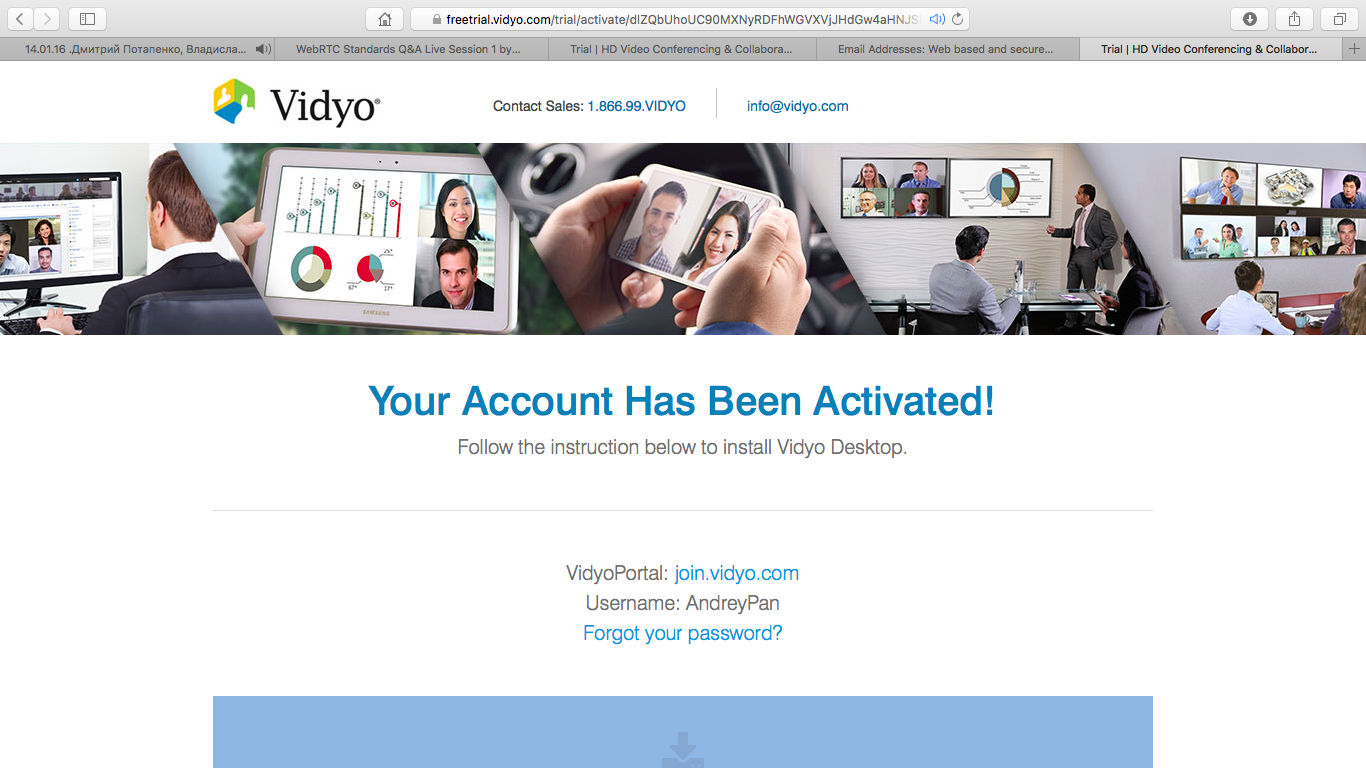
As is the case with other services, registration on the service is required first.
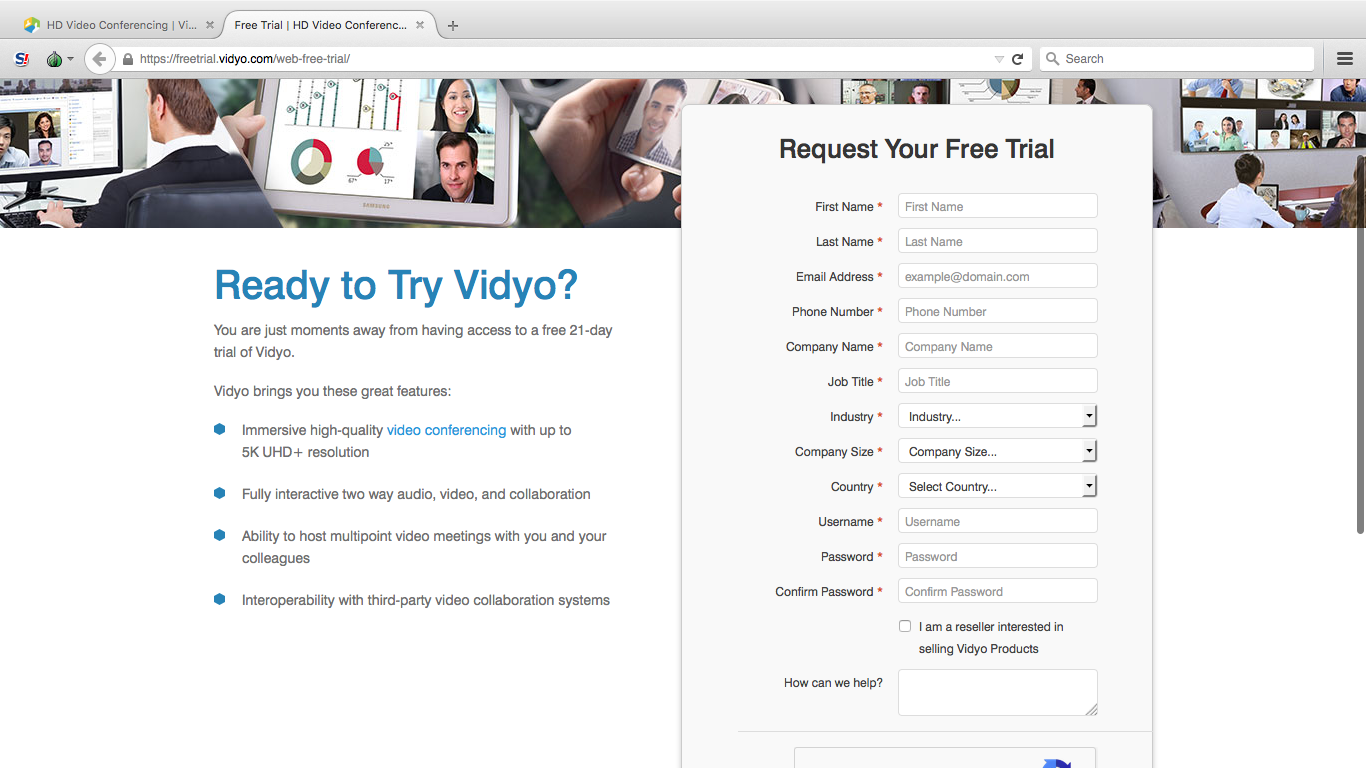
Further, after registration, you will need to install the software on your local computer and enter the data obtained upon activation to connect to the service.

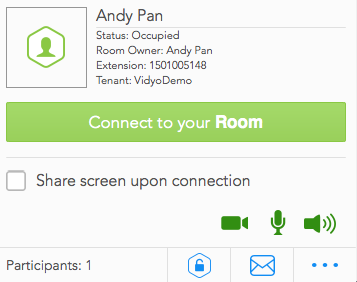
After entering the data, a connection will be made to the service and it will be possible to create a meeting (room for a virtual meeting). The screenshot shows that each registered and connected to the service is provided with a unique extension number (Extension).
To connect other participants to the meeting (to the room), you will need to send an invitation to other participants, for example by e-mail.
After clicking on the corresponding icon in the program window, a draft message will be created in the program for processing e-mail, where connection data will be visible, which must be reported to other potential participants in the meeting.
The text of such a letter is shown below:
To check the operability of the data received from the Vidyo service, we created an account in the Bria softphone based on the data provided by the service:
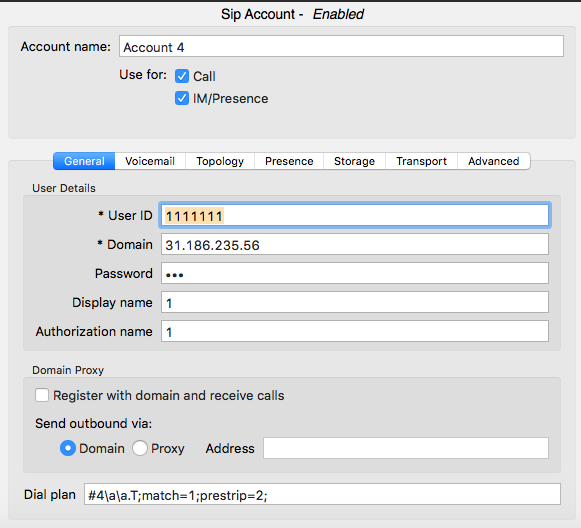
When creating an account in Bria, we proceeded from the fact that the username and password can be chosen arbitrarily and only the IP address that will be connected to and (in the future) the number that will be dialed to connect to the meeting in the room is critical.
Please note that only the account created for the Vidyo service should be included in Bria so that the dialer will be made in this service.
After dialing the number 1501005148, the Bria keyboard will dial and connect to the virtual “room” where the meeting will be held.
In the program window, you can see that a new participant has appeared in the meeting, as shown in the screenshot below:
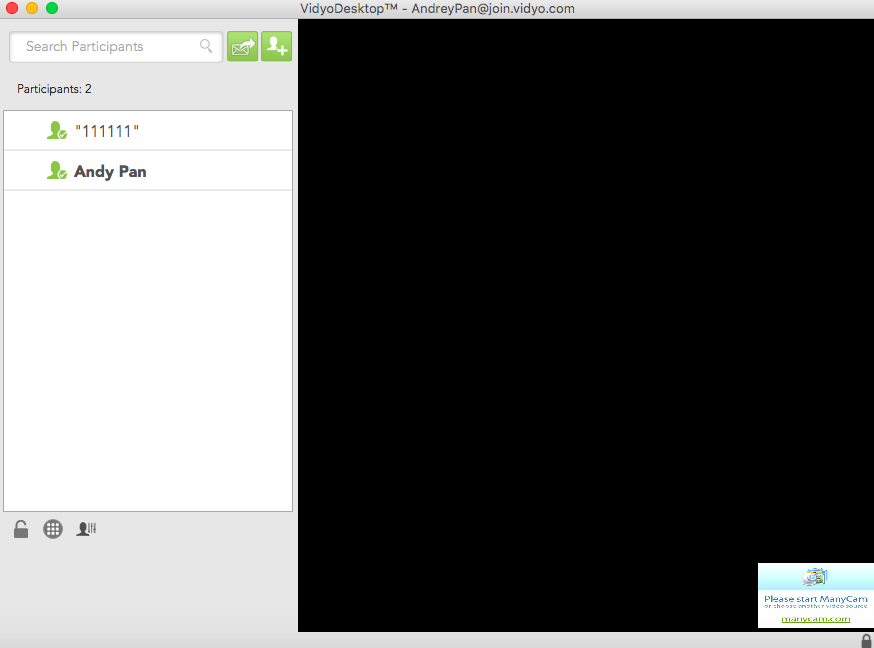
Since our test through Bria was successful, we will begin to test the integration of Web Call Server 4 with the Vidyo service.
To do this, create a command in the REST console, as shown in the screenshots below, and send a request to Web Call Server 4.

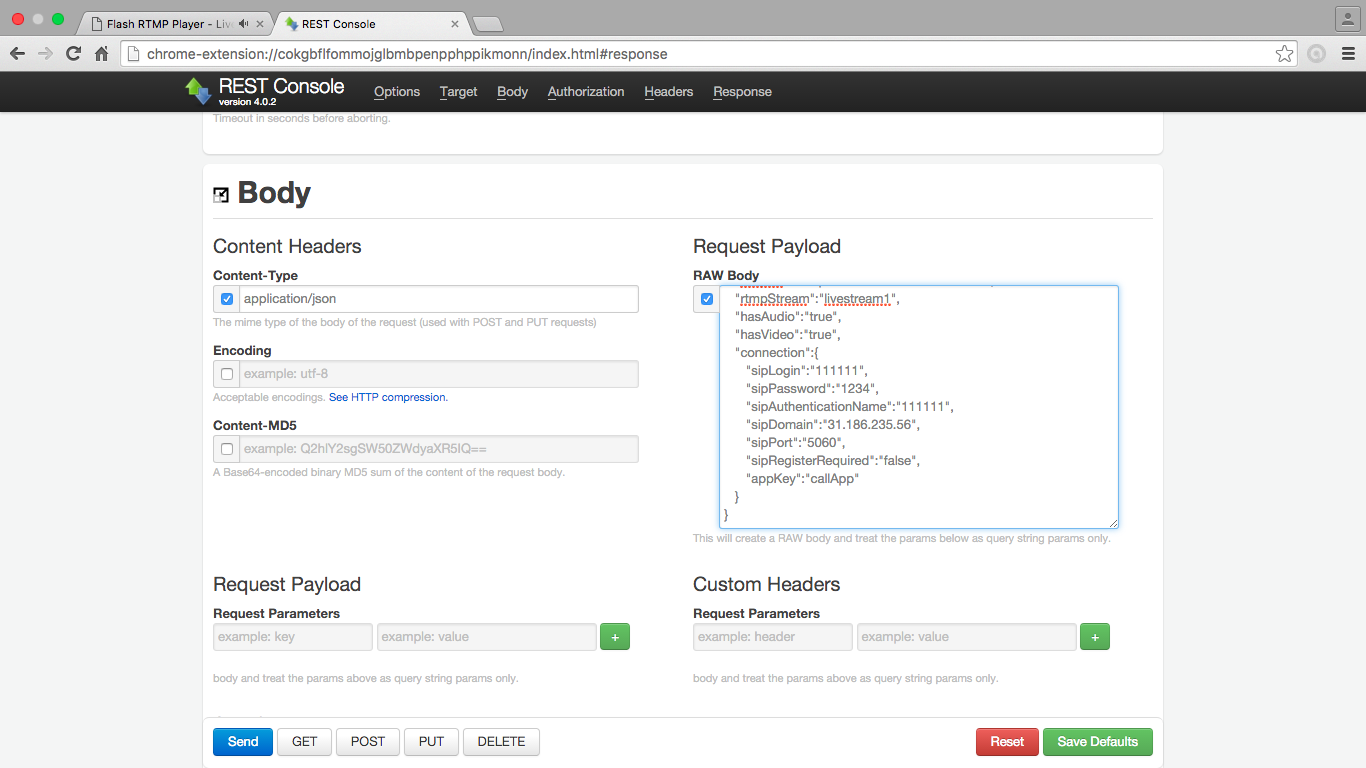
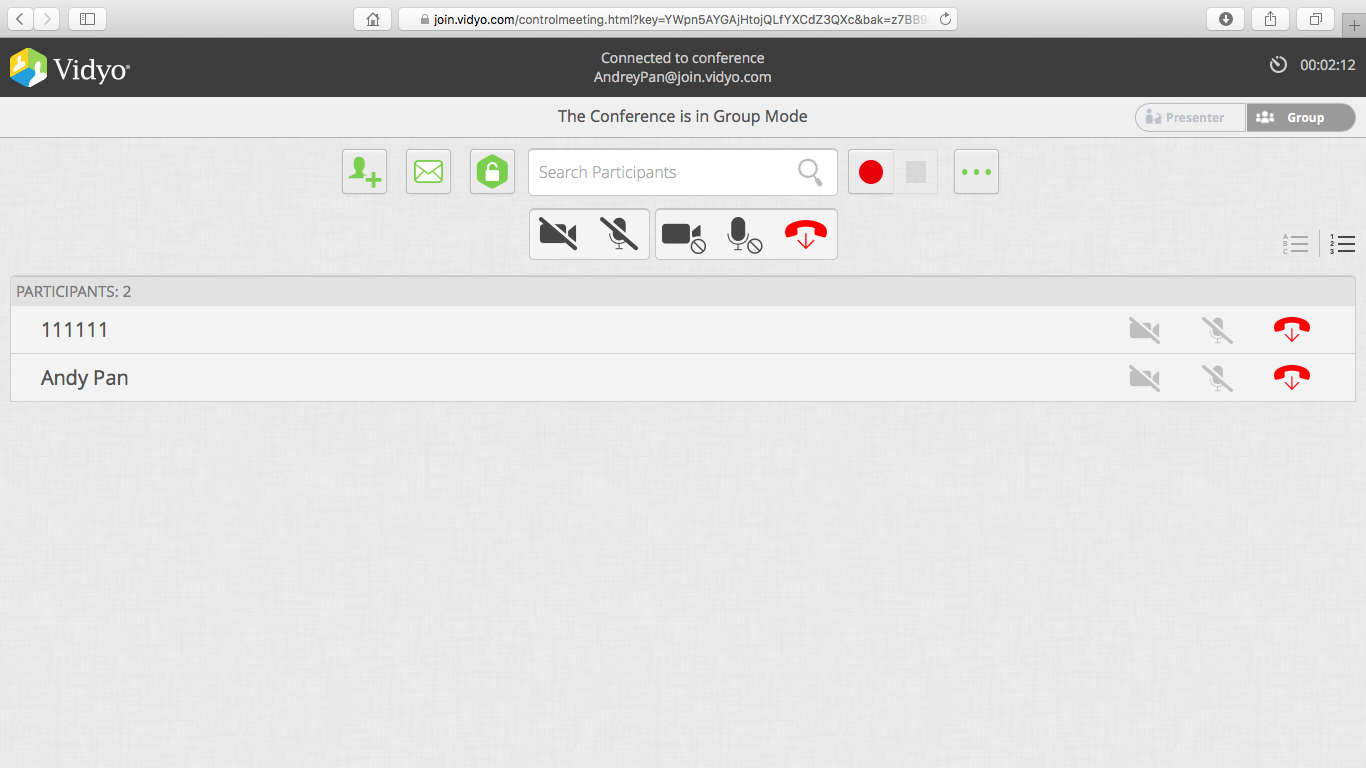
After sending the request, a new meeting participant will appear on the Vidyo service website (with the ID that we specified in the Web Call Server command).
And at the same time, in the player through which we check the availability of broadcasts from the connected service, you can see a window with a picture that was transmitted by the rally initiator to the service as a replacement for broadcasting from a web camera.
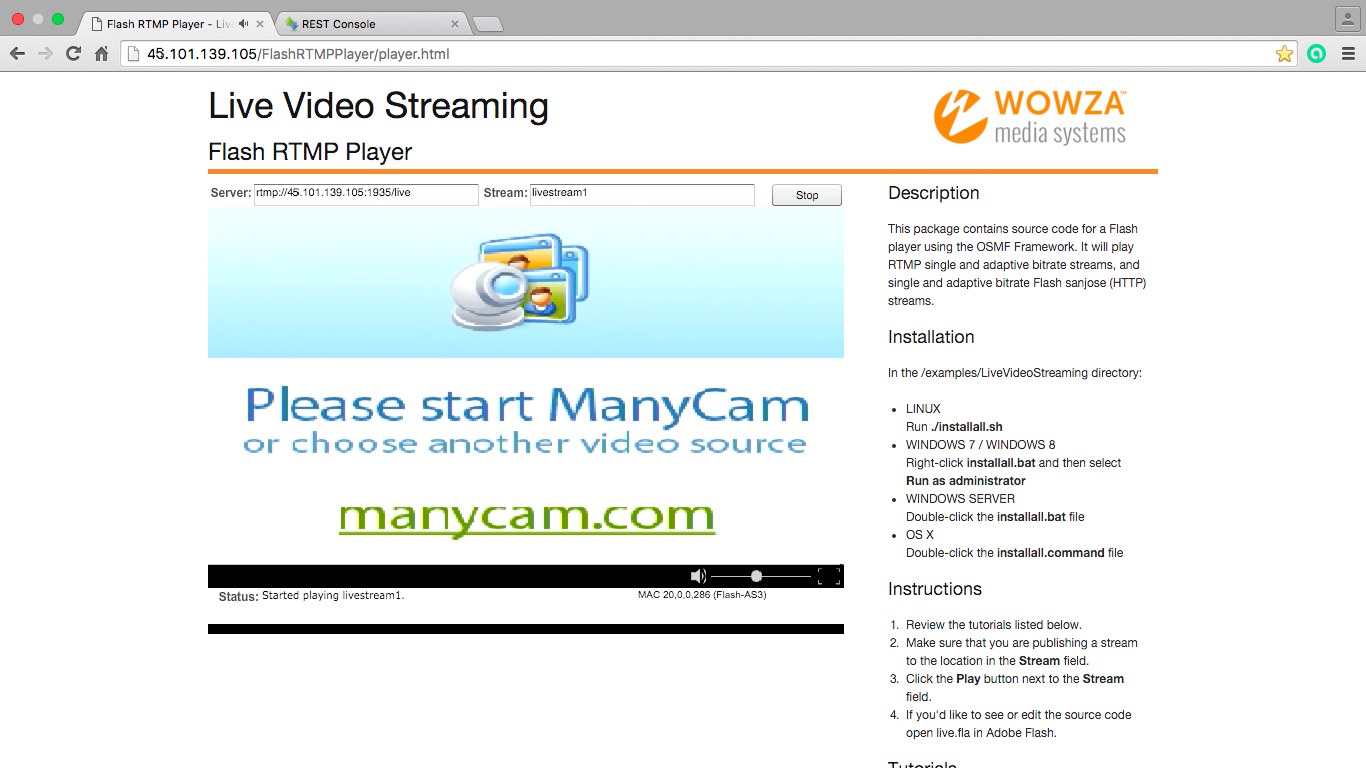
The mechanism for starting streaming video servers was described earlier and during this test we used both AMS and WSE, while the settings for Web Call Server were used as we specified for zoom.us
One of the relatively well-known services for organizing conferences on the Internet is the Blue Jeans service, the integration with which we also decided to check.
This service also offers a fairly simple mechanism for organizing a meeting (rally), for a start you need to register and create your account, as shown below:

After this step, as in previous cases with similar services, you must install the software provided by the Blue Jeans service.
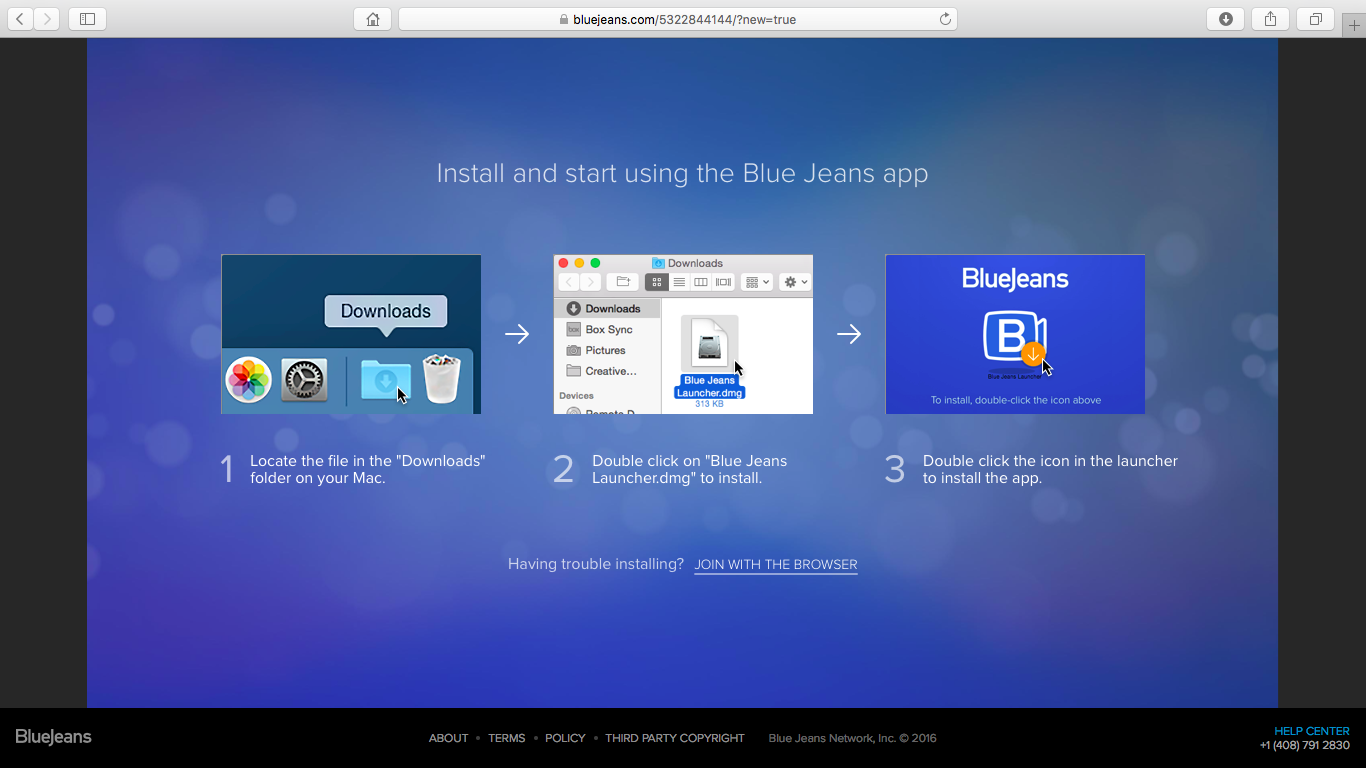
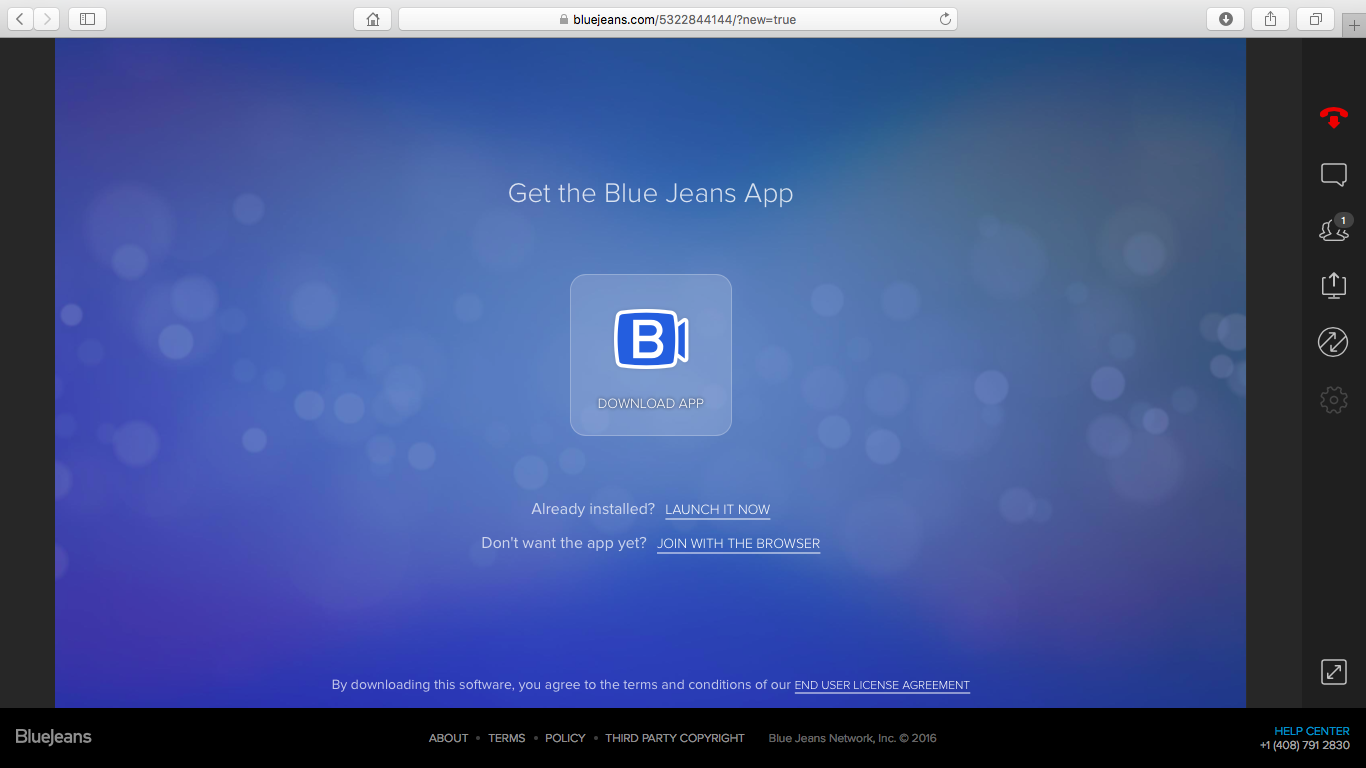
After installing the Blue Jeans software on your computer, further steps are performed through this software.
Naturally, in order to connect someone to the meeting, you need to organize this meeting, and for this in Blue Jeans software you need to create such a meeting and after creating it - send the meeting data to potential participants, in this case:
If the second participant whom you want to invite uses the same Blue Jeans software, the Blue Jeans service offers to enter the code in a special window (“pairing code”) and you can “parallelize” your and his software. However, such a function was not used for the purposes of our testing, we used the meeting ID and passcode provided by the service.
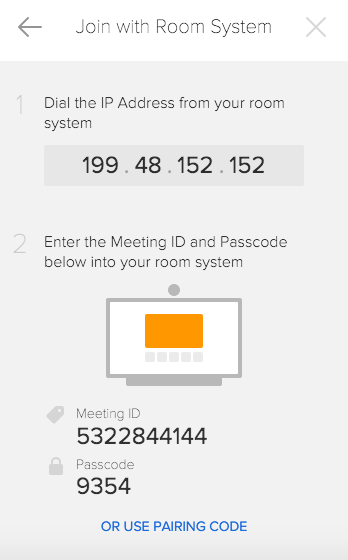
After receiving the data for connecting to the virtual “room” where the meeting is held, we, as before, decided to check the operation of the service with the Bria softphone.
To do this, create an account in Bria as shown below:
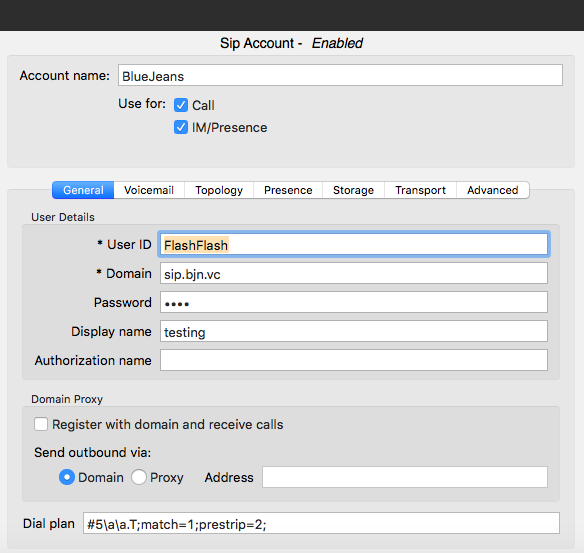
It should be noted that we collected data for Domain from the Blue Jeans community, as it is proposed to use the IP address (as shown above) for dialing or the domain name bjn.vc. directly when creating the room.
The fact that you need to use the sip.bjc.vc notation to connect using SIP is described in the messages of the community, as shown below:
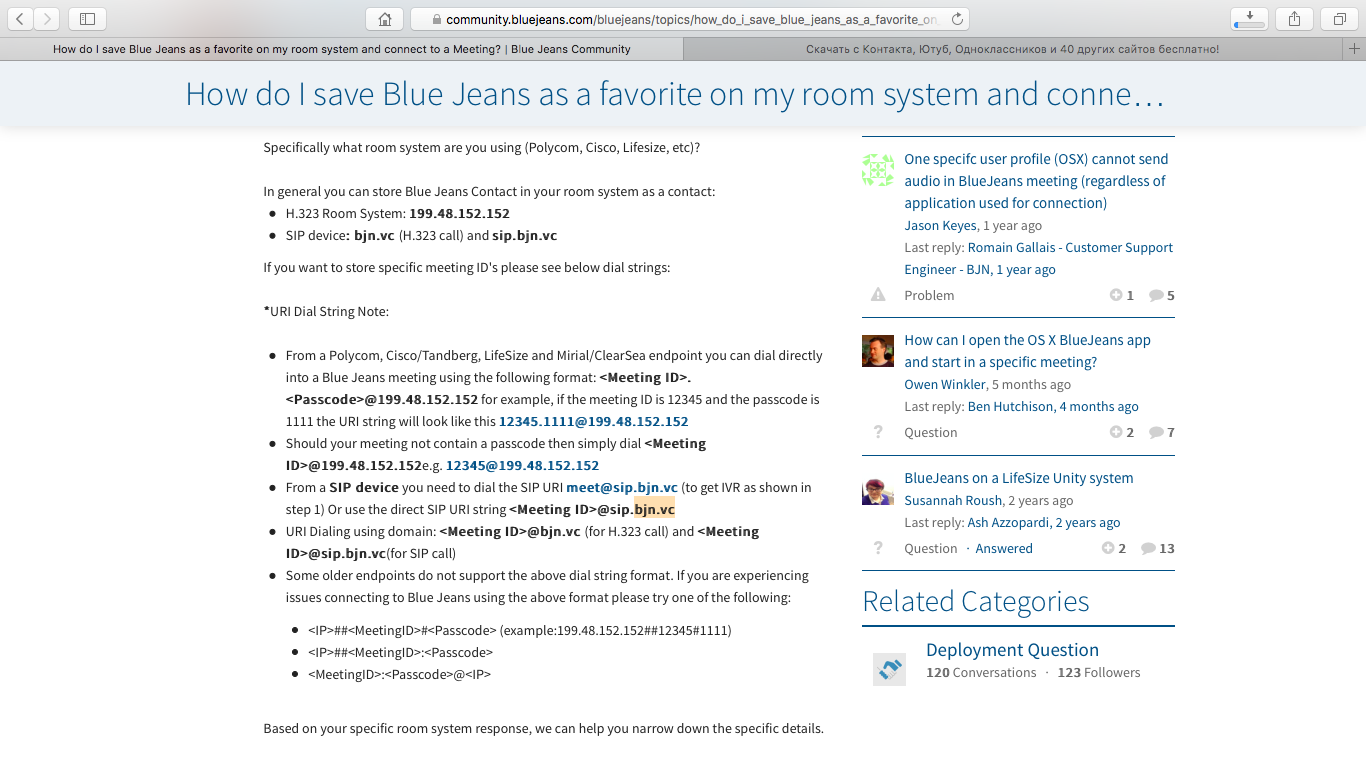
After creating an account in Bria, we typed the rally ID on the keyboard and got connected with broadcasting the picture (in our case, a video clip recorded earlier in ManyCam) into the rally and broadcasting the rally data in Bria, as shown below:
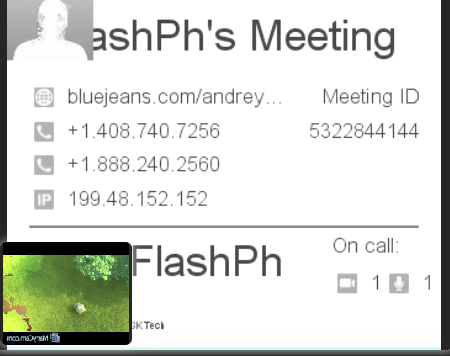
Further, checking the integration capabilities between Blue Jeans and Web Call Server 4, we sent the following request to the address of Web Call Server 4 using the REST console: http: //107.179.239.120:9091/RESTCall/call:
It should be noted that in the request, the rally ID is used as the callee field, and the data taken from the community is used as sipDomain, that is, sip.bjc.vc
After connecting to the Blue Jeans software window, you can see that several participants appeared in the rally (one of them is Bria , second Web Call Server 4), as shown below:
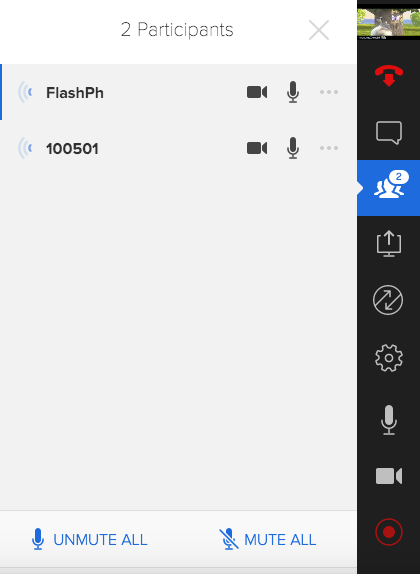
In the player, we can accordingly observe the “picture” from the local computer (as shown below), that is, we see what the “Blue Jeans” software “sees” on the local computer. Next, Blue Jeans software sends this video to the service, and Web Call Server 4 initiates and receives a response from the Blue Jeans service and redirects the service response to the streaming video server (AMS or WSE, in our experiment), which we see in the Flash Player window 'a.
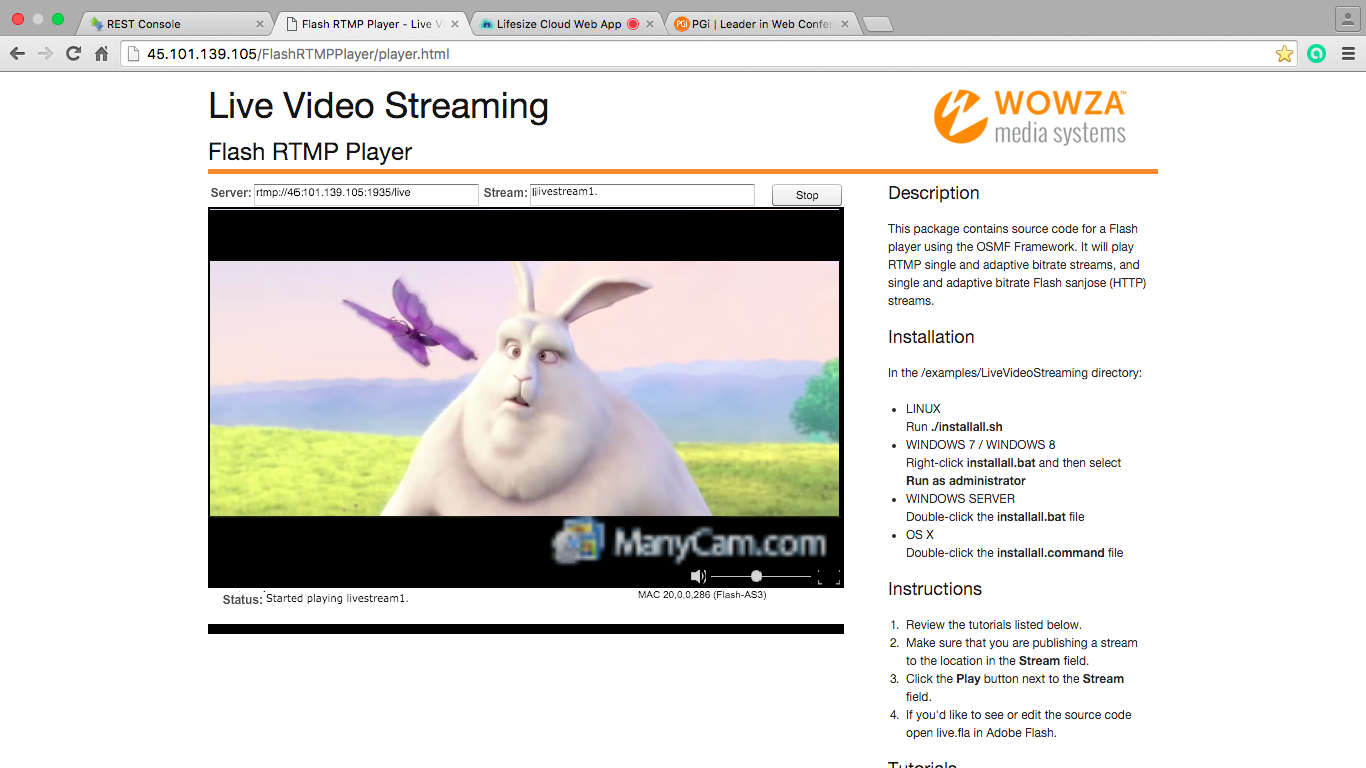
By the general impression, with the exception of the “default” that a specific domain must be used for SIP connection, the general interaction with the Blue Jeans service turned out to be simple and relatively hassle-free.
Another available service, the integration with which was tested, is the Lifesize service.
Just like everyone with the previous services, you can use the service after registering on the site, downloading and installing the software provided by the service, and this is exactly what we did.
After installing the software on the local computer, you can say “as usual”, you need to create a meeting (see the screenshot below):
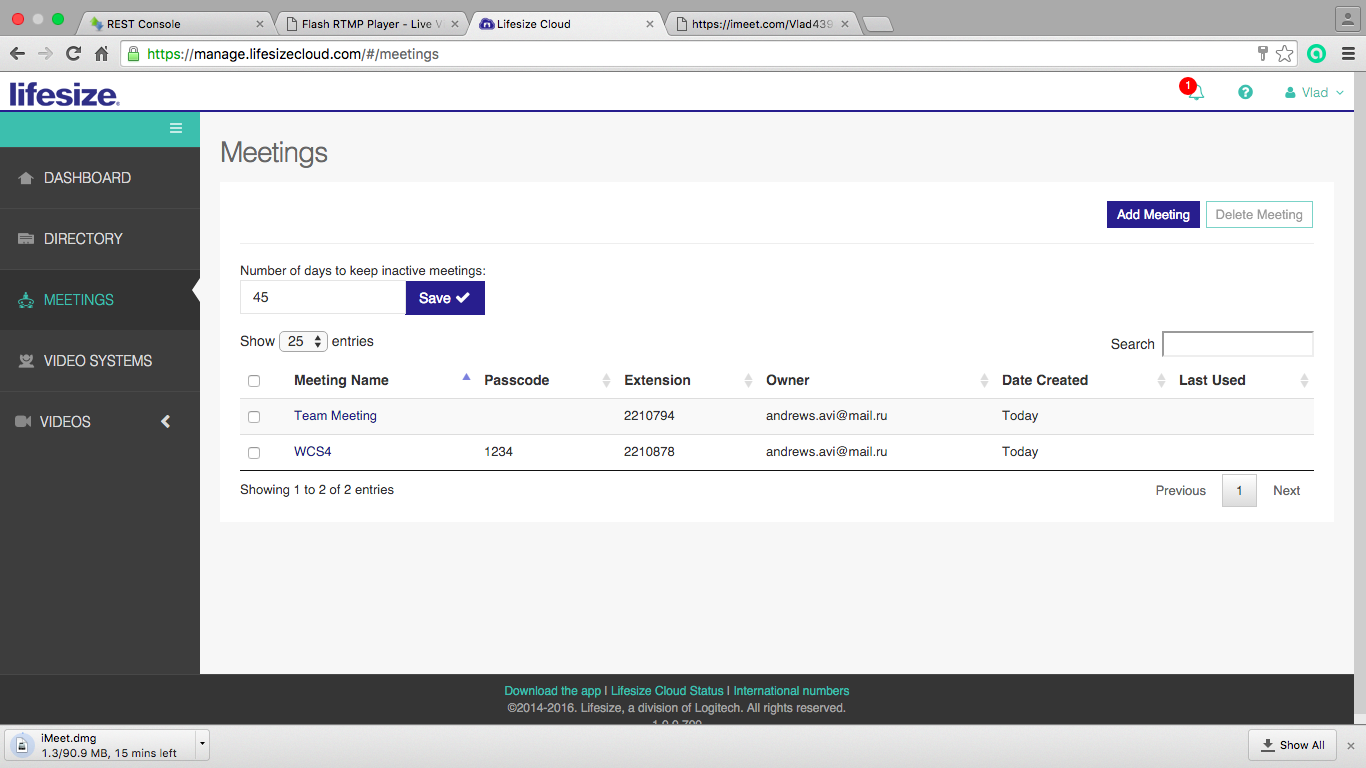
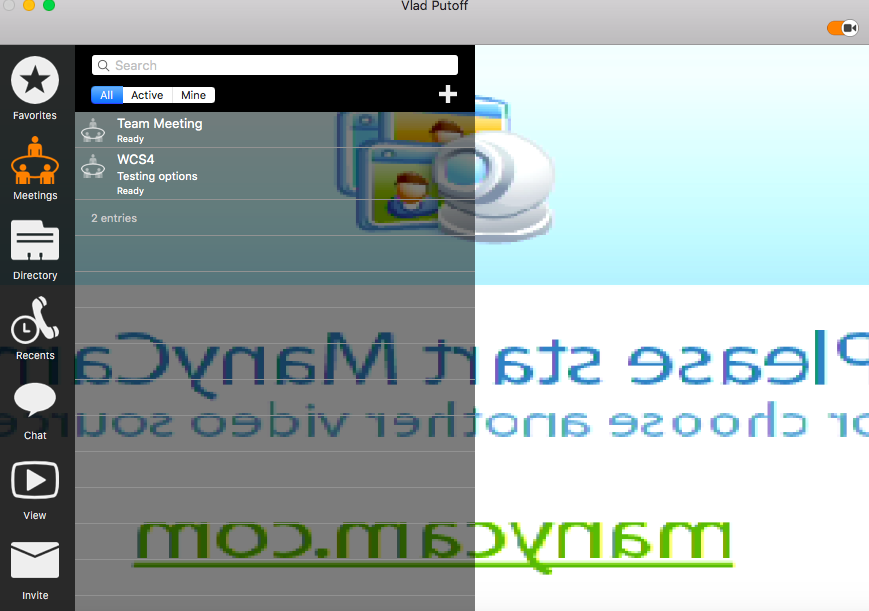
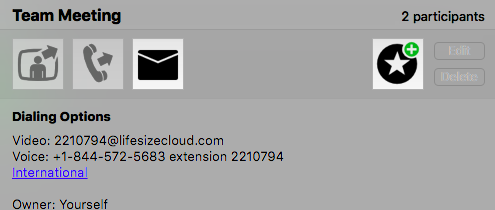
For each meeting, contacts (data) are provided, by which a third-party participant can make a call (appeal) and participate in the meeting, as follows:
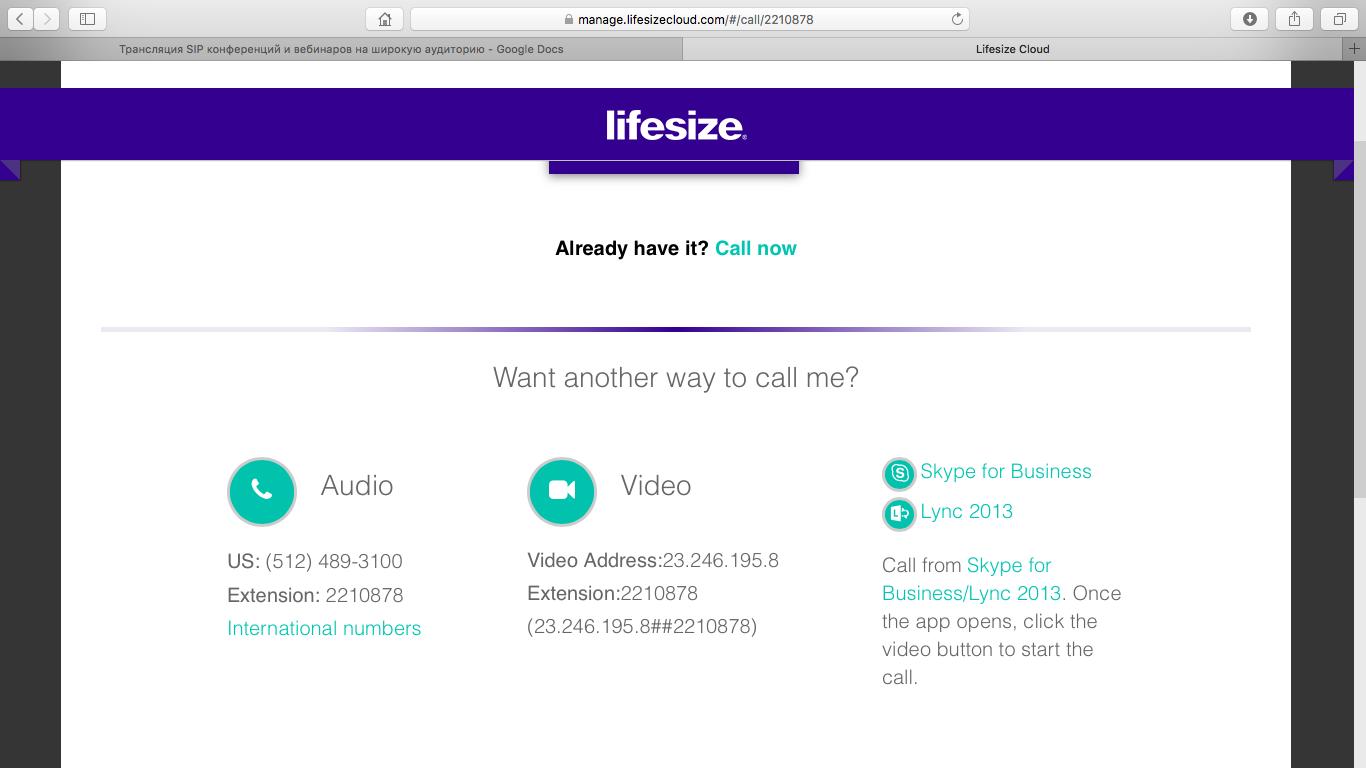
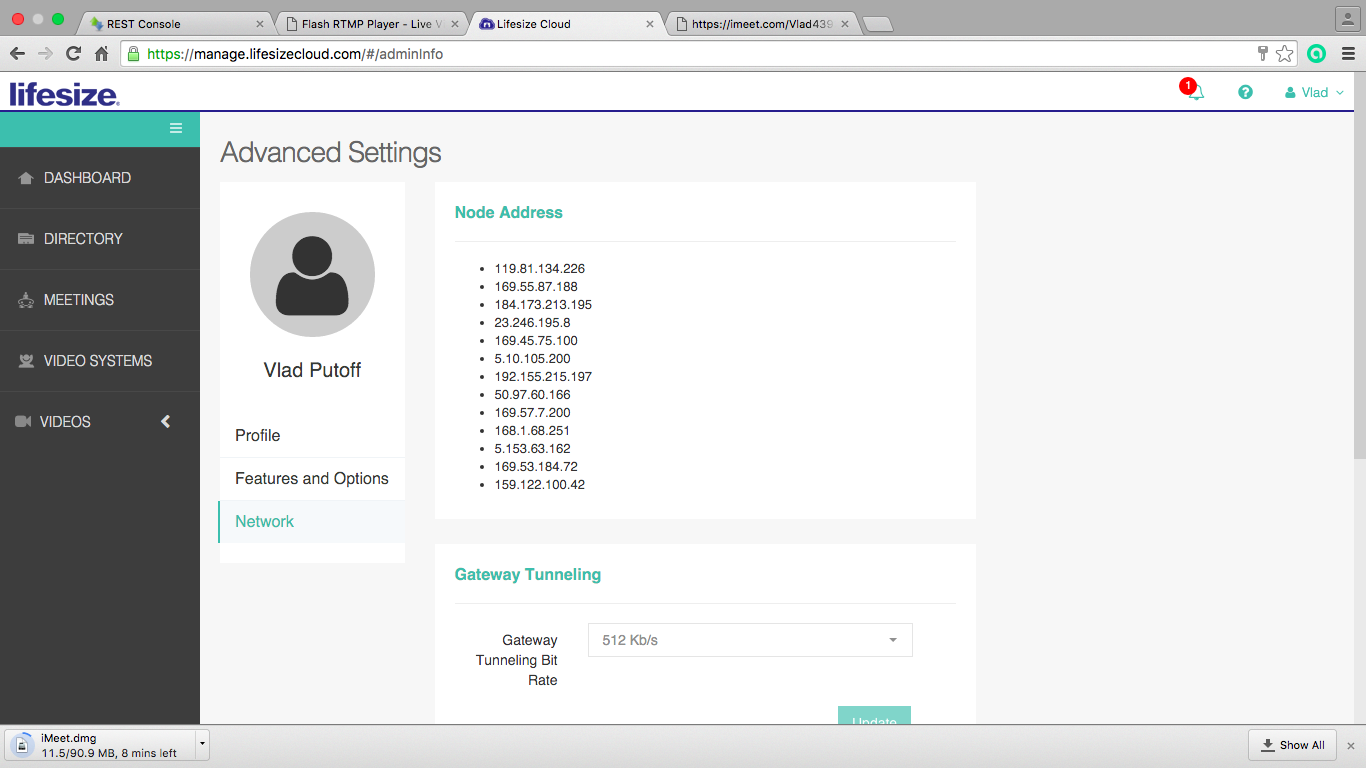
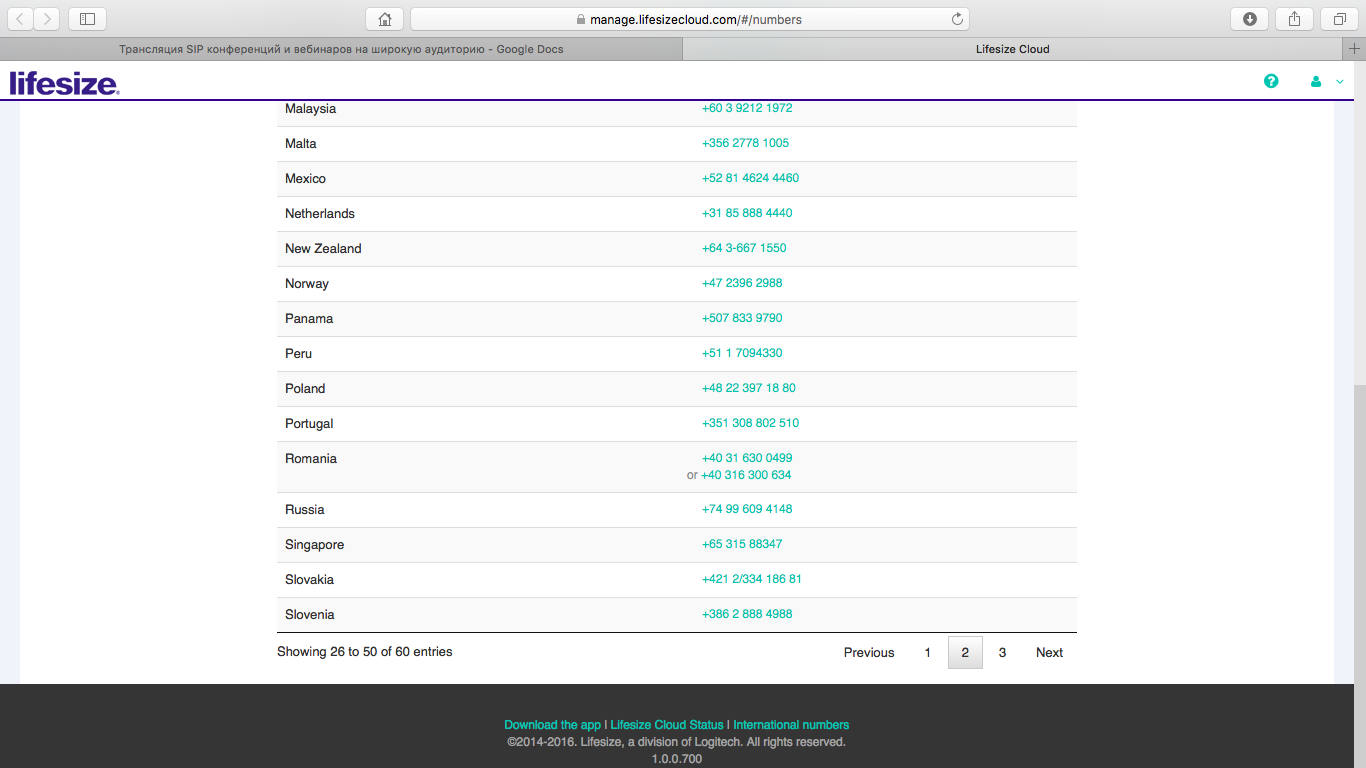
We used the data provided by the Lifesize service for dialing and were pleasantly amazed that each stage of connecting to the service is accompanied by visual information (and a voice assistant, which, incidentally, is a common function for all similar services):
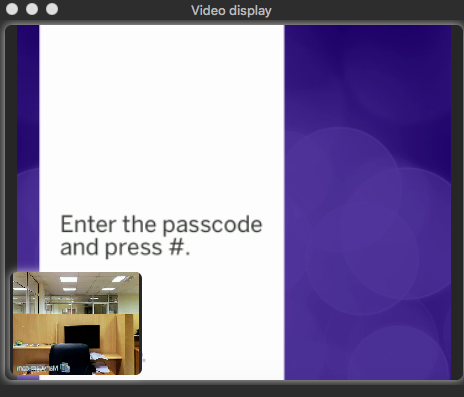
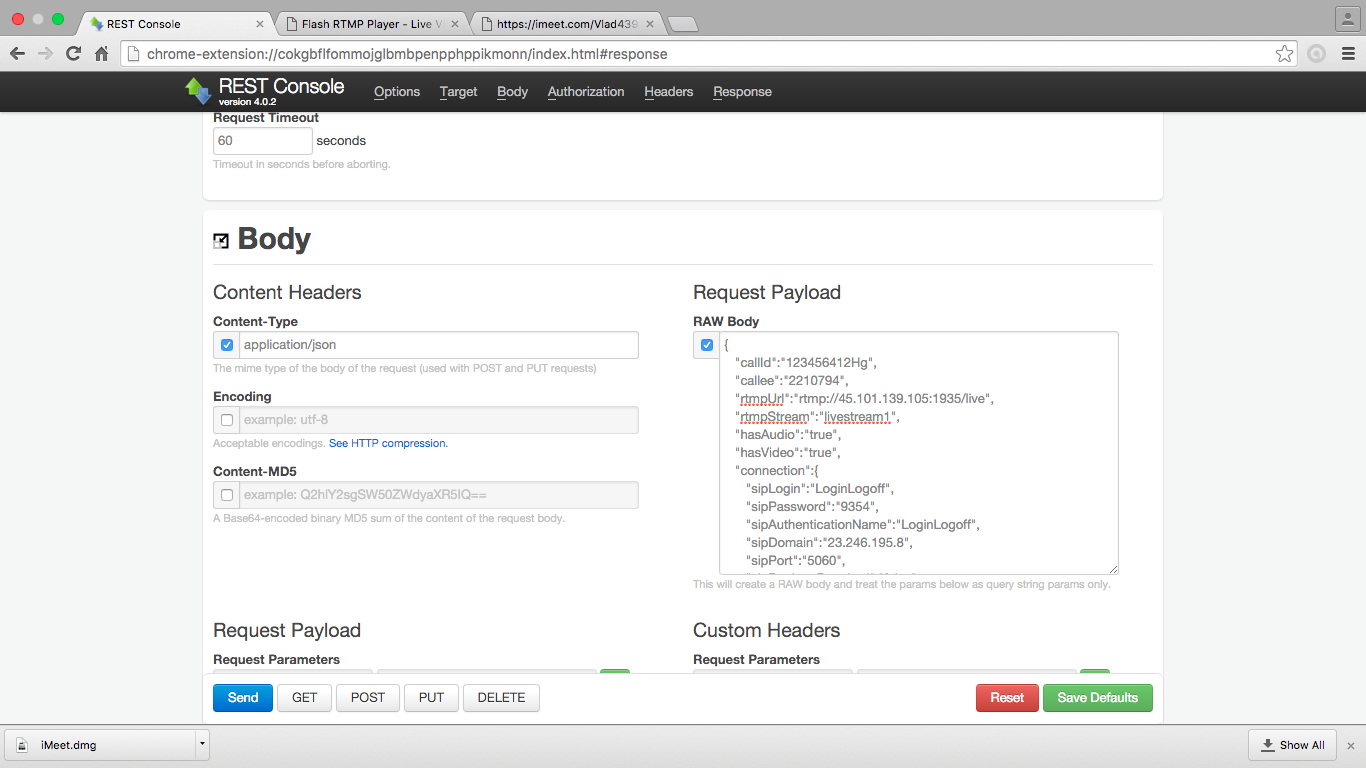
Web Call Server 4, as usual, using a command through the REST console, established the connection with the Lifesize service according to the provided data (see above).
The service itself shows in its program the window of the connected participant:

And shows the number of participants:
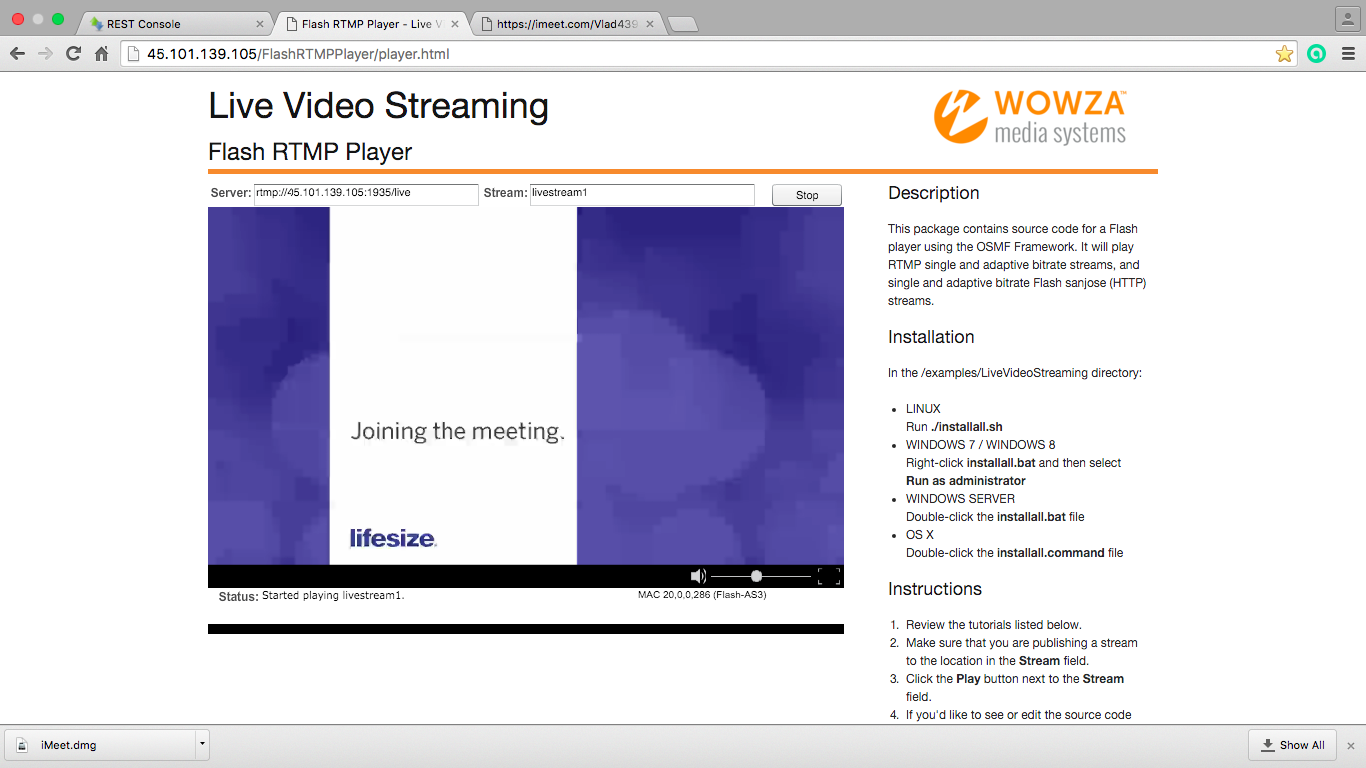
And the response results were broadcast by Web Call Server to the streaming server (AMS or WSE).
According to subjective feelings, this service is more demanding on the quality of the communication channel, however, this observation is not some kind of confirmed fact, and is completely subjective.
IMeet service provides a line of various solutions for organizing joint events on the Internet, including with the ability to connect participants using the phone.
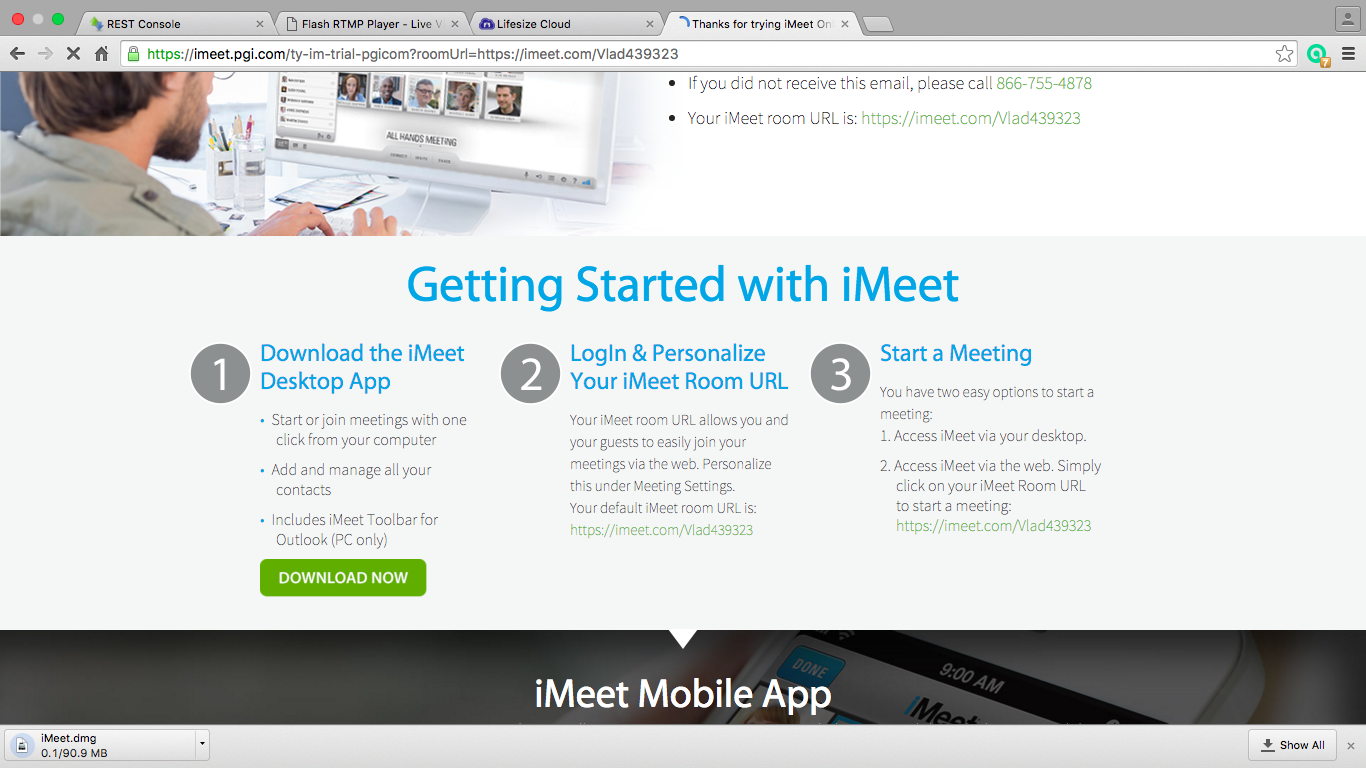
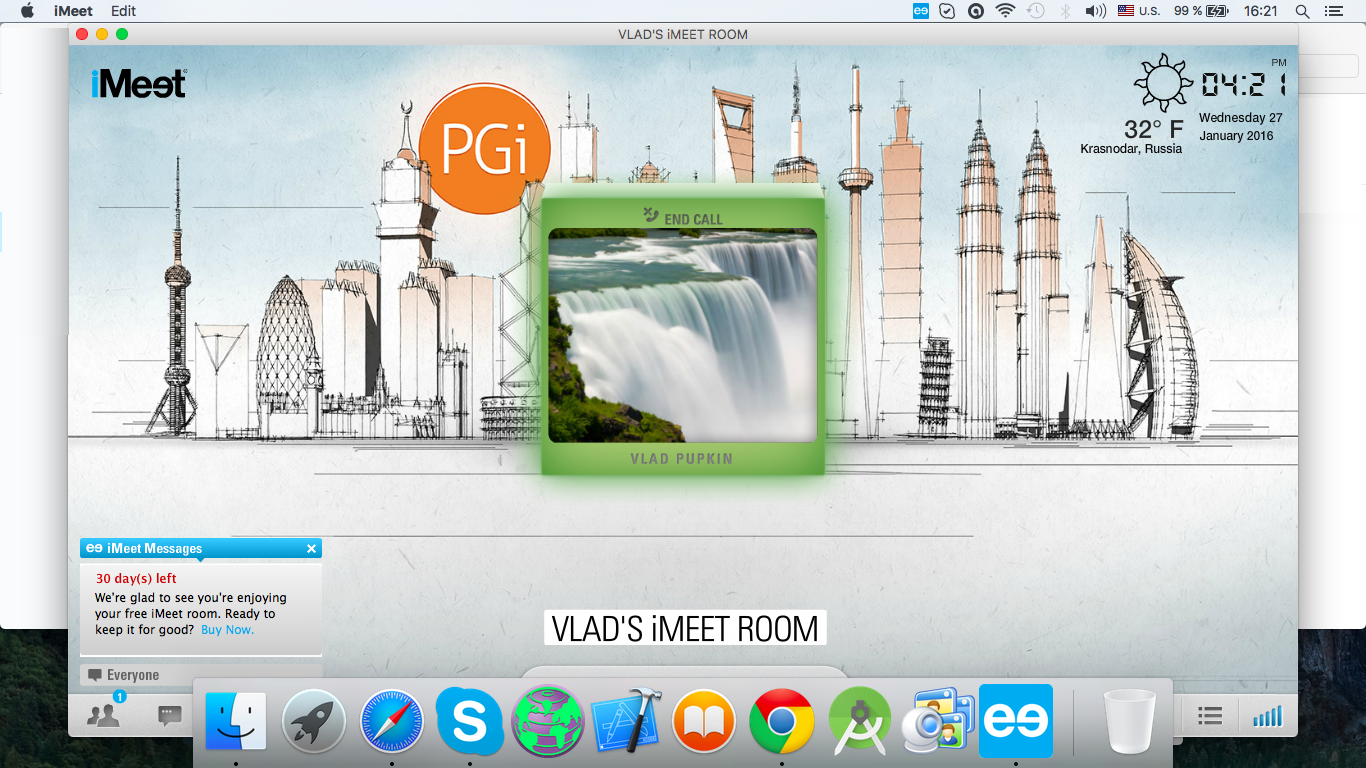
The interface of the program, which must be downloaded and installed in order to use the service, is striking in its colorful design and accompanying information (time, weather, etc.).
As before - the service provides data, but unlike the previous ones, the URI of the type is provided as a dial-up address: www.imeet.com/georgeb
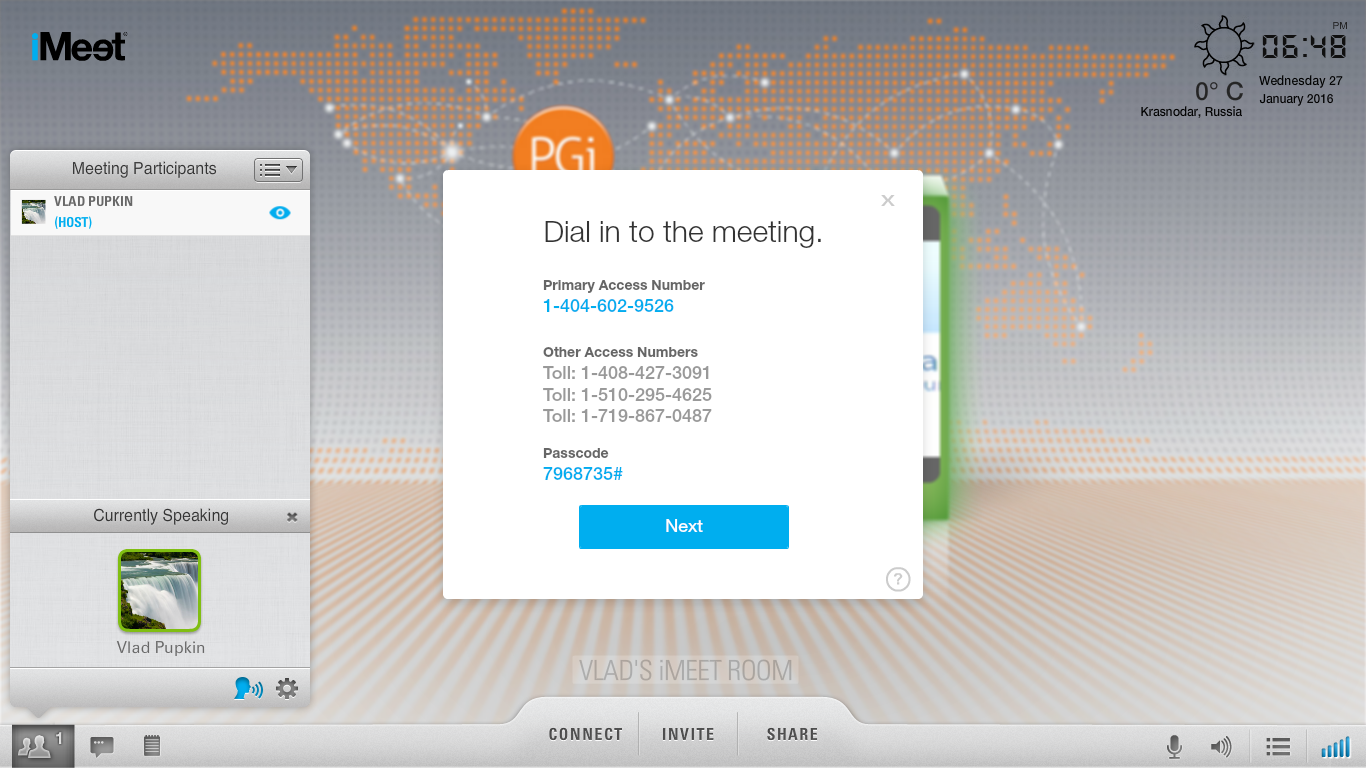
As with the previous services, there is the possibility of inviting third-party participants to the meeting (including by e-mail), and also, quite conveniently, dialing from the service to the phone number of the potential participant (that is, not the participant needs to call, but you need the service calling).
Using the link from the email invitation, I was able to participate in the meeting using a web browser (without the need to install software):
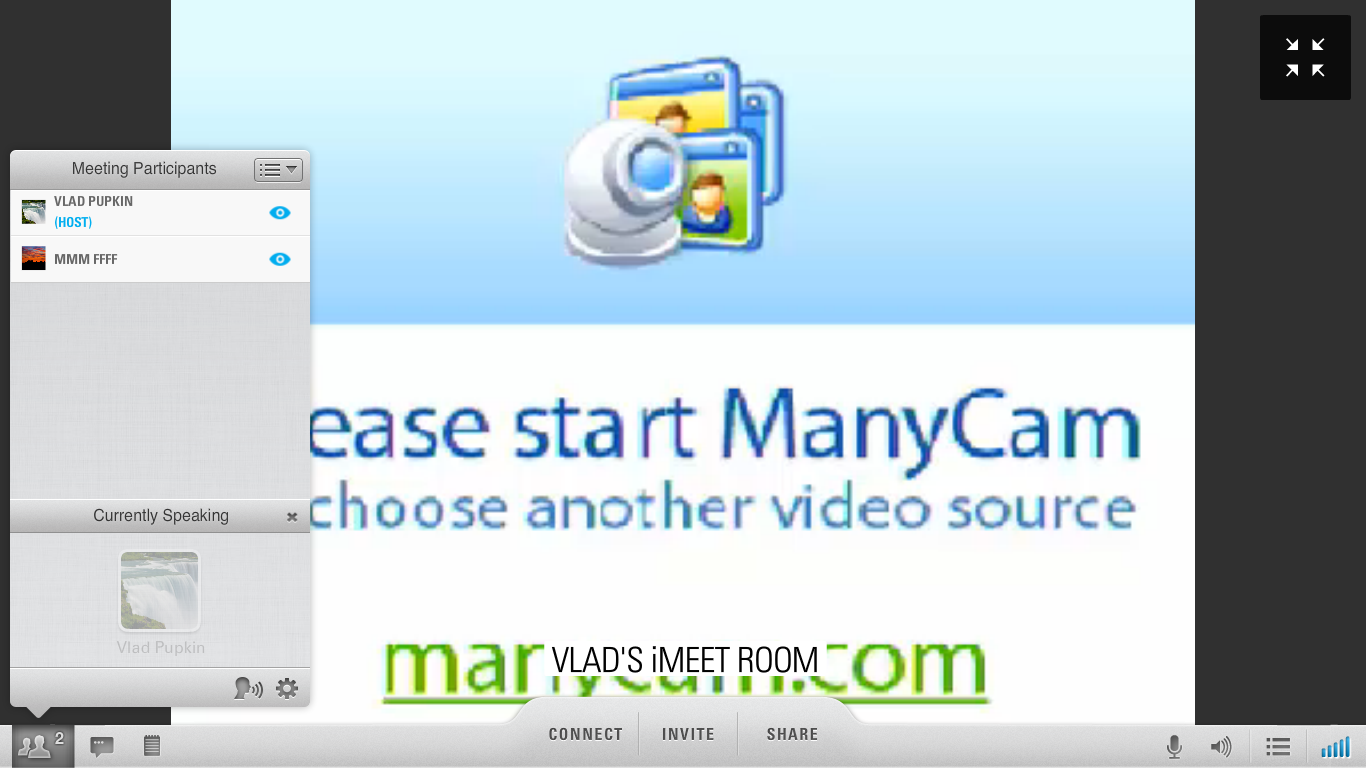
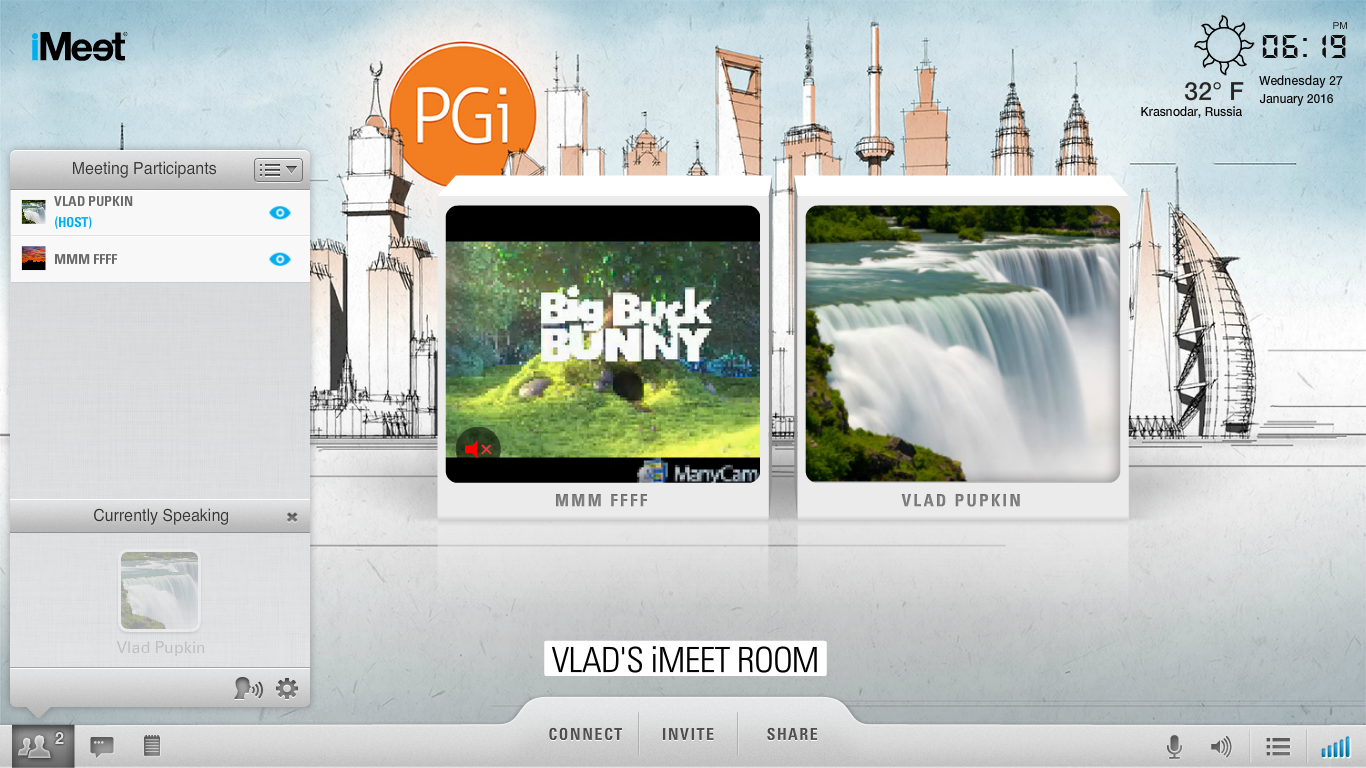
However, it was not possible to get through to the rally from the Bria softphone, which, from our point of view, is explained by the service in the following comment:
Using the recommendations received and the following Bria settings, there was still no connection with the rally (the Domain parameter was changed to both www.imeet.com/Vlad439323 and www.imeet.com/Vlad439323 ):
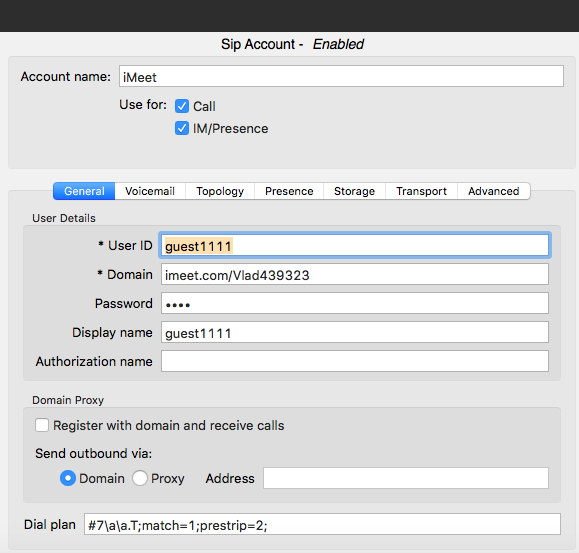
We dare to assume that to connect using the SIP protocol it is necessary to test other software and a slightly different type of service provided by this service, for example iMeetVRC:
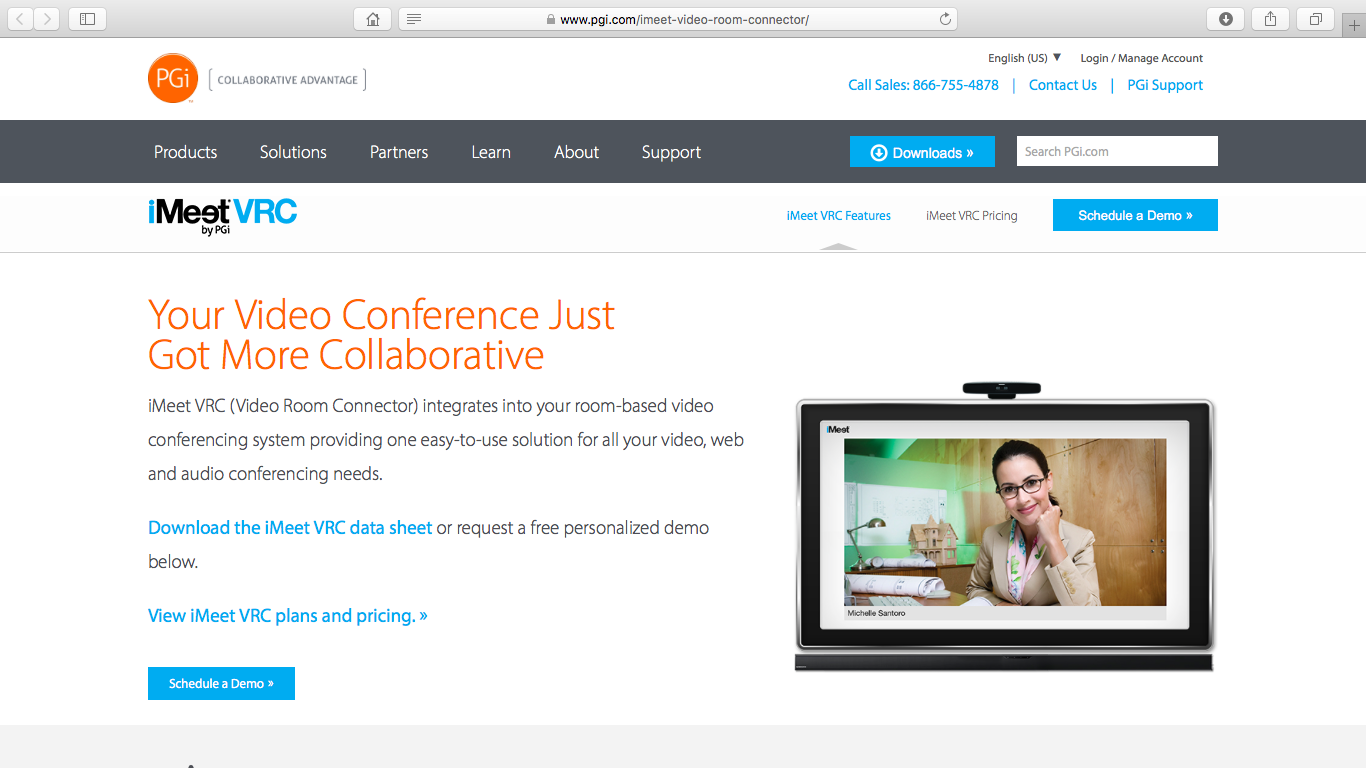
Which will be verified by us in subsequent tests.
In accordance with our selection criteria and experimental conditions, we were able to test the mutual compatibility of various services and software products with varying degrees of success, which will be explained below. Surprisingly, many services were seamlessly integrated with the Wowza Streaming Engine and Adobe Media Server using the middleware Web Call Server 4.
In particular, we were able to verify that there are:
All tests were conducted with two streaming servers - Wowza Streaming Engine and Adobe Media Server.
Testing results are summarized by us in the table below:

When examining the candidates for testing, we were convinced that some of the services, links to which are available, do not exist or do not provide an online version of the services (and require installing software on the server), some of the services turned out to be highly functional “messengers” or did not support the SIP protocol.
We would like to assume that the result of mutual testing of services and software that we showed will encourage other interested parties using this list: vsee.com/videoconference to conduct independent testing of other services with the same or a different set of software and it would be interesting to know what conclusions and the results will come from the results of such a new experiment.
When conducting corporate training webinars, conferences or public meetings, rallies, existing services and solutions that support the SIP protocol are used. However, such services, as a rule, do not have solutions aimed at mass broadcasting (broadcasting) on the Internet. Existing services, such as Zoom.us, InterCall, Twilio, Vidyo, iMeet and so on, as well as other software and hardware solutions and products of other manufacturers, do not provide the functionality of converting a conference organized using the SIP protocol to mass broadcast on the Internet .

We set ourselves the goal of deciding which of the solutions we chose (by which we mean the combination of software products and services) will allow us to expand the audience of the event with minimal labor, as shown in the diagram above.
Below, we will consider possible integration options between the two streaming video servers Adobe Media Server and Wowza Streaming Engine, Twilio, Zoom.us, Vidyo, Lifesize, Blue Jeans, iMeet, CounterPath Bria 4 softphone and Flashphoner Web Call Server 4 platforms in various combinations.
Navigation
Basic requirements for the integration platform
. Test experiment scheme.
Conditions for the experiment.
Integration with zoom.us service.
Starting and configuring Web Call Server 4.
Initiating a connection through Web Call Server 4.
Managing an established connection through Web Call Server 4.
Broadcasting multiple connections from Zoom.us.
Analysis of possible problems with integration.
Integration with Twilio service.
Web Call Server Management.
Integration with OpenSIPS.
Integration with Vidyo.
Integration with the Blue Jeans service.
Integration with Lifesize.
Integration with iMeet.
Final conclusions.
Resources used.
. Test experiment scheme.
Conditions for the experiment.
Integration with zoom.us service.
Starting and configuring Web Call Server 4.
Initiating a connection through Web Call Server 4.
Managing an established connection through Web Call Server 4.
Broadcasting multiple connections from Zoom.us.
Analysis of possible problems with integration.
Integration with Twilio service.
- Setting up a Twilio account and SIP domain.
- Configuring Bria and joining a Twilio domain.
- Reconfiguration of Web Call Server for use with Twilio.
Web Call Server Management.
Integration with OpenSIPS.
Integration with Vidyo.
Integration with the Blue Jeans service.
Integration with Lifesize.
Integration with iMeet.
Final conclusions.
Resources used.
How candidates for testing were selected
Having decided to test various services and software products for mutual compatibility and the ability to mass broadcast on the Internet, we selected services and products according to several criteria.
The basic requirements for a server that integrates between other services and software:
- flexible settings mechanism for various integrated services and software products;
- availability of detailed documentation;
- availability of technical support from the manufacturer;
- ease of administration.
When choosing services, the main criterion was that: a) the service could provide a test period for using the software; b) the service must declare or imply that there is support for connecting participants via SIP. We made a number of exceptions to this rule with the zoom.us service and with Bria, since we are well acquainted with this softphone and its features and usage features, and the zoom.us service is a fairly new startup with declared great features, that's why we decided to test it (even though the SIP connection for this service is paid).
Based on the selection criteria formulated, our experience with various integration software and the convenience of using this or that software, we decided to use Web Call Server 4 for our experiments, although other software is also possible.
Test experiment design
One of the most common options for interaction between the source (on the right) and the recipient of the content (on the left) is shown in the diagram below:

It should be noted that when checking various options for organizing interactions through the integration platform, we rearranged the indicated scheme depending on the needs of the experiment.
Streaming servers used in the experiment:
- Wowza streaming engine
- Adobe Media Server
Integration platform:
- Flashphoner Web Call Server 4
- REST console (Google Chrome)
Broadcast Sources:
- CounterPath Bria 4
- Twilio.com service
- service Zoom.us
- iMeet service
- Vidyo service
- Blue Jeans service
- Lifesize service
Programs for viewing broadcasts (or content):
- Flash player
Programs for sending RTMP stream to the server:
- Adobe Flash Media Live Encoder 3.2
Conditions for the experiment
A prerequisite for the experiment is the presence of correctly installed and configured software products described above.
The screenshot below shows the setup of Adobe Flash Media Live Encoder, which was installed on the local client (outside the local network in which the CDN platforms were launched).

We used the broadcast from Adobe Flash Media Live Encoder as a verification source for the audio / video stream through the streaming video server. The resulting stream (after the streaming video server) was checked using Flash Player (shown in the screenshot below).
It is imperative to carefully check the stream settings (IP address, port, stream name) both at the source and at the receiver (player).
The translation verification scheme (health of streaming video servers) is presented below:


After checking the fact that the audio / video stream reaches the RTMP server, which we see through the player, you can go directly to testing.
Also, at the time of testing Web Call Server with the Twilio service, it is necessary to establish what public IP address is assigned by the service provider for Web Call Server access to the Internet and register this address in the SIP domain settings. The same operation must be done for the public IP address, which is used to test the Twilio service with Bria (installed on the local computer).
Integration with zoom.us service
With the growing interest in distance learning and the spatially distributed exchange of audio / video information in real time, various services providing the necessary functionality are gaining popularity. One such service is zoom.us.
The organization of testing using this service is described below:

First you need to set up your account and follow the steps to “initiate” the virtual classroom (see screenshot).

After initiation, the software provided by the service will be launched on the local computer, which will capture voice from the microphone and video from the computer’s camera.
Each meeting is assigned a unique nine-digit ID, informing which, together with the IP address of the service that is being broadcast, you can invite third-party participants to the meeting. The sequence of actions is shown in the following screenshots.
Ultimately, with the IP address and meeting ID provided by zoom.us, we can configure Web Call Server 4 and the viewer to participate in the “meeting.”


Starting and Configuring Web Call Server 4
Despite the fact that Web Call Server 4 is an integration tool between different content sources and streaming servers, each conference (or other source) can have individual settings, features and undocumented requirements for implementing standard SIP, RTMP protocols.
In our particular case, both streaming servers are installed on the same device, so the first step is to make sure that only one of the servers (AMS or WSE) is working simultaneously - otherwise (when there is a separate device for each software) the next operation is not necessary.
We needed to force stop one of them streaming servers, as shown below:
Console
[root @ wowza ams] # ./amsmgr server ams stop
Server: ams command: stop
NPTL 2.12
Stopping Adobe Media Server (please check / var / log / messages)
Server has shutdown ...
[root @ wowza ams] # service WowzaStreamingEngine start
WowzaStreamingEngine : starting ...
In this particular example, AMS is stopped (we know in advance that it worked on port 1936), and the Wowza Streaming Engine works on port 1935 at address 45.101.139.105.
Next, you need to make sure that the configuration of the Web Call Server 4 server matches the parameters of the content source used (in our example, zoom.us), for this, for example, through ssh, you can access the server on which Web Call Server 4 is deployed and find the file in the ./conf directory configuration, as shown in the screenshot below:

In the file itself, you need to change the codecs parameters and a number of others, as indicated in the screenshot (in this case, the parameters that are applicable to other services can simply be “commented out”):

After saving the new settings in the configuration file, restart Web Call Server 4 (as shown below):
Console
[root @ SF1 conf] # service webcallserver stop
FlashphonerWebCallServer: stopping [OK]
[root @ SF1 conf] # service webcallserver start
FlashphonerWebCallServer: starting [OK]
As a result of all the above actions, we are guaranteed to have correctly functioning streaming video server and Web Call Server 4, and you can proceed to direct control of Web Call Server 4 and the broadcast source.
Connections via Web Call Server 4
Having installed and configured, correctly working Web Call Server 4, we must bear in mind that in general, this software product acts as an intermediary between the content source and the streaming server. In the general case, mediation consists in initiating a SIP call to a content source, receiving a response from the content source, receiving the content itself and broadcasting this received content to the streaming server.
The Web Call Server itself requires management tools, the implementation of which is organized through the REST / JSON API commands. Such a management mechanism can be integrated into any existing software product and provide automatic management of Web Call Server.
For our specific case, we use a REST console through which requests with parameters are sent to the Web Call Server, which in turn depend on which content source needs to be integrated with the CDN.
For example, to join a meeting organized on zoom.us, you need to send the following request (which we will do through the Google Chrome REST console):
REST console
{
"CallId": "Xq2tlLcX89tTjaji", # arbitrary unique call identifier
"callee": "10000", # name of the caller (randomly selected)
"rtmpUrl": "rtmp: //45.101.139.105: 1935 / live", # broadcast address (Platform CDN)
“rtmpStream”: “lifestream1”, # name of the streamed stream
“hasAudio”: “true”, # attribute of audio content (yes / no)
“hasVideo”: “true”, # attribute of video content (yes / no)
“Connection”: # connection parameters
{
“sipLogin”: “10000”, # login
“sipPassword”: “10000000”, # password
“sipAuthenticationName”: “10000”, # name for authentication
“sipDomain”: “162.255.36.11”, # IP address of the meeting (provided by zoom.us)
“SipPort”: “5060”, # Port on which SIP broadcasting is
“sipRegisterRequired”: “false”, # registration attribute in the
“appKey” domain : “callApp”
}
}
A request with the above parameters is sent to a special Web Call Server URI, as indicated below in the screenshot:

After the request from Web Call Server 4 is completed, WebCallServer will be connected to the meeting organized by zoom.us (in this case, Web Call Server 4 will act as one of the “listeners”), at the same time the response (content of the zoom.us service) received by Web Call Server 4 - Web Call Server 4 will be redirected further to the streaming video server (as we see in the screenshots below):

Manage an established connection through a Web Call Server
In this particular case, with the zoom.us service, it is necessary to additionally connect to a specific “meeting” by sending to the zoom.us server a specific identifier (provided by the service) of the “meeting” (in our case it is 311 705 123). One way is DTMF tone dialing (for example, on a softphone keyboard). Web Call Server 4 can perform the same operation, as shown in the screenshot:

You can also send such a request via the REST console through the following command:
REST console
/ Note: syntax 1 ********** is practical know-how when working with zoom.us/
{
"CallId": "Xq2tlLcX89tTjaji", # the same ID as in the previous request
"type": "RFC2833",
"dtmf": "1 ********** 311705123 #" # unique ID, provided by zoom.us service
}
/ Note: syntax 1 ********** is practical know-how when working with zoom.us/
As a result, a specific “subscriber” will be connected to the broadcast of a specific “meeting”, as shown in the screenshot below. As you can see in the screenshot, in the window of the zoom.us interface the Web Call Server logo is visible, which in this case is one of the “listeners” of the launched “rally”.


At the same time, in the Wowza Flash Player window we see a broadcast that was redirected from zoom.us to the Wowza Streaming Engine server via Web Call Server 4 (see screenshot).
Thus, by means of two commands transmitted through the REST console to Web Call Server 4, we managed to initiate participation in the meeting (“rally”) on zoom.us and redirect the content (“picture” and audio stream) to the Wowza Streaming Engine server for subsequent broadcasting through CDN network.
Broadcast multiple connections from Zoom.us
Web Call Server 4 can provide translation of any number of connections from the zoom.us service, which we tested in practice.
To do this, you need to configure your Bria account as shown in the screenshots below:


And you need to install sufficient codecs for audio and video:


Further, when dialing a unique ID of the room in which the rally takes place, a connection will be made to the general conference with the broadcast of the common content via the CDN server.

Analysis of possible integration issues
As a source of knowledge about the possible causes of failures in the interaction between Web Call Server 4 and other software products and services, it is recommended to refer to the log files on the server where Web Call Server 4 is installed, as shown in the screenshots:


The results of query execution through the REST console can also be viewed through the tools provided by Google Developer Tools, as shown in the screenshot:

Integration with Twilio Service
To test the flexibility of the Web Call Server 4 integration platform, we also tested the interaction with the Twilio service.
The organization of the experiment is shown in the diagram:

Setting up a Twilio account and SIP domain
To start using the Twilio service, you need to set up an account on the service and create a domain to which softphones will connect. The sequence of these actions is shown in the following screenshots:
Stage 1. Creating a domain - in our case, flashphoner2

Stage 2 - Creating an Access List and Defining Access Rights for a Domain

Step 2.1 - Creating a list of IP addresses for which domain access is allowed.
It is important to include in this list both the IP addresses of subscriber devices (softphones) and the IP address of Web Call Server 4.


Step 2.2 - Creation of access rights

After the domain is created in the Twilio service, the access rights and the list of IP addresses for which access is allowed are generated - you can start configuring the softphone, in our case, Bria 4.
Configuring Bria and joining a Twilio domain
In Bria settings you need to create an account (account) to access Twilio, as shown in the screenshots below:


In the same place in Bria settings it is necessary to configure the use of audio codecs: G711 aLaw, uLaw as well as the H.264 video codec.


After that, you can make a test call through Bria and listen through the softphone to an answering machine record provided by Twilio.
If the domain on the service is configured correctly (and the answering machine is audible in Bria), you can start creating a control command for Web Call Server.
Change Web Call Server configuration for use with Twilio
When testing the Twilio service with Web Call Server 4, you need to change the server settings. Such changes are made to the flashphoner.properties configuration file.

In particular, the set of used codecs and a number of other parameters are changing.

What and how to change in the configuration file is indicated in the documentation for Web Call Server 4 provided by the manufacturer of the integration server.
After changing the configuration of Web Call Server, it is necessary to reboot the server so that the changes take effect:
Console
[root @ SF1 conf] # service webcallserver stop
FlashphonerWebCallServer: stopping [OK]
[root @ SF1 conf] # service webcallserver start
FlashphonerWebCallServer: starting [OK]
Web Call Server Management
As in the previous experiment, Web Call Server is controlled by sending a REST command through the Google Chrome REST console, as shown below:
REST console
{
«callId»:«Xq2tlLcX89tTjaji»,
«callee»:«flashphoner2.sip.twilio.com»,
«rtmpUrl»:«rtmp://45.100.109.105:1936/live»,
«rtmpStream»:«lifestream1»,
«hasAudio»:«true»,
«hasVideo»:«true»,
«connection»:{
«sipLogin»:«flashphoner2»,
«sipPassword»:«RadK2151312»,
«sipAuthenticationName»:«flashphoner2»,
«sipDomain»:«flashphoner2.sip.twilio.com»,
«sipPort»:«5060»,
«sipRegisterRequired»:«false»,
«appKey»:«callApp»
}
}
The request is sent to the Web Call Server address: http: //107.179.239.129:9091/RESTCall/call.
As a result of executing the request, a call is generated to the Twilio SIP domain of the service and in Flash Player you can listen to the response received from the Twilio service - or rather, you can hear the message from the Twilio answering machine playing.
Thus, as a result of testing the operation of Web Call Server 4 as an integration solution between Twilio and Bria, we were convinced that the integration server is able to interact with the Twilio service and the softphones connected to this service.
Integration with OpenSIPS
To test the possibility of interaction with IP-PBX solutions, a test was conducted with the IP-PBX OpenSIPS server.
The layout of the test site is shown below:

In this case, Bria acts as a “service” that receives calls from third-party subscribers and answers calls with content. In connection with this other role, in which Bria acts in this particular case, it is necessary to change the settings as shown in the screenshots below. In particular, you need to create an account to make calls to IP-PBX OpenSIPS:

As in previous cases, to demonstrate the ability to control Web Call Server, we send a request:
REST console
{
«callId»:«Xq2tlLcX89tTjaji»,
«callee»:«10050»,
«rtmpUrl»:«rtmp://45.101.139.105:1935/live»,
«rtmpStream»:«lifestream1»,
«hasAudio»:«true»,
«hasVideo»:«true»,
«connection»:{
«sipLogin»:«10051»,
«sipPassword»:«15001»,
«sipAuthenticationName»:«10051»,
«sipDomain»:«87.222.225.52»,
«sipPort»:«5080»,
«sipRegisterRequired»:«false»,
«appKey»:«callApp»
}
}
It should be noted that the call is made through the account 10051 created on the OpenSIPS server, and the “number” of the called subscriber is indicated in the “callee” field.
As a result, a call made to Web subscriber 4 to the “subscriber” 10050 was redirected to the streaming server and subsequently listened via Flash Player.
Integration with Vidyo
Another service we tested with is Vidyo.com. The need for mass broadcasting is related to the fact that this service has a limited number of participants in each broadcast (rally) and, accordingly, there may be a need to use the usual service (Vidyo) to hold an event with 50, 100 or more number of participants.
As is the case with other services, registration on the service is required first.


Further, after registration, you will need to install the software on your local computer and enter the data obtained upon activation to connect to the service.


After entering the data, a connection will be made to the service and it will be possible to create a meeting (room for a virtual meeting). The screenshot shows that each registered and connected to the service is provided with a unique extension number (Extension).
To connect other participants to the meeting (to the room), you will need to send an invitation to other participants, for example by e-mail.
After clicking on the corresponding icon in the program window, a draft message will be created in the program for processing e-mail, where connection data will be visible, which must be reported to other potential participants in the meeting.
The text of such a letter is shown below:
Let's meet via Vidyo!
— To join from your desktop or mobile device: Click join.vidyo.com/flex.html?roomdirect.html&key=1sQAgMIbOVihE3SFKKjl47oryI
— To join from your H.323/SIP video conferencing system inside the US: 75.98.89.60 and 1501005148 and PIN (If required)
— To join from your H.323/SIP video conferencing system outside the US: 31.186.235.56 and 1501005148 and PIN (If required)
— To join from telephone: (800) 916-5971, Conference ID 1501005148, and PIN (If required)
NOTE: Any video, audio and/or materials viewed during this conference may be recorded.
Need help getting started? Check out the Vidyo Knowledge Center at www.vidyo.com/knowledge-center
To check the operability of the data received from the Vidyo service, we created an account in the Bria softphone based on the data provided by the service:

When creating an account in Bria, we proceeded from the fact that the username and password can be chosen arbitrarily and only the IP address that will be connected to and (in the future) the number that will be dialed to connect to the meeting in the room is critical.
Please note that only the account created for the Vidyo service should be included in Bria so that the dialer will be made in this service.
After dialing the number 1501005148, the Bria keyboard will dial and connect to the virtual “room” where the meeting will be held.
In the program window, you can see that a new participant has appeared in the meeting, as shown in the screenshot below:

Since our test through Bria was successful, we will begin to test the integration of Web Call Server 4 with the Vidyo service.
To do this, create a command in the REST console, as shown in the screenshots below, and send a request to Web Call Server 4.


After sending the request, a new meeting participant will appear on the Vidyo service website (with the ID that we specified in the Web Call Server command).

And at the same time, in the player through which we check the availability of broadcasts from the connected service, you can see a window with a picture that was transmitted by the rally initiator to the service as a replacement for broadcasting from a web camera.

The mechanism for starting streaming video servers was described earlier and during this test we used both AMS and WSE, while the settings for Web Call Server were used as we specified for zoom.us
Blue Jeans Integration
One of the relatively well-known services for organizing conferences on the Internet is the Blue Jeans service, the integration with which we also decided to check.
This service also offers a fairly simple mechanism for organizing a meeting (rally), for a start you need to register and create your account, as shown below:

After this step, as in previous cases with similar services, you must install the software provided by the Blue Jeans service.


After installing the Blue Jeans software on your computer, further steps are performed through this software.
Naturally, in order to connect someone to the meeting, you need to organize this meeting, and for this in Blue Jeans software you need to create such a meeting and after creating it - send the meeting data to potential participants, in this case:
- IP address (dial IP)
- Meeting ID
- Verification Code (passcode)
If the second participant whom you want to invite uses the same Blue Jeans software, the Blue Jeans service offers to enter the code in a special window (“pairing code”) and you can “parallelize” your and his software. However, such a function was not used for the purposes of our testing, we used the meeting ID and passcode provided by the service.

After receiving the data for connecting to the virtual “room” where the meeting is held, we, as before, decided to check the operation of the service with the Bria softphone.
To do this, create an account in Bria as shown below:

It should be noted that we collected data for Domain from the Blue Jeans community, as it is proposed to use the IP address (as shown above) for dialing or the domain name bjn.vc. directly when creating the room.
The fact that you need to use the sip.bjc.vc notation to connect using SIP is described in the messages of the community, as shown below:

After creating an account in Bria, we typed the rally ID on the keyboard and got connected with broadcasting the picture (in our case, a video clip recorded earlier in ManyCam) into the rally and broadcasting the rally data in Bria, as shown below:

Further, checking the integration capabilities between Blue Jeans and Web Call Server 4, we sent the following request to the address of Web Call Server 4 using the REST console: http: //107.179.239.120:9091/RESTCall/call:
REST console
{
«callId»:«100501Cxbsf»,
«callee»:«5322844144»,
«rtmpUrl»:«rtmp://45.101.139.105:1935/live»,
«rtmpStream»:«livestream1»,
«hasAudio»:«true»,
«hasVideo»:«true»,
«connection»:{
«sipLogin»:«100501»,
«sipPassword»:«9354»,
«sipAuthenticationName»:«100501»,
«sipDomain»:«sip.bjn.vc»,
«sipPort»:«5060»,
«sipRegisterRequired»:«false»,
«appKey»:«callApp»
}
}
It should be noted that in the request, the rally ID is used as the callee field, and the data taken from the community is used as sipDomain, that is, sip.bjc.vc
After connecting to the Blue Jeans software window, you can see that several participants appeared in the rally (one of them is Bria , second Web Call Server 4), as shown below:

In the player, we can accordingly observe the “picture” from the local computer (as shown below), that is, we see what the “Blue Jeans” software “sees” on the local computer. Next, Blue Jeans software sends this video to the service, and Web Call Server 4 initiates and receives a response from the Blue Jeans service and redirects the service response to the streaming video server (AMS or WSE, in our experiment), which we see in the Flash Player window 'a.

By the general impression, with the exception of the “default” that a specific domain must be used for SIP connection, the general interaction with the Blue Jeans service turned out to be simple and relatively hassle-free.
Lifesize Integration
Another available service, the integration with which was tested, is the Lifesize service.
Just like everyone with the previous services, you can use the service after registering on the site, downloading and installing the software provided by the service, and this is exactly what we did.
After installing the software on the local computer, you can say “as usual”, you need to create a meeting (see the screenshot below):


For each meeting, contacts (data) are provided, by which a third-party participant can make a call (appeal) and participate in the meeting, as follows:


We used the data provided by the Lifesize service for dialing and were pleasantly amazed that each stage of connecting to the service is accompanied by visual information (and a voice assistant, which, incidentally, is a common function for all similar services):

Web Call Server 4, as usual, using a command through the REST console, established the connection with the Lifesize service according to the provided data (see above).

The service itself shows in its program the window of the connected participant:

And shows the number of participants:

And the response results were broadcast by Web Call Server to the streaming server (AMS or WSE).


According to subjective feelings, this service is more demanding on the quality of the communication channel, however, this observation is not some kind of confirmed fact, and is completely subjective.
Integration with iMeet
IMeet service provides a line of various solutions for organizing joint events on the Internet, including with the ability to connect participants using the phone.

The interface of the program, which must be downloaded and installed in order to use the service, is striking in its colorful design and accompanying information (time, weather, etc.).
As before - the service provides data, but unlike the previous ones, the URI of the type is provided as a dial-up address: www.imeet.com/georgeb


As with the previous services, there is the possibility of inviting third-party participants to the meeting (including by e-mail), and also, quite conveniently, dialing from the service to the phone number of the potential participant (that is, not the participant needs to call, but you need the service calling).
Using the link from the email invitation, I was able to participate in the meeting using a web browser (without the need to install software):


However, it was not possible to get through to the rally from the Bria softphone, which, from our point of view, is explained by the service in the following comment:
"While iMeet does not have a direct integration with SIP / SIMPLE or XMPP, iMeet provides each host with a personal online meeting room, so you can also simply put in your URL (eg www.imeet.com/georgeb ) into an IM conversation to invite guests into your meeting. You could also store your iMeet URL in your Salesforce profile and allow people to connect to your iMeet directly from there! ”( Community.imeet.com/thread/1700 )
Using the recommendations received and the following Bria settings, there was still no connection with the rally (the Domain parameter was changed to both www.imeet.com/Vlad439323 and www.imeet.com/Vlad439323 ):

We dare to assume that to connect using the SIP protocol it is necessary to test other software and a slightly different type of service provided by this service, for example iMeetVRC:

Which will be verified by us in subsequent tests.
Final conclusions
In accordance with our selection criteria and experimental conditions, we were able to test the mutual compatibility of various services and software products with varying degrees of success, which will be explained below. Surprisingly, many services were seamlessly integrated with the Wowza Streaming Engine and Adobe Media Server using the middleware Web Call Server 4.
In particular, we were able to verify that there are:
- the ability to initiate a call to the Zoom.us service and call control;
- возможность трансляции потокового контента в том числе с несколькими подключениями с сервиса Zoom.us;
- возможности Web Call Server’а дозваниваться до сервиса Twilio и абонентов, подключенных к этому сервису;
- способность управлять вызовами у подключенных через IP-PBX OpenSIPS абонентов интеграция с сервисом Vidyo оказалась более простой, чем с сервисом zoom.us, так как инициация и управление соединением в Web Call Server ограничилось одной командой;
- сервис Lifesize субъективно потребовал большей пропускной способности для качественного отображения видео в окне сервиса, в то время как сервис Blue Jeans в использовании оказался простым и позволил практически в несколько элементарных шагов осуществить одновременное подключение к митингу Bria и Web Call Server 4 ;
All tests were conducted with two streaming servers - Wowza Streaming Engine and Adobe Media Server.
Testing results are summarized by us in the table below:

When examining the candidates for testing, we were convinced that some of the services, links to which are available, do not exist or do not provide an online version of the services (and require installing software on the server), some of the services turned out to be highly functional “messengers” or did not support the SIP protocol.
We would like to assume that the result of mutual testing of services and software that we showed will encourage other interested parties using this list: vsee.com/videoconference to conduct independent testing of other services with the same or a different set of software and it would be interesting to know what conclusions and the results will come from the results of such a new experiment.
Resources used
- Traffic Analyzer - www.wireshark.org
- Wowza Streaming Engine - www.wowza.com
- Adobe Media Server - www.adobe.com/products/adobe-media-server-family.html
- Web Call Server 4 - flashphoner.com
- www.zoom.us
- www.twilio.com
- www.lifesize.com
- www.bluejeans.com
- www.vidyo.com
- www.pgi.com
- CounterPath Software - www.counterpath.com/bria
- Video / audio content processing software - manycam.com
