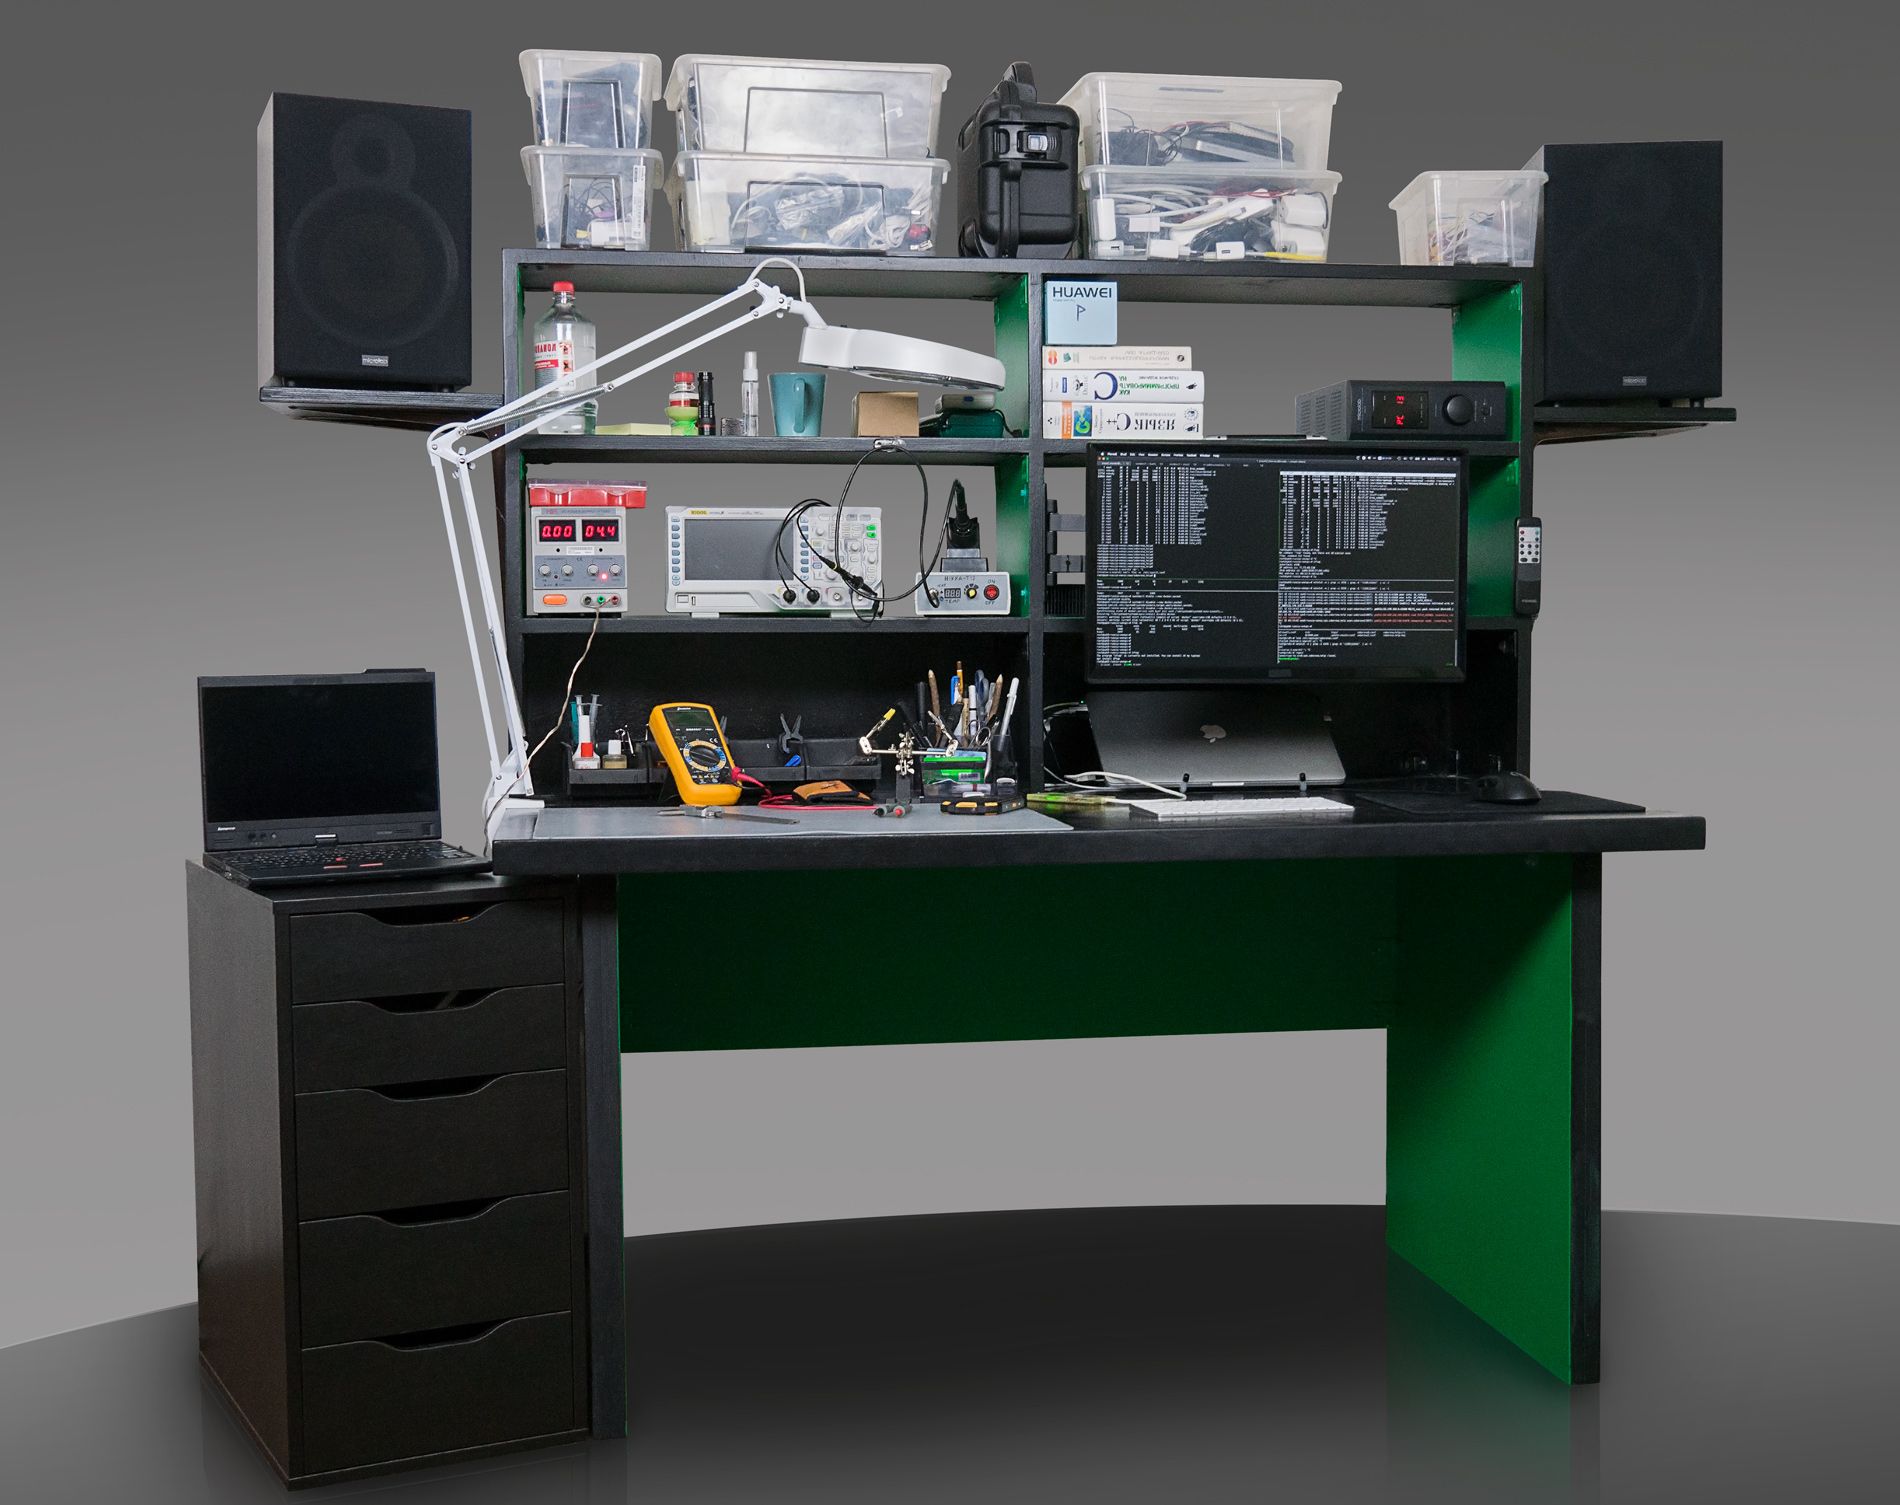
Check it out: made the table
TL; DR This article describes my experience of building a table from scratch out of plywood. From design to assembly.
I suffered from bad tables for a very long time. All of them are uncomfortable, of poor quality, small and, most importantly, COTTON. More or less decent tables cost thousands of dollars. In the end, I decided to make the table by myself.
Basic requirements for the table:
- Stability! Objects on the table should not shake, if you sharply put your hands on the table or push off from it. My table weighs ~ 120kg. You can make flips from its edge, while at the other end you can solder SMD components.
- The width and depth of the table top. Tables 60 cm wide are humiliation. I need to have a depth reserve so that I can move the laptop forward and at the same time get enough working space.
- Spaciousness. I need shelves to place equipment there: soldering irons, laboratory power supply, oscilloscope, audio amplifier, etc. At the same time the shelves should be as stable as the table.
- Price. I'm not ready to lay out a few thousand dollars. My table cost about $ 300, taking into account the purchase of the entire tool for assembly and painting.
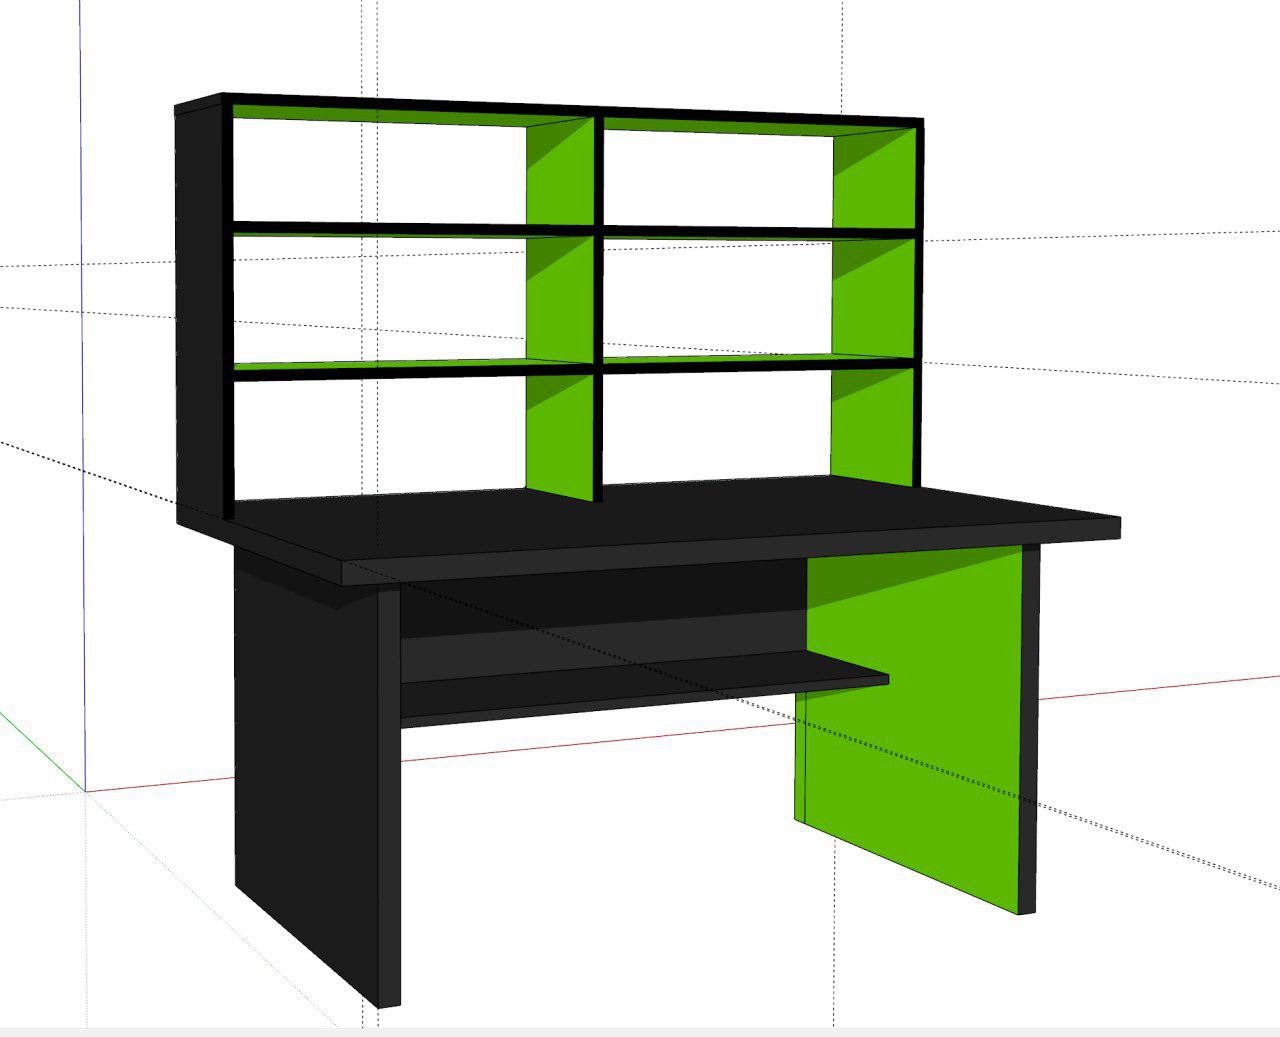
3D model
To calculate the materials I modeled the table in SketchUp. I have never worked with modeling software before. In general, it was quite simple.
Model file stol.skp
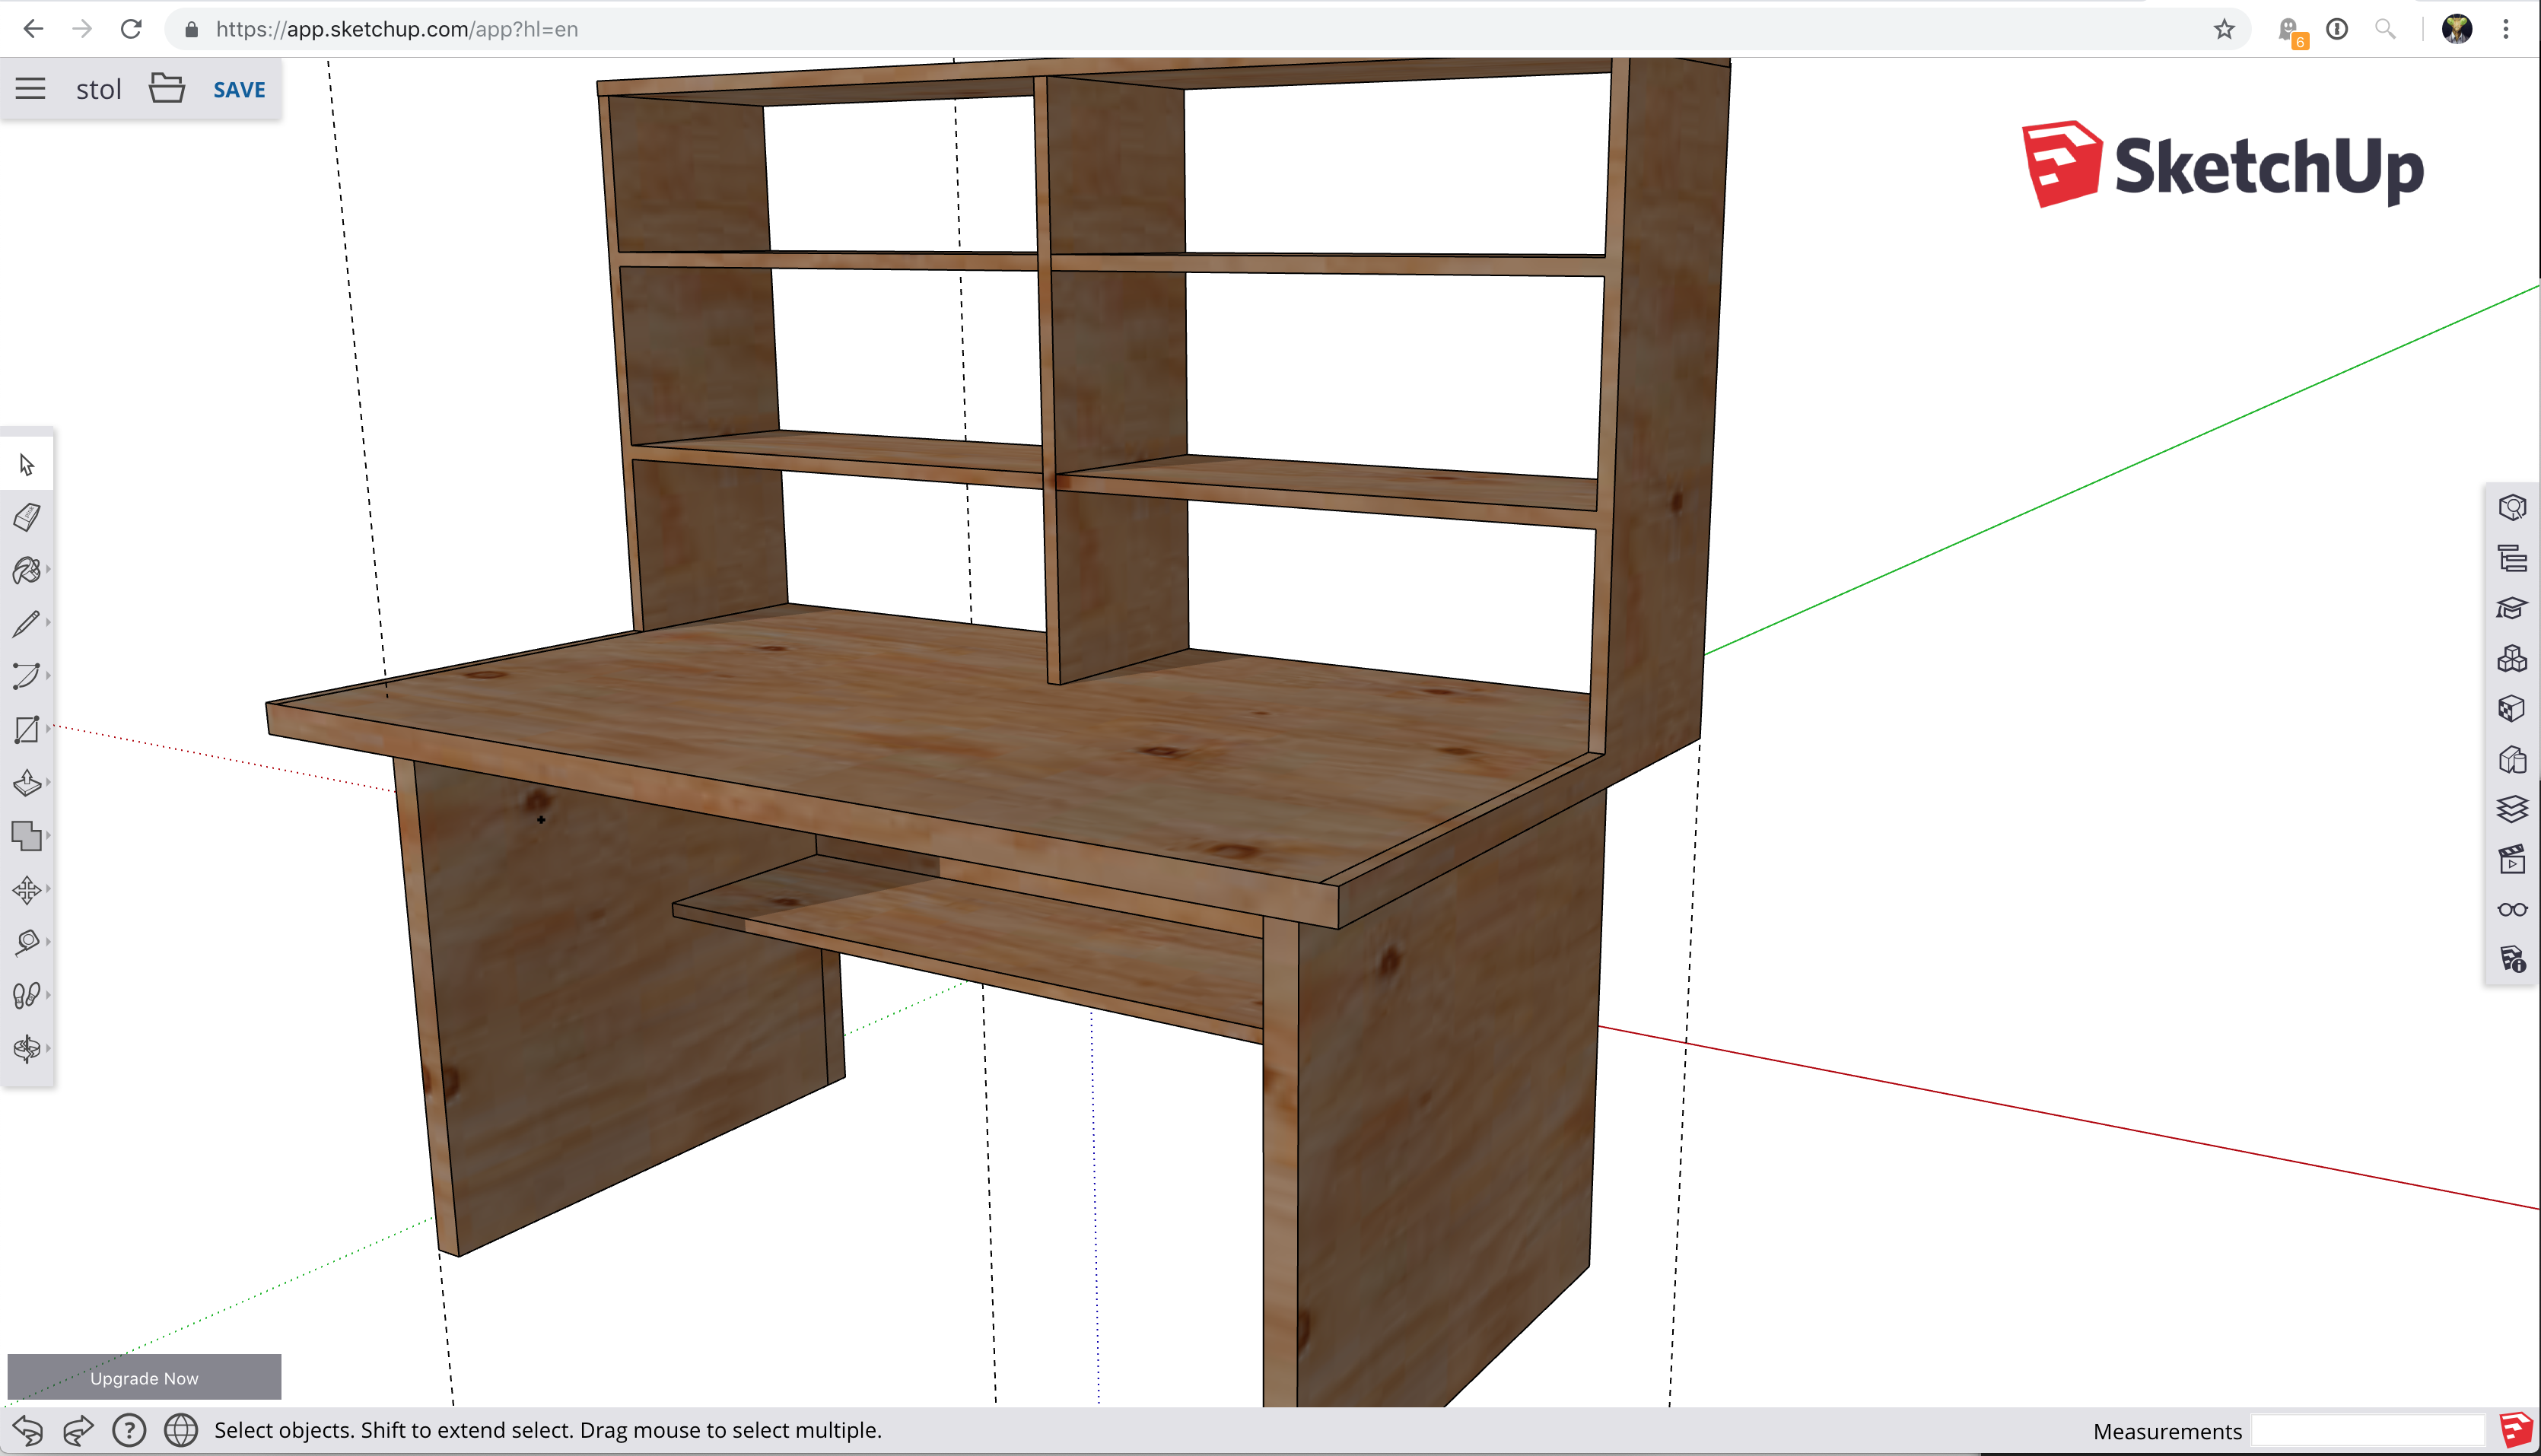
Now the free version of Sketchup has become fully browser-based, which I don’t really like. On the Internet you can find the old desktop version, it is more comfortable to use.
There you can play with flowers. I decided to paint the table in black and green.
Plywood sawing
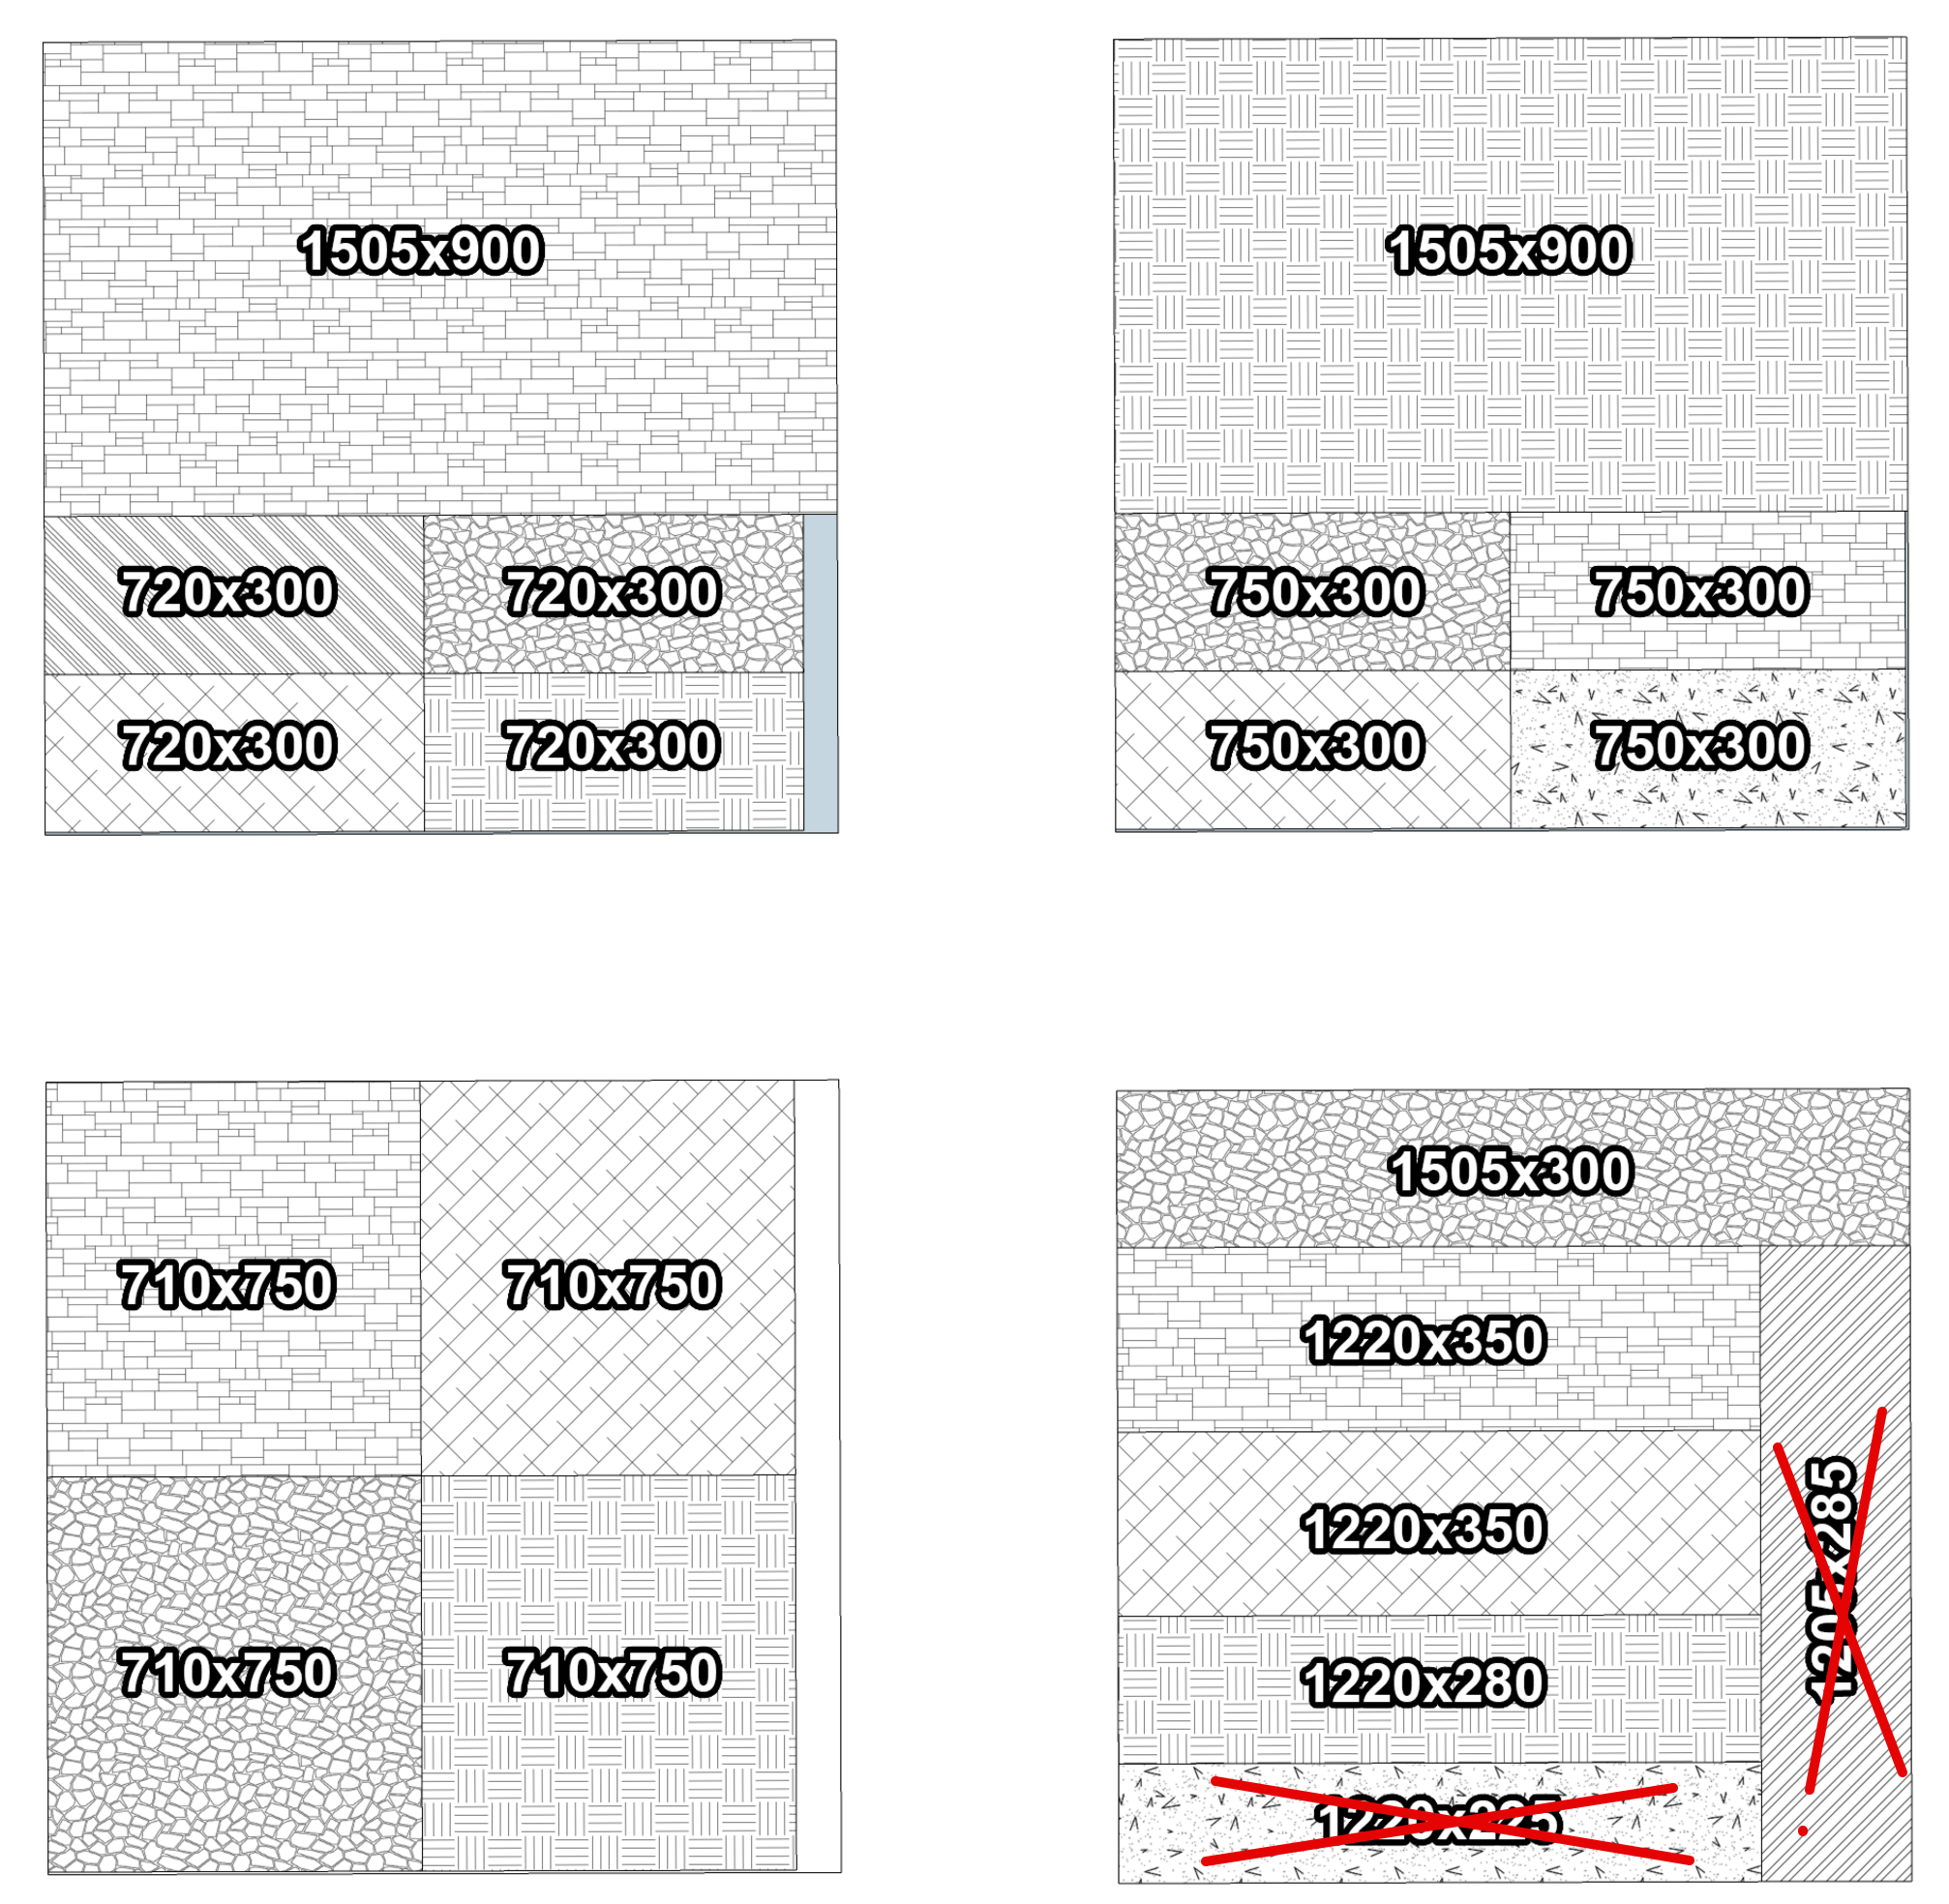
It was decided to make the tabletop and walls with a thickness of 42 mm in order to surely get a stable table. For this, plywood sawing was ordered with a thickness of 21 mm. In the future, it was intended to combine two sheets into a sandwich in order to obtain the desired wall thickness.
About plywood you need to know the following:
Variety determines the quality of the surface. Grade 4 plywood will have knot holes. I chose 2/2 grade plywood. The fraction indicates the grade of plywood on the reverse side. It would be possible to take a lower grade plywood and modify the surface defects with a putty.
Moisture resistance. Plywood is FC (Plywood + Carbamide-formaldehyde glue) and PSF (Plywood + Resin Phenol-formaldehyde glue). The second is characterized by high moisture resistance. There is enough FC in the room.
Thickness.Despite the fact that there is plywood and 40 mm, in my case it turned out to be cheaper to make the desired thickness of two sheets. The upper shelves, it was decided to make a thickness of 21 mm, that is, from a single layer.
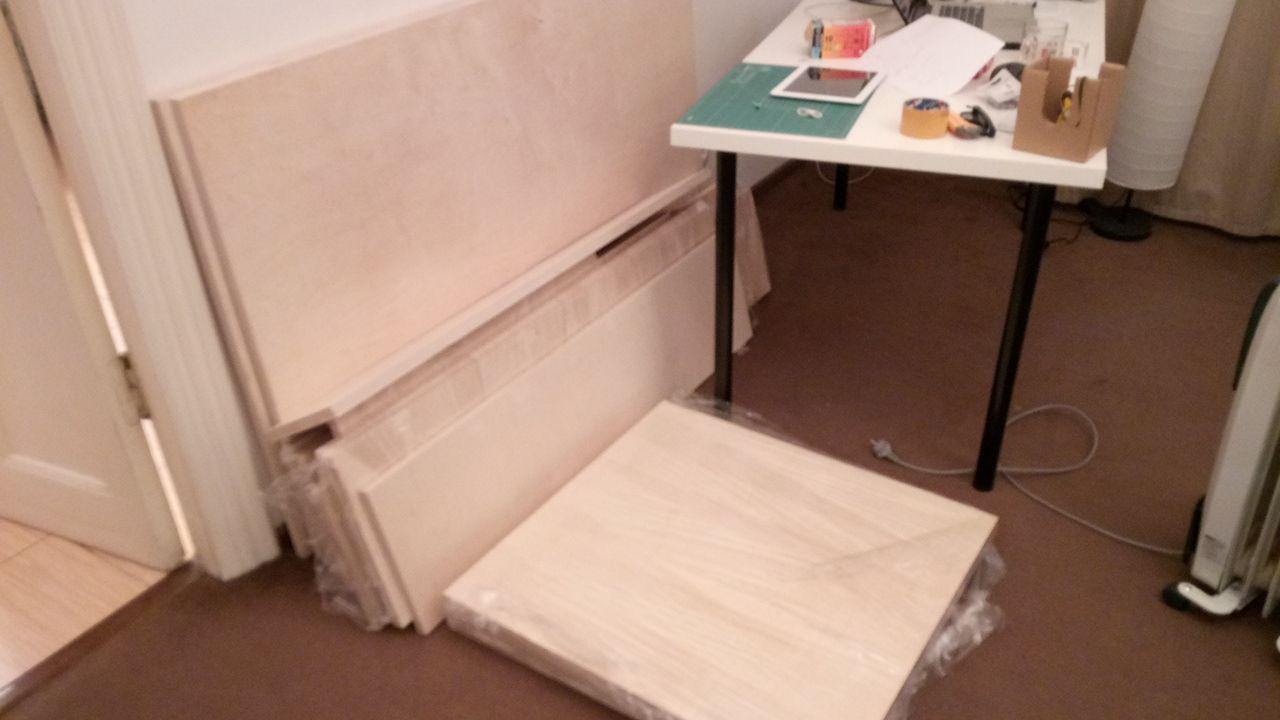
From the 3D model, I was able to easily get the right dimensions for cutting. When calculating it is important to consider the thickness of the saw, 4 mm, and 10 mm cutting of the sheet along the edges. Since I did not at first take into account these moments, I had to recalculate. As a result, it was decided to donate two details. Clickable On the Internet, many sites offer cutting services for plywood with delivery, so I did not have to go anywhere. Ordered plywood arrived itself in two days, cut into the necessary parts. The cost of plywood with sawing came 8100 rubles. ($ 120) for the material + 1100 rubles. ($ 20) shipping. Plywood sawn into parts. (clickable)
Assembly
Previously, I had no such experience, it was only possible to assemble furniture from IKEA. I had to buy a powerful screwdriver. Of consumables: screws, furniture screws "confirmat", corners, sandpaper, paint, varnish.
Surely shown here can cause resentment of experienced craftsmen because of the violation of technology. I apologize for the quality of the photo, at that moment it was not planned to publish it anywhere.
The table top and side walls were folded from two sheets and twisted with screws. For reliability, for some reason, I decided to additionally lubricate them inside with PVA glue. Bottles on top for better bonding between sheets.
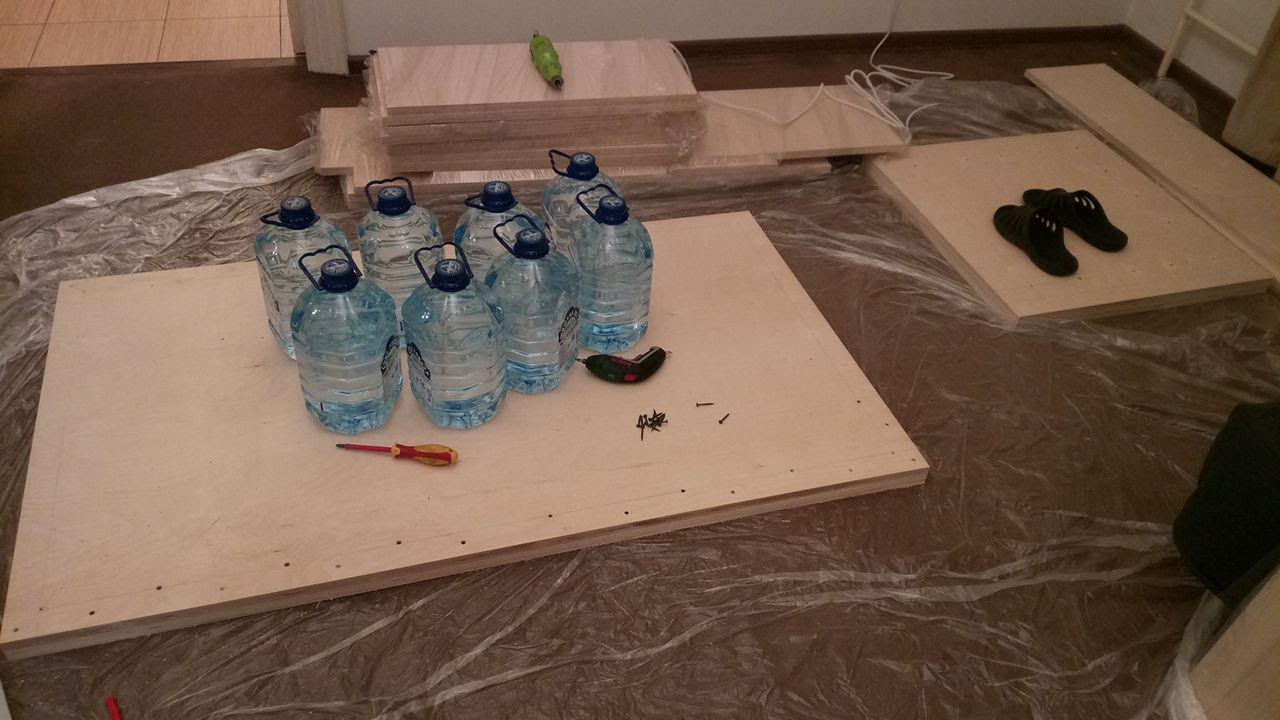
Two sheets of plywood, twisted with screws and glued with glue. Bottles press sheets.
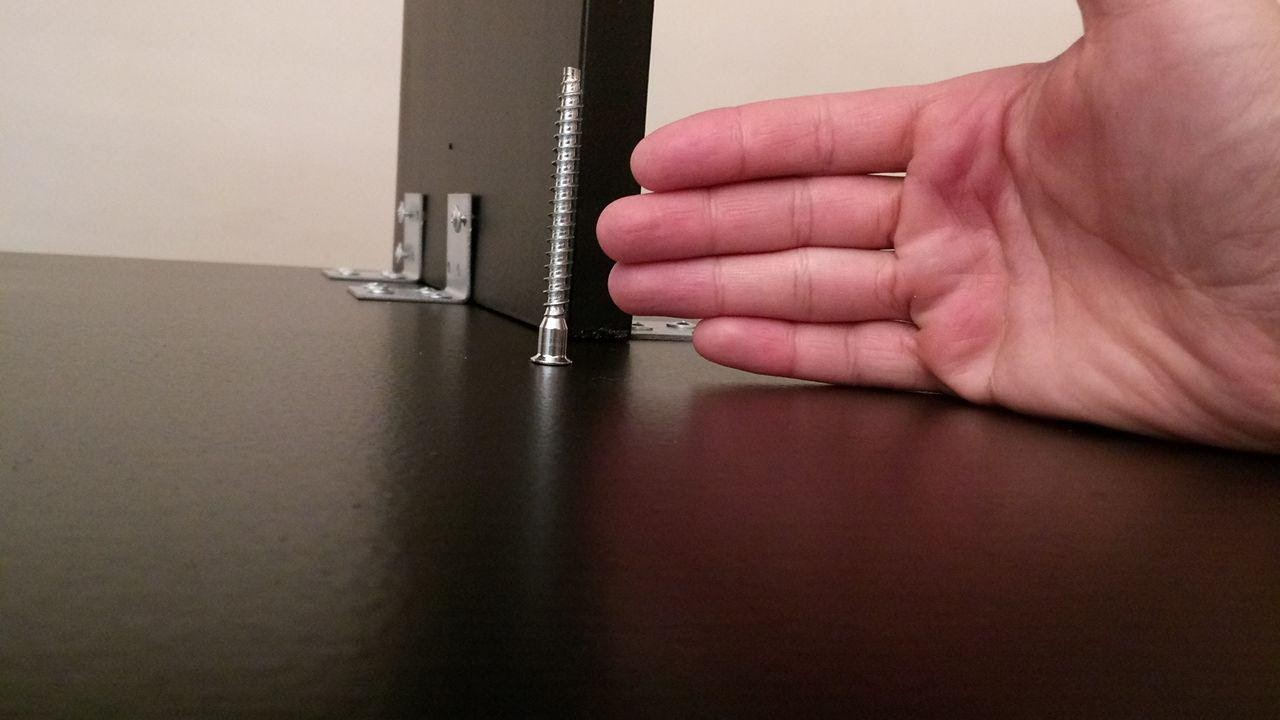
Before screwing in the screws for them, a hole was drilled with a thin drill and a recess for the cap was made so that the cap of the screw would go just below the surface (like, this is called “sweat”).
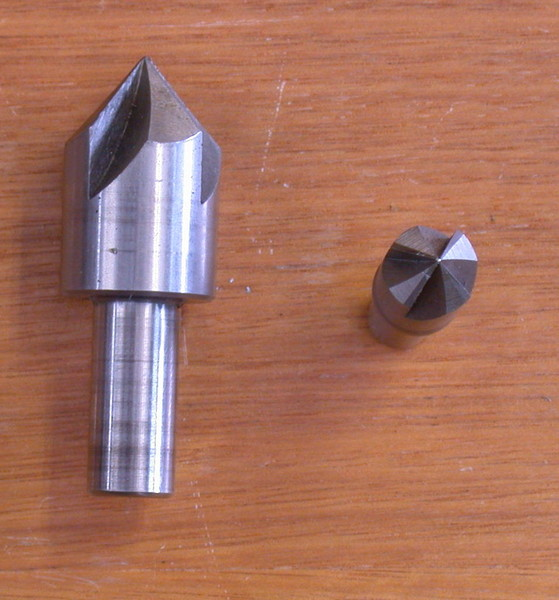
A drill for grooves under the head of the screw. The
grooves for the screws were covered with wood putty and sanded. Surprisingly, putty on wood, when absorbed into wood, became very durable.
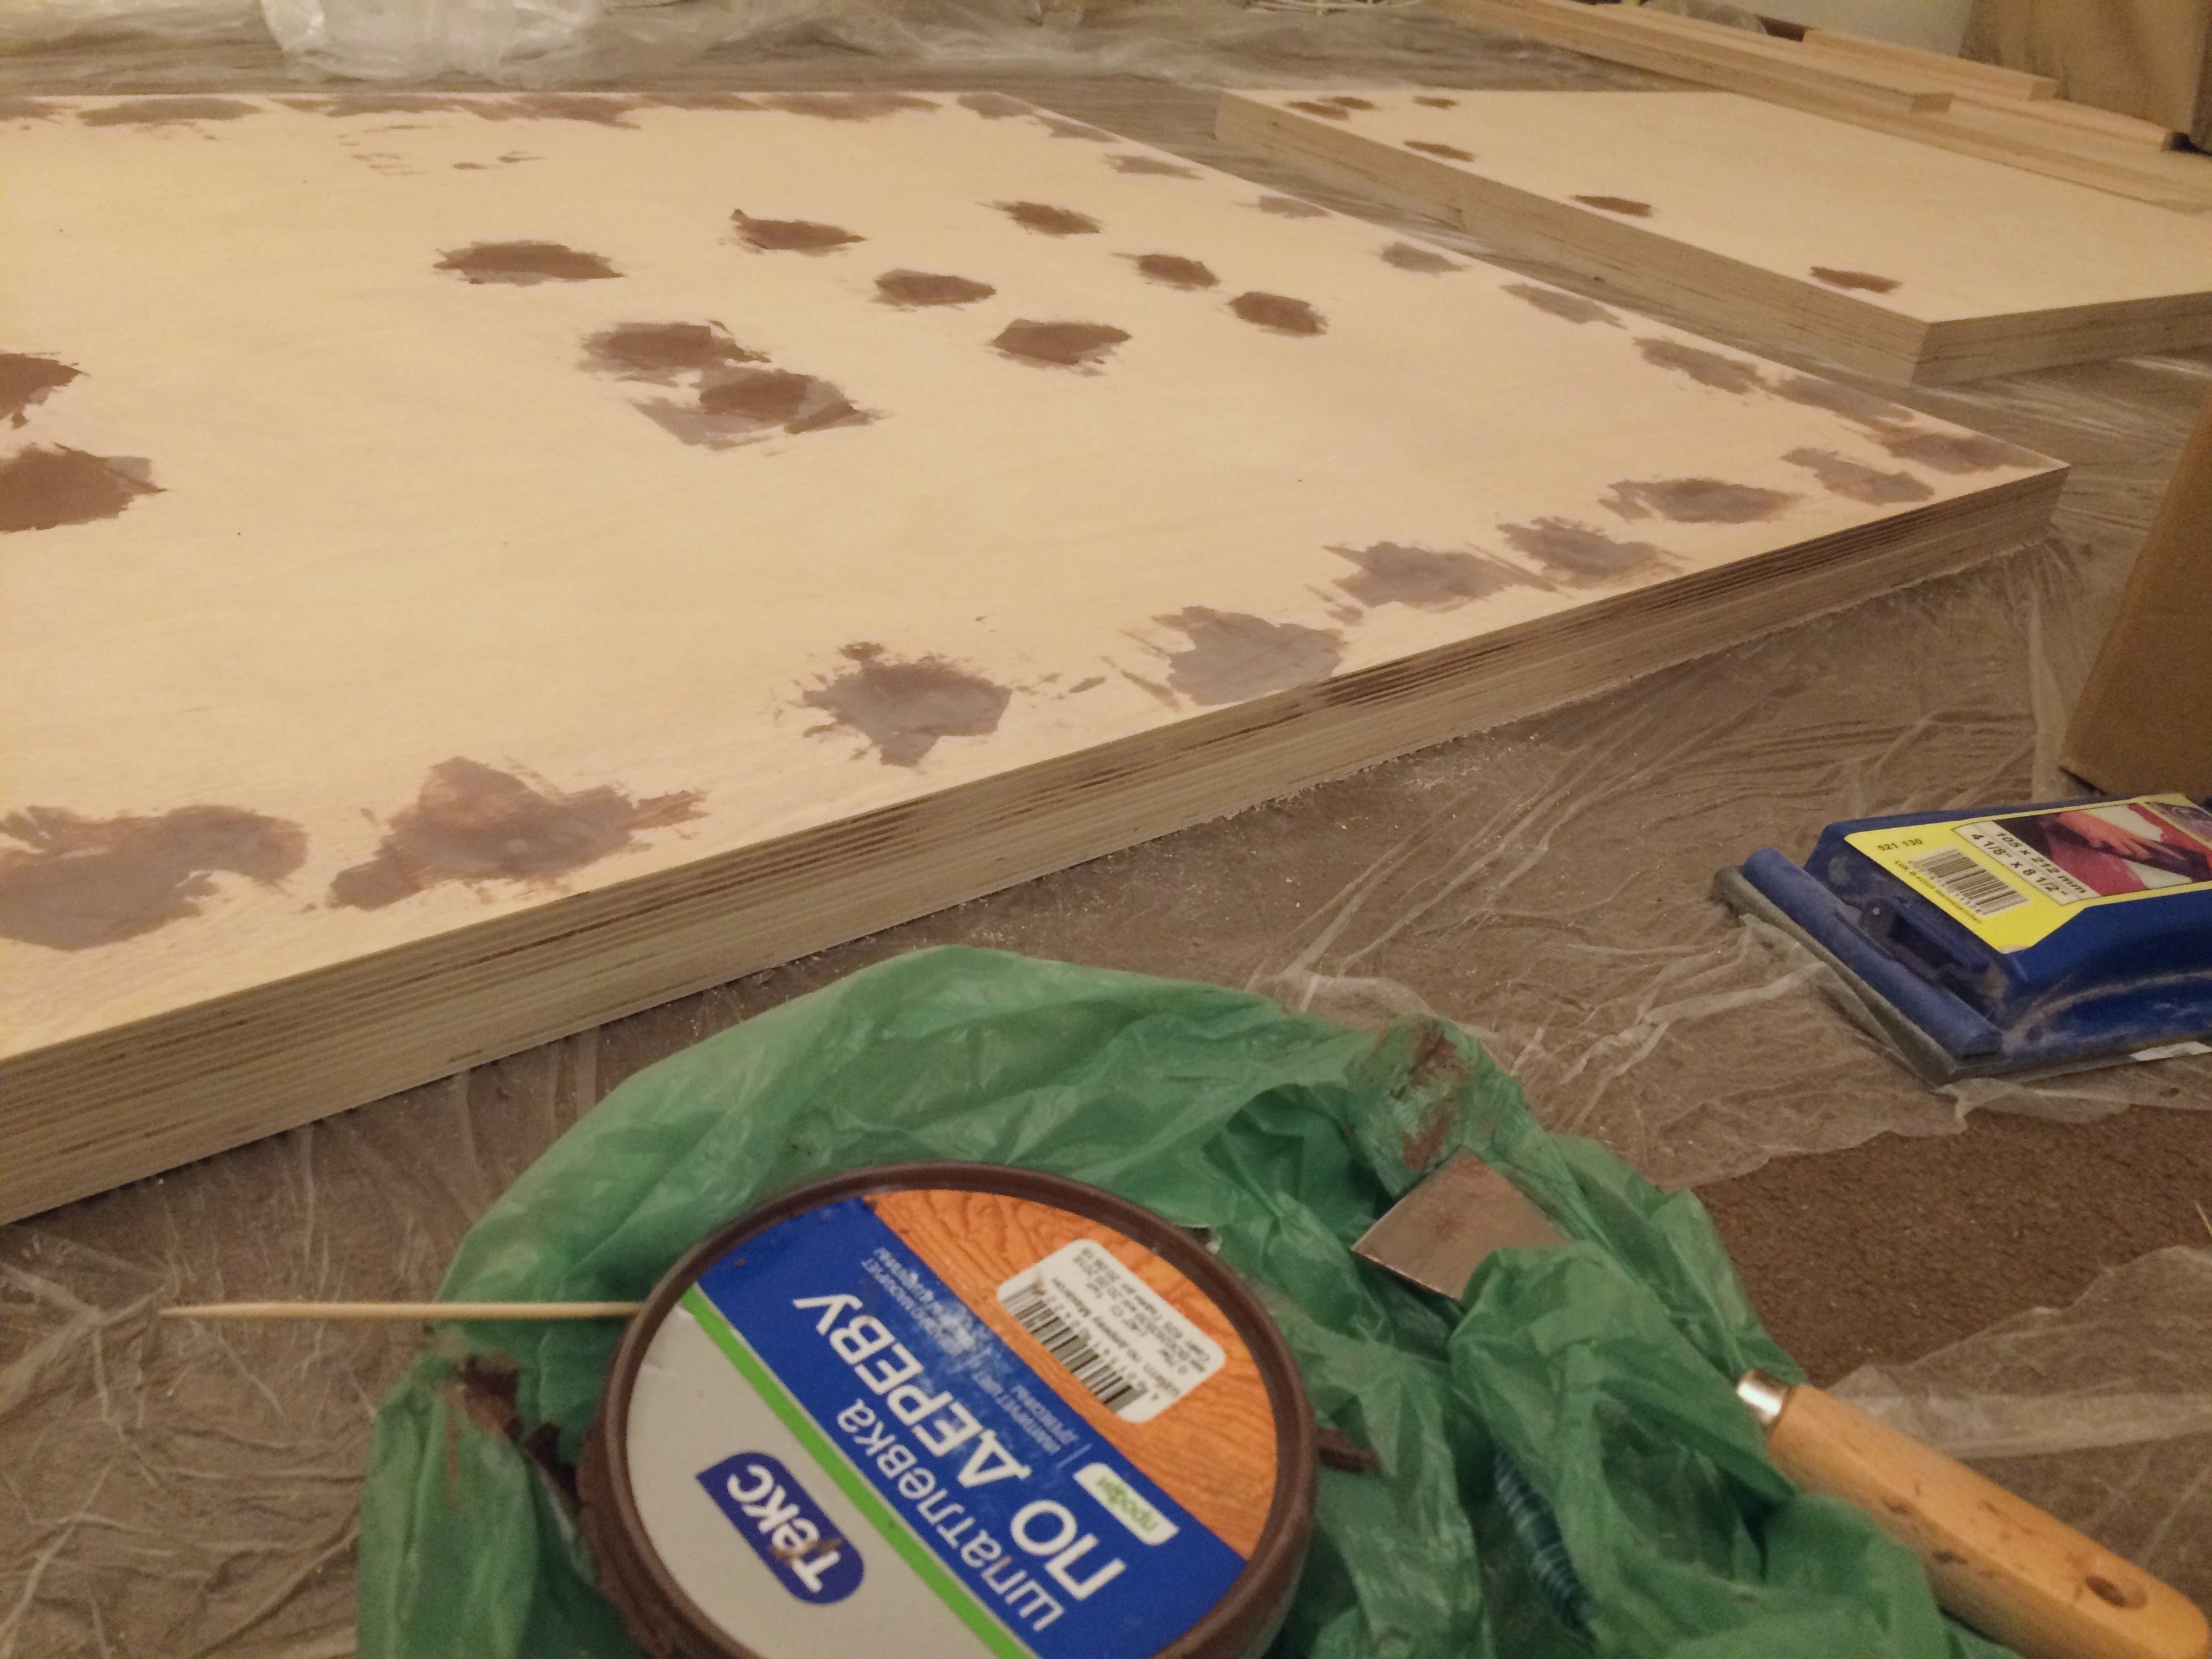
The holes from the self-tapping screws are covered with a wood putty.
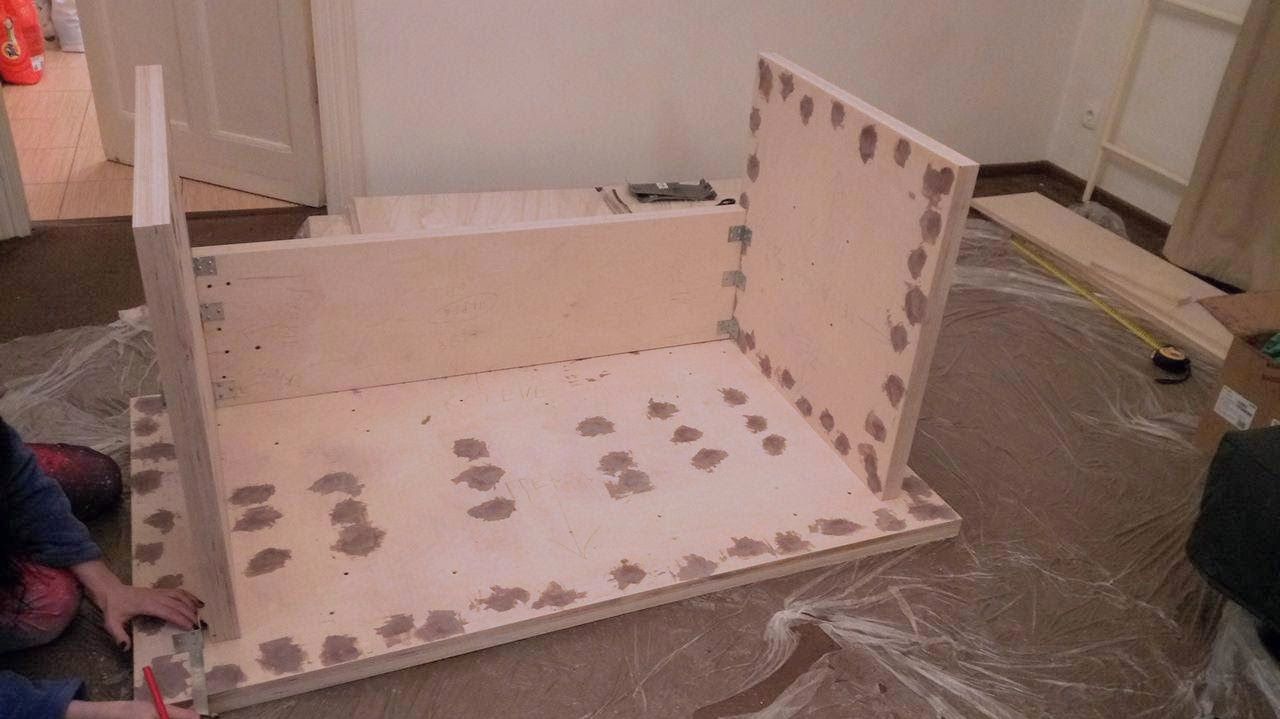
The side walls were connected to the worktop with ordinary galvanized corners. Surely it was possible to make aesthetic, using hidden fasteners, but the method with the corners is very simple, does not require accurate measurements and is quite reliable.
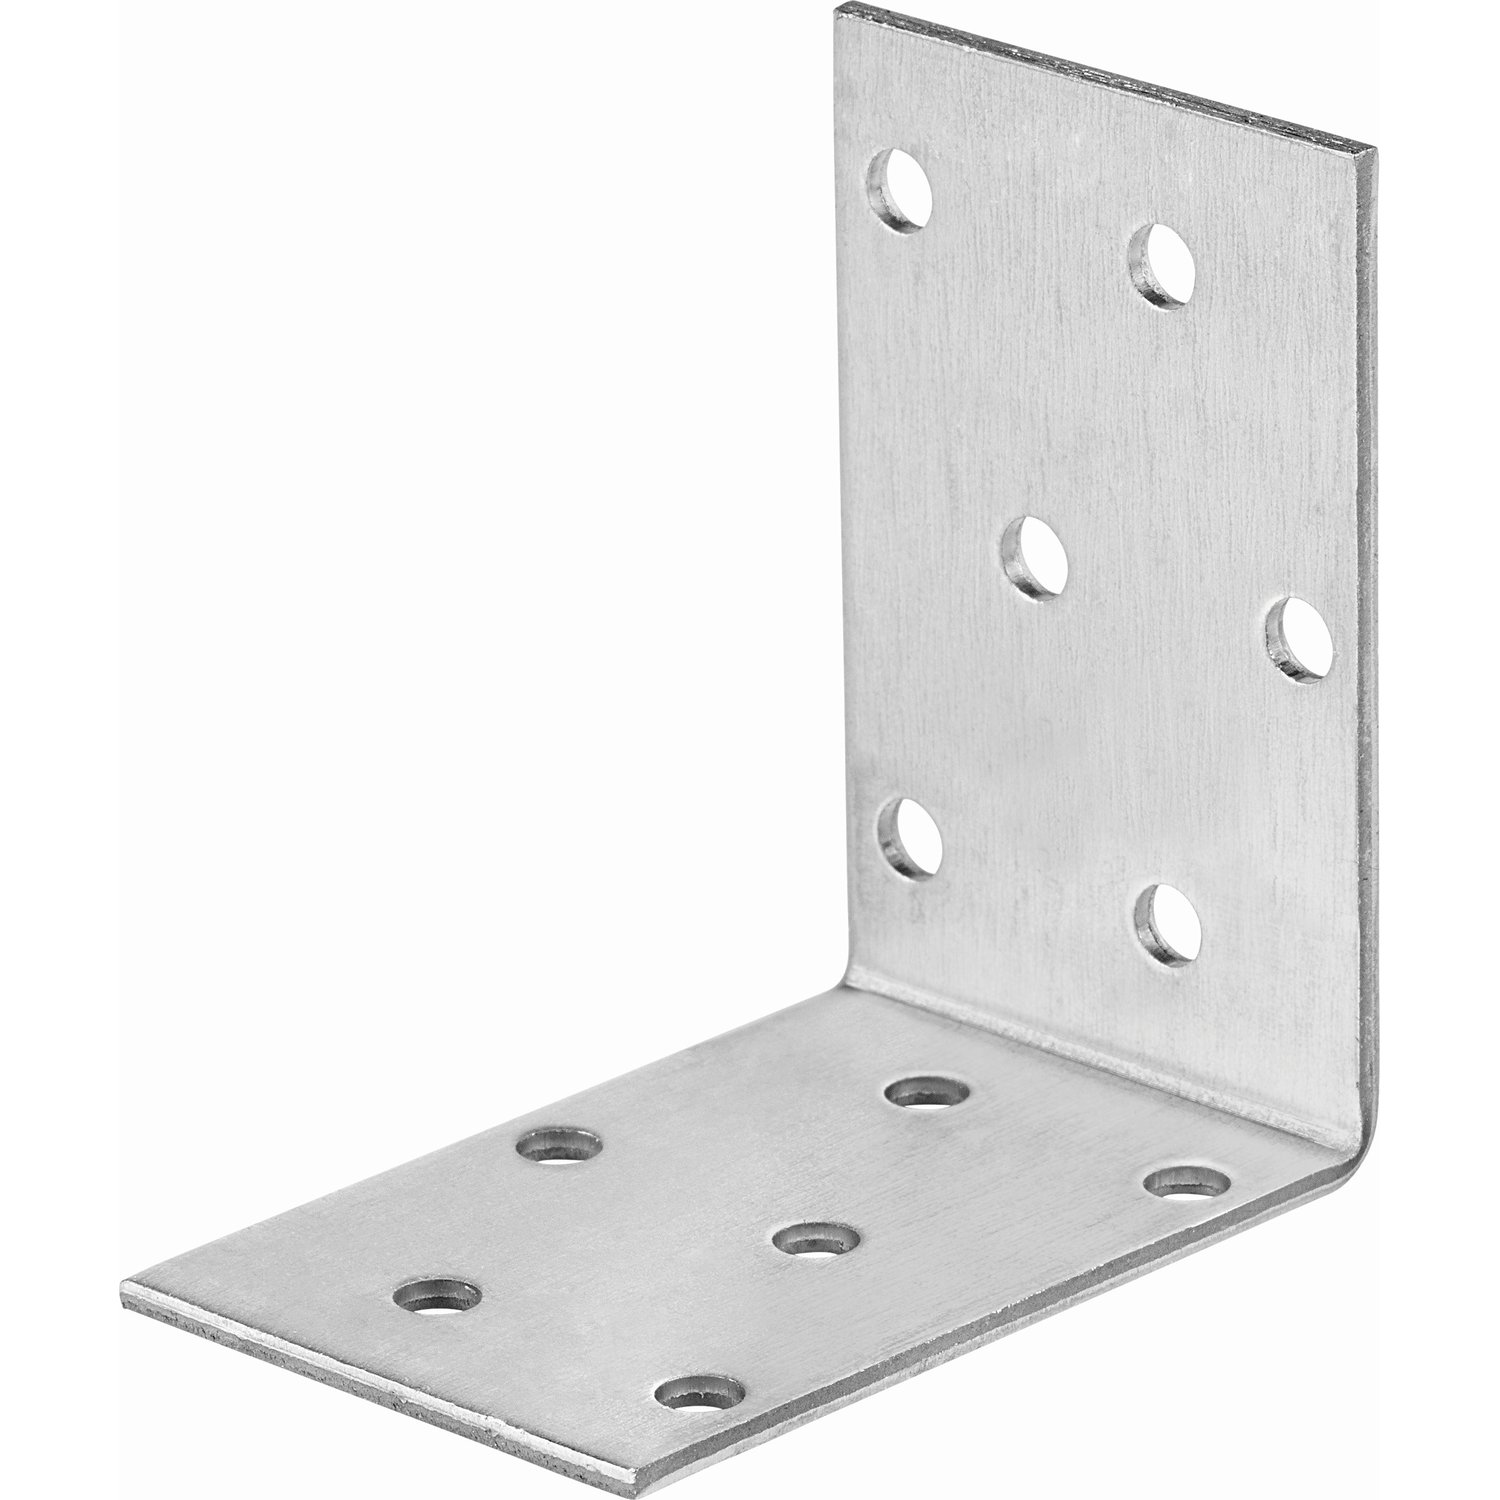
Steel galvanized corner - cheap and easy
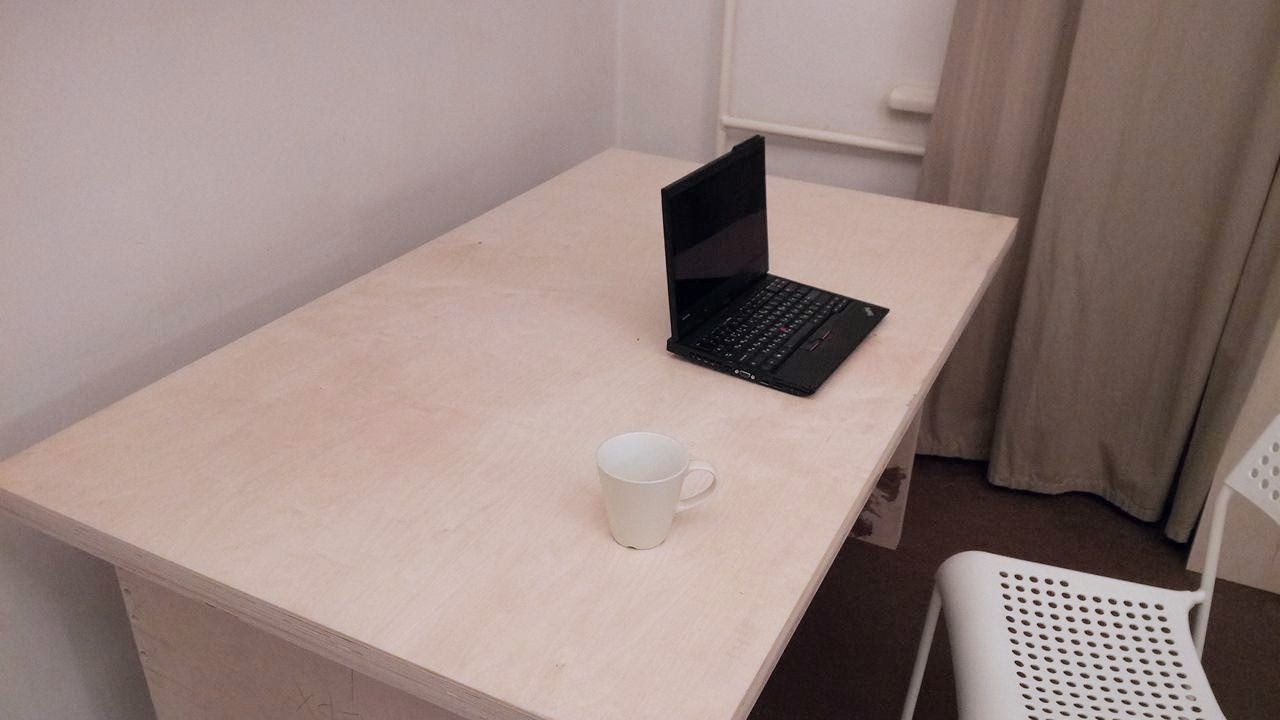
You can estimate the size of the table top relative to the ThinkPad X220 laptop. It can be seen that the depth of the table allows you to fit about four sizes of the laptop.
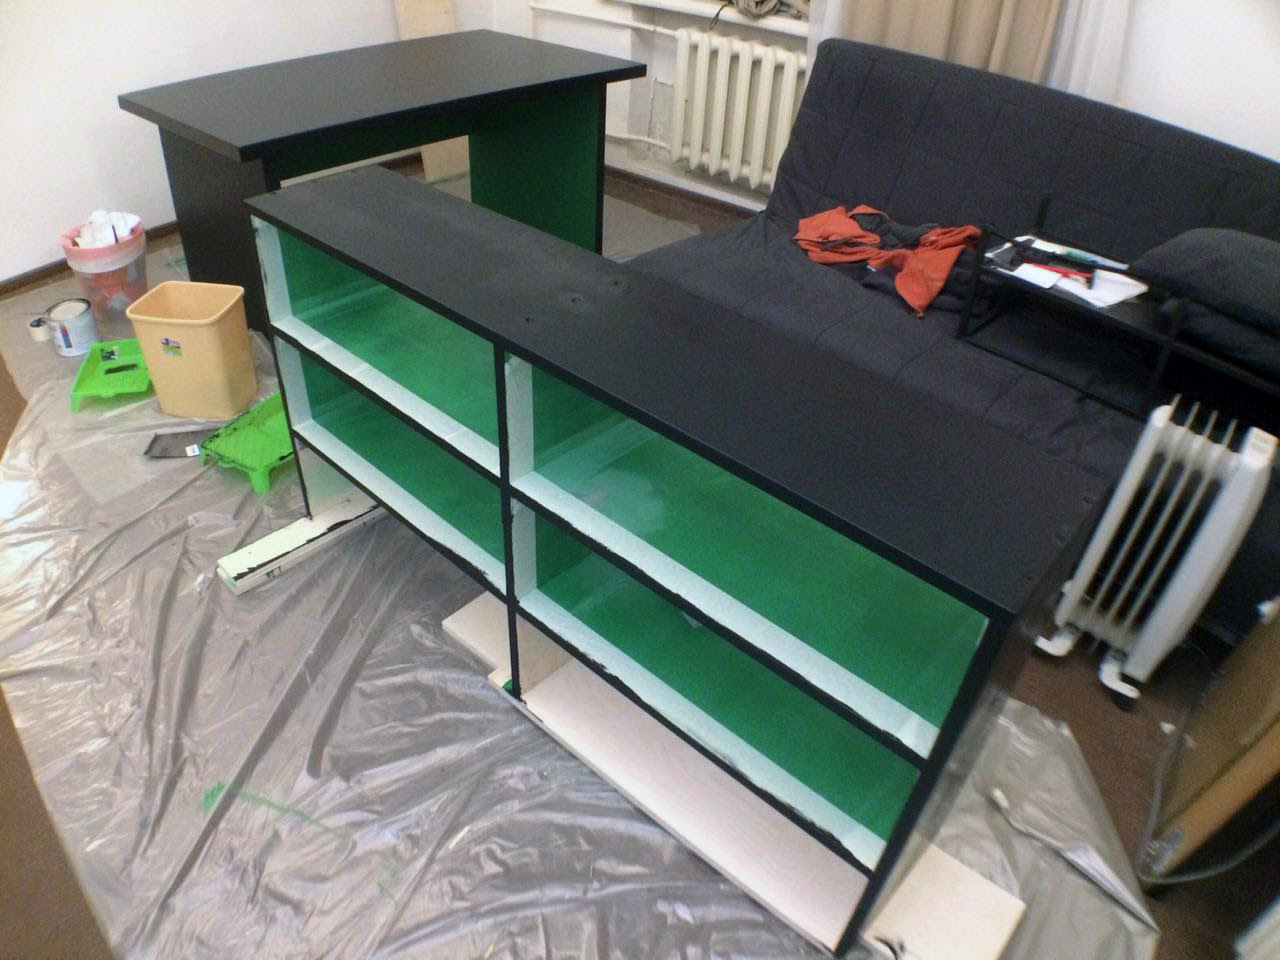
In parallel, shelves were assembled. They had to suffer because of my curvature. Initially the shelves were supposed to be connected only with screws confirmat, without corners, so that the fixings could not be seen at all. To do this, it was necessary to precisely drill holes in the ends of the boards. But the marking of the holes turned out to be not very accurate and some of the screws did not go in completely. In the end, I decided to spit and also use the corners. The holes from the screws that go through the ends of the boards are visible from above.
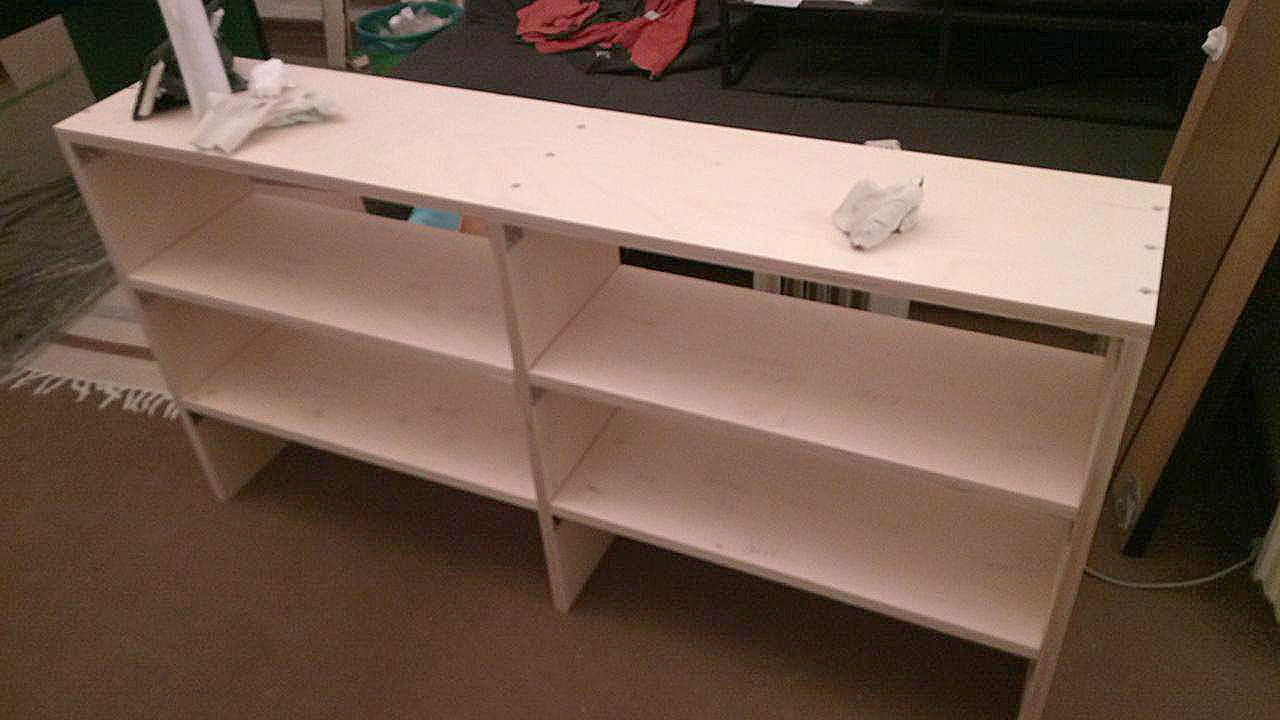
Shelf assembly was the most difficult
Painting
The most enjoyable process. It turns out that modern paints do not smell at all, they dry for half an hour, and are very pleasant to work with, so that the table could be painted right in the apartment without discomfort.
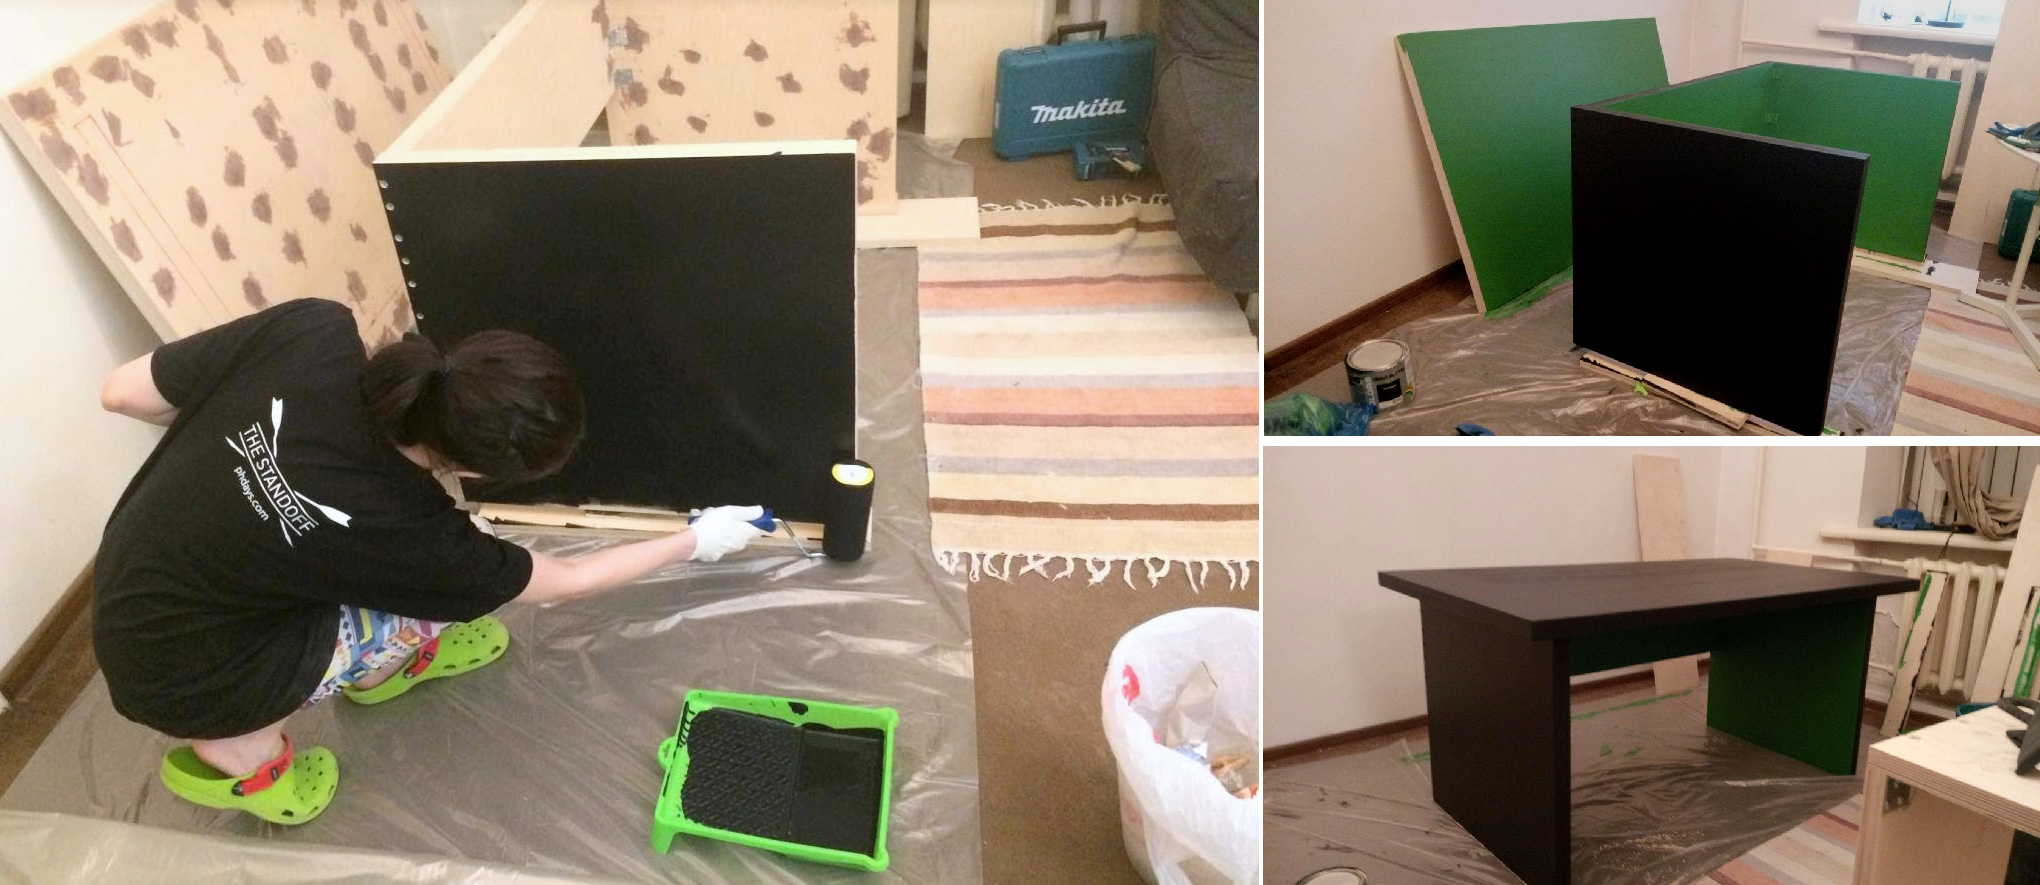
Painting is the most pleasant process.
Painting the shelves
Final build
I was afraid that the shelves would not be securely fixed to the table top and would “walk”, therefore, in addition to the confirmatte, I fastened the corners together. Now I think that it was superfluous, since the corners were quite enough, and the marking of the holes for the through screw turned out to be too time consuming.
In addition to the corners, there were three furniture screws in each of the three boards below. Answering the question: the back-up screws on the background were handed over completely, this is just a fitting so that you can move the center board.
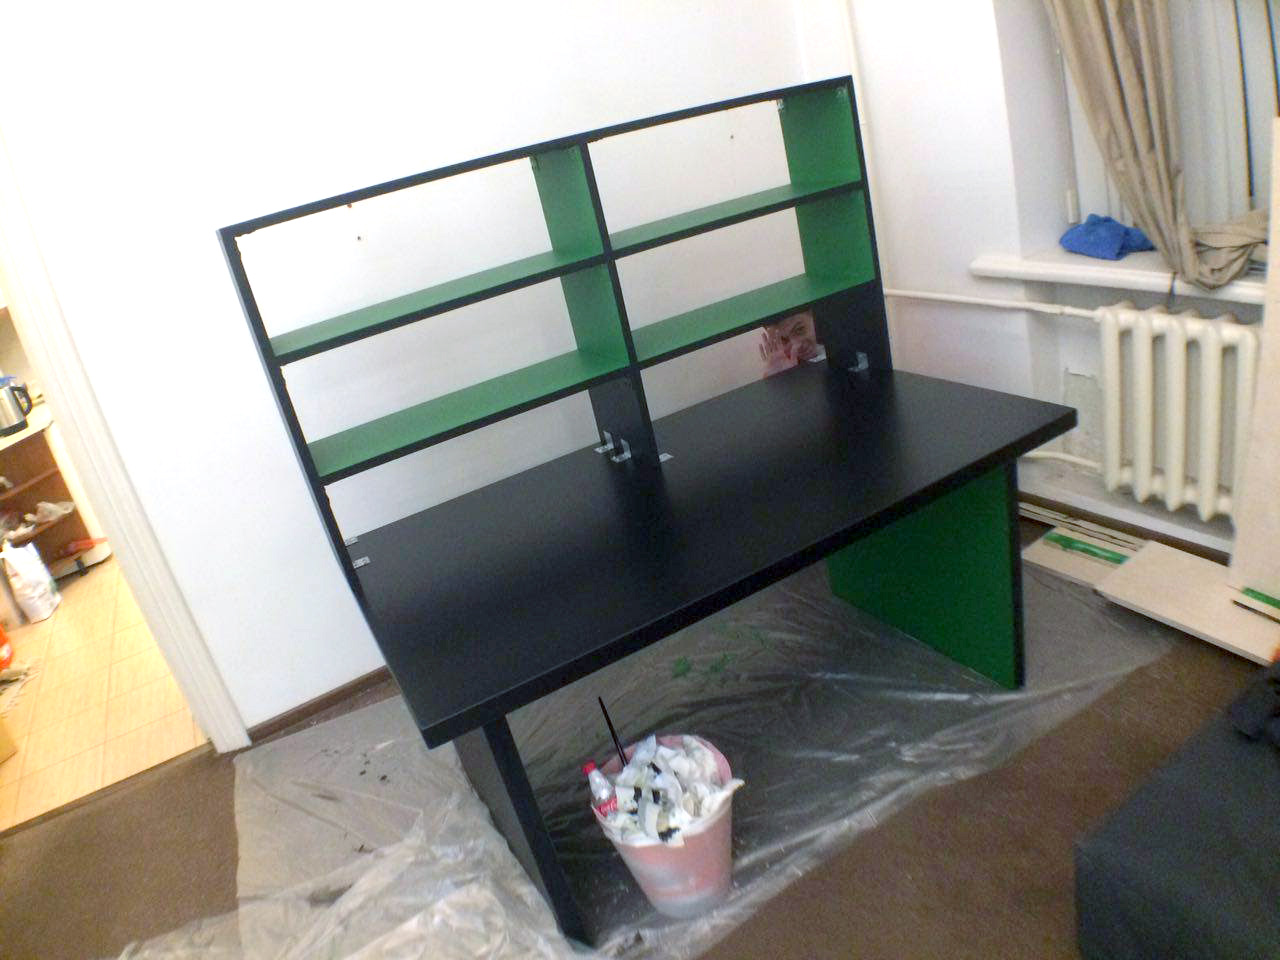
Galvanized corners are visible, fastening the shelves with the table top. Then they will be painted black.
At all the front ends of the table top and shelves, the chamfer was removed (sharp angle) using a rough sandpaper. It turned out to be easier than I expected. So the sharp edge of the table does not stick into the hands, like those of the same IKEA tables.
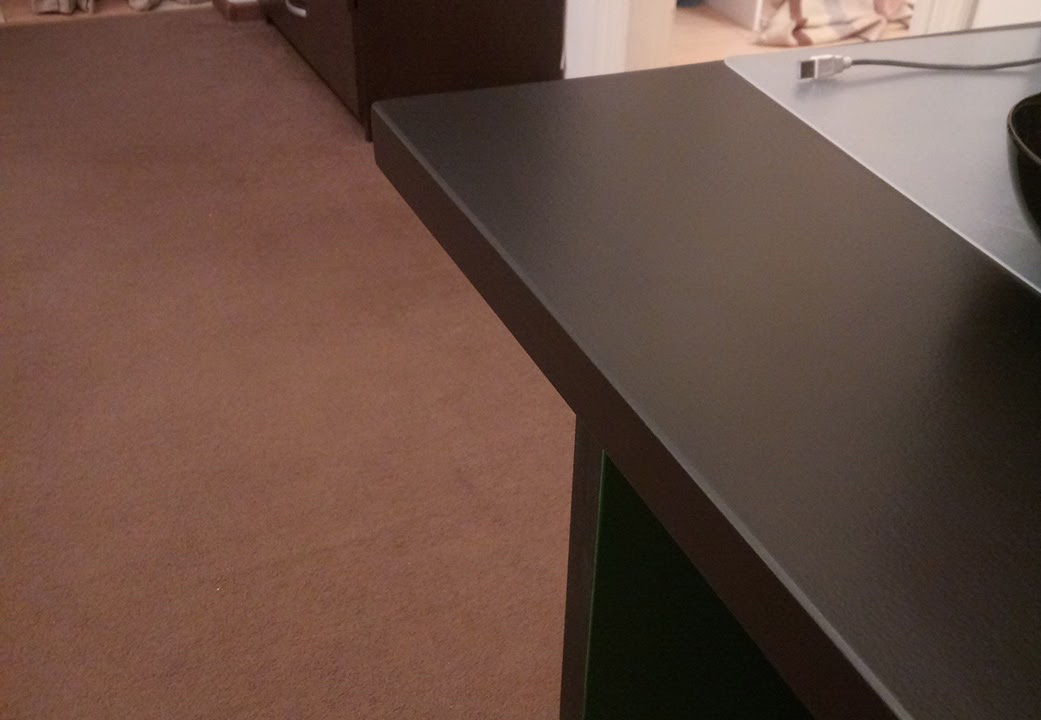
The sharp edges of the tabletop were
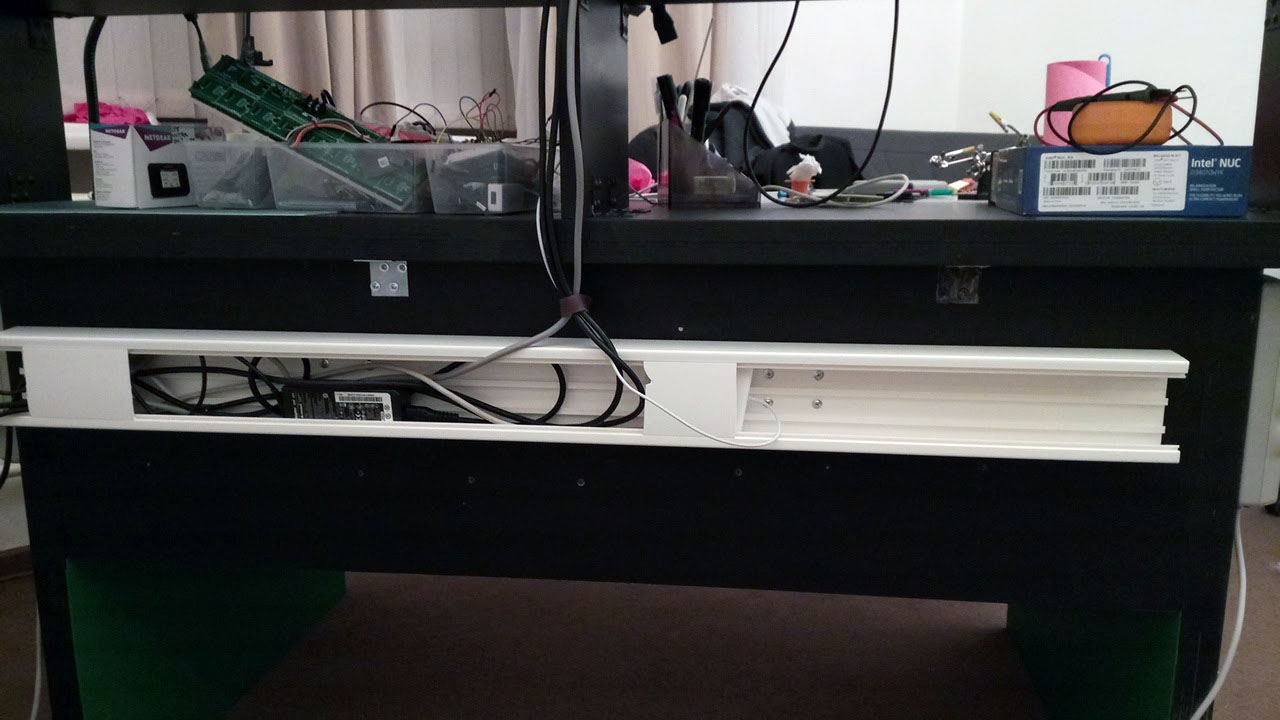
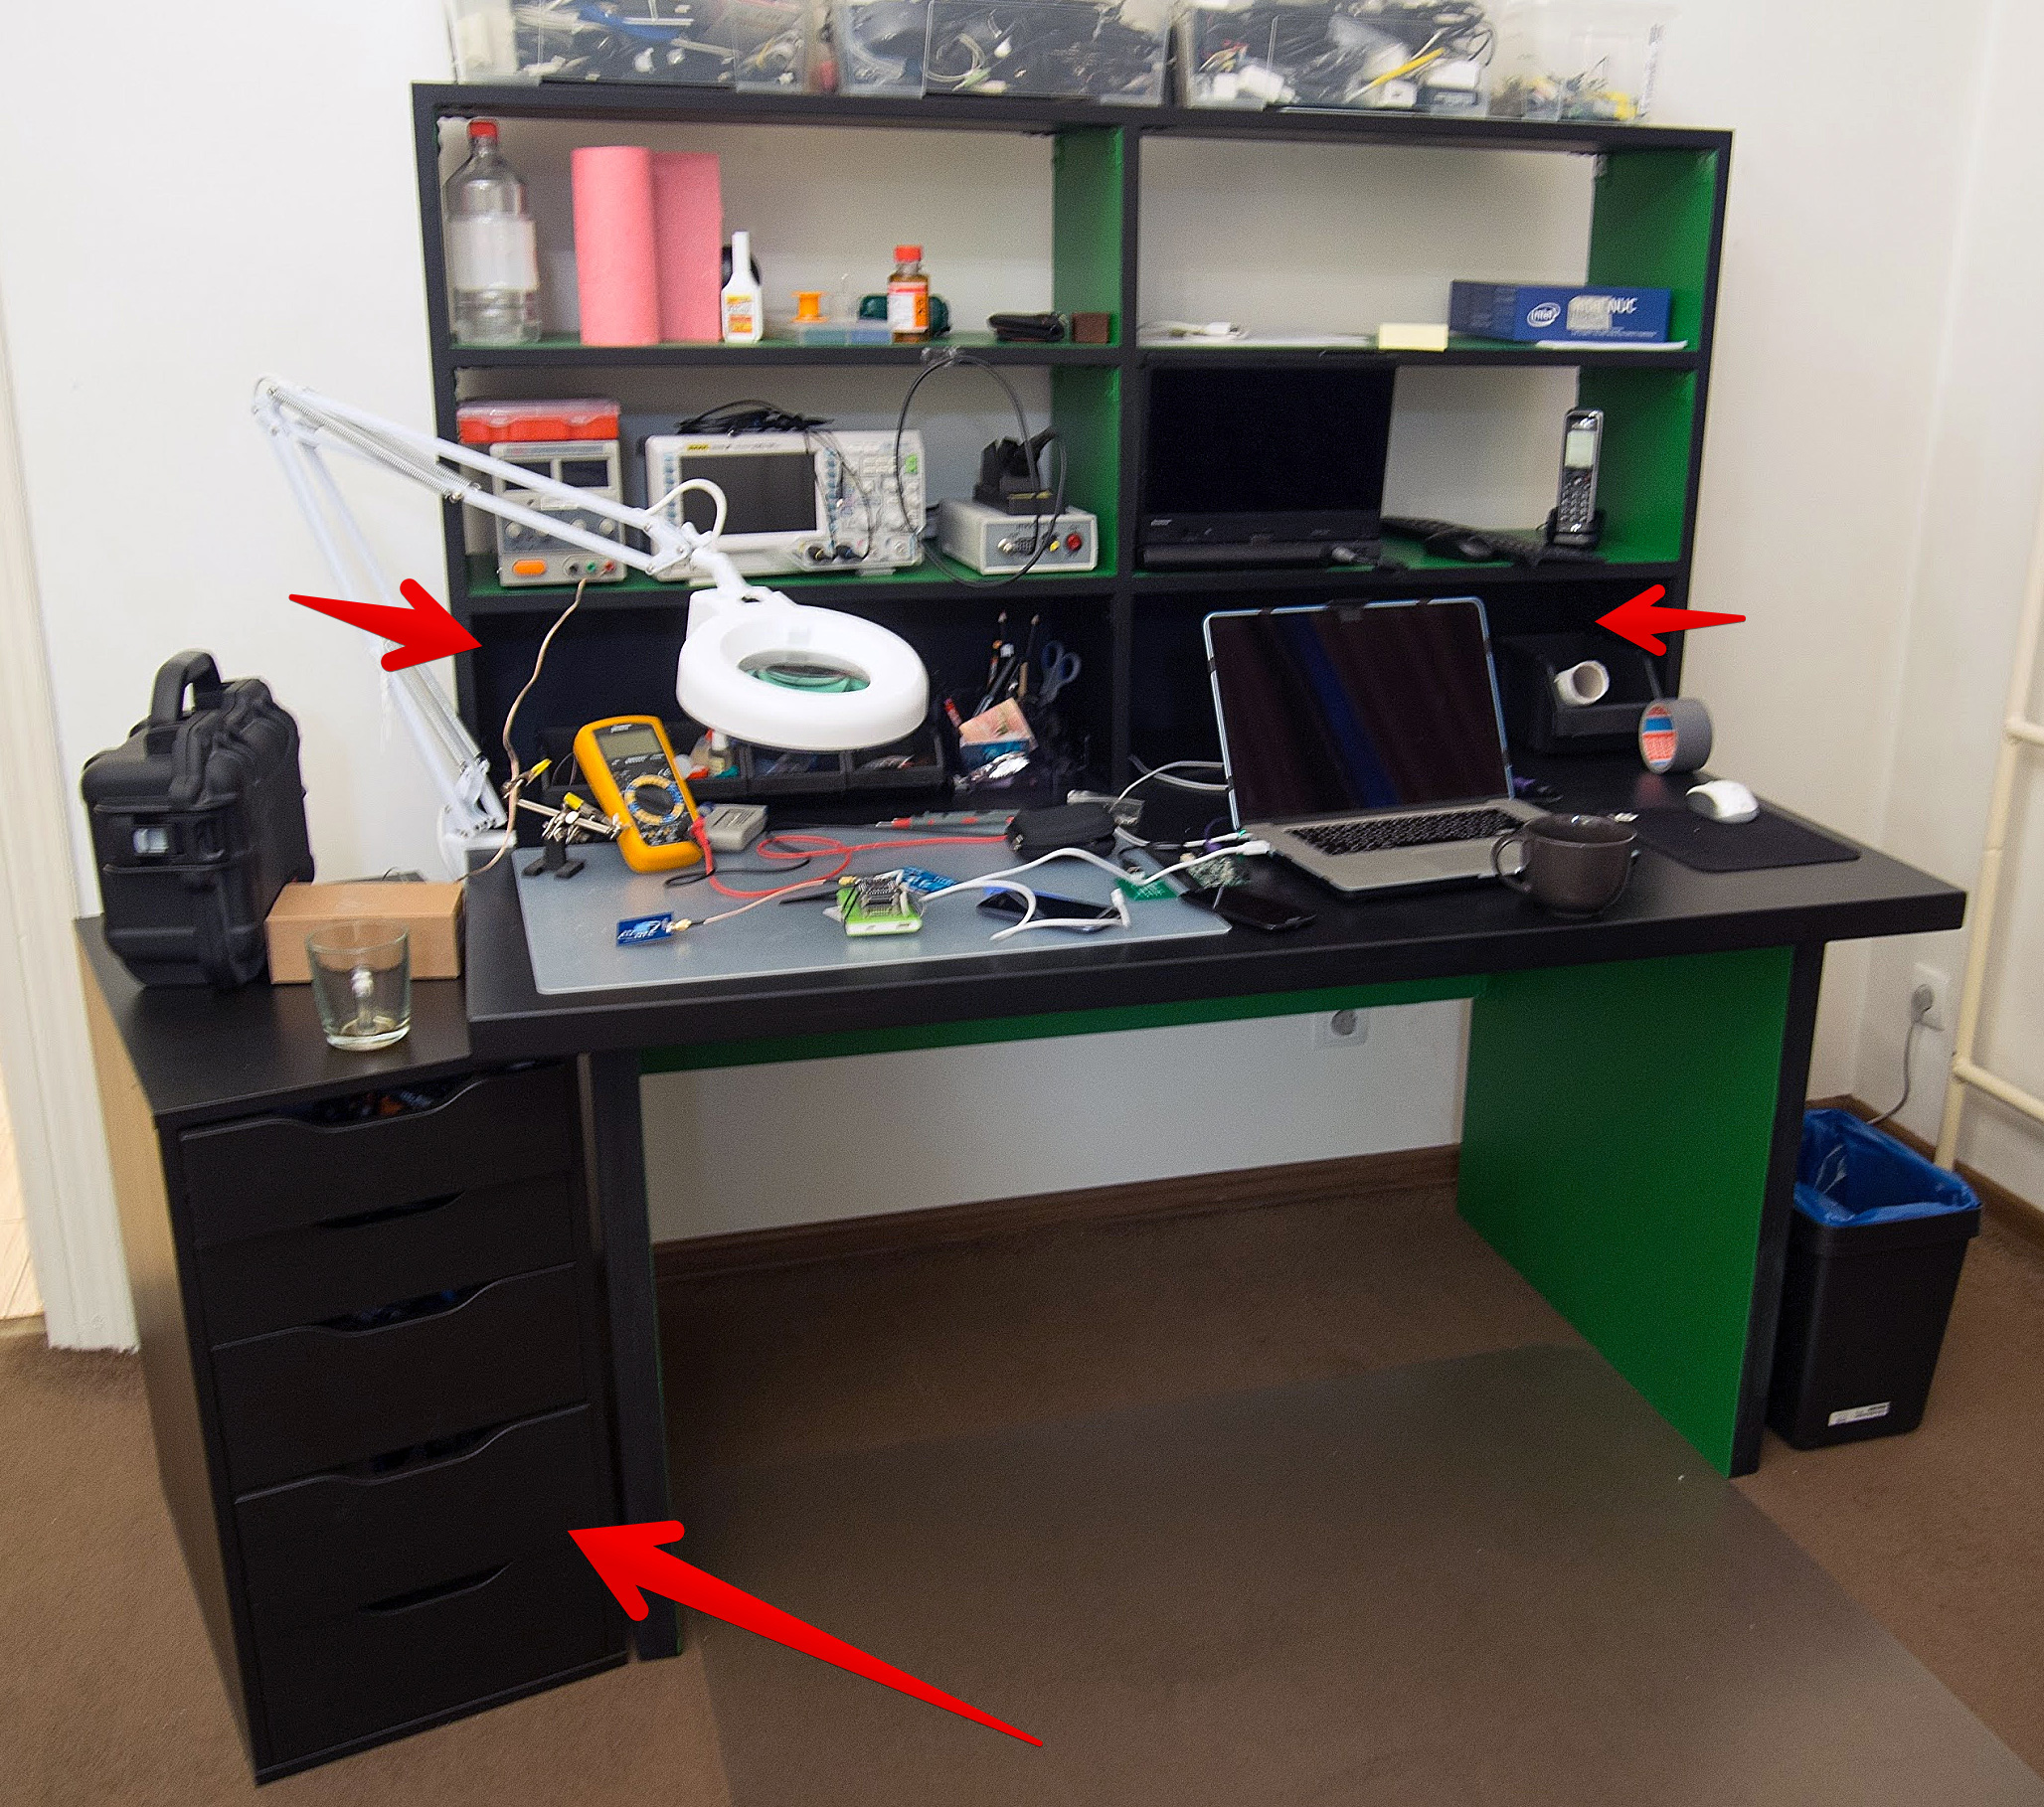
Cable management
The largest plastic box was bolted at the back for cable management. It laid the wires that go to the sides.
On both sides, I screwed extension cords (in some regions of Russia they are called “pilot”) into eight outlets.
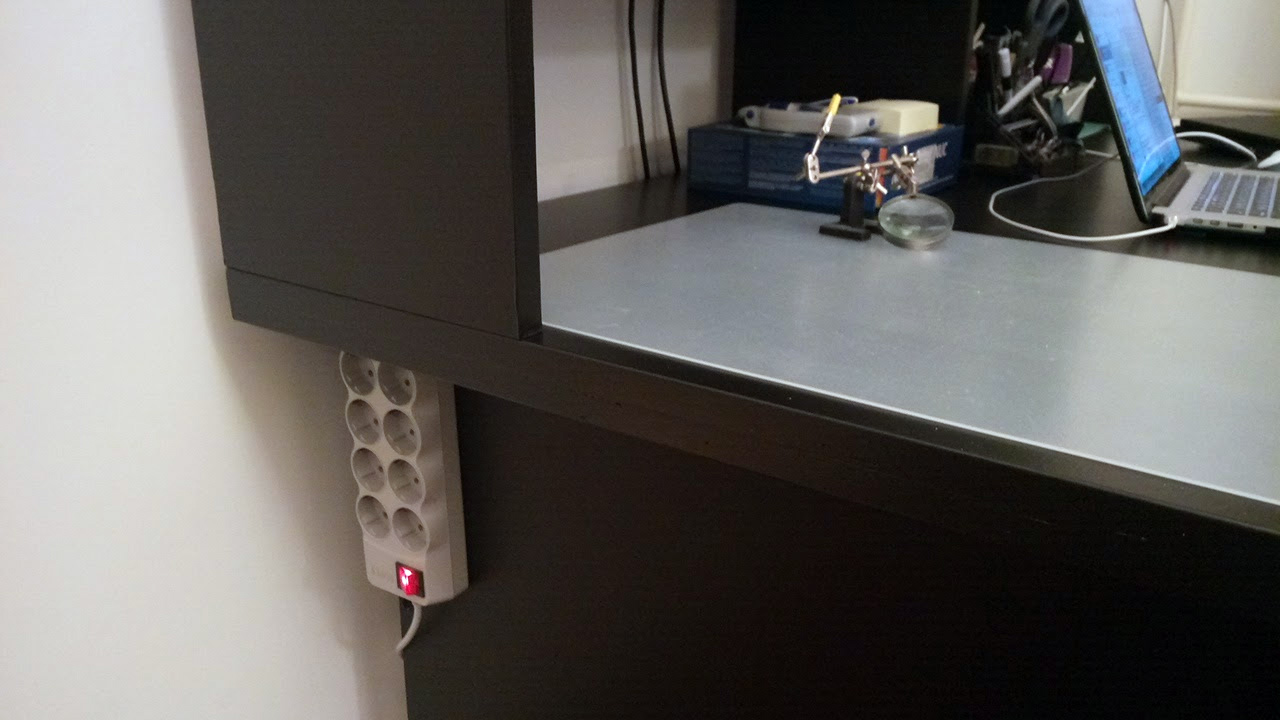
As a result, there are no cables under the table, except for one that goes upwards from the socket into the box. On the cabinet with drawers you can not pay attention, it will be removed from under the table.
No cables under the table.
Crates
It was necessary to store tools somewhere, and I bought an added drawer with drawers in IKEA. She was perfect in height to get under the table.
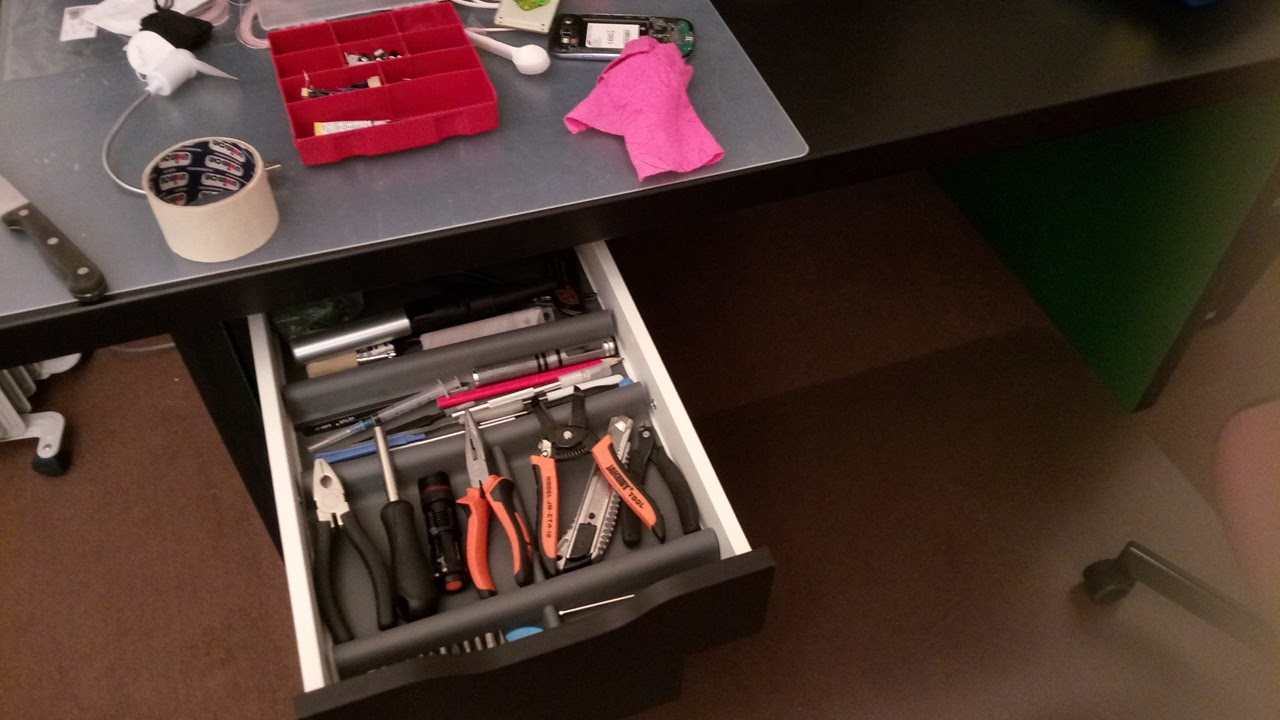
IKEA drawer with drawers
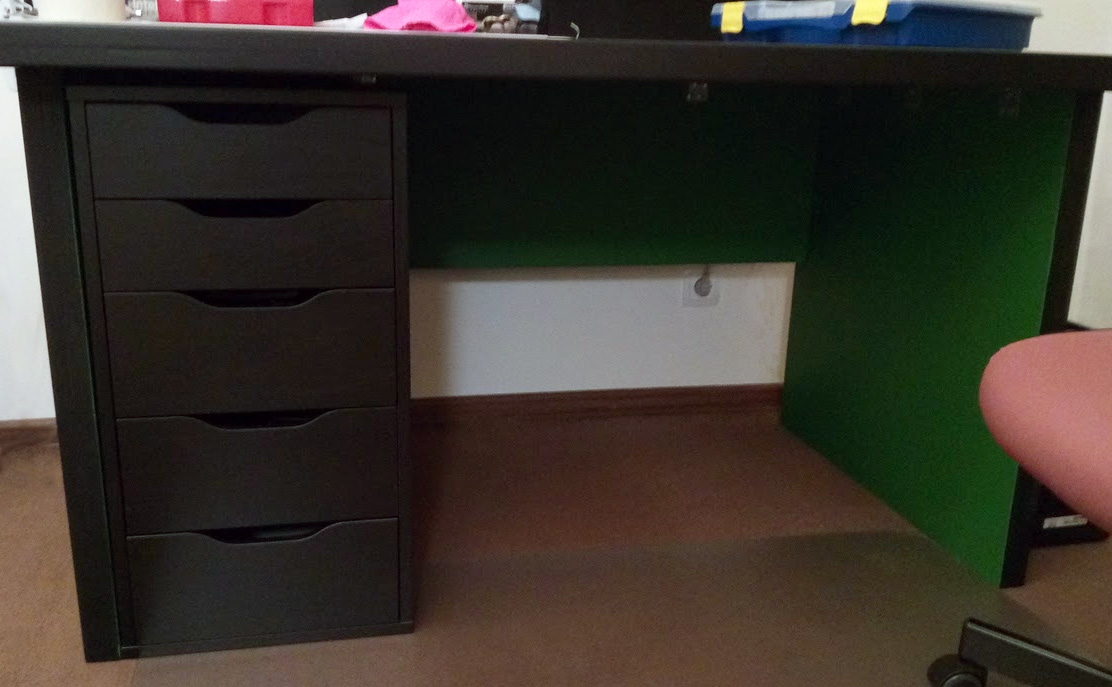
I tried to place it inside the table, but it turned out to be inconvenient because it cut off part of the working surface. As a result, I placed the cabinet on the side outside the table. It also turned out that things from the far edge of the tabletop are constantly falling overboard. Therefore, a partition was added, closing tightly the bottom shelf. There were holes for cables.
The cupboard outside was more convenient. The back wall was covered with a sheet of plywood to keep things from falling off the table.
Columns
I wanted to listen to Mouzon not only with headphones. Therefore, the "ears" for the speakers were attached to the shelves. Also, a monitor on the bracket, attached to the inner wall of the shelf.
Something like this table now.
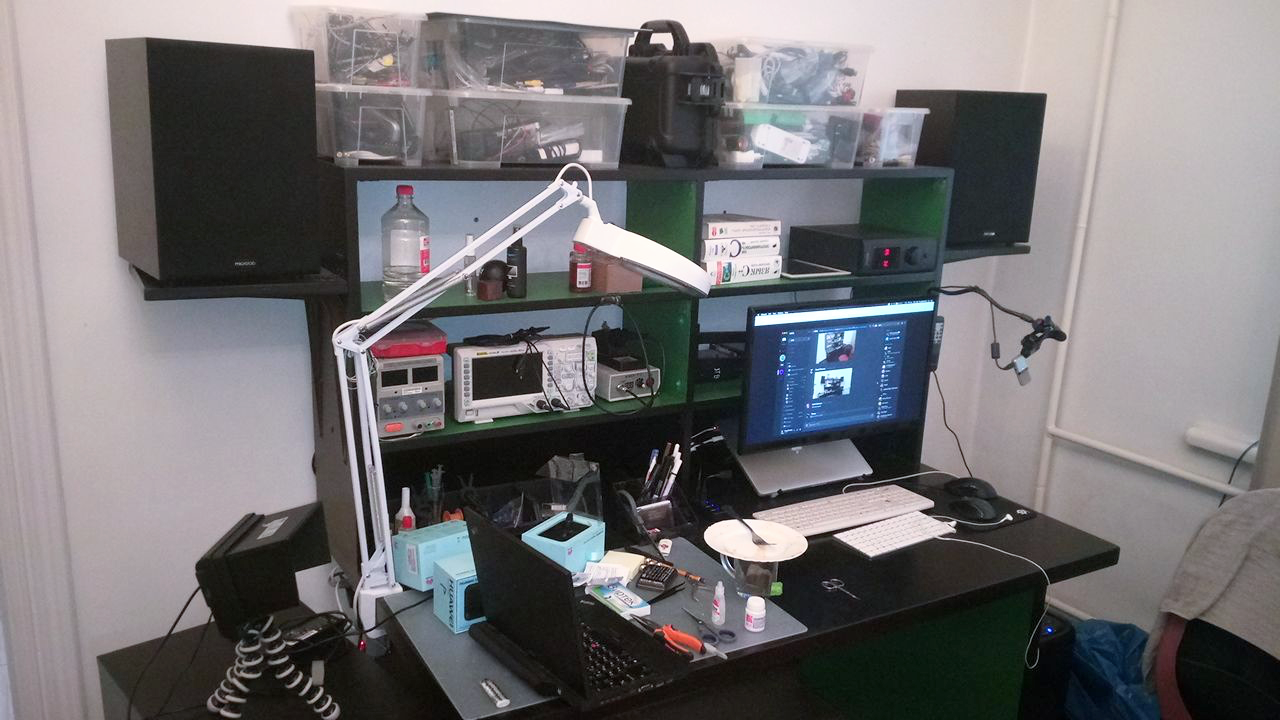
Speaker Stands
Stability test
A bare table without equipment weighs about ~ 120 kg. Together with the speakers, instruments, monitor - already ~ 160 kg. Despite the fact that such a weight makes it very difficult to move the table, it carries the main advantage - STABILITY !! 111 . I can collect a house of cards at one end of the table while I dance at the other.
Video demonstrating the stability of the table (15 MB)
Conclusion
Overall, I am very pleased with the result. Even without experience, it is quite possible to assemble an acceptable table in two or three days. Nothing like $ 300 can be bought. I write this post after a year of using the table and I can soberly tell about the advantages and disadvantages, without which it could not have done.
- ✓ Sustainability is the most important advantage of this table, which I will not tire of talking about. I am terribly annoyed by the tables on which the monitor is constantly shaking and everything is flying apart, if you barely touch it.
- ✓ Spaciousness and convenience. The shelves perfectly perform their function, it is easy to reach all devices. A monitor mounted on a bracket does not interfere with access to the entire surface of the tabletop under it. The table is divided into two zones: the right - computer keyboard, the left - engineering soldering.
- ✓ Durability. On the table, you can jump with a run, while at the other end there is a painful ration. Increased strength and resistance to dynamic loads also allows you to use the table for other than its intended purpose for a variety of family life.
- ✘ paint fastness- This is the main drawback that I can highlight. I deliberately do not provide recommendations on the choice of paint for the countertop, because I never managed to find the perfect option. The first coating I used was water-based acrylic and varnish. After a couple of months, the lacquer degraded in places of constant contact with the skin due to sebum and acids excreted in sweat. I tried to solve this problem by using alkyd paint. As a result, in the apartment for a week there was such a stench that all the homeworkers cursed me, even the hood installed above the table and pointing out the window did not help. Alkyd paint never dried out in a week, in the end I had to remove it with a plane and repaint the countertop again with acrylic paint, this time with yacht varnish. While holding on, but I still do not like. Sure that there is a correct solution to this problem, but it is unknown to me. Perhaps in the comments prompt. In this case, on all other surfaces, where there is no constant contact with the skin, the first painting keeps perfectly.
- ✘ Weight. For sustainability you have to pay. Every time I am going to move the table away to shift the cables, I have to call my neighbor for help. The table is really very heavy.