Making iBeacon and Eddystone Beacon “on the knee”
- Tutorial
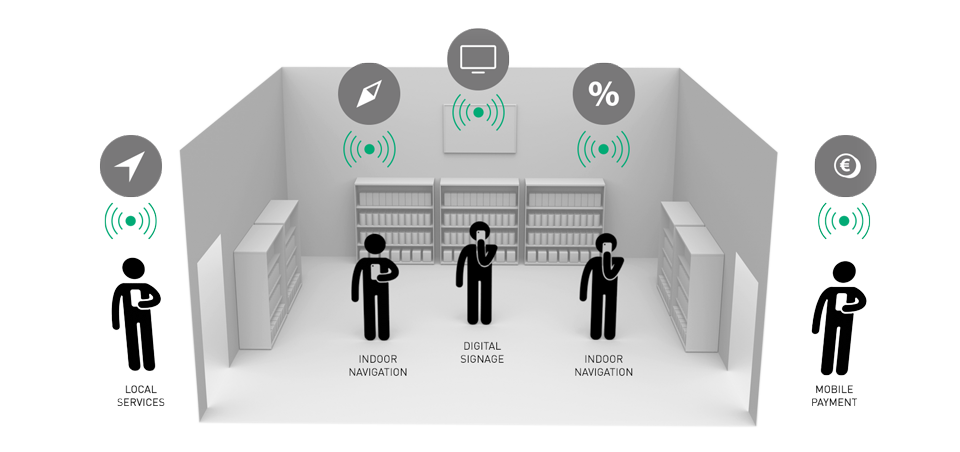
iBeacon and Eddystone are Apple and Google services, respectively, using BLE (Bluetooth Low Energy) for local positioning indoors. The basic principle of both services is the same, only the format of the transmitted data is different. A beacon (transmitter) periodically, with an interval from fractions of a second to several seconds, transmits packets of the Bluetooth LE standard, which contain additional information in addition to the header. The technology is not intended to accurately determine the position in the room, but only to record the moment of approaching at some close distance to the lighthouse.
A classic example of using lighthouses is museums. Arriving at the museum, you install a special application on your smartphone and go to inspect the exposition. Approaching the exhibit (lighthouse) at a certain distance, the smartphone captures this and displays excursion information on the screen.
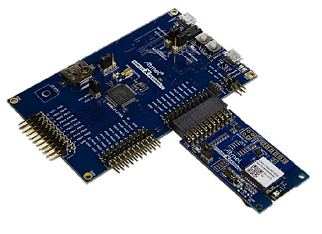
You can find many ready-made beacons on sale, but today we will assemble a prototype of our own beacon (both iBeacon and Eddystone) on the Atmel microcontroller SAML21 and BLE module BTLC1000.
Iron
We will implement Bluetooth on the basis of the ATBTLC1000-XPRO expansion card with this module. As the host, we use the ATSAML21J18B microcontroller installed on the ATSAML21-XPRO-B debug board
Generating an Example for iBeacon
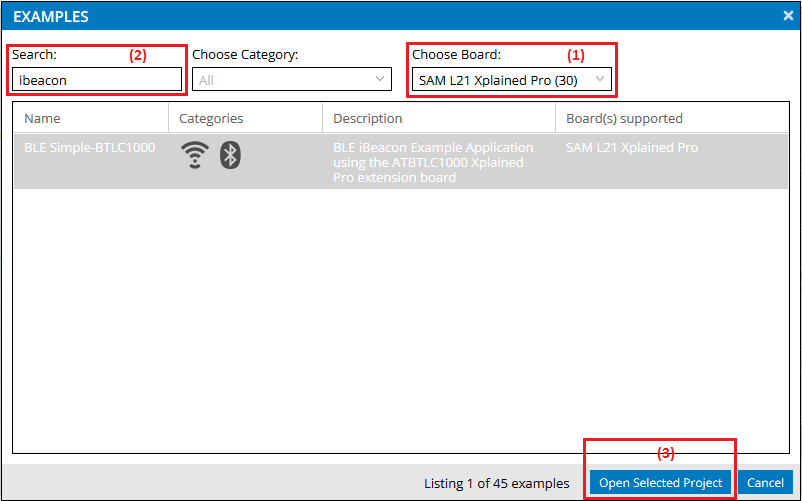
To do this, go to the Atmel | Start - Web code configurator for Atmel microcontrollers. In one of our past articles, we already wrote about using this tool. On the main page, click the Browse All Examples button and in the window that opens, select the SAM L21 Xplained Pro debug board , and in the search we type the line ibeacon . We select the BLE Simple-BTLC1000 example and click on the Open Selected Project button :
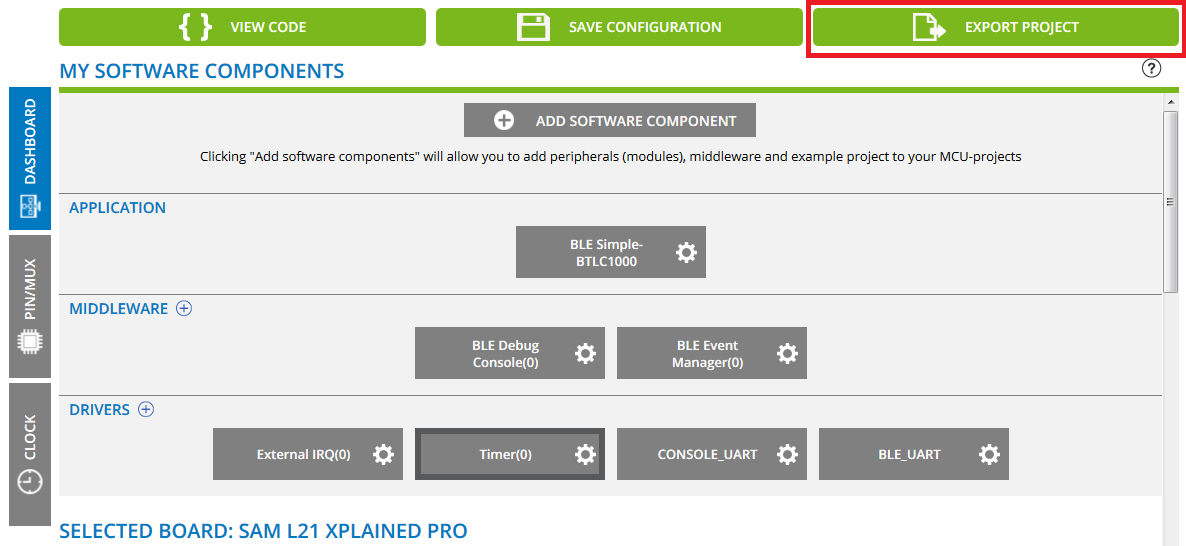
The default configuration, in theory, corresponds to the hardware and nothing needs to be changed here. Just in case, you can compare the result with a screenshot and press the EXPORT PROJECT button in the upper right corner of the screen:
We put a checkmark in front of the Makefile (standalone) item , rename the project and press the DOWNLOAD PACK button :

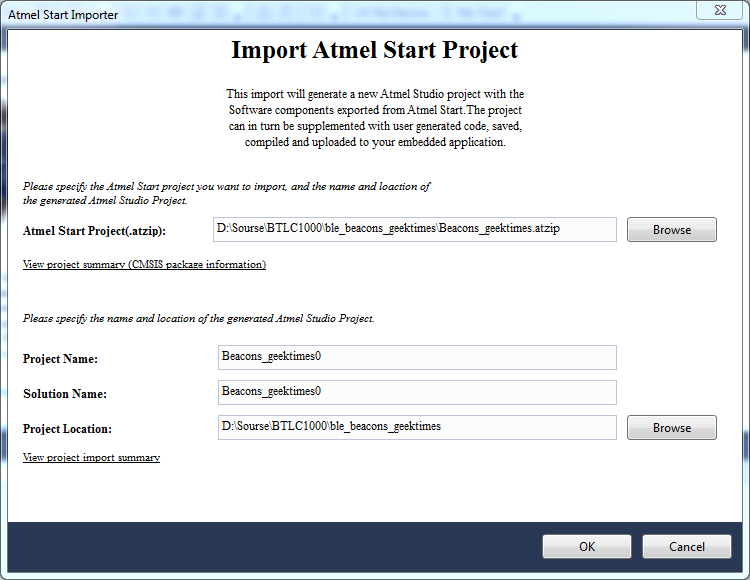
As a result, a file with the * .atzip extension is downloaded . In principle, this is a regular archive in which the project for Atmel Studio is stored. Open the file (it should be associated with the studio) and wait until the project starts. In the dialog that opens, if desired, change the name of the project and the path to the folder with the project and click OK:
We wait until the project is formed.
Trial run
Basically, the out-of-the-box example already works as an iBeacon. We are trying to compile the project with the F7 button.
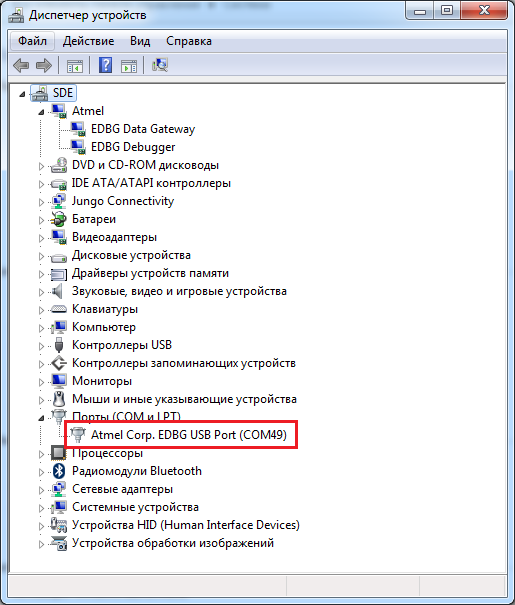
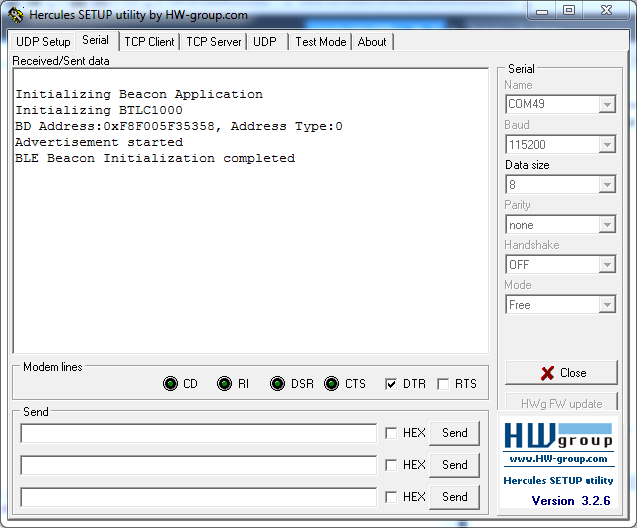
If the compilation is successful, you can upload the project to the microcontroller for the first tests. I recommend that you preliminarily launch a terminal program for monitoring bargain information. The built-in EDBG debugger is also defined in the system as a virtual COM port to which one of the SERCOMs of the microcontroller is connected.
We launch our favorite terminal machine , set the speed to 115200 and the DTR checkbox.
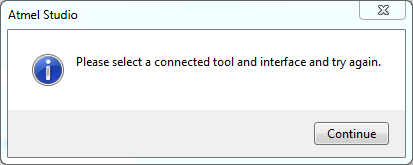
Press the F5 button to fill in the firmware. If you upload it for the first time, a message appears asking you to select the programmer to use:
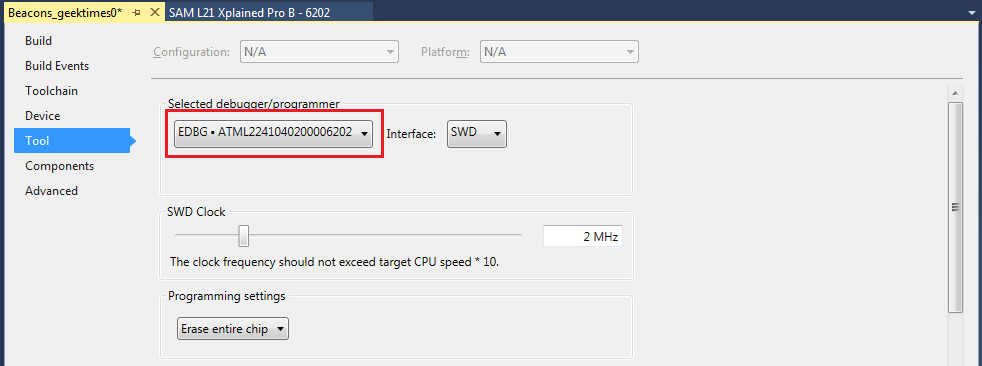
In the dialog box, specify our debugger:
Press F5 again and wait until the controller is programmed and the program starts to run. If everything is done correctly, in the terminal you should see the following information:
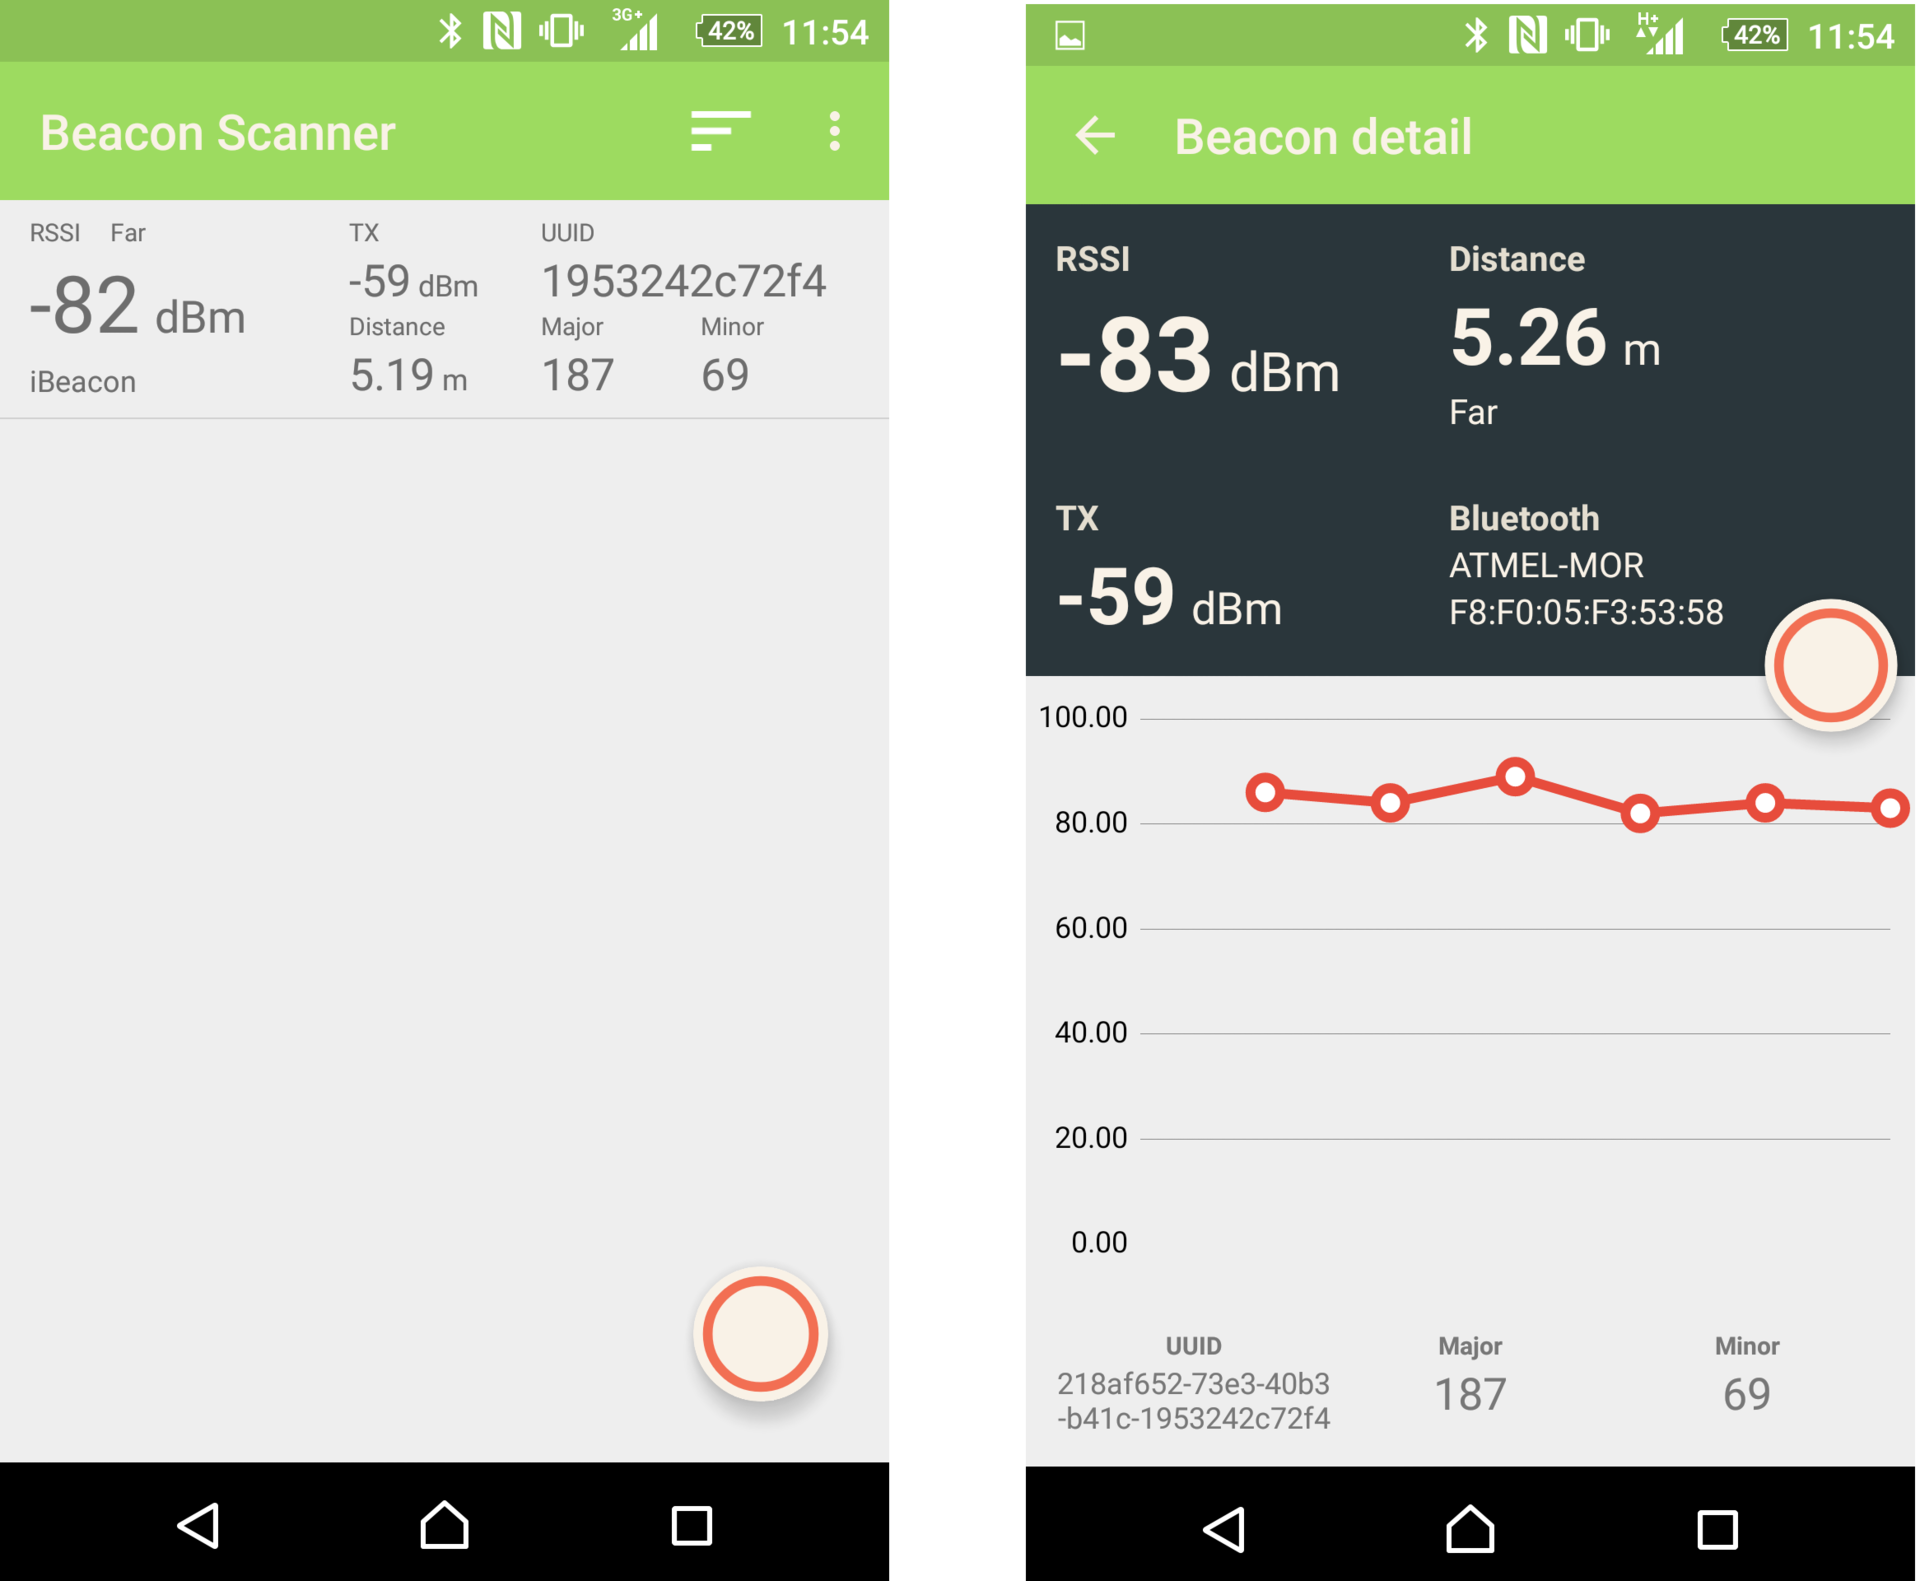
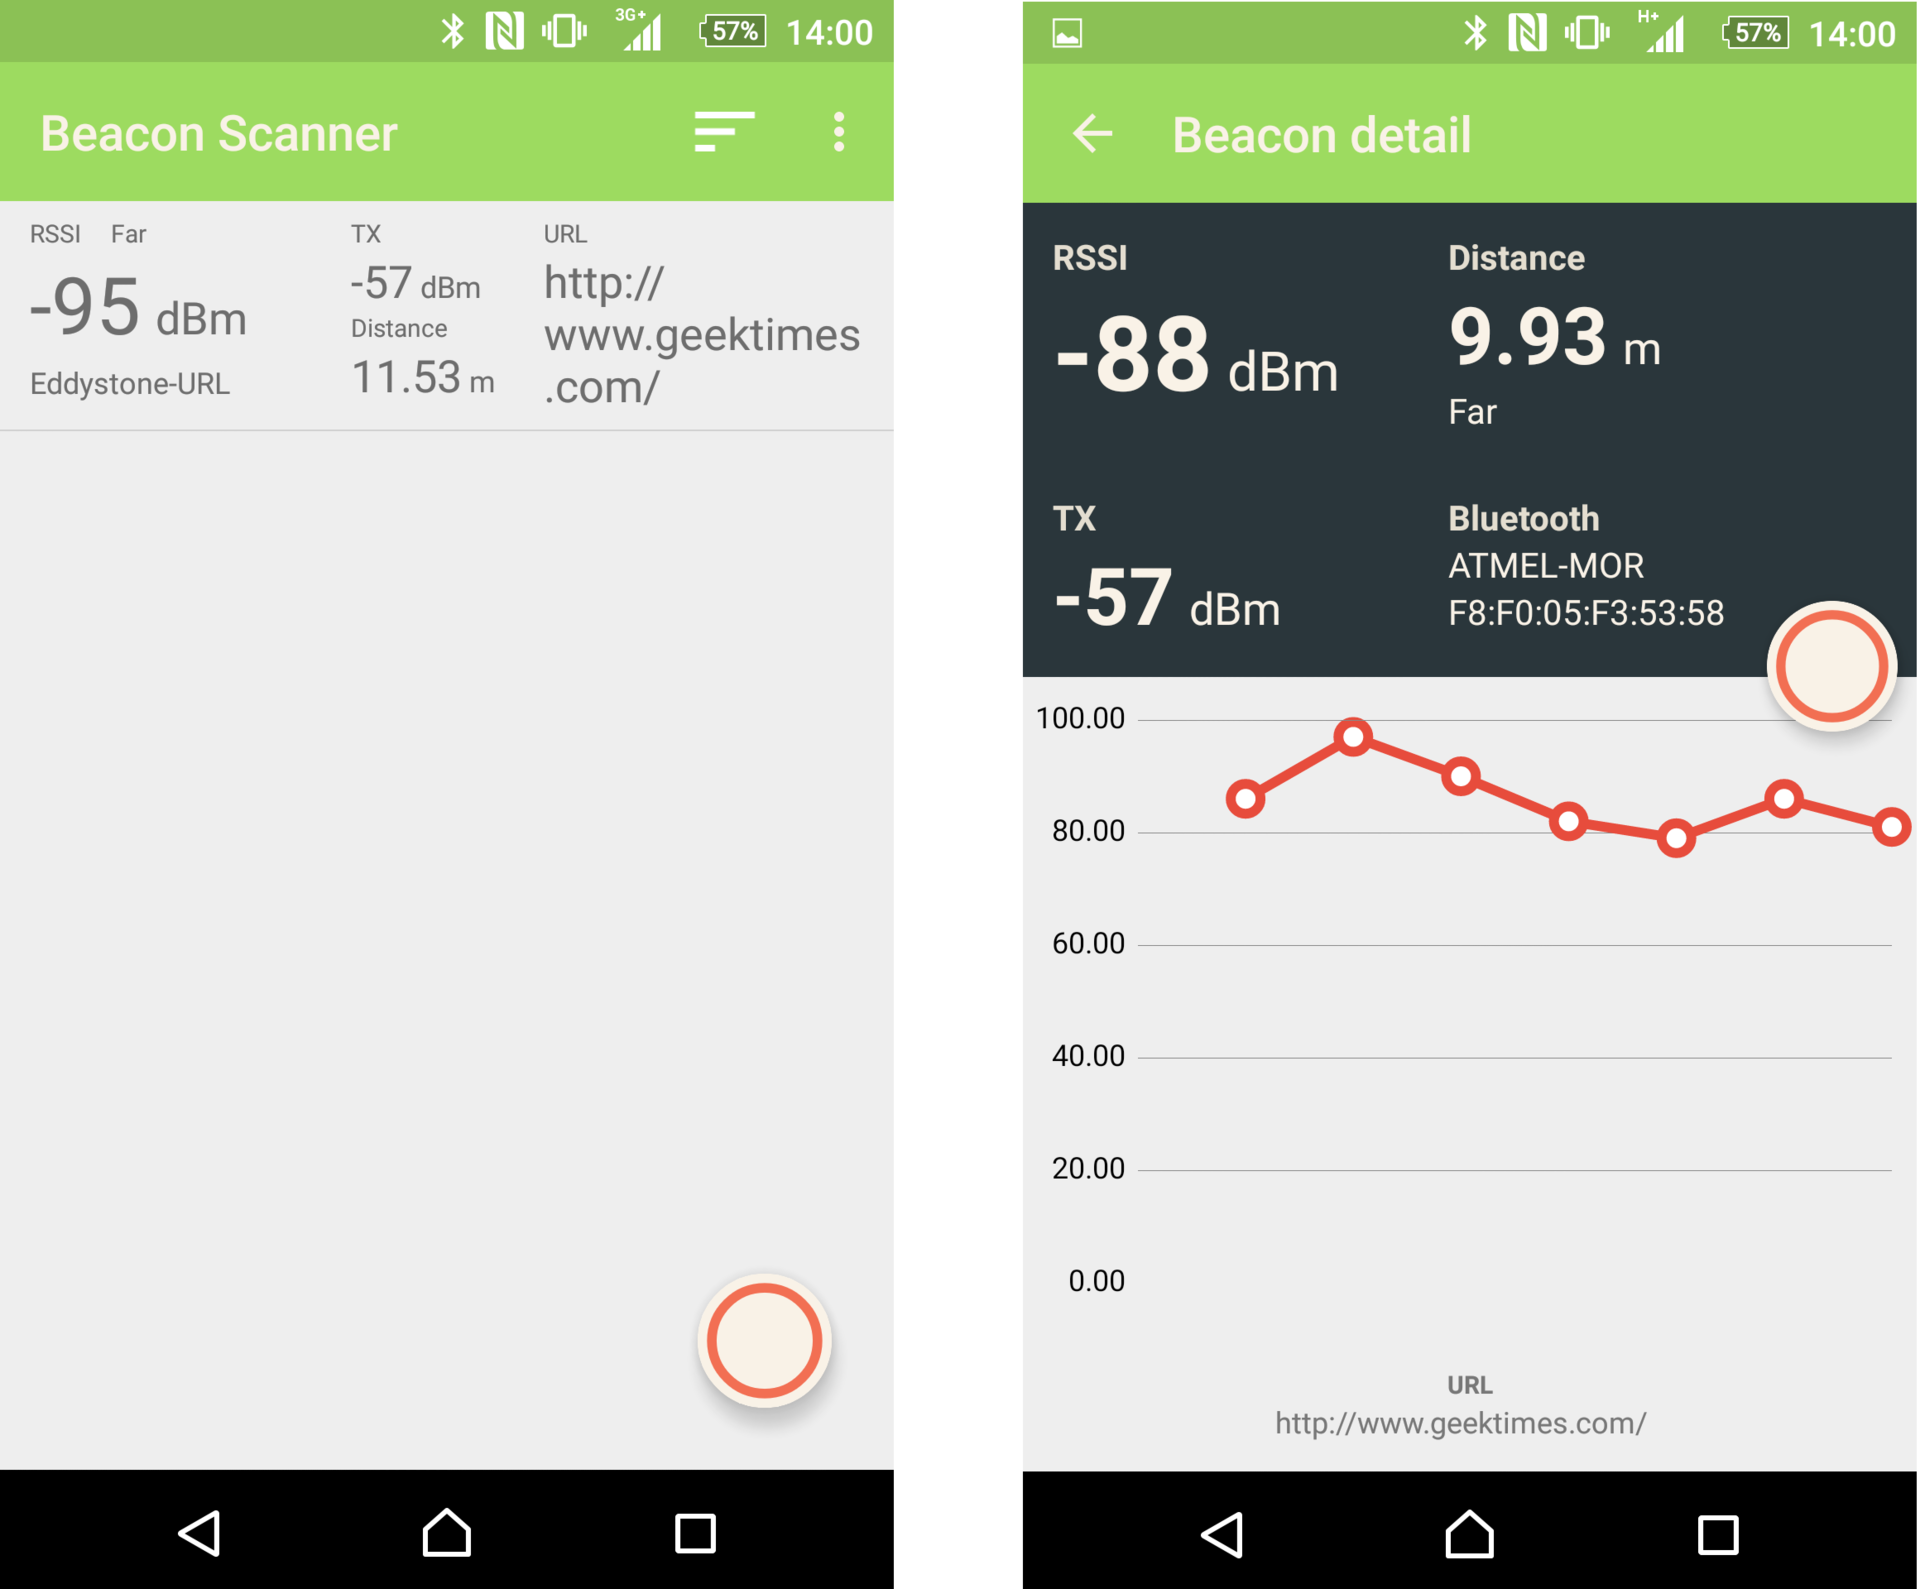
Now we launch on your phone any application that works with beacons (for example, iBeacon & Eddystone Scanner for Android) and we should see our label.
We’ll deal a bit with the format of the transmitted data. And he, according to the old tradition of Apple, is very simple. The beacon from the payload transmits the following data:
UUID. A 128-bit unique identifier for a group of beacons that identifies their type or affiliation with one
Major organization . A 16-bit unsigned value that can be used to group beacons with the same UUID
Minor.16-bit unsigned value with which you can group beacons with the same UUID and Major
Measured Power (signal level 1 m from the transmitter). An 8-bit signed integer is the received signal strength indicator (RSSI) value calibrated at a distance of 1 m from the receiver, which is used to determine the proximity to the receiver (mobile device). Measured in dBm.
In the main file simple_btlc1000.c, the adv_data array is defined , in which this data is placed. In addition, there is additional utility information, the decoding of which can be found in the Proximity Beacon
Specification document at developer.apple.com/ibeacon .
static uint8_t adv_data[] =
{
0x1a, 0xff,
0x4c, 0x00,   // Company ID
0x02, 0x15,  // Beacon Type
// Proximity UUID
0x21, 0x8A, 0xF6, 0x52, 0x73, 0xE3, 0x40, 0xB3, 0xB4, 0x1C, 0x19, 0x53, 0x24, 0x2C, 0x72, 0xf4,
0x00, 0xbb,   // Major
0x00, 0x45,   // Minor
0xc5   // Measured Power
};
The main magic happens in the beacon_init () function , which is called immediately before the main loop in main. In it, using the at_ble_adv_data_set API function , we tell the module which data we want to transmit (the very adv_data array ), and then using the at_ble_adv_start function, we start the transfer process itself with the frequency of their transmission (BEACON_ADV_INTERVAL).
Beacon_init () function code
static void beacon_init(void)
{
	static at_ble_handle_t service;
	/* establish peripheral database */
	if (at_ble_primary_service_define(&service_uuid, &service, NULL, 0, chars, 2) !=  AT_BLE_SUCCESS)
		DBG_LOG("Failed to define the primary service");
	/* set beacon advertisement data */
	if(at_ble_adv_data_set(adv_data, sizeof(adv_data), scan_rsp_data, sizeof(scan_rsp_data)) != AT_BLE_SUCCESS)
		DBG_LOG("BLE Beacon advertisement data set failed");
	/* BLE start advertisement */
	if(at_ble_adv_start(AT_BLE_ADV_TYPE_UNDIRECTED, AT_BLE_ADV_GEN_DISCOVERABLE, NULL, AT_BLE_ADV_FP_ANY,
	   BEACON_ADV_INTERVAL, BEACON_ADV_TIMEOUT, BEACON_ABSOLUTE_INTERVAL_ADV) != AT_BLE_SUCCESS)
	{
		DBG_LOG("BLE Beacon advertisement failed");
		ble_device_disconnected_ind();
	}
	else
	{
		DBG_LOG("Advertisement started");
		ble_device_connected_ind();
	}
}
Redoing the project for Eddystone beacons from Google
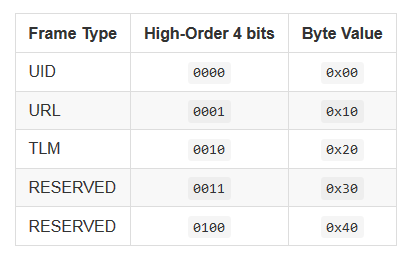
To do this, only one thing needs to be done - change the transmitted data array to the at_ble_adv_data_set function . Let's get a separate array and fill it. You can read about the package format here . Unlike iBeacon, Eddystone can currently transmit 3 types of packets. The type identifier is transmitted in one of the bytes of the package:
We will pass the link.
The recording format of the link itself can be seen on this page.
Link Transfer Format
URL Scheme Prefix
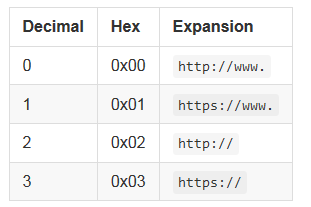
Eddystone-URL HTTP URL encoding
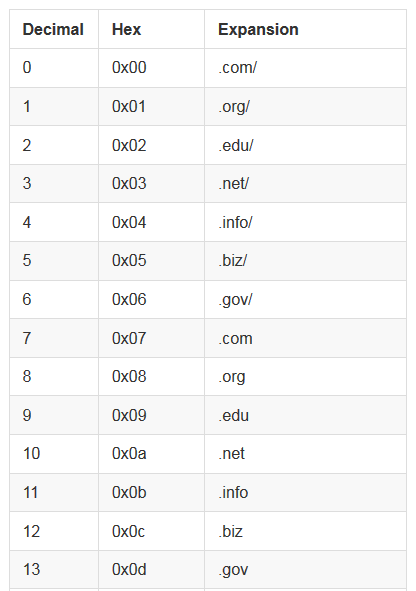
Eddystone-URL HTTP URL encoding
Note: the .ru domain is not in the list of supported. I really wanted the link to be live, so I will write geektimes.com, because it has a redirect from geektimes.ru, but habrahabr.com does not redirect it to the .ru domain in the same way.
As a result, we get the following package for Eddystone:
static uint8_t eddystone_data[] =
{
	0x03,
	0x03,
	0xaa, 0xfe,
	0x10,						// длина
	0x16,
	0xaa, 0xfe,					// 16-bit Eddystone UUID
	0x10,						// Frame Type: 0x10 для URL
	0xf0,						// TX Power
	0x00,						// URL Scheme: http://www.
	'g', 'e', 'e', 'k', 't', 'i', 'm', 'e', 's',
	0x00,						// .com/
};
Do not forget to specify a new package in the API:
at_ble_adv_data_set(eddystone_data, sizeof(eddystone_data), scan_rsp_data, sizeof(scan_rsp_data)) != AT_BLE_SUCCESS)
Compile, fill, look at the result.
That's all, until we meet again. Now on open spaces habr.