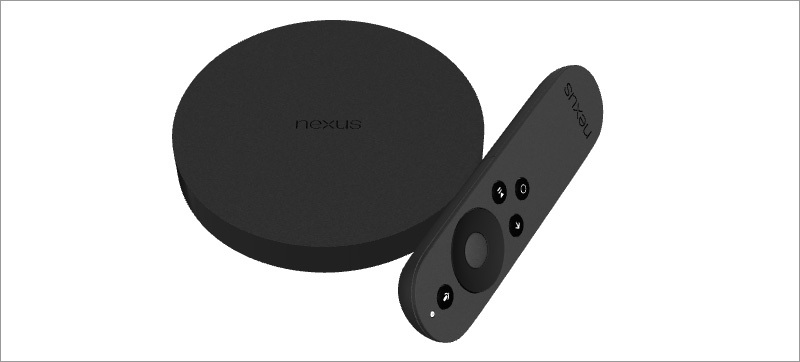
A Story About Making Friends Nexus Player (FUGU) and Intel Mobile Development Kit
- Transfer
The Intel Mobile Development Kit for Android contains many useful tools for developing and optimizing applications. In order to take full advantage of them, creating programs for the Nexus Player, you need to make some changes to the firmware of the device.
There are various working environments and tools for Android development. In addition, they are constantly evolving. Therefore, we tried to make this guide universal. Here are recommendations and links to the necessary resources that will allow everyone to prepare the Nexus Player for working with Intel MDK. We conducted tests using the following devices and programs:
It should be noted that the factory image of the LMY47D system should be flashed without any problems on any Nexus Player, which can be taken in the store. Below we will consider the situation in which you may need this opportunity.
In order to take full advantage of the Intel Mobile Development Kit (Intel MDK) on the Nexus Player, you must have root access to it. You can gain access by collecting the boot.img image yourself and flashing it to the device. Although during the preparation of boot.img the system.img and recovery.img images are also created, they do not interest us, since in order to prepare the Nexus Player for working with MDK, it is enough to work on boot.img.
You can find instructions for setting up the environment for building the image, as well as for downloading its source code, using the source.android.com resource .
Following the guidance provided on the aforementioned resource, we found the latest branch of code, switched to it and completed the assembly. At the time of writing this material, it was an LMY47D branch, or android-5.1.0_r1 for a FUGU device. As soon as the working environment is prepared, to build the image we need the following sequence of commands:
Please note that the lunch command can also be run without parameters, then the configuration is done through the menu. This may be needed for later versions of the kernel, it is very likely that lunch startup keys may change. The most important thing when running this command is, firstly, that the assembly is done for the FUGU device, and secondly, the use of the USERDEBUG parameter.
If everything is done correctly, then at this stage several files will be created located in the out / target / product / fugu / folder. Among them, there is one that we need - boot.img.
Now that the assembly of the boot image is completed, it must be flashed to the device. Connect the Nexus Player to the computer using USB and turn it on. Make sure, using the adb devices command, that the system recognized it. If after running this command it turns out that ADB does not see the Nexus Player, this usually means that USB debugging is disabled in the developer’s settings on the device. To continue, you must enable it.
Now we have to execute a rather simple sequence of commands - and the image we just created will be flashed onto the device.
Now everything is ready to work with Nexus Player using the Intel Mobile Development Kit tools. In particular, after the successful completion of the above steps, you will be able to:
If during the work something went wrong, or you, after the experiments, want to return the device to the factory state in which root rights are not granted, you can do this. Factory images for Nexus Player are here . Immediately there are simple and clear instructions for flashing. In fact, at the beginning of work on this material, Android 5.0 was installed on our device. However, the behavior of the system did not suit us, so the Nexus Player was updated to Android 5.1.0 using the factory image of LM47D. After that, everything we needed worked like magic.
If you want to optimize your Android applications for Nexus Player, now you have everything you need to unleash the potential of this device using the Intel Mobile Development Kit.
- Target device Nexus Player (FUGU), bought in a free sale on which Android 5.1.0 is installed (LMY47D system image).
- A host computer connected to the Internet running Ubuntu 12.
It should be noted that the factory image of the LMY47D system should be flashed without any problems on any Nexus Player, which can be taken in the store. Below we will consider the situation in which you may need this opportunity.
Building a boot image with root privileges
In order to take full advantage of the Intel Mobile Development Kit (Intel MDK) on the Nexus Player, you must have root access to it. You can gain access by collecting the boot.img image yourself and flashing it to the device. Although during the preparation of boot.img the system.img and recovery.img images are also created, they do not interest us, since in order to prepare the Nexus Player for working with MDK, it is enough to work on boot.img.
You can find instructions for setting up the environment for building the image, as well as for downloading its source code, using the source.android.com resource .
Following the guidance provided on the aforementioned resource, we found the latest branch of code, switched to it and completed the assembly. At the time of writing this material, it was an LMY47D branch, or android-5.1.0_r1 for a FUGU device. As soon as the working environment is prepared, to build the image we need the following sequence of commands:
repo init -u https://android.googlesource.com/platform/manifest -b android-5.1.0_r1
repo sync -j5
source build/envsetup.sh
lunch full_fugu-userdebug
make -j8
Please note that the lunch command can also be run without parameters, then the configuration is done through the menu. This may be needed for later versions of the kernel, it is very likely that lunch startup keys may change. The most important thing when running this command is, firstly, that the assembly is done for the FUGU device, and secondly, the use of the USERDEBUG parameter.
If everything is done correctly, then at this stage several files will be created located in the out / target / product / fugu / folder. Among them, there is one that we need - boot.img.
Obtaining root rights on the Nexus Player
Now that the assembly of the boot image is completed, it must be flashed to the device. Connect the Nexus Player to the computer using USB and turn it on. Make sure, using the adb devices command, that the system recognized it. If after running this command it turns out that ADB does not see the Nexus Player, this usually means that USB debugging is disabled in the developer’s settings on the device. To continue, you must enable it.
Now we have to execute a rather simple sequence of commands - and the image we just created will be flashed onto the device.
adb reboot bootloader
fastboot oem unlock
fastboot flash boot out/target/product/fugu/boot.img
fastboot oem lock
fastboot continue
Nexus Player is ready to go!
Now everything is ready to work with Nexus Player using the Intel Mobile Development Kit tools. In particular, after the successful completion of the above steps, you will be able to:
- Use the Nexus Player for its intended purpose.
- Connect to the device using ADB and use the adb root command to work in root mode.
- Use Intel VTune Analyzer with Energy Profiler. Here are some useful links:
- Getting started with Intel VTune Amplifier for Systems .
- Further details on how to analyze the power consumption of the Nexus Player using Intel SoCWatch and Energy Profiler can be found in How to enable SoCWatch on Nexus (FUGU) player .
- General information on using Intel Energy Profiler can be found in Getting Started with Intel Energy Profiler for Android .
If something went wrong ...
If during the work something went wrong, or you, after the experiments, want to return the device to the factory state in which root rights are not granted, you can do this. Factory images for Nexus Player are here . Immediately there are simple and clear instructions for flashing. In fact, at the beginning of work on this material, Android 5.0 was installed on our device. However, the behavior of the system did not suit us, so the Nexus Player was updated to Android 5.1.0 using the factory image of LM47D. After that, everything we needed worked like magic.
Summary
If you want to optimize your Android applications for Nexus Player, now you have everything you need to unleash the potential of this device using the Intel Mobile Development Kit.