UX-team MailChimp: Patterns and SVG-animation [5th part of the book]
- Transfer
[ TL; DR ]
[ 1st part of the book ]
[ 2nd part of the book ]
[ 3rd part of the book ]
[ 4th part of the book ]
[ 6th part of the book ]
[ 7th part of the book ]
[ 8- I am part of the book ]
Understanding the pattern library
Federico Holgado
The Refabricating Architecture , written by Stephen Kieran and James Timberlake, has greatly influenced my understanding of design. The authors of this book compare architecture with the automotive, aerospace and shipbuilding industries, discussing the almost complete invariance of construction processes (from a fundamental point of view) over the past 80 years in contrast to the rapid changes in other manufacturing and design industries.
They write that in the traditional sense, the construction process consists in the delivery of all necessary components to the construction site and subsequent assembly. The architect conducts a site survey, makes the necessary measurements and prepares the appropriate drawings; further - the team of builders interprets the results of his work, prepares the site using various techniques, and begins to work with the foundation. As soon as the structure of the building is ready, they conduct communications and proceed to the finishing work.
Kieran and Timberlake compare this process with counterparts from other fields of activity. For example, in the automotive industry several processes are combined at once, which allows to optimize production, reduce costs and improve the quality of equipment produced. The car components are not produced within the framework of one plant, but are ordered from third-party contractors. The modular approach has proven itself both in shipbuilding and in the aerospace industry.
When we started working on the redesign of our application in 2013, we decided to apply a similar breakdown of processes and modules. As a result, we had to get a system consisting of interchangeable parts or “atoms” - the smallest components. Larger components should consist of such “atoms” and constitute the core of the application. At the same time, consistency was necessary in the structure and design of pages and application subsystems.
Our pattern library has basic elements with ready-made components based on "atoms", allowing developers to create interfaces that are consistent with existing systems. Next, I will talk about the practical application of this library.
Practice
Having engaged in the redesign, we started with the most popular section of the application - the control panel. In the old version, we displayed data on a simple grid, but after working with sketches and prototypes, we decided to make changes. We tried to introduce two modes: with beautiful cards and a more informative grid. The “visual” approach did not work due to the fact that most of the campaigns of our users look quite similar. At the same time, we knew that it was very important for our customers to be able to sort campaigns by their attributes, which also excluded the “tabular” approach.

Thus, we came to a rack system, which allowed us to establish communication with various sections of the application. As a result, it came in handy immediately in its three sections. Instead of sorting, we used filters (where appropriate) and finally got the finished basis of our control panel. Several months spent on the development of the rack system, paid off with a number of advantages. We did not need to waste time redesigning several other parts of the application at once. Below are the mobile versions of the campaign and export sections, the similarities of which are easy to see. Adaptation of the rack system for the control panel for exporting a zanal in just 45 minutes, taking into account the mobile version.

We applied the rack system in a number of sections of the application, which previously had not received enough attention from the point of view of design, but it was from the patterns that allowed us to integrate these sections into the overall design concept and ensure work even on very modest screen space. Another plus of this approach is that we were able to distribute the human resources of the team and organize parallel work both on the rack system and on the overall page structure, navigation, etc. Part of the team worked at the base, and the other part was engaged in design, while everyone was in the know.
What else has been done
Through the use of this approach, we were able to ensure the modularity of not only the rack system, but also practically all parts of the application: forms, buttons, tables, editor elements, etc. At the first stage of the work, it was quite difficult to think in such a concept, when you were already used to preparing separate UI elements for each of the new ideas. Thus, we came to relatively chaotic CSS, heterogeneous design and differences in the software implementation of the elements.
Investments in the form of the time spent paid off, and we learned a lot by borrowing experience from other industries: a modular approach, organization of development processes, etc. In the process, our team constantly exchanges ideas - front-end developers always keep in touch with engineers. Our designers helped us understand the principles of vertical and horizontal rhythm, which allowed us to simplify page layout. Now, back-end developers can prepare universal systems that can be reused. Of course, this helps to reduce development time, providing an understanding of the standard interface states.
The overall level of accuracy and coherence that we managed to achieve not only pleases us, but also allows our customers to more effectively solve their problems. Today we have a standardized system that allows us to ensure further development. It seems that we are on the right track, based on the knowledge that we have gained by studying other areas of production.
SVG, sit down, 5!
Caleb Andrews, Alvaro Sanchez
For a long time we carefully studied the process of using our application by customers. Not only in order to make our product better, but also for a general understanding of the feelings and thoughts of customers arising in the process of working with it. Based on such experience, we understand that sending newsletters is a rather exciting process due to tight deadlines and the need to eliminate possible errors. What people don’t do before sending letters to their subscribers: they bite their lips, rub their palms, and sometimes they sweat almost afterwards. We ourselves go through all this ourselves, working on our own UX Newsletter newsletter.
Understanding the emotional context of this process, we wanted to support our customers by showing them our understanding of what was happening. We decided that Freddie [the MailChimp mascot] could help us with this, which, according to the idea, “gives five” to everyone who successfully handled the dispatch. Previously, we displayed a static palm of Freddy and decided to slightly enliven this moment with the help of SVG animation .
SVG animation is not some new technology, but many only recently got to work with it. In order to structure our story, we divided it into two parts: preparation for working with SVG and implementation using the example of Freddy's palm.
Caleb: Better SVG
Let's start by preparing the files. First you need to understand the hierarchy of layers.
It is a key element in working on SVG illustrations in Illustrator. We decided to divide the animation frames into groups so that there was nothing superfluous in each illustration: only the most necessary. It is important to be careful with the choice of names for groups in order to understand why the elements that they contain are intended and to correctly write the path to them in a text editor (which you will have to do in the process of writing the script).
Removing unnecessary anchor points.
The fewer points, paths and their groups each layer contains, the “easier” the SVG code will be executed. And if you install a set of scripts for Illustrator from Hiroyuki Sato, you can remove unnecessary anchor points by simply opening the File> Scripts> Delete Anchor Points tab.
Masks are good, but only in moderation
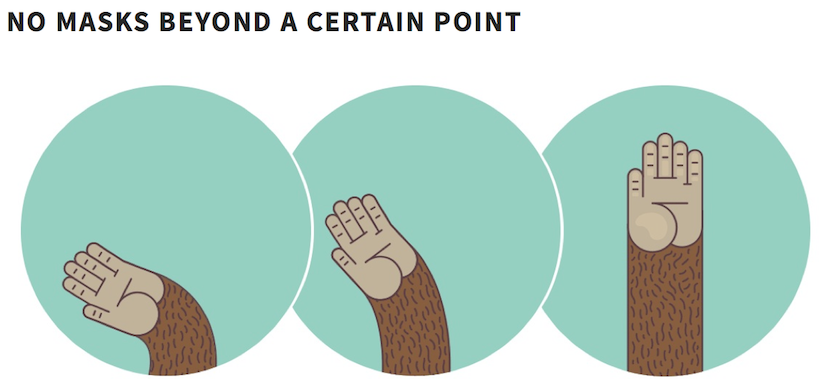
In the figure above, the “give five” gesture from Freddy was created from 3 groups of elements combined into one SVG file without using masks. These groups are animated frames that can be hidden or, conversely, made visible when it becomes necessary. Subsequently, we decided to create masks to make the SVG animation more controlled and “clean”.
Turn off editing in Illustrator
Now you need to export your drawings from Illustrator as an SVG file. This point is easy to miss: when saving the file in SVG format, do not forget to disable the "Keep editing ability in Illustrator" option in the "Options" tab. This will allow you to make the resulting file much easier - you will not need these features in the browser. Such a procedure should be performed only with the final version of the illustration - as you might guess, after that the file will not be so easy to open and edit again in Illustrator.
Shapes Against Contours
You can open your SVG file in a text editor and evaluate the generated code. In the example, my SVG file contains two elements - a rectangle and an outline. In theory, these are two identical rectangles, but the code that generates them is fundamentally different. If it’s unusual for you to work with contours, you can easily convert them using the command “Object”> “Parse”.
Conclusion

Not all that complicated, right? A little thoughtful preparation, and to create an SVG animation that will attract attention and not slow down the browser, turns out to be quite simple.
Варlvaro: what hides the “five” gesture
Caleb explained how we prepared our SVG animation, now I will try to go further and explain what we did next. I simplified my explanations, but at the end I indicated a link to the source code in case you want to see all the components of the final animation.
Preparation
When I just started a project with Freddy's animation, I was given its prototype, made in After Effects, and then exported to GIF. Caleb helped me recreate objects from the prototype in Illustrator: Freddy’s foot, fur, etc. After I placed the elements each on the right layer, I exported them as SVG files. As a result, we got 3 SVG files, one for each image of the Freddy’s foot. Then I thought about how to animate the created images.
Rummaging around in JavaScript libraries a bit, I decided to work withSnap.svg . Snap supports features such as creating masks, cropping and aligning, creating patterns, gradients, grouping elements. It also provides a simple and intuitive animation API.
The implementation of the animation function - "mina" (it is "anim" [from the word "animation"] on the contrary) uses the AnimationFrame request, so that the animation plays in the browser without failures, as Paul Irish explained .
(By the way, if you use a library that does not support the AnimationFrame query for animating elements, consider the possibility of a phenomenon such as “ layout thrashing .” It occurs when JavaScript adds and removes elements from the DOM again and again, thereby slowing down the browser) .
Motion animation
I created a “five” gesture from 3 separate images of Freddy’s foot, each of which reflected its different (paw) position. To make the final image look like a single object that accepts different positions, I needed to create “smooth” transitions from one position to another. To do this, I applied the step-by-step animation technique and connected the three main images with additional “transitions”. (Why didn’t I just animate a single image? Taking into account all the points on the Freddy’s woolly foot, counting and adjusting the “twist” of the foot in each position turned out to be too complicated in the context of a tight project time).
To download all three images, I used the Snap.load function. At first, I called this function for each of the images separately. As a result, the final picture was animated pretty well in Firefox, but there were problems with the animation in Google Chrome. In the end, I realized that Firefox “recognized” all the transitions and the initially set values, regardless of how many times I called the Snap.load function. Chrome, however, did not save transition information and setpoints because each new call to Snap.load created a new SVG fragment with its own viewing area and coordinate system. I solved this issue by saving all the source materials (3 variations of the position of the Freddy’s foot) in one SVG, so I needed to call the function only once instead of three.
The next step was to determine the order in which the elements appear in the final version of the animation.
To achieve this, I needed to use the Snap.svg function to group items. For example, for such a grouping:
// Order of grouping is important!!!
// s = SVG canvas created by Snap
var group = s.group(
	circleBG,
	hand1,
	hand2,
	hand3
);
Grouping also determines the order of the elements on the stack: the circleBG element will be at the bottom, and hand3 will be at the top.
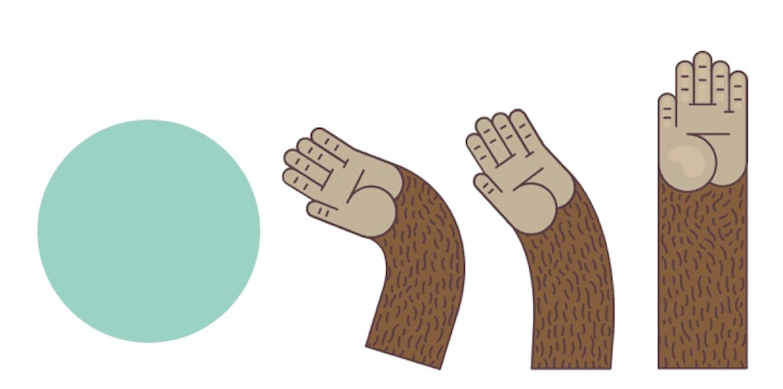
Then we created and applied the mask to the specified group, so that the elements were animated “inside” the outline defined by the mask — in this case, inside the circle.
We created the mask like this:
// Create a circle at x:200 and y:200
// and 200px radius
circleMask = s.circle(
	200,
	200,
	200
);
// Fill with white
circleMask.attr({ fill: "#FFFFFF" });
To apply a mask to the elements of a group, I added a mask attribute to it (group):
group.attr( {mask: circleMask} );
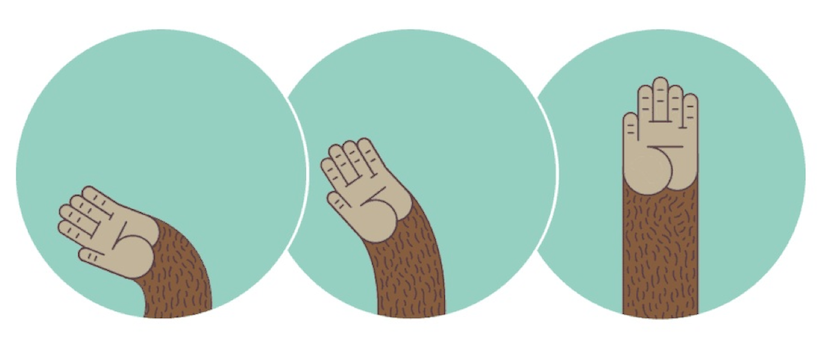
As soon as we created and applied the mask, I set the position of each element and made the necessary ones visible on the final image. For our “give me five” gesture, I uploaded 3 elements that I animated, one after the other and at different intervals.
I set the position of the foot in each of its positions using the transformation line :
// Initialize position.
arm1.transform(
	"s0.6r-30t-100, 280"
);
Each letter is a command: “s” for scaling [“scale”], “r” for rotating [“rotate”], “t” for translate.
Using this notation, I made the element arm1 40% smaller, I rotated it by -30 degrees and positioned it outside the borders of the mask so that it was not visible.
I used similar commands to initialize the elements arm2 and arm3, but hid them, setting the value of the indicator "opacity" to 0.
// Set opacity to 0
arm2.attr( {opacity: 0} );
Combining Elements
After completing these operations, I began to animate the images and create transitions between them. Here the fun begins.
Snap.svg has an Animate feature. She receives the following attributes:
Element.animate(
	attrs,
	duration,
	[easing],
	[callback]
);
Here is an example of the first animation for a “five” gesture:
	arm1.animate(
	{transform:'t-50,60'},
	400,
	mina.backout,
	function(){
		// callback code here
	}
);
Using the transformation attributes and new values as the first parameter of the function, I programmed the movement of the arm1 element from the position -100px to -50px along the X axis and from 280px to 60px along the Y axis. The
second attribute (400) is the total duration of the animation in milliseconds.
The third attribute (mina.blackout) is a timing function similar to mina.linear, mina.easein, mina.easeout, etc. The mina.blackout function creates a “swing” effect, making the movement more natural.
The fourth attribute is a callback function that executes as soon as the animation finishes. This is very important because this way you can bind one animation to another and control the creation of a consistent animated series.
For example, when switching between the elements arm1 and arm2, I hide arm1 using the initial transformation callback function. As soon as the process is completed, the arm1 element ceases to be visible (display: none), and the process of animating the arm2 element begins.
This all happens very quickly - the “attenuation” of the first element lasts 30 milliseconds, and the appearance of the second - 10 milliseconds.
Here is the piece of code that describes the specified callback functions:
arm1.animate(
	{transform: 't-50,60'},
	400,
	mina.backout,
	function(){
		//400ms
		arm1.animate(
			{opacity: 0},
			30,
			mina.linear,
			function(){
				// hide arm1
				arm1.attr(
					{display: "none"}
				);
				// Chain/Start
				// animation for arm2
				_highFive.animate02();
				// fadein 10ms
	});
}, 100);
For a more detailed overview of the code that was created for the animation of the “five” gesture, you can independently study the original version .
[ Translation of the 6th part of the book ]