OpenWRT + OpenVPN for Asterisk. The budget way to organize a VPN network
 This is another article about the MR3020 router, OpenWRT and OpenVPN. As a bonus, I post ready-made firmware for this router with OpenVPN installed, a text editor Nano and wget. Everything superfluous is disabled in the firmware, including the web interface, ipv6 and WiFi.
 Work with the router is possible only through telnet and SSH. I will not write how to raise the OpenVPN server, there are a lot of articles about it, this article personally helped me .
Prehistory
To organize a telephone network, I needed to organize a VPN. For these purposes, OpenVPN was selected.
Since the budget was limited, it was decided to put on points, and by the way, there are three of them. The cheapest routers with OpenWRT support.
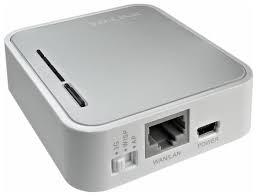
TP-Link MR3020 was bought for the test, and after successful testing, a couple more of these kids were bought.
Although the router has only one LAN port, it turned out to be very convenient to connect it on points. There is no need to put a VoIP gateway and a router in close proximity to each other. A prepared router is connected to any free network port at a remote point, a Voip gateway can also be connected to any free network port by indicating the IP address of our router with a gateway. Naturally, both of them must be in the same network with an Internet gateway.
Router setup
If the MR3020 is fresh, then go to the web interface and fill in the firmware via the appropriate menu. If the router already has OpenWRT, then proceed as follows:
We go to the router via telnet or SSH and do:
cd /tmp/ && wget http://alians-it.pro/images/files/openwrt-ar71xx-generic-tl-mr3020-v1-squashfs-factory.bin && mtd -r write openwrt-ar71xx-generic-tl-mr3020-v1-squashfs-factory.bin firmware
If there is no Internet, then in any way we upload the firmware to the router, for example, via SSH (scp) or, as I do: install a web server on your computer, put the firmware in the www directory and also download the firmware via wget, but from your computer.
If you did something wrong or forgot the address of the router, you can put it in "emergency mode": Turn off / on the router; wait until the LED under the WPS / RESET button flashes about once per second (WPS / RESET until this moment is on for 3 seconds, then goes off for 3 seconds), immediately press this button and wait until it starts to flash very quickly, release the button . That's it, the router is accessible via telnet at 192.168.1.1. Set up the network and reflash.
After successful firmware, we go to the router via telnet at the address 192.168.1.1 and set the password for root:
passwd
Enter the password two times, and reboot the router:
reboot
After the reboot, the router will be available only via ssh, the username root password is the one you specified.
Network configuration:
nano /etc/config/network
We bring the file to the following form:
config interface 'loopback'
        option ifname 'lo'
        option proto 'static'
        option ipaddr '127.0.0.1'
        option netmask '255.0.0.0'
config globals 'globals'
        option ula_prefix 'fd69:9e94:7464::/48'
config interface 'lan'
        option ifname 'eth0'
        option force_link '1'
        option type 'bridge'
        option proto 'static'
        option netmask '255.255.255.0'
        option ip6assign '60'
        option ipaddr '192.168.1.11'
        option gateway '192.168.1.10'
        option dns '8.8.8.8'
        option delegate '0'
You need to edit the section:
config interface 'lan'
Where 192.168.1.10 is the address of the Internet gateway in the network of the remote point, and 192.168.1.11 is any free address that our router will have. If you have a free address 192.168.1.1, then add only
option gateway '192.168.1.10'
option dns '8.8.8.8'
DNS is optional.
Configuring OpenVPN:
We go and copy the keys and certificates to the / etc / openvpn / folder. For convenience, I put everything in the archive and download at once:
cd /etc/openvpn/ && wget http://192.168.1.5/client_Sushi_Terra.tar.gz && tar xzvf client_Sushi_Terra.tar.gz
As you may have guessed, 192.168.1.5 is the address of my working computer with a web server installed, and client_Sushi_Terra is the name of the remote point that was invented when generating certificates and keys on the OpenVPN server.
Editing the client configuration:
nano /etc/openvpn/client.conf
It was
client
port port
remote ip-adres
proto udp
dev tun
ca /etc/openvpn/ca.crt
cert /etc/openvpn/client_Sushi_Terra.crt
key /etc/openvpn/client_Sushi_Terra.key
#cipher BF-CBC
#auth MD5
pull #
comp lzo
persist-key
persist-tun
verb 3
port port
remote ip-adres
proto udp
dev tun
ca /etc/openvpn/ca.crt
cert /etc/openvpn/client_Sushi_Terra.crt
key /etc/openvpn/client_Sushi_Terra.key
#cipher BF-CBC
#auth MD5
pull #
comp lzo
persist-key
persist-tun
verb 3
Has become
client
port 7193
remote is 37.193.254.254
proto udp
dev the tun
ca /etc/openvpn/ca.crt
the cert /etc/openvpn/client_Sushi_Terra.crt
key /etc/openvpn/client_Sushi_Terra.key
#cipher BF-the CBC
#auth the MD5
pull #
COMP- lzo
persist-key
persist-tun
verb 3
port 7193
remote is 37.193.254.254
proto udp
dev the tun
ca /etc/openvpn/ca.crt
the cert /etc/openvpn/client_Sushi_Terra.crt
key /etc/openvpn/client_Sushi_Terra.key
#cipher BF-the CBC
#auth the MD5
pull #
COMP- lzo
persist-key
persist-tun
verb 3
Where port 7193 and remote 37.193.254.254 are the port and address of the OpenVPN server.
We also configure masquerading on the tun0 port after the successful launch of OpenVPN:
echo 'iptables -t nat -A POSTROUTING -o tun0 -j MASQUERADE' >> /etc/init.d/openvpn
Once again, we reboot the router:
reboot
Now the router will be available at 192.168.1.11.
If everything is correct, a new tun0 interface will appear.
Fire wall setting:
Open the file / etc / config / firewall for editing:
nano / etc / config / firewall
config defaults
        option syn_flood '1'
        option output 'ACCEPT'
        option forward 'ACCEPT'
        option input 'ACCEPT' #'DROP'
config include
        option path '/etc/firewall.user'
config rule
        option target 'ACCEPT'
        option name 'ssh'
        option proto 'tcp'
        option src '*'
        option src_port '22'
        option dest_port '22'
And replace:
option input 'ACCEPT' #'DROP'
On the:
option input 'DROP'
Now the router will be available only on port 22, although there is no way to reach it in any other way. Instead of "*" you can specify an ip-address, and this will be the only address from which you can log into the router via ssh.
Configure VoIP Gateway
Network setup: specify the IP address of our router as the Internet gateway:

I have OpenVPN uploaded on the same server as Asterisk, so I specify the OpenVPN server address as the sip proxy.
If Asterisk is installed on a separate server, then in the OpenVPN server configuration it is necessary to allow clients to see each other and pass routes to clients to each remote point.
SIP setup: specify as sip proxy: Asterisk server address.

If you specify our router as a gateway on any other device, then it will also have access to the entire OpenVPN network and all subnets of remote points, unless, of course, this is allowed and configured on the OpenVPN server itself.
I would also add that I recommend setting up a firewall both on a server with Asterisk and on a server with OpenVPN - as if the internal network, including the VPN, is as aggressive an environment as the public Internet.