The best gift is a book. Making a beautiful binding
The idea of creating a book with my own hands settled in my head for a long time. Having studied the practical side of the issue, I only strengthened myself in this desire, but my hands did not even reach the choice of a book. And some time ago, fate decreed for me. Due to force majeure circumstances, a desire arose to give me a unique thing, and, as you know, there is no better gift book. The choice fell on the favorite work of the object of my uncontrolled interest, incredibly wise and capacious, meaning, and not words, the creation of Exupery - "The Little Prince". The desire to create was spurred by my personal love for this book. The decision was made, time inexorably approached the moment of delivery, and I started to work.

Where to start was the main question. Glory to Google and Habr, I managed to find some rather detailed instructions for binding books, promising, with a competent approach, a result that could suit the inner craving for beauty.
I will leave links to these articles at the end along with thanks to the authors. I would like to think that I managed to take the best of their methods and bring something of my own.
To begin with, it was worth choosing a format. For me it was a6, because the book is small, and with a larger format it would have turned out to be unpresentably thin, and in this size, in my opinion, it looks much nicer. The first step was expectedly layout. I needed to download several versions before I managed to find an option with appropriate formatting (to edit less) and color pictures, which, however, were later replaced with better ones. The layout itself took several hours, it was necessary to choose a font that was suitable in size and style, replace and position the pictures less randomly, and select the appropriate indents. With the layout of a more capacious book, it will take much longer.

Next print. It’s worth mentioning right away that even at the preparation stage I decided for myself that I want to get the result as accurate as possible, and therefore, throughout the entire production, I was not shy about using automated equipment - printers, cutters and a laser engraver.
So seal. The order of the pages was set using the wordpage program, because it turned out to be the simplest tool and, in general, satisfying me on all counts. The only thing she lacks is the calculation of numbering for duplex printing.

Everything is simple, you need to set your own parameters - the number of pages, the number of pages in a notebook, print pages from the first line, turn over the sheets and print pages from the second line. The main thing is not to confuse orientation.
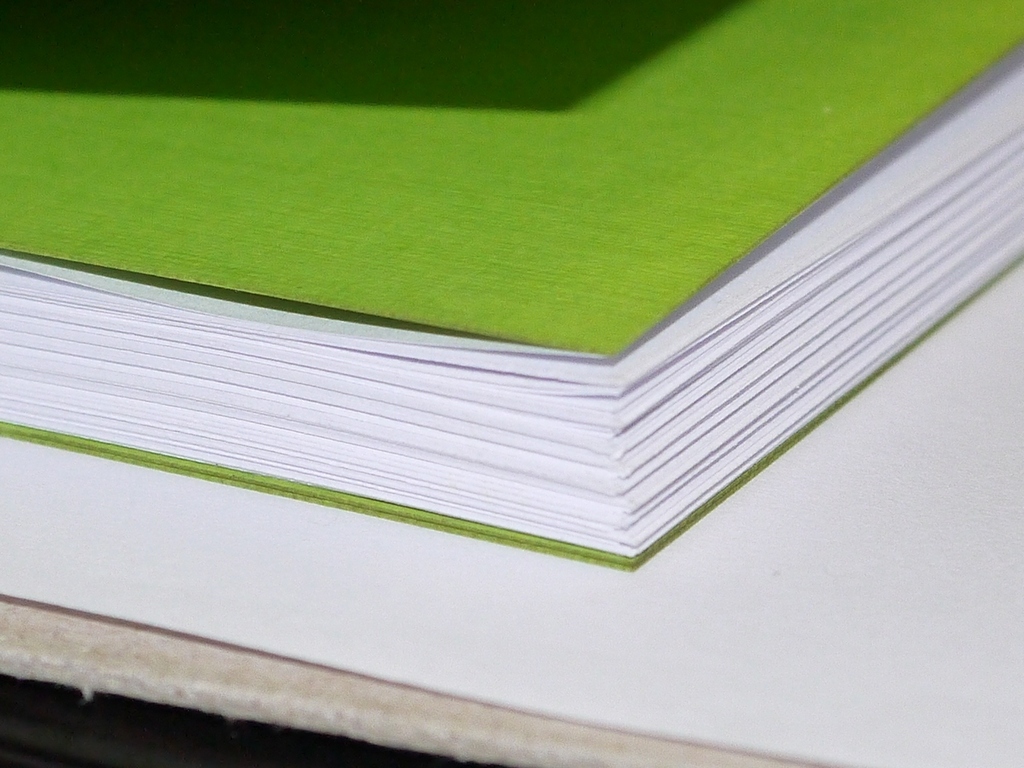
Cutting sheets to size A5 was carried out on a paper cutter designed specifically for this purpose, so that everything was neat, quick and trouble-free. You can, of course, cut with an office knife, but the result will be worse, and you will have to spend much more time on it. Together with trimming sheets for a book, you should immediately trim a couple of blank sheets of thicker paper, for bookends of the same size.
Now we fold the A5 in half and get the coveted A6, and with it the first idea of how it will look in the end. Folding should be based on page numbers. Since I decided to bind notebooks with 16 sheets, I had 4 sheets of A5 in my notebook. The internal ones should be bent with strong pressure (you can even hold a fingernail at the bend place), the external ones, on the contrary, with a weak one, this way you get neat notebooks that are smooth and with the same edges (which, by the way, must be cut later).
The binding was decided to sew through. It hurt I liked how the colored threads look on the back of the notebook, and this option looked a bit stronger. To pierce the holes, you need to take thicker paper (I had 240g / m ^ 2), cut it to the height of the sheets and mark it, taking into account the width of the lace around which you will staple the pages, and also indent from the edges by 10 mm (not necessary just that much, it just looked good in my case).

Next, we apply this template to each notebook in turn (for additional fixation I pressed it with stationery clips) and we make neat holes with a sharp awl, exactly opposite the marking lines. This is a very crucial stage, requiring maximum care and accuracy. The more careful we are here, the less then we will have to edit.


I sewed the binding with the help of embroidery threads (floss), it looks good, it keeps excellent, what else is needed ?! Since this is a gift, it was worth considering the preferences of the future owner, the favorite color is green, it remains only to find the threads of the desired shade. The binding is sewn starting from the first or last notebook, first we thread the thread from the outside to the inside of the book, along the edges where the thread goes from one notebook to another, we fasten it with knots.
The resulting design, aligning the notebooks relative to each other, is clamped into a press and gently smeared with glue. I used special glue for cardboard and paper, UHU creative. It dries quickly, glues perfectly, not water-based, so it does not soak the paper and after gluing it remains somewhat elastic. Leave to dry.


After our book has dried and stuck together we can get it and evaluate the result.
Next, we take sheets cut out at first for bookends, fold in half and, smearing with glue the edge near the bend (I smeared 5mm), glue it from the outside.

We wait for drying, cut off excess threads and lace from binding, fix the edges of the lace and knots with glue, it is perfectly absorbed into the fabric and holds the volume. To reinforce the binding, we glue something “marle-like” on it. It was a canvas for me (again from the embroidery area). So far, we are not fastening it to the flyleaf so that the frozen glue does not interfere with us further.

Due to the fact that the sheets in the notebooks are folded one around the other, as a result, the leading edge turns out to be a little “toothy”, and, like we did not try, the pages cannot be stitched perfectly evenly.
It's time to finish the cut. You have to be careful here. Due to the threads and the fold of the paper, the binding side is slightly thicker, so under the press you need to compress it carefully so that the binding does not lead, otherwise the cut will be uneven. The easiest way is to put a sheet of cardboard on top of the central part so that the book is pressed over the entire area.
So, the book is now flat and looks very cool, but it will be better. It's time to hide the not-so-pretty back. For this, captals (captal tape, etc.) are needed. In general, this same tape can be bought. But to find it is not so simple in the retail network, and via the Internet it is not so fast. Time was already running out, in addition, I wanted to make the captals the same color as bookends and bookbinding thread. So it was decided to make them yourself. I just took the ribbon that I used for binding, and sheathed it on one side with the same green thread, folded in half, then curly cut the ribbon.

This tape seems to be properly sewn to the binding, through notebooks (into the same holes). But, firstly, I already had them under a layer of glue, and secondly, it would be ugly on the spread of the notebook, well, until the heap, I suggested that no one would throw the book, because the captals would hold well on the glue, so that just stuck them. First, the main part, so that the glue does not protrude from under the thread, but at the same time holds the tape directly under it, and after drying it slightly shortens the side “gloves” and glues them to the main part cross to cross.
Well, the book itself is ready. Now it's up to the cover. The cover should be a little larger than the book in height. Since the book is small, I made cardboard in height 10 mm larger (5 mm on each side), the same width as the book. The template was drawn in Corel and cut on a laser engraver. For the outside, I took a textured design of dark brown paper, drew in Corel the arrangement of the elements on it and the trim lines so as not to measure anything, and printed it all on paper, on a regular “laser” of a4 format. Then he cut along the lines with a clerical knife. All elements + 8.5 mm each fit on the paper on the bending part.

With this markup, it is worth considering the thickness of the cardboard to leave a lap for folding.

We apply a thin uniform layer of glue on the cardboard, while sufficient to ensure that it is firmly fixed to the paper, and, applying the markup, carefully press down. The glue dries quickly, so there should be no mistake. I have one cardboard when squeezed shifted by half a millimeter, it was not possible to return it to its place. In this case, the paper was separated only with the top layer of cardboard. It's good that I cut out 2 sets of cardboard boxes at once, I had to redo everything. After drying, we wrap the edges, smeared with glue; then leave to dry.

A piece of glue on the inside will be hidden by the flyleaf, so it’s not critical, that’s what happened in the end:

Try on a book:


Everything turned out neatly and beautifully, and it seems like you can paste the book, and then put the image on the cover, but I decided what can be done better! The cover was good, and with the printed image it would have become even better, but it did not look durable enough, not complete or something. And I decided that the cover should be leather. I did not have skills in working with leather, the material is moody, requiring experience and tools that I also did not have, and therefore I turned to a person who does all kinds of leather work (next time I will do it myself). We discussed all the details, material, manufacturing, etc., I handed him a paper cover, for pasting and flashing leather lace. Here is what happened.

Снаружи мне сразу все понравилось, а с внутренней стороны ждал сюрприз. Края были ужасно криво обрезаны. По длинной стороне была возможность их немного подрезать, чтобы подровнять, что и было сделано с помощью острого канцелярского ножа и металлической линейки.
А вот по коротким сторонам (низ и верх) обрезать было нечего, пришлось шаманить. Намазал немного клея, приложил к краю линейку, и вытягивал кожу там, где не достает, прижимал, где выступает. В правом нижнем углу обложки не хватало большого куска, пришлось вырезать, подклеивать и ровнять из кусочков, которые обрезал. После высыхания это все еще можно заметить, но в глаза не бросается.
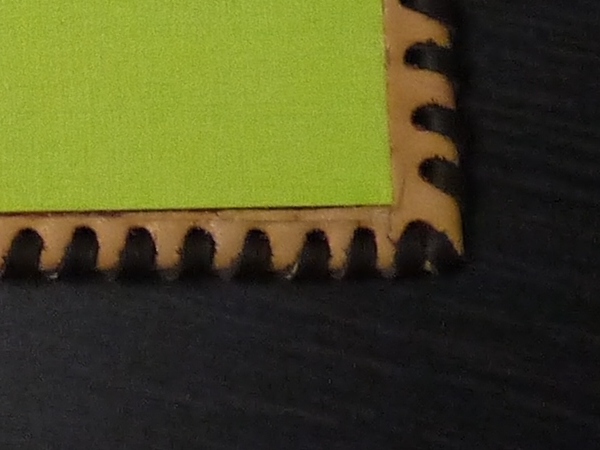
После всех вышеописанных мероприятий обложка приняла достойный вид, который меня удовлетворил. Клеим книгу.
Smear the surface of the flyleafs together with the canvas with a thin even layer, press. Between the fold of the flyleaf, we lay a larger sheet so that excess glue, which in any case will be, albeit in a small amount, does not glue the pages. Five minutes is enough, we open it, remove the excess glue, it still has not dried, and it is removed almost without a trace. The same thing on the other hand, then put dry. Take a close look so that there is no glue on the pages.
It's time for decorative work. For application on the cover, the image located at the head of the post was selected.
To get a good result, you need to make a vector from a raster image. The rough part of the work was done by the Vector magic utility, a familiar designer helped bring the image to mind. Here is what happened.

Now the image is suitable for engraving. Crossing our fingers, place the book under the laser. One minute of worries - and you're done. Now it remains to remove traces of burned skin, soot or something like that. It is well absorbed into the small pores of the skin, so removing it is not so simple. I erased it, but not everything went as smoothly as I would like.

In general, the result suited me, but so far the skin was too brand and not protected. To avoid oily fingerprints on the skin and it is generally more protected, you need to apply a top coat. It is absorbed into the top layer, gives a light shine (the effect may be different, depending on the composition) and water-repellent properties. And then failure awaited me. In the process of erasing traces of engraving, I damaged a thin top layer of the skin, which, obviously, had some kind of additional coating. After applying the “finish” the skin in this place darkened. And although everyone I asked told me that everything was in order, there was no limit to my frustration.

What I just did not try to remove the darkening, nothing helped. The solution was found quite quickly.

This was the final touch. Now everything suited me. The finish coating, on top of everything else, cemented the small elements of the picture. Now the book looked and felt really worthy and durable. We look what happened.


In conclusion, some tips. Consider the location of page numbers on a spread, I only remembered about this when the pages were printed and punctured for binding. As you can see, the left side of the page numbers is in the wrong place. I did not remodel, I decided that this would only add personality. Before the book itself, it’s worth putting a blank sheet, or a sheet with a cover, because the first page opens worse than the others, because of the 5 mm that the flyleaf holds on to. To the maximum, do everything yourself, "if you want to do well, do it yourself." I will carry out work with the skin in the next project (he will certainly) myself to do it carefully initially, even if it takes ten times more time. It is better to engrave the skin already with the applied finish, then the soot is washed off with a simple cloth or cotton wool, without any difficulties and sacrifices.
Well, what I would like to say. I spent about 2 weeks on this project, an hour and a half a day. I put my own work and soul into this thing. I really like what happened. This is a unique thing, this is exactly what I wanted to do. I would never have managed to buy something as full of emotions. This is by far the best present I have ever made. I think it’s clear that it was worth it.
I hope my experience is useful to someone.
www.strana-naoborot.com/5raznoe/book/pereplet.htm
habrahabr.ru/post/96684
Where to start was the main question. Glory to Google and Habr, I managed to find some rather detailed instructions for binding books, promising, with a competent approach, a result that could suit the inner craving for beauty.
I will leave links to these articles at the end along with thanks to the authors. I would like to think that I managed to take the best of their methods and bring something of my own.
To begin with, it was worth choosing a format. For me it was a6, because the book is small, and with a larger format it would have turned out to be unpresentably thin, and in this size, in my opinion, it looks much nicer. The first step was expectedly layout. I needed to download several versions before I managed to find an option with appropriate formatting (to edit less) and color pictures, which, however, were later replaced with better ones. The layout itself took several hours, it was necessary to choose a font that was suitable in size and style, replace and position the pictures less randomly, and select the appropriate indents. With the layout of a more capacious book, it will take much longer.
Next print. It’s worth mentioning right away that even at the preparation stage I decided for myself that I want to get the result as accurate as possible, and therefore, throughout the entire production, I was not shy about using automated equipment - printers, cutters and a laser engraver.
So seal. The order of the pages was set using the wordpage program, because it turned out to be the simplest tool and, in general, satisfying me on all counts. The only thing she lacks is the calculation of numbering for duplex printing.
Everything is simple, you need to set your own parameters - the number of pages, the number of pages in a notebook, print pages from the first line, turn over the sheets and print pages from the second line. The main thing is not to confuse orientation.
Cutting sheets to size A5 was carried out on a paper cutter designed specifically for this purpose, so that everything was neat, quick and trouble-free. You can, of course, cut with an office knife, but the result will be worse, and you will have to spend much more time on it. Together with trimming sheets for a book, you should immediately trim a couple of blank sheets of thicker paper, for bookends of the same size.
Now we fold the A5 in half and get the coveted A6, and with it the first idea of how it will look in the end. Folding should be based on page numbers. Since I decided to bind notebooks with 16 sheets, I had 4 sheets of A5 in my notebook. The internal ones should be bent with strong pressure (you can even hold a fingernail at the bend place), the external ones, on the contrary, with a weak one, this way you get neat notebooks that are smooth and with the same edges (which, by the way, must be cut later).
The binding was decided to sew through. It hurt I liked how the colored threads look on the back of the notebook, and this option looked a bit stronger. To pierce the holes, you need to take thicker paper (I had 240g / m ^ 2), cut it to the height of the sheets and mark it, taking into account the width of the lace around which you will staple the pages, and also indent from the edges by 10 mm (not necessary just that much, it just looked good in my case).
Next, we apply this template to each notebook in turn (for additional fixation I pressed it with stationery clips) and we make neat holes with a sharp awl, exactly opposite the marking lines. This is a very crucial stage, requiring maximum care and accuracy. The more careful we are here, the less then we will have to edit.
I sewed the binding with the help of embroidery threads (floss), it looks good, it keeps excellent, what else is needed ?! Since this is a gift, it was worth considering the preferences of the future owner, the favorite color is green, it remains only to find the threads of the desired shade. The binding is sewn starting from the first or last notebook, first we thread the thread from the outside to the inside of the book, along the edges where the thread goes from one notebook to another, we fasten it with knots.
The resulting design, aligning the notebooks relative to each other, is clamped into a press and gently smeared with glue. I used special glue for cardboard and paper, UHU creative. It dries quickly, glues perfectly, not water-based, so it does not soak the paper and after gluing it remains somewhat elastic. Leave to dry.
After our book has dried and stuck together we can get it and evaluate the result.
Next, we take sheets cut out at first for bookends, fold in half and, smearing with glue the edge near the bend (I smeared 5mm), glue it from the outside.
We wait for drying, cut off excess threads and lace from binding, fix the edges of the lace and knots with glue, it is perfectly absorbed into the fabric and holds the volume. To reinforce the binding, we glue something “marle-like” on it. It was a canvas for me (again from the embroidery area). So far, we are not fastening it to the flyleaf so that the frozen glue does not interfere with us further.
Due to the fact that the sheets in the notebooks are folded one around the other, as a result, the leading edge turns out to be a little “toothy”, and, like we did not try, the pages cannot be stitched perfectly evenly.
It's time to finish the cut. You have to be careful here. Due to the threads and the fold of the paper, the binding side is slightly thicker, so under the press you need to compress it carefully so that the binding does not lead, otherwise the cut will be uneven. The easiest way is to put a sheet of cardboard on top of the central part so that the book is pressed over the entire area.
So, the book is now flat and looks very cool, but it will be better. It's time to hide the not-so-pretty back. For this, captals (captal tape, etc.) are needed. In general, this same tape can be bought. But to find it is not so simple in the retail network, and via the Internet it is not so fast. Time was already running out, in addition, I wanted to make the captals the same color as bookends and bookbinding thread. So it was decided to make them yourself. I just took the ribbon that I used for binding, and sheathed it on one side with the same green thread, folded in half, then curly cut the ribbon.
This tape seems to be properly sewn to the binding, through notebooks (into the same holes). But, firstly, I already had them under a layer of glue, and secondly, it would be ugly on the spread of the notebook, well, until the heap, I suggested that no one would throw the book, because the captals would hold well on the glue, so that just stuck them. First, the main part, so that the glue does not protrude from under the thread, but at the same time holds the tape directly under it, and after drying it slightly shortens the side “gloves” and glues them to the main part cross to cross.
Well, the book itself is ready. Now it's up to the cover. The cover should be a little larger than the book in height. Since the book is small, I made cardboard in height 10 mm larger (5 mm on each side), the same width as the book. The template was drawn in Corel and cut on a laser engraver. For the outside, I took a textured design of dark brown paper, drew in Corel the arrangement of the elements on it and the trim lines so as not to measure anything, and printed it all on paper, on a regular “laser” of a4 format. Then he cut along the lines with a clerical knife. All elements + 8.5 mm each fit on the paper on the bending part.
With this markup, it is worth considering the thickness of the cardboard to leave a lap for folding.
We apply a thin uniform layer of glue on the cardboard, while sufficient to ensure that it is firmly fixed to the paper, and, applying the markup, carefully press down. The glue dries quickly, so there should be no mistake. I have one cardboard when squeezed shifted by half a millimeter, it was not possible to return it to its place. In this case, the paper was separated only with the top layer of cardboard. It's good that I cut out 2 sets of cardboard boxes at once, I had to redo everything. After drying, we wrap the edges, smeared with glue; then leave to dry.
A piece of glue on the inside will be hidden by the flyleaf, so it’s not critical, that’s what happened in the end:
Try on a book:
Everything turned out neatly and beautifully, and it seems like you can paste the book, and then put the image on the cover, but I decided what can be done better! The cover was good, and with the printed image it would have become even better, but it did not look durable enough, not complete or something. And I decided that the cover should be leather. I did not have skills in working with leather, the material is moody, requiring experience and tools that I also did not have, and therefore I turned to a person who does all kinds of leather work (next time I will do it myself). We discussed all the details, material, manufacturing, etc., I handed him a paper cover, for pasting and flashing leather lace. Here is what happened.
Снаружи мне сразу все понравилось, а с внутренней стороны ждал сюрприз. Края были ужасно криво обрезаны. По длинной стороне была возможность их немного подрезать, чтобы подровнять, что и было сделано с помощью острого канцелярского ножа и металлической линейки.
А вот по коротким сторонам (низ и верх) обрезать было нечего, пришлось шаманить. Намазал немного клея, приложил к краю линейку, и вытягивал кожу там, где не достает, прижимал, где выступает. В правом нижнем углу обложки не хватало большого куска, пришлось вырезать, подклеивать и ровнять из кусочков, которые обрезал. После высыхания это все еще можно заметить, но в глаза не бросается.
После всех вышеописанных мероприятий обложка приняла достойный вид, который меня удовлетворил. Клеим книгу.
Smear the surface of the flyleafs together with the canvas with a thin even layer, press. Between the fold of the flyleaf, we lay a larger sheet so that excess glue, which in any case will be, albeit in a small amount, does not glue the pages. Five minutes is enough, we open it, remove the excess glue, it still has not dried, and it is removed almost without a trace. The same thing on the other hand, then put dry. Take a close look so that there is no glue on the pages.
It's time for decorative work. For application on the cover, the image located at the head of the post was selected.
To get a good result, you need to make a vector from a raster image. The rough part of the work was done by the Vector magic utility, a familiar designer helped bring the image to mind. Here is what happened.
Now the image is suitable for engraving. Crossing our fingers, place the book under the laser. One minute of worries - and you're done. Now it remains to remove traces of burned skin, soot or something like that. It is well absorbed into the small pores of the skin, so removing it is not so simple. I erased it, but not everything went as smoothly as I would like.
In general, the result suited me, but so far the skin was too brand and not protected. To avoid oily fingerprints on the skin and it is generally more protected, you need to apply a top coat. It is absorbed into the top layer, gives a light shine (the effect may be different, depending on the composition) and water-repellent properties. And then failure awaited me. In the process of erasing traces of engraving, I damaged a thin top layer of the skin, which, obviously, had some kind of additional coating. After applying the “finish” the skin in this place darkened. And although everyone I asked told me that everything was in order, there was no limit to my frustration.
What I just did not try to remove the darkening, nothing helped. The solution was found quite quickly.
This was the final touch. Now everything suited me. The finish coating, on top of everything else, cemented the small elements of the picture. Now the book looked and felt really worthy and durable. We look what happened.
In conclusion, some tips. Consider the location of page numbers on a spread, I only remembered about this when the pages were printed and punctured for binding. As you can see, the left side of the page numbers is in the wrong place. I did not remodel, I decided that this would only add personality. Before the book itself, it’s worth putting a blank sheet, or a sheet with a cover, because the first page opens worse than the others, because of the 5 mm that the flyleaf holds on to. To the maximum, do everything yourself, "if you want to do well, do it yourself." I will carry out work with the skin in the next project (he will certainly) myself to do it carefully initially, even if it takes ten times more time. It is better to engrave the skin already with the applied finish, then the soot is washed off with a simple cloth or cotton wool, without any difficulties and sacrifices.
Well, what I would like to say. I spent about 2 weeks on this project, an hour and a half a day. I put my own work and soul into this thing. I really like what happened. This is a unique thing, this is exactly what I wanted to do. I would never have managed to buy something as full of emotions. This is by far the best present I have ever made. I think it’s clear that it was worth it.
I hope my experience is useful to someone.
Used materials
www.strana-naoborot.com/5raznoe/book/pereplet.htm
habrahabr.ru/post/96684