Testing VoCore in hackspace - a micro-computer with WiFi on Linux / OpenWrt
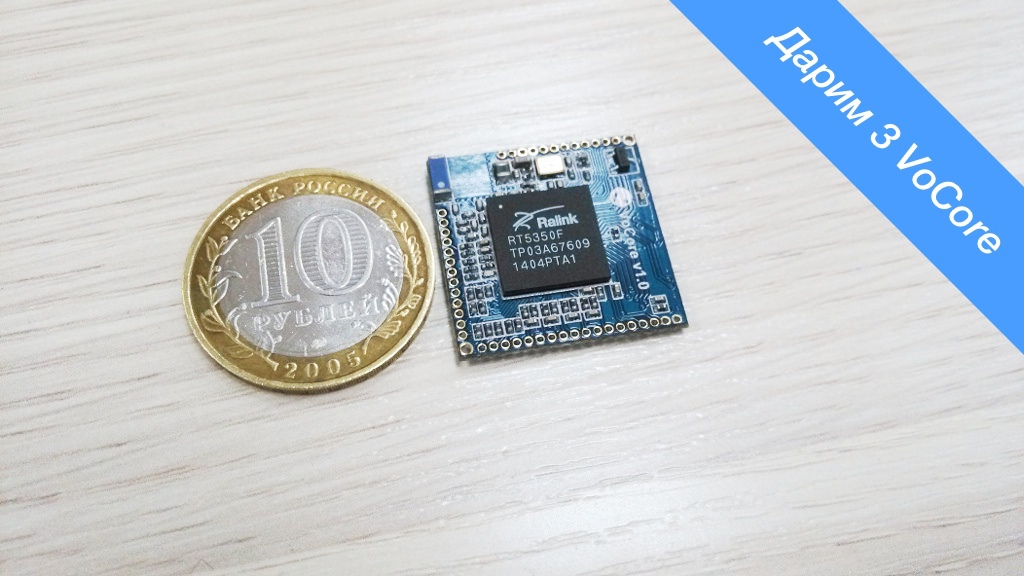
VoCore is such a microcomputer with Linux / OpenWrt on board, which more recently with the help of crowdfunding raised more than $ 100k (from the declared $ 6k). Inside this little thing: a MIPS 360MHz processor, WiFi 802.11n, Ethernet 10 / 100Mbps, and a bunch of GPIO. Everything fit on a scarf measuring 25x25mm!
Below we will talk about how to get VoCore (this device) to perform a simple action in five minutes - to turn on and off the LED. It is clear that with the help of simple schemes, instead of the LED, you can connect any other load: from the bulb to the heating boiler.
And most importantly, we are announcing a competition to distribute three VoCore to those who offer the best ideas for its application. Details, again, under the cut!
A more detailed feature of VoCore:
- firmware - OpenWrt;
- processor - RT5350 (360MHz MIPS) (recently there was a post Exploring Chinese routers on RT5350 );
- RAM - 32 MB SDRAM;
- ROM - 8MB SPI Flash;
- interfaces - 10 / 100M Ethernet, USB, UART, I2C, I2S, PCM, JTAG,> 20 GPIO;
- size - 25x25mm;
- price - approximately 80 yuan in China (about 500 rubles).
So, we have VoCore (we got pre-release versions), and there is a firm intention to control something, for example, an LED.
The plan is this:
- connect power to VoCore
- connect via Wi-Fi to VoCore and log in via SSH to OpenWrt
- assemble a simple resistor LED circuit on the breadboard
- connect this circuit to the GPIO output of VoCore
- implement GPIO output control
- blink LED
Let's get started.
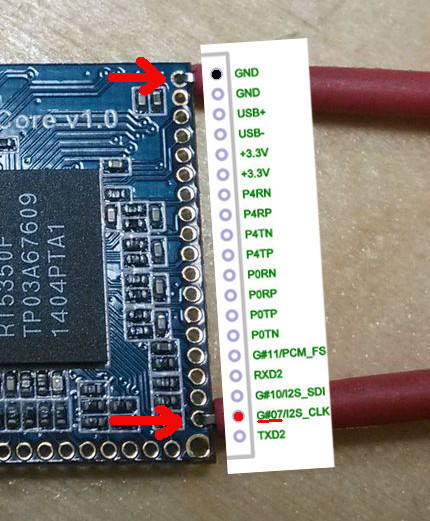
First of all, we need to find the specifications for the pins of this board:
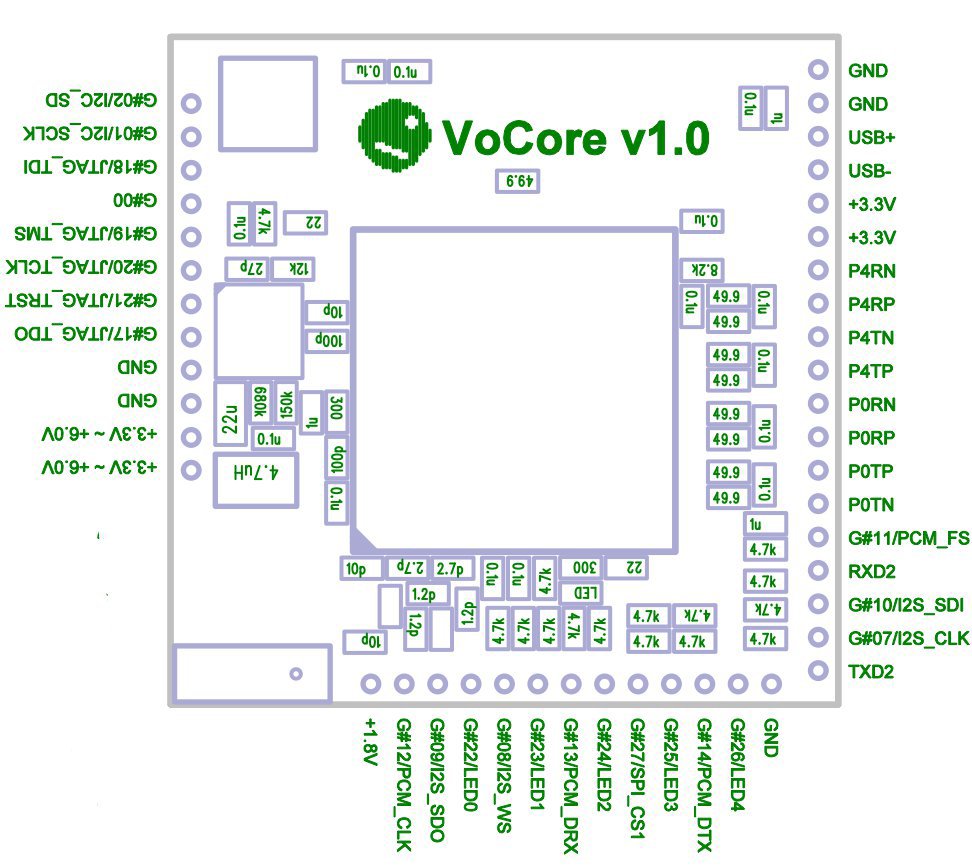
Attention , tk. we have a pre-release version - then in the release version - slight differences are possible.
1. Connect the power
We used four 1.5V batteries. We get a total of 5.5V. VoCore can be powered from + 3.5V to + 6.0V.
Since on VoCore, pins have a pitch of 1.27 rather than 2.54, we had to use special “crocodiles” to work with them.
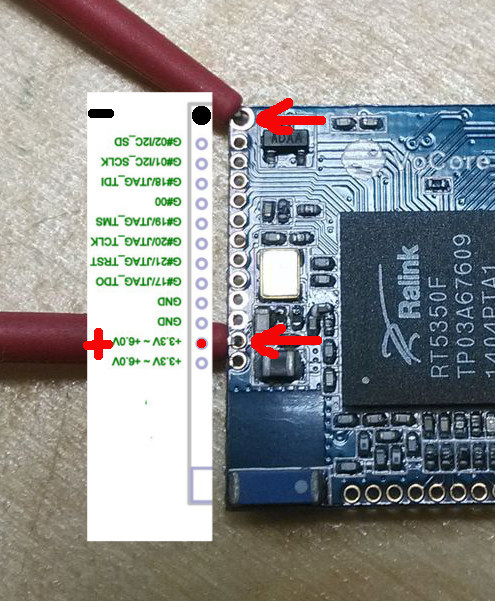
It so happened that in our example we put a minus on HOLE1 (technical hole for mounting the board) - it turned out that it works like a “ground”. And the lower left legs of GND, by contrast, were not connected to the ground.
2. Connect to VoCore via Wi-Fi and log in via SSH
After turning on the power, we wait about 30 seconds until VoCore boots up (Linux) and does a Wi-Fi search. We are connected to the WiFi point with the SSID "VoCore" (who would have thought).
After that, go ssh to IP 192.168.61.1 and log in with the root / vocore details .
We see a familiar picture:

Now we are inside OpenWrt / Linux - inside a coin-sized computer !
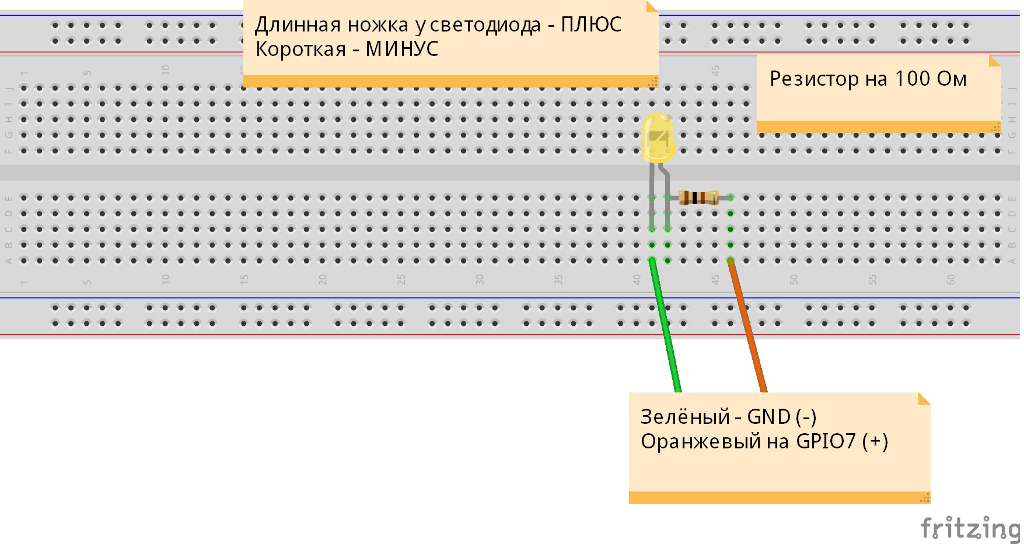
3. We create on the breadboard the circuit for the LED
On the breadboard (without using a soldering iron) we will make a simple circuit for turning on the LED (let's not forget about the resistor).
Here is the diagram:
Let me remind you that in the breadboard - there is an internal structure for connecting the pins - which provides contact without the need for soldering ( here , it is indicated how the pins are connected on the breadboard)
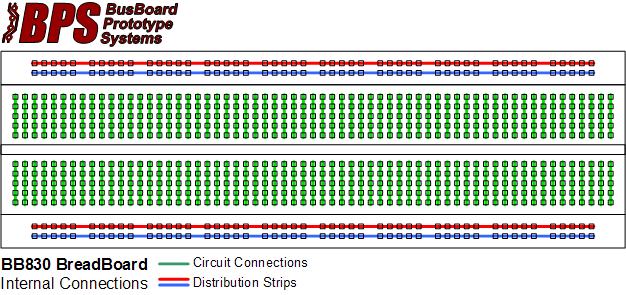
4. Connect to GPIO VoCore
To control the LED we will use GPIO7.
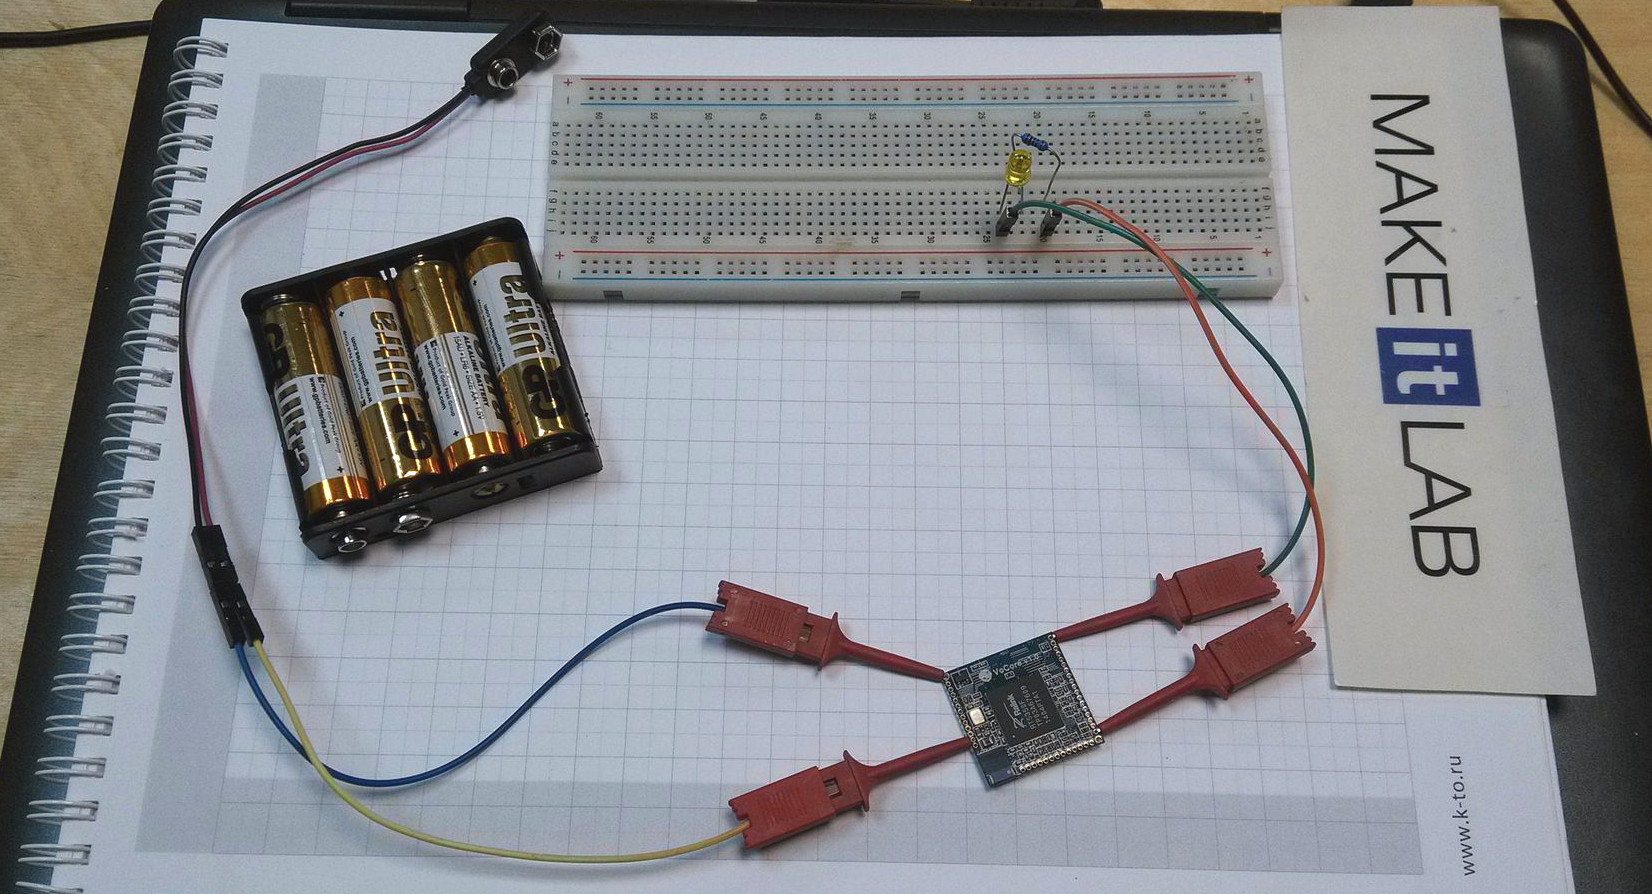
We connect according to the scheme:
Here is our layout assembly:
5. Initialize the GPIO
To work with GPIO outputs, we will use GPIO Sysfs - this is a mechanism for working with GPIO as a file system.
To control the GPIO output - you just need to create acc. file and write to it 0 or 1.
Perform the following steps in the console:
cd /sys/class/gpio
echo 7 > export
cd gpio7
echo out > direction
We went to the virtual file system - "/ sys / class / gpio", connected the "7" GPIO, and indicated its direction "out".
6. Turn on and turn off the LED
Now that the port is configured, we can change the value by writing the value (1 or 0) to the “value” file.
We light the LED, transmitting the truth to GPIO7:
echo 1 > value
Well, we extinguish (issue 0):
echo 0 > value
Read more about GPIO sysfs here: GPIO Sysfs Interface for Userspace .
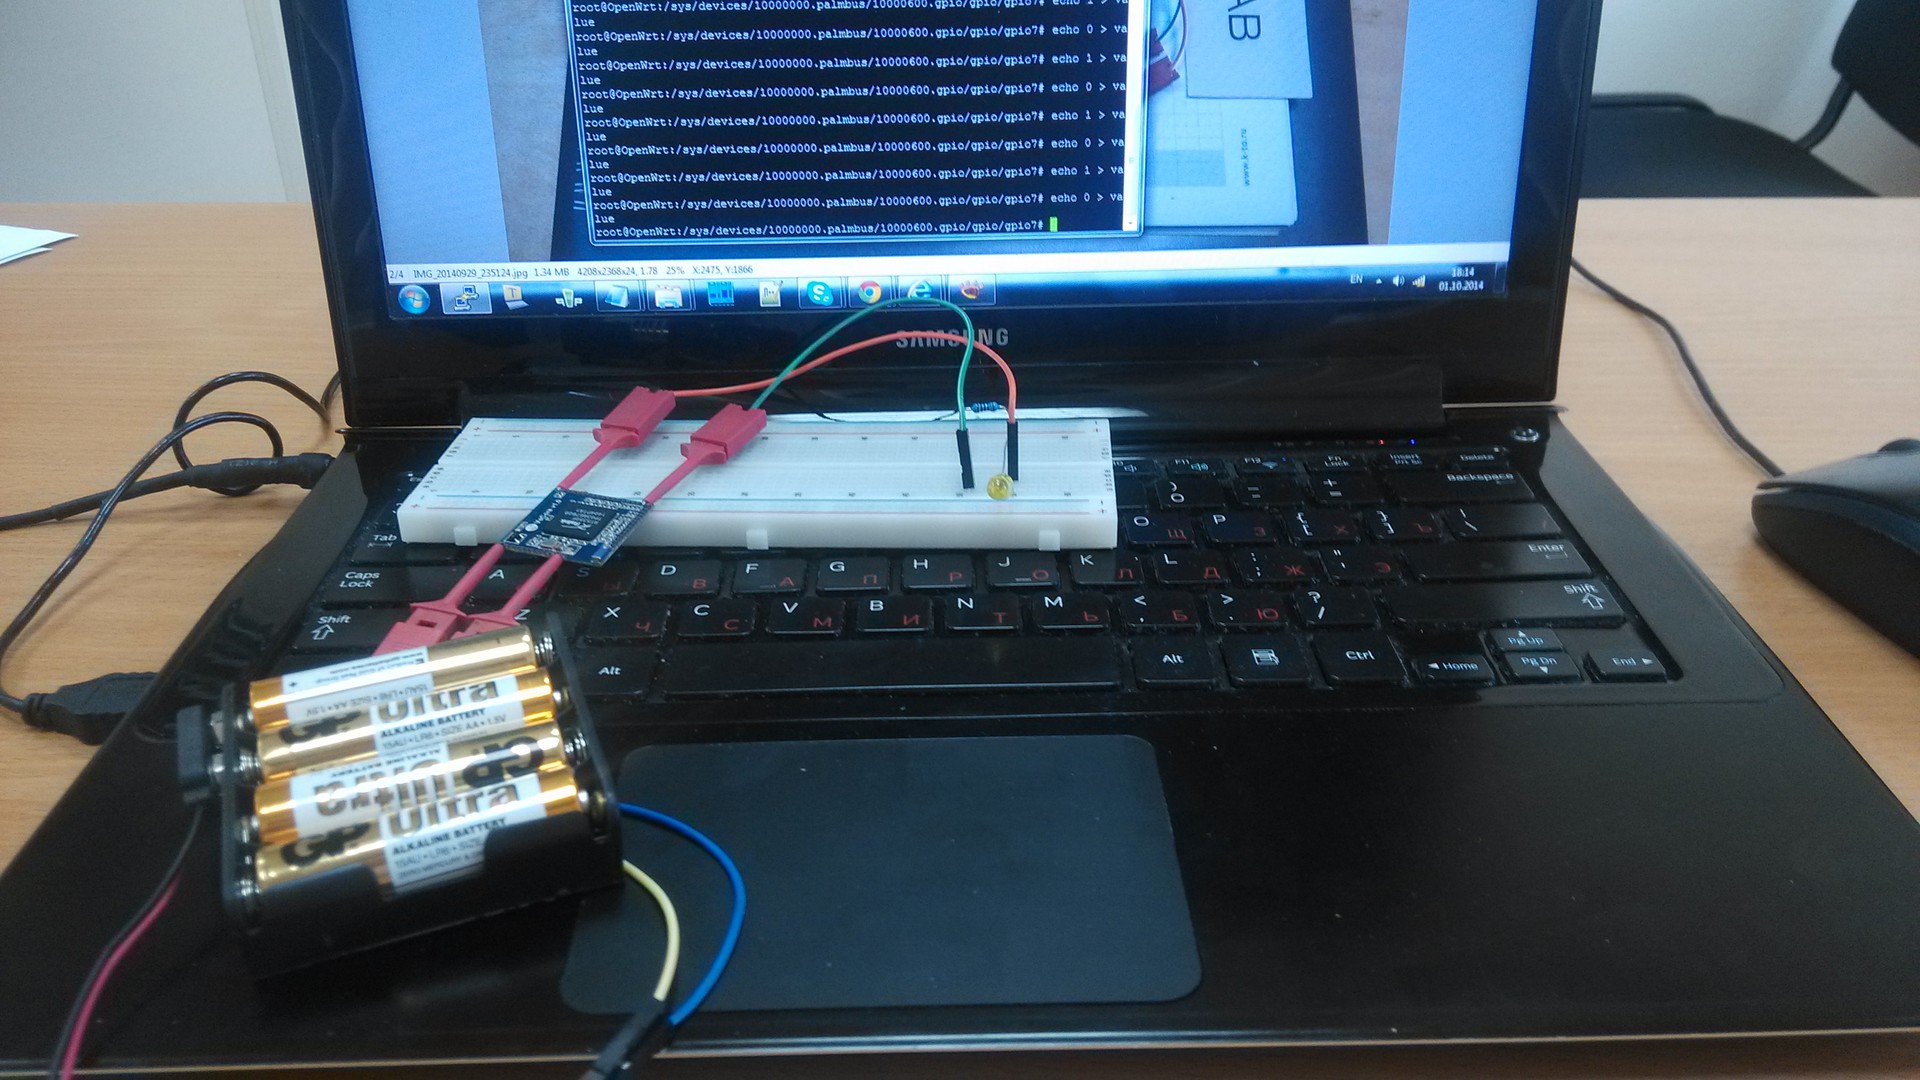
Here is what happened at the end:
Video
Competition
We have 3pcs of VoCore in the hackspace, which we are ready to send for free. For this, we announce the Competition . The main goal of the competition is to see how much the VoCore project will be of interest to readers
The competition will consist of two stages. The first stage will last from now until 10/12/2014. During this time, it is required to formulate the idea of the project, or to show developments with similar systems (based on OpenWrt or using other microcomputers).
An application can be submitted in two ways:
1) by posting a comment under this post;
2) by sending a description to the mail hackspace@makeitlab.ru
At the second stage, we will vote on 10 works that we like, and we will choose the three best ones (from October 13, 2014 to October 19, 2014). At the same time, two winners will be selected by the largest number of votes, and one will select subjectively for the project most liked.
The application welcomes:
1) the availability of a ready-made analogue based on OpenWrt;
2) the availability of an analogue on other microcomputers;
3) a detailed description and history of creation;
4) links to the code if the project is open.
Profile
Also, we had the idea to order a batch of VoCore directly at the factory in China. To do this, you need to assess the potential of the market. If you have any interest in this device, do not be lazy, fill out a couple of fields in this profile . The more comers appear, the cheaper VoCore will be!
Finally, a couple of useful links:
VoCore project on IndieGoGo
Official site of the VoCore project
PS: Thank you for providing VoCore for the test and competition targence Thank you
very much for the detailed OpenWrt pin pull algorithm .