Morty, we're at UltraHD! How to watch any movie in 4K by drawing it through a little-known neural network
Probably, you heard about the technology of Yandex DeepHD, with the help of which they once improved the quality of Soviet cartoons. Alas, it is not yet publicly available, and we, ordinary programmers, are unlikely to have the strength to write their own solution. But personally I, as the owner of the Retina-display ( 2880x1800 ), recently wanted to see "Rick and Morty" very much. What was my disappointment when I saw the soap on this screen looks like 1080 , in which there are originals of this animated series! (this is an excellent quality and usually it is quite enough, but believe me, the retina is so arranged that the animation with its clear lines in 1080p looks soapy, like 480r on an FHD monitor)
I firmly decided that I wanted to see this animated series in 4K, although I absolutely could not write neural networks. However, a solution was found! It’s curious that we don’t even have to write code, we need only ~ 100 GB of disk space and some patience. And the result is a clear image in 4K, which looks more worthy than any interpolation.
First, we must immediately understand that there is no technology in open access to increase video using neural networks. At all. But there are several projects that can increase photos. And if so, let's transcode our video into a huge pile of frames!
This can be done through Adobe Premiere Pro or another program for working with video, but I am sure that not everyone has it installed. So let's use the ffmpeg console utility . I took the first episode of the first season, and it started:
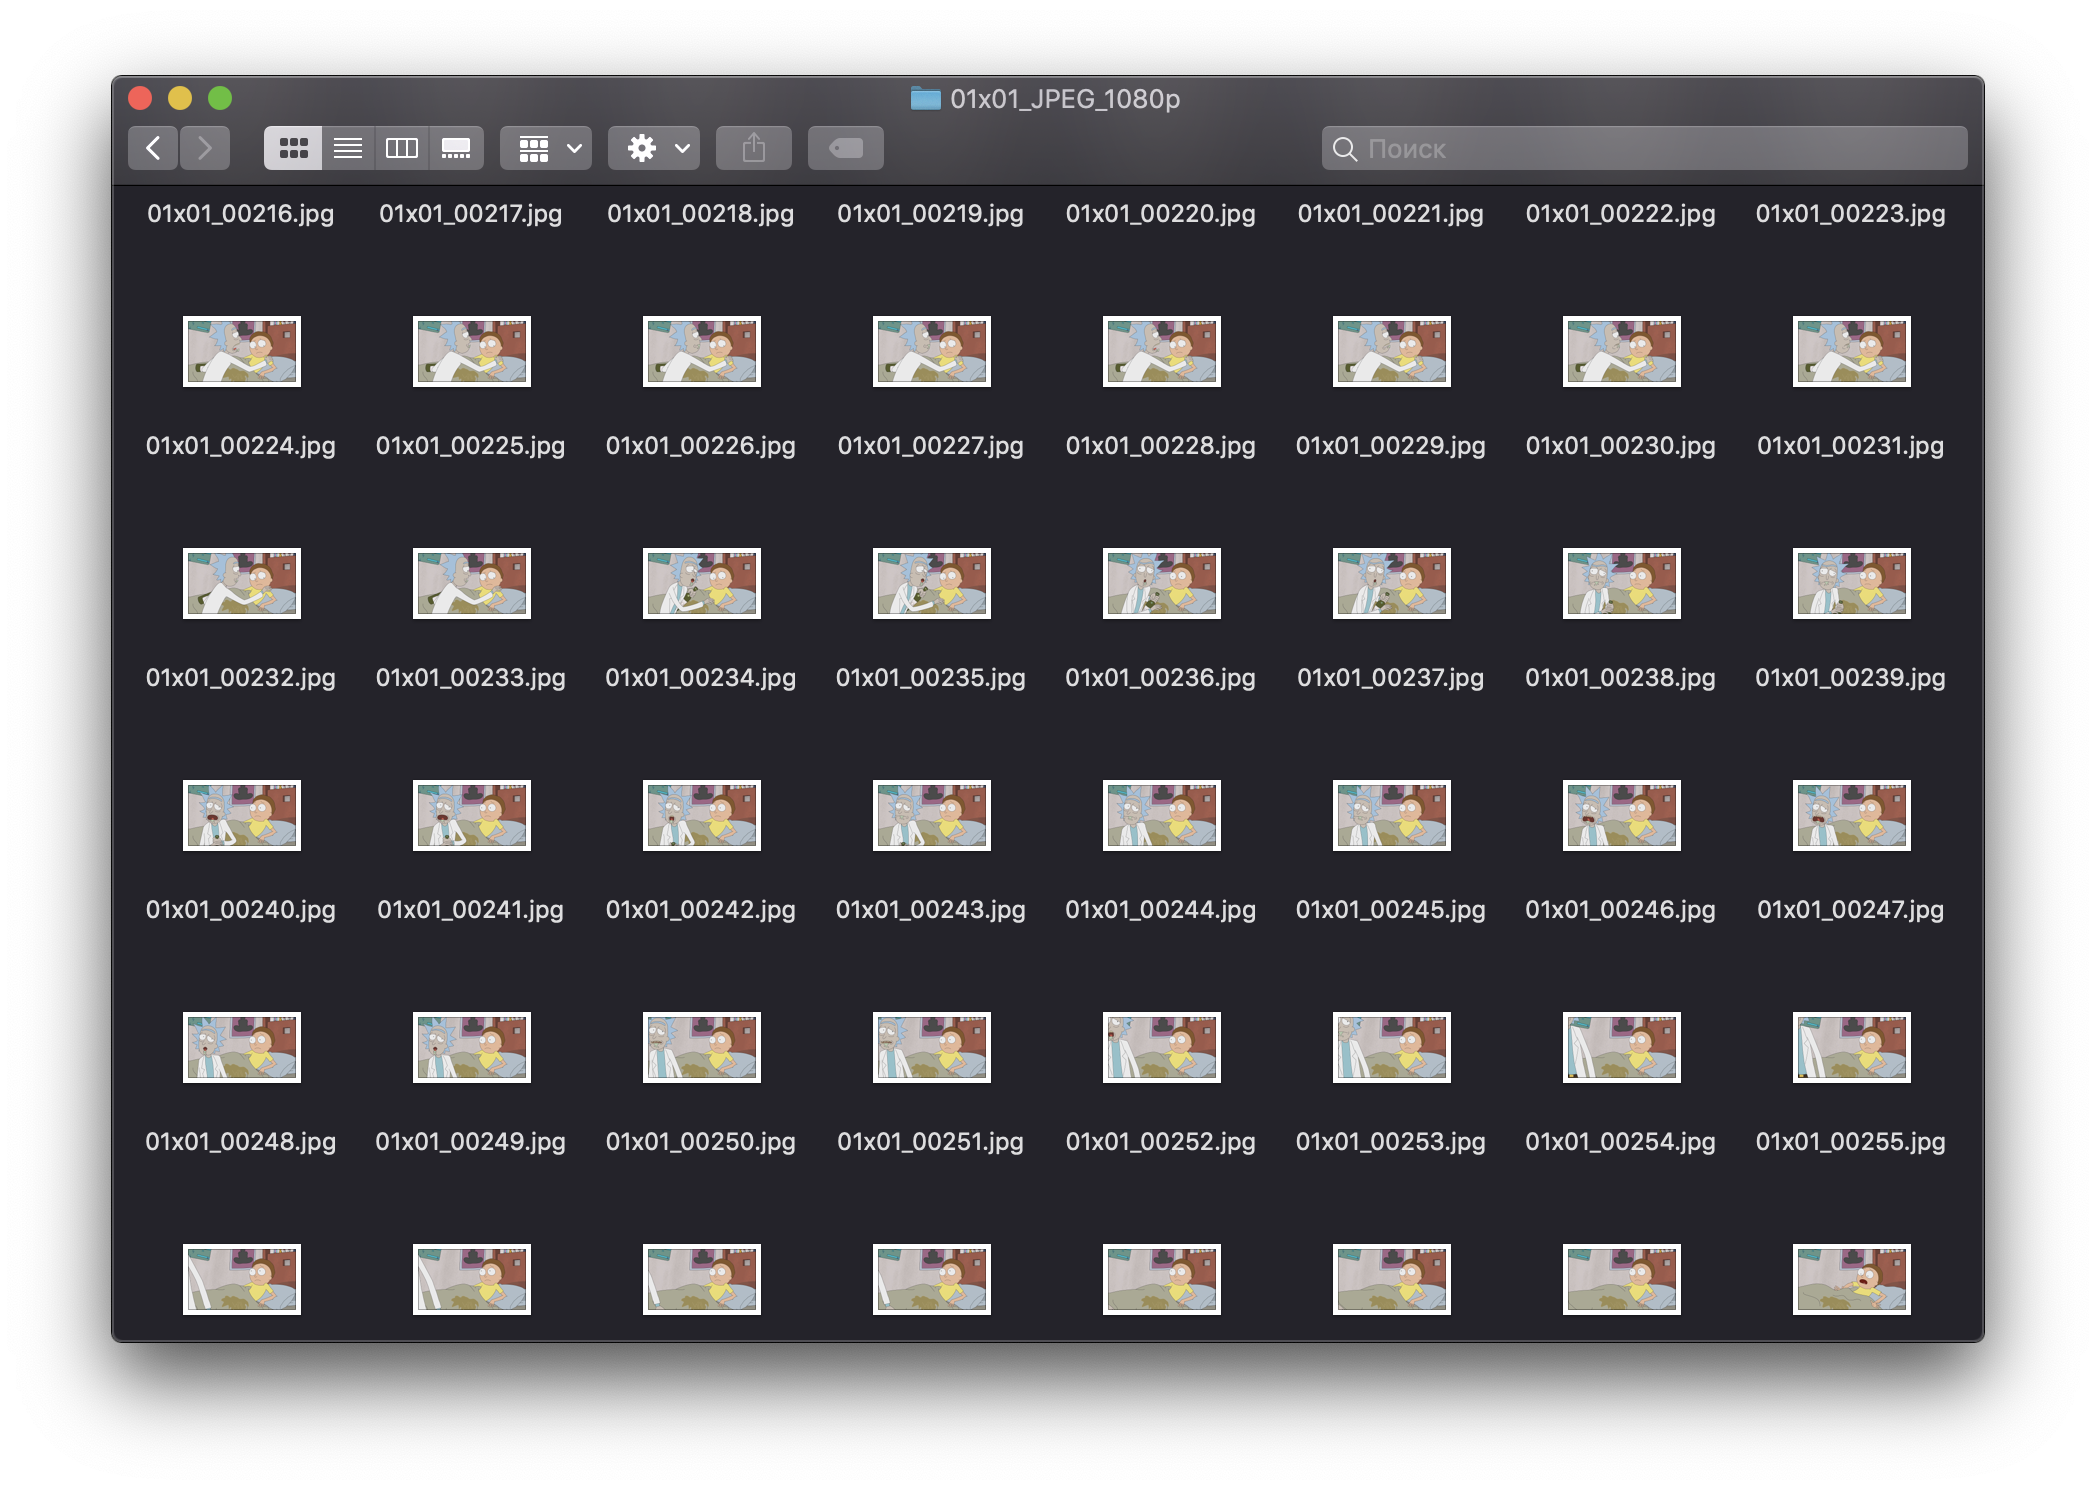
After waiting about 10 minutes, we will get a huge folder with images. She took me 26 GB.
It remains to process each of these frames!
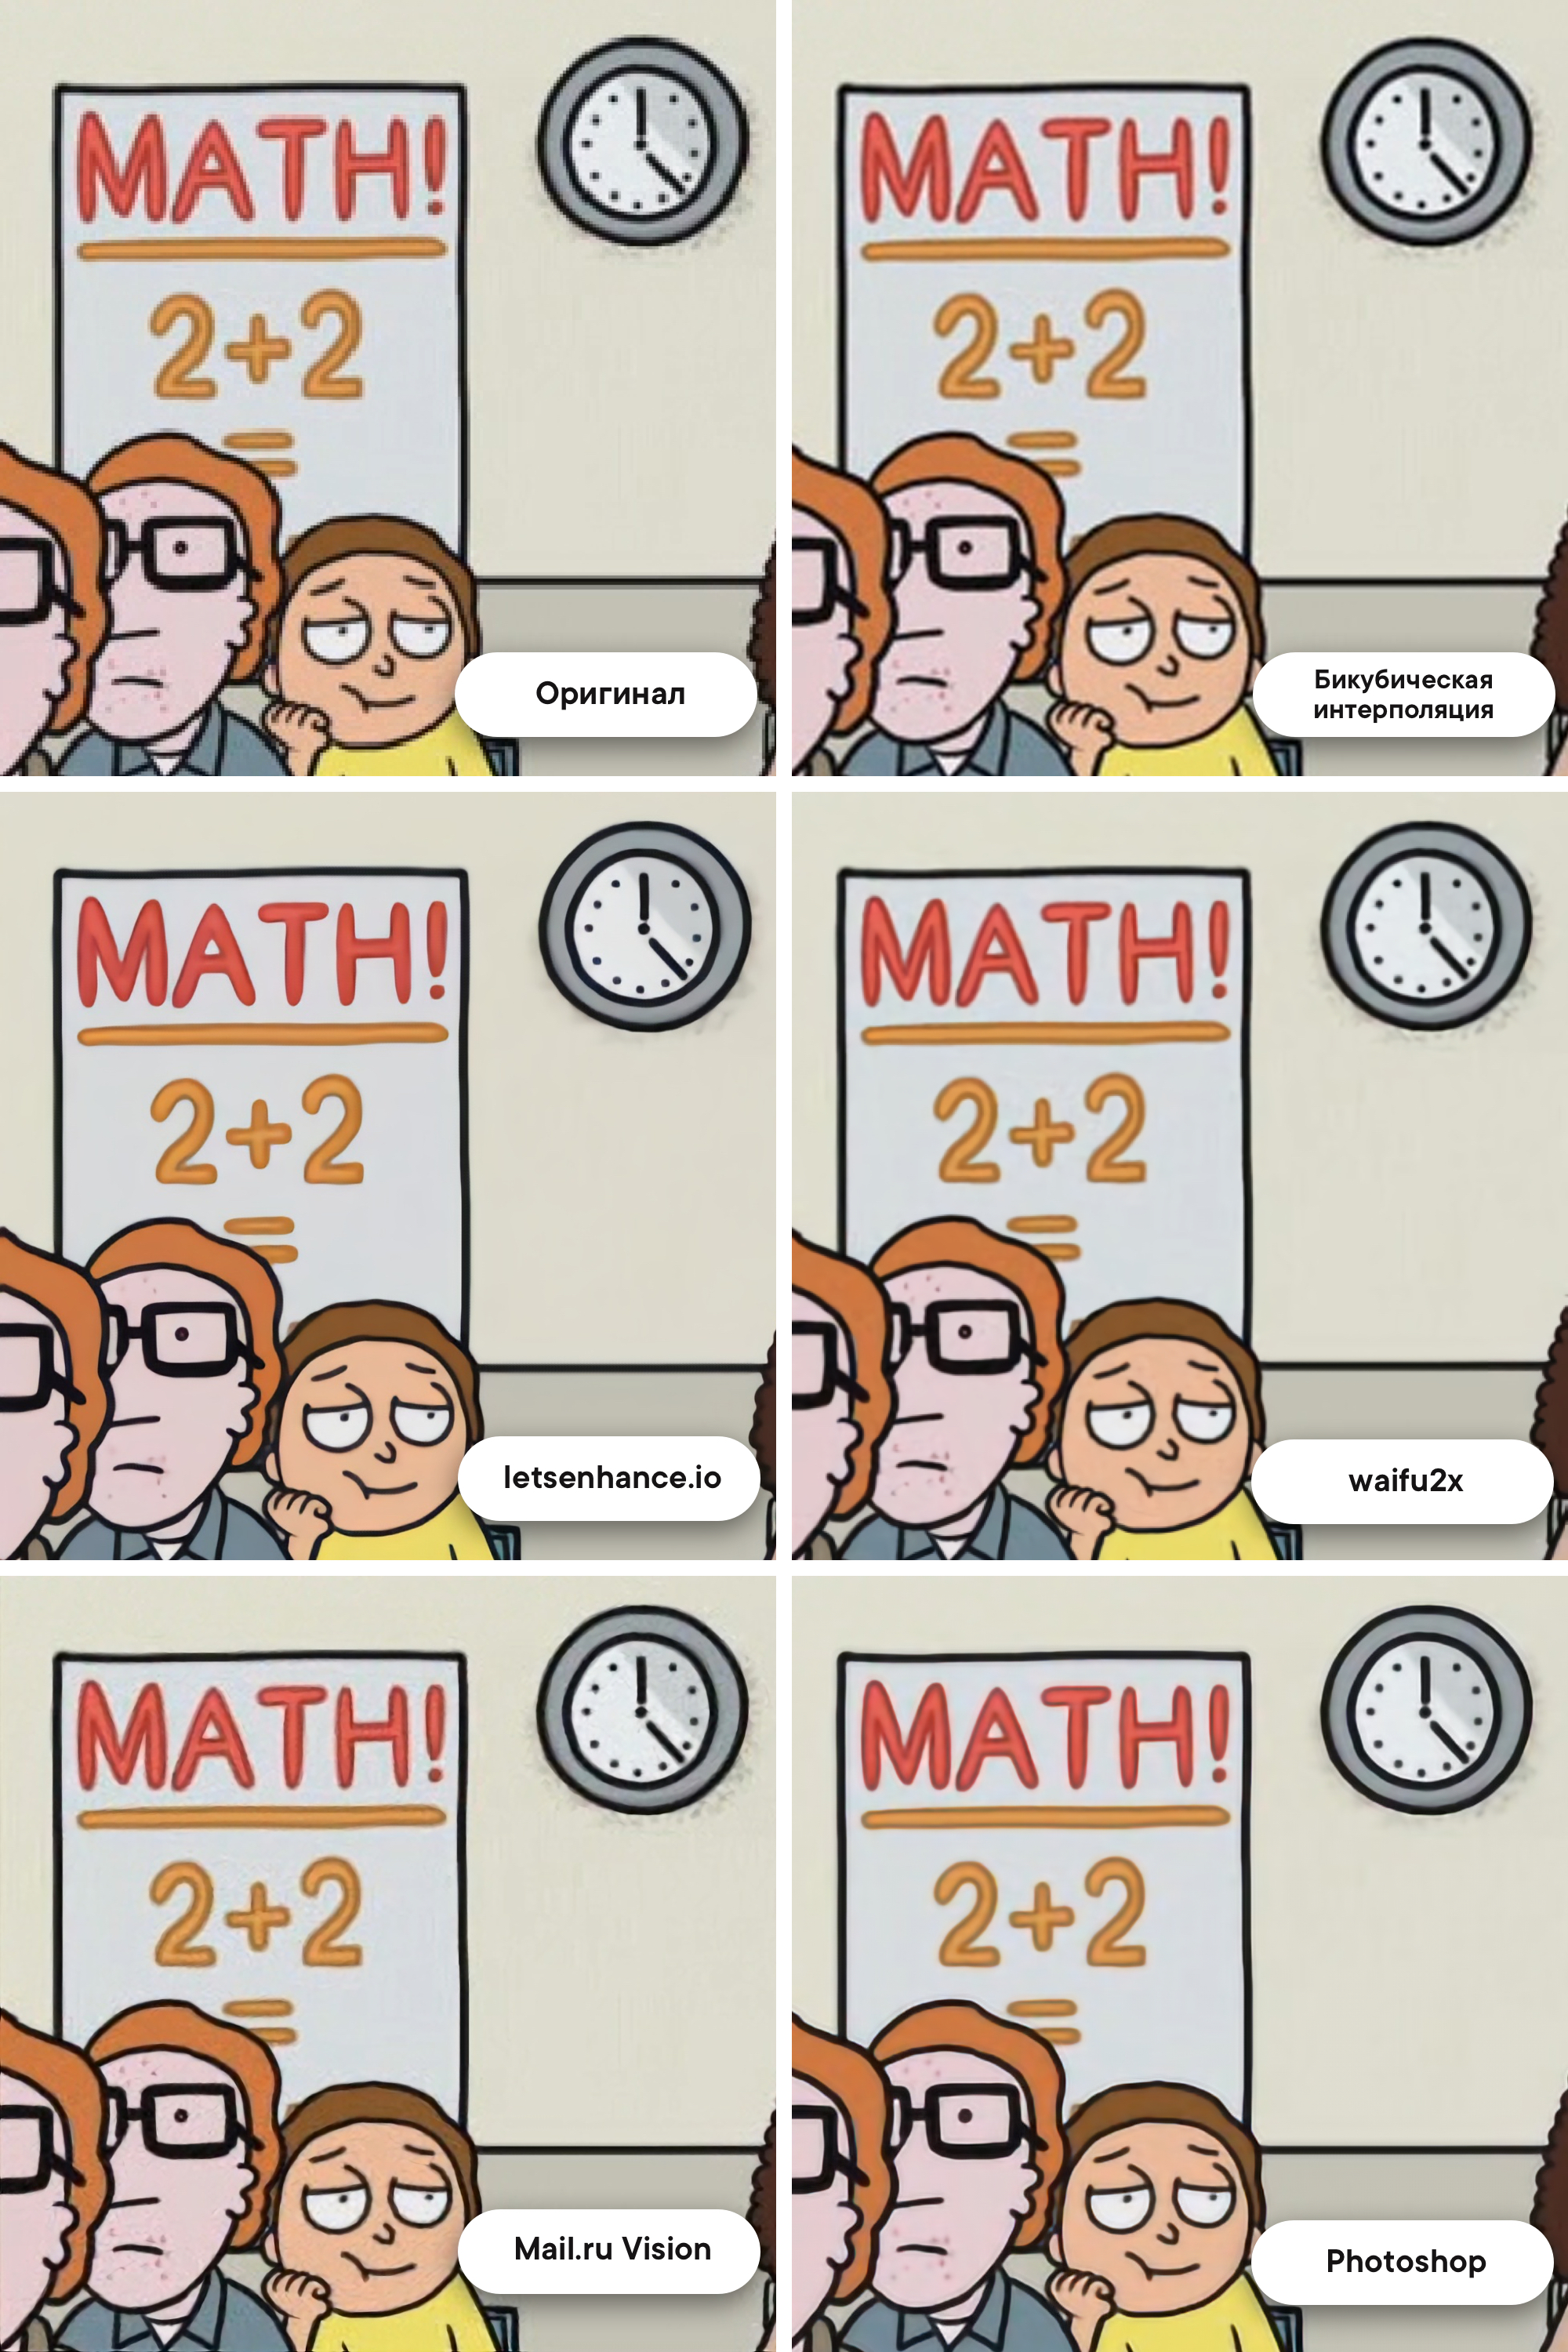
I found three options that work more or less normally - this is the well-known Let's Enhance , waifu2x (trained on the anime) and Mail.ru Vision.
A little later, I will definitely show examples.
Mail.ru Vision and Let's Enhance processed the images quite well, but they, unfortunately, are not open source, that is, we will have to write the creators to the post office to process the 31,000 images and probably pay a lot. Therefore, I looked at the remaining waifu2x, but he did not please me with the qualitative result, there were noises and fuzziness. Still, "Rick and Morty" - this is not anime.
I was already desperate to endlessly flip through Github and thematic forums, but ... Salvation suddenly came! I found an option that works on the machine locally, processes the image in less than a second, and shows excellent quality. And you will not believe who once again came to our aid!
Adobe Photoshop!
And no, I will not tell a true story about how there you can make a good picture with a couple of filters. Adobe really trained the real neural network, which, when scaled inside the program, can draw an image!
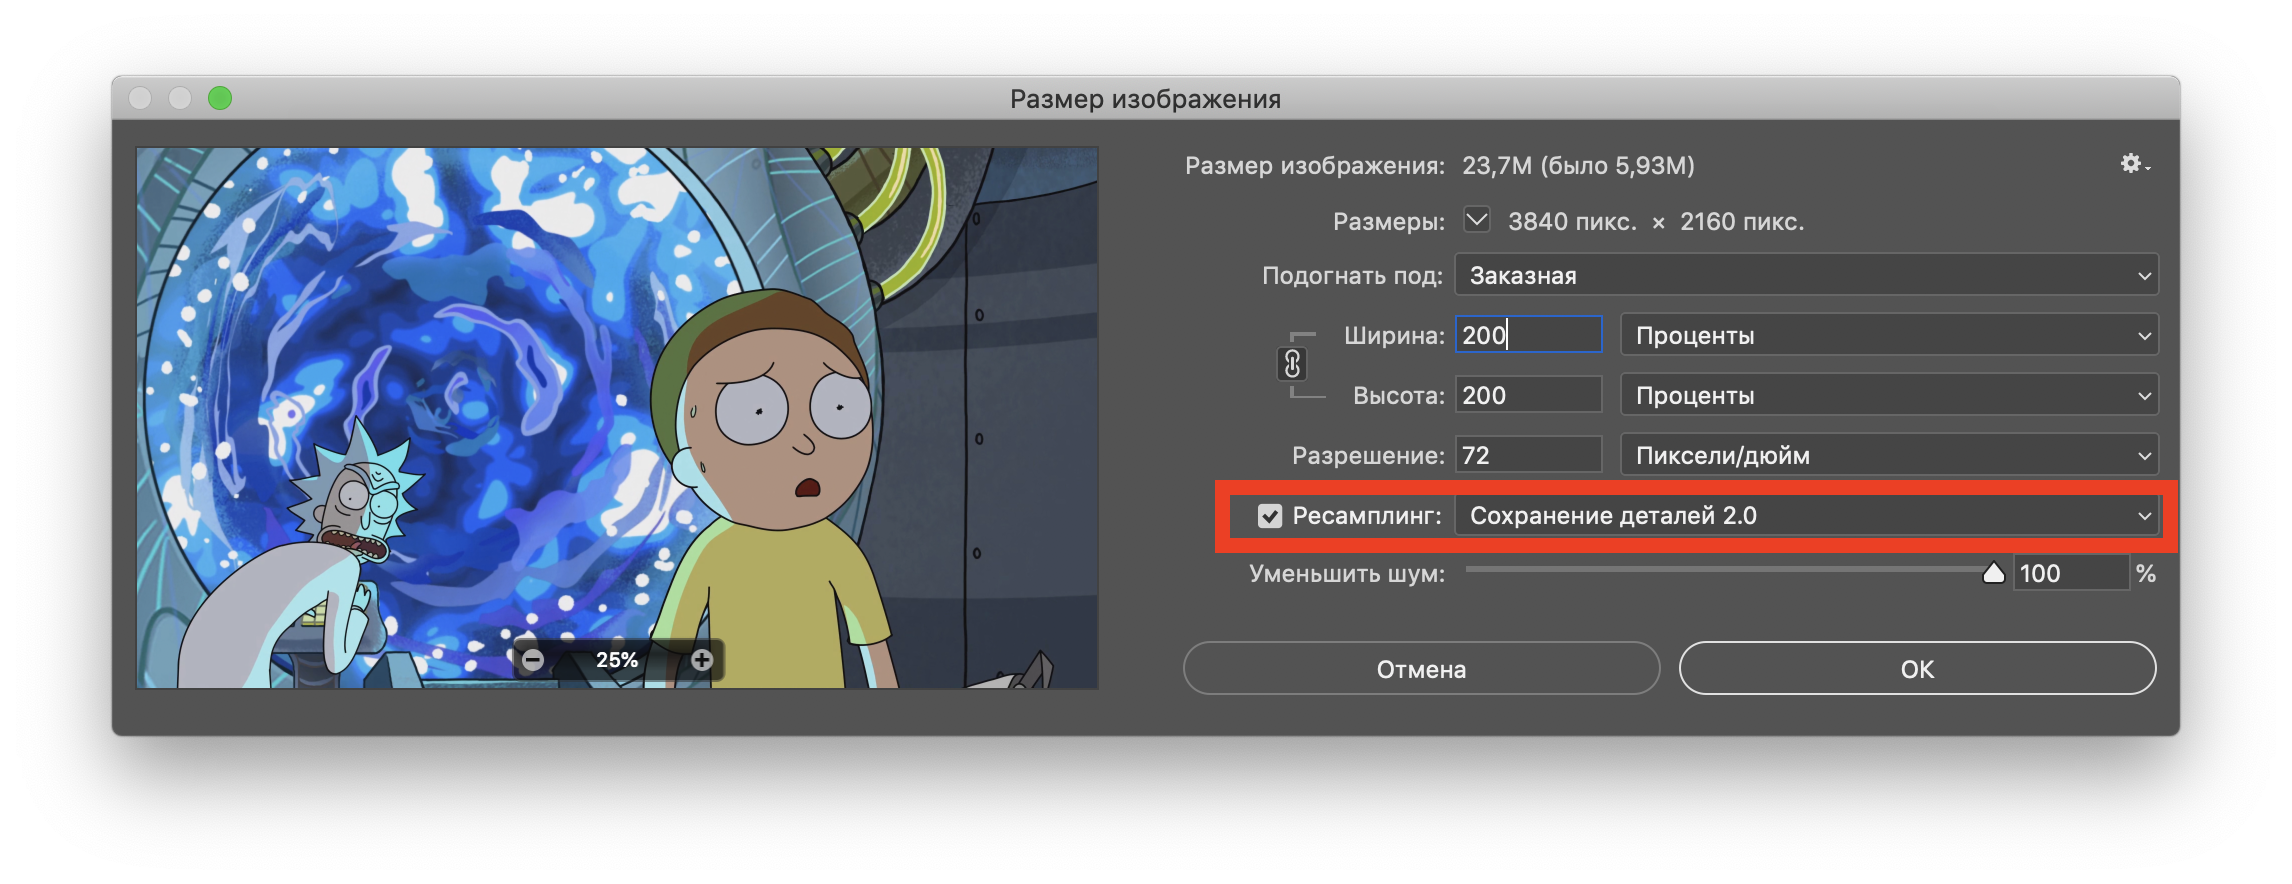
First you need to open the original image, then go through the top menu in Image> Image Size ... and select resampling "Saving Parts 2.0".
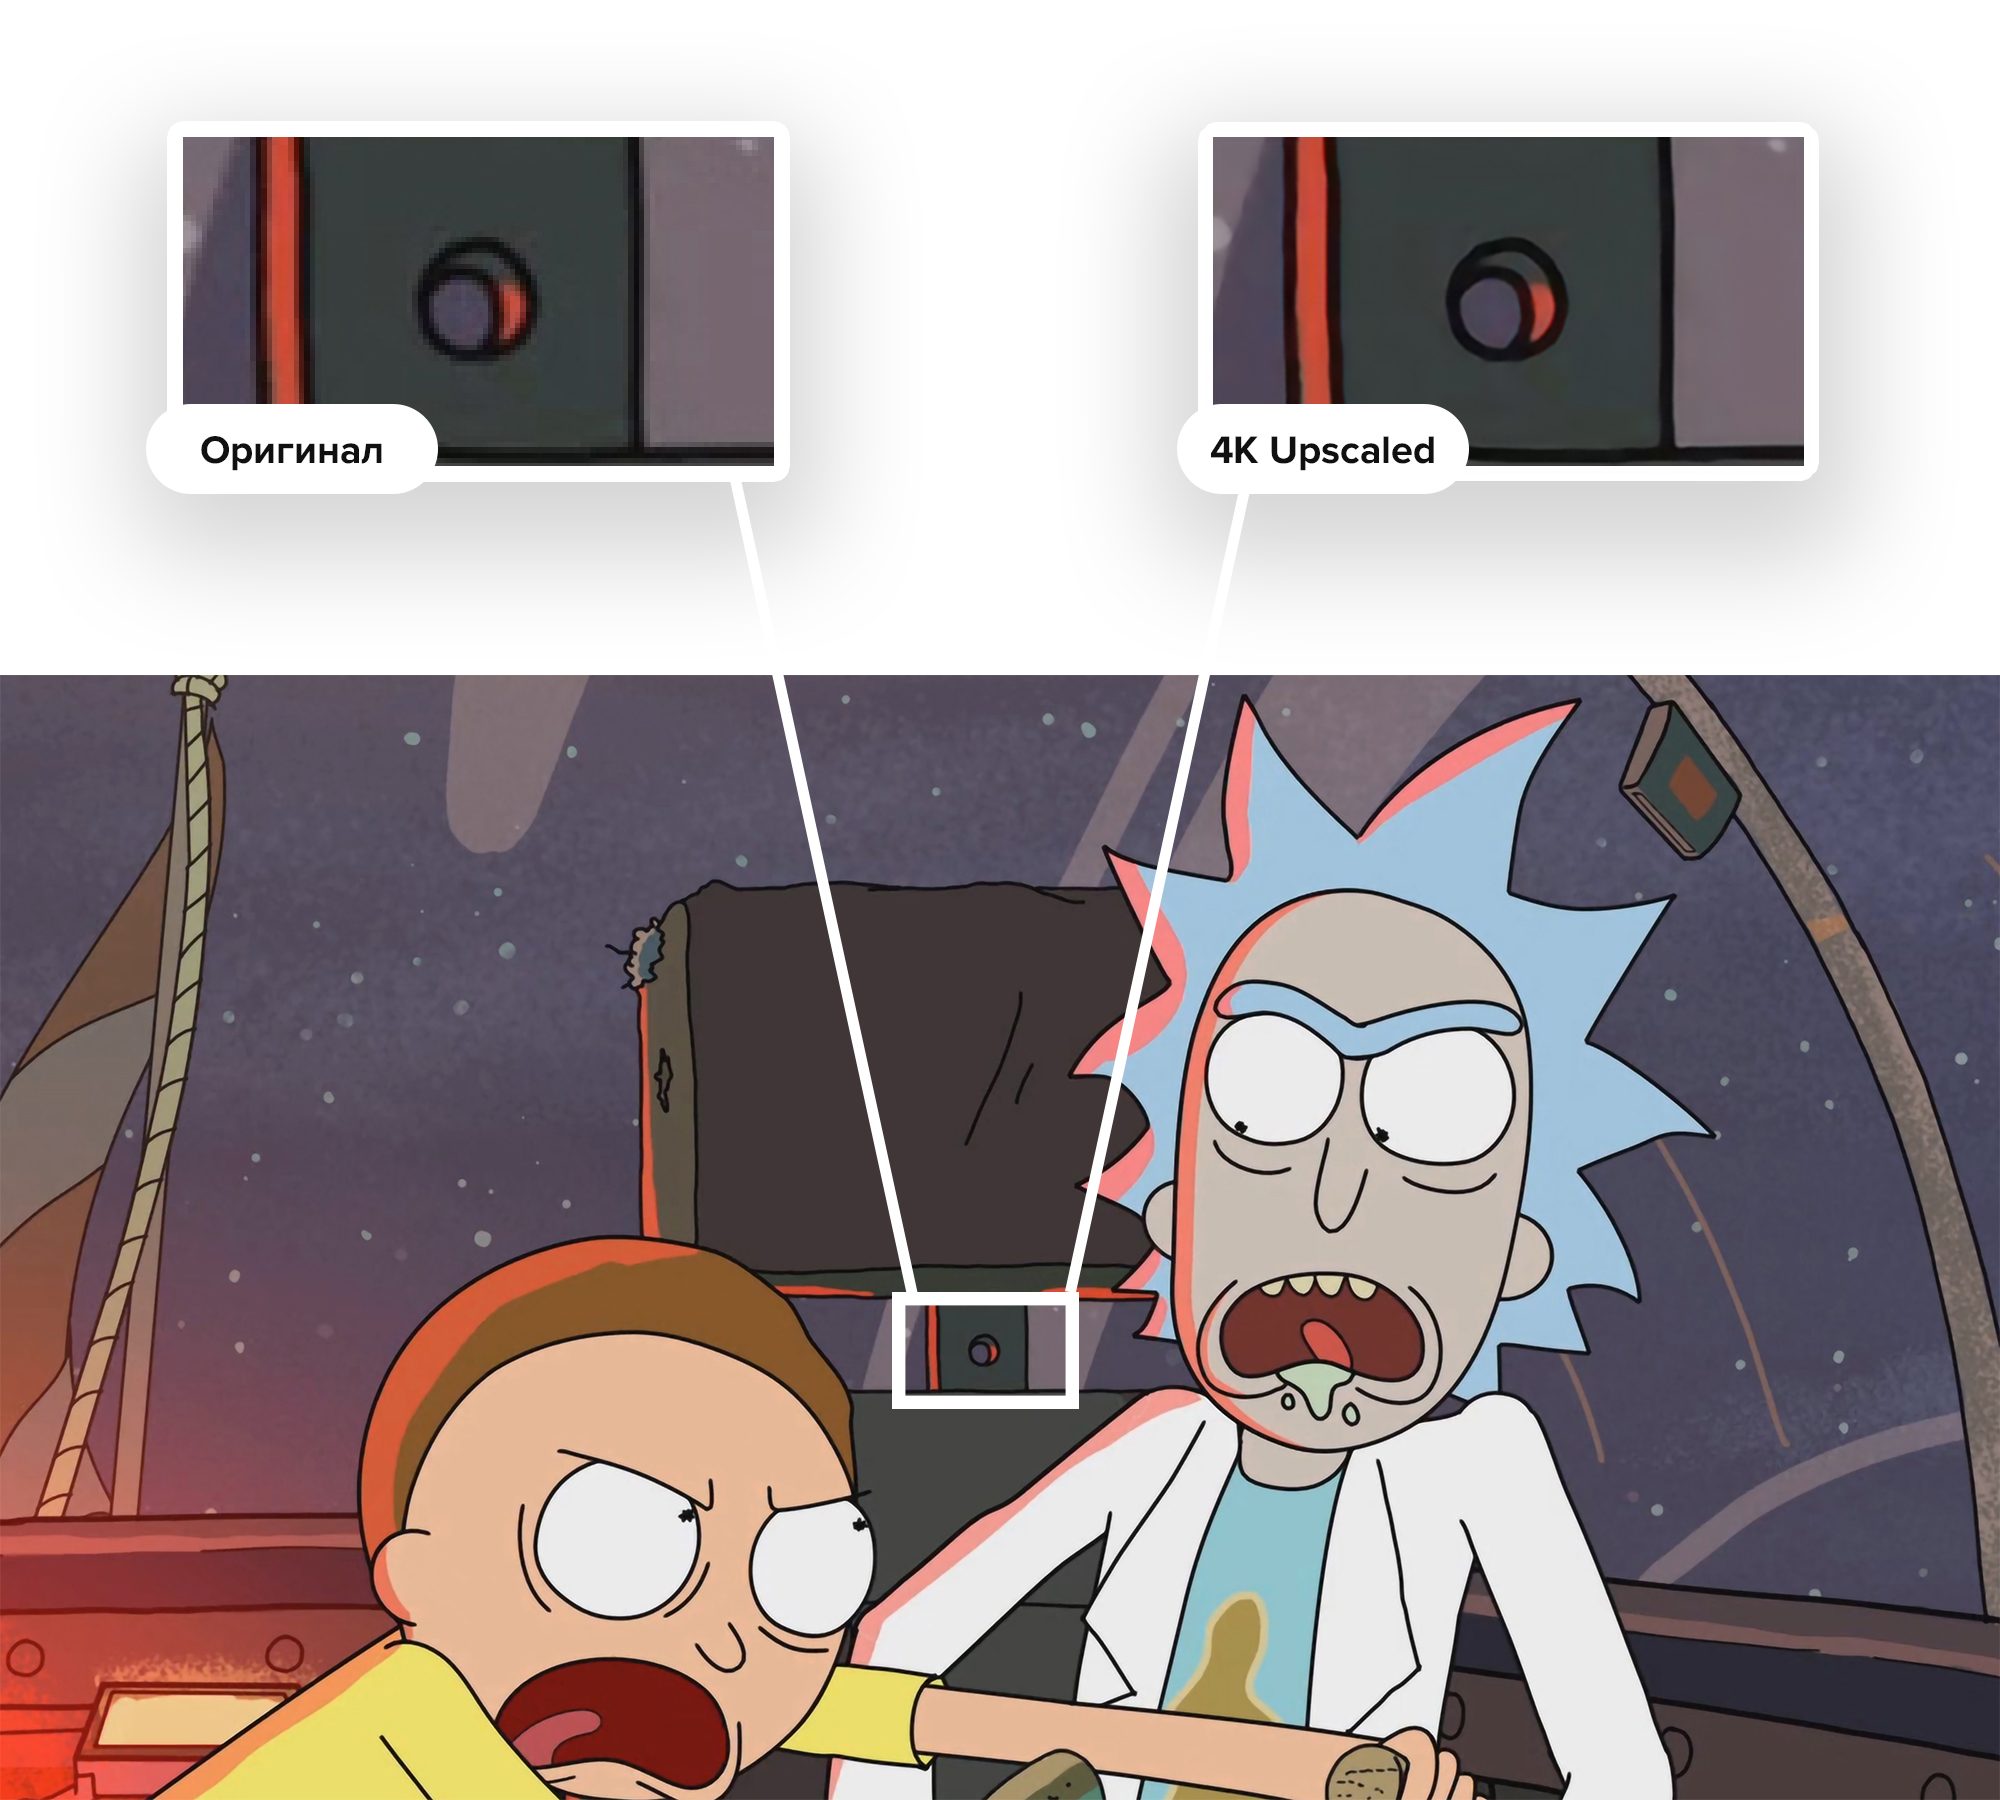
The result was pleasantly surprised! Perhaps only ahead of Let's Enhance. Here is the promised comparison (the original image is approximately 8 times closer):
- And now what, manually process each frame through photoshop?
Of course not! In Photoshop, there is an Actions tool that allows you to first write a sequence of actions, and then apply it to a whole folder with images. I will not paint the whole process, it is easily googled.
I left my laptop to process thirty one thousand frames for the night using the “make upscale twice and save” pattern. I woke up in the morning - everything is ready! Another folder with a bunch of frames, but now in 4K and with a size of 82 GB .
Ffmpeg will help us again.
We understand that we completely forgot about the audio track, and we get it from the original file:
And then we dump the sound in the folder with all 4K-frames. All our efforts were not in vain, we are ready for the final gluing together!
Be careful : after -r put exactly the number of frames that were in the original , otherwise the sound will not match the picture!
We got the first episode of “Rica and Morty” in 4K. Here is a sample . Of course, it was a bit lamer or something ... But in fact, this approach has a serious advantage. When working with other films or cartoons, we can comfortably, right through Photoshop, bring their frames to the ideal. We picked up the perfect sharpness and color balancing for a few frames from the film, then recorded our actions in Action, extended it to the entire film, and got an excellent result without any mathematical difficulties. This makes a wonderful upscale a little closer to the average user. The most complicated things, which people walked for centuries, are reproduced quickly and without special knowledge - what is it, if not the future?
I firmly decided that I wanted to see this animated series in 4K, although I absolutely could not write neural networks. However, a solution was found! It’s curious that we don’t even have to write code, we need only ~ 100 GB of disk space and some patience. And the result is a clear image in 4K, which looks more worthy than any interpolation.
Training
First, we must immediately understand that there is no technology in open access to increase video using neural networks. At all. But there are several projects that can increase photos. And if so, let's transcode our video into a huge pile of frames!
This can be done through Adobe Premiere Pro or another program for working with video, but I am sure that not everyone has it installed. So let's use the ffmpeg console utility . I took the first episode of the first season, and it started:
$ ffmpeg -i RiM01x01_4K.mp4 -q:v 1 IM/01x01_%05d.jpgWhy JPG, not PNG?
Справедливый вопрос. Дело в том, что 31 000 PNG, которые бы мы получили бы на выходе, весили умопомрачительно много. Настолько много, что можно незначительно пожертвовать качеством.
К слову, параметр -q:v 1 означает, что мы выводим JPG в максимально возможном качестве.
К слову, параметр -q:v 1 означает, что мы выводим JPG в максимально возможном качестве.
After waiting about 10 minutes, we will get a huge folder with images. She took me 26 GB.
It remains to process each of these frames!
How will we process?
I found three options that work more or less normally - this is the well-known Let's Enhance , waifu2x (trained on the anime) and Mail.ru Vision.
A little later, I will definitely show examples.
Mail.ru Vision and Let's Enhance processed the images quite well, but they, unfortunately, are not open source, that is, we will have to write the creators to the post office to process the 31,000 images and probably pay a lot. Therefore, I looked at the remaining waifu2x, but he did not please me with the qualitative result, there were noises and fuzziness. Still, "Rick and Morty" - this is not anime.
I was already desperate to endlessly flip through Github and thematic forums, but ... Salvation suddenly came! I found an option that works on the machine locally, processes the image in less than a second, and shows excellent quality. And you will not believe who once again came to our aid!
Adobe Photoshop!
And no, I will not tell a true story about how there you can make a good picture with a couple of filters. Adobe really trained the real neural network, which, when scaled inside the program, can draw an image!
First you need to open the original image, then go through the top menu in Image> Image Size ... and select resampling "Saving Parts 2.0".
The result was pleasantly surprised! Perhaps only ahead of Let's Enhance. Here is the promised comparison (the original image is approximately 8 times closer):
- And now what, manually process each frame through photoshop?
Of course not! In Photoshop, there is an Actions tool that allows you to first write a sequence of actions, and then apply it to a whole folder with images. I will not paint the whole process, it is easily googled.
I left my laptop to process thirty one thousand frames for the night using the “make upscale twice and save” pattern. I woke up in the morning - everything is ready! Another folder with a bunch of frames, but now in 4K and with a size of 82 GB .
Back in the video
Ffmpeg will help us again.
We understand that we completely forgot about the audio track, and we get it from the original file:
ffmpeg -i RiM01x01_1080p.mp4 -vn -ar 44100 -ac 2 -ab 320K -f mp3 sound.mp3And then we dump the sound in the folder with all 4K-frames. All our efforts were not in vain, we are ready for the final gluing together!
ffmpeg -i 01x01_%05d.jpg -i sn.mp3 -vcodec libx264 -preset veryslow -crf 10 -r 23.976 RiM_01x01_4K.mp4Be careful : after -r put exactly the number of frames that were in the original , otherwise the sound will not match the picture!
Done!
We got the first episode of “Rica and Morty” in 4K. Here is a sample . Of course, it was a bit lamer or something ... But in fact, this approach has a serious advantage. When working with other films or cartoons, we can comfortably, right through Photoshop, bring their frames to the ideal. We picked up the perfect sharpness and color balancing for a few frames from the film, then recorded our actions in Action, extended it to the entire film, and got an excellent result without any mathematical difficulties. This makes a wonderful upscale a little closer to the average user. The most complicated things, which people walked for centuries, are reproduced quickly and without special knowledge - what is it, if not the future?