The path to continuous integration. Selenium + TeamCity
Entry
Consider integrating Selenium IDE tests into a continuous integration process using TeamCity. I’ve seen it in many places when QA creates tests (at best, it often happens when clickers simply “click on a project” and make reports) and regularly run them, and as a rule, all this happens locally on his computer. As for me, it’s absolutely not a systematic approach, which (now in 2014) is solved by a million solutions to fully automate the process.
Well, since Continuous Integration is such a popular practice, why not introduce functional testing into the process of continuous integration, make life easier for testers and raise the level of quality of the product as a whole.
What do we want and what do we want
What is?
- CI server (TeamCity) for building and deploying projects
- QA with a bunch of tests created in Selenium IDE
- Enthusiasm
What do i need?
- Add Selenium IDE tests to the continuous integration process
How to install, configure and make the first build configurations in the vast more than necessary, because I will not describe, and it's not about that.
I ask for cat.
Preparation and configuration of agent build
As the build agent’s beat, a Windows machine was installed, on which TeamCity Agent is installed and picked up in the TeamCity server.
We take the following steps to configure among for execution:
All manipulations will occur in "C: \ Selenium", therefore we create the directory of the same name there.
On this machine, the selenium server standalone should be raised, which for convenience would be good to install in Windows as a service, since manual calling is not entirely comme il faut. You can do this using the nssm utility (“Non-Sucking Service Manager”).
Download, unpack and put in "C: \ Selenium".
Download selenium-server-standalone and put it there (the latter at the time of writing can be downloaded from here ).
Install Selenium Server as a Service
C:\Selenium\nssm-2.16\win64\nssm.exe install Selenium-Server "C:\Program Files (x86)\Java\jre7\bin\java.exe" "-jar C:\Selenium\selenium-server-standalone-2.42.2.jar"
We use NUnit as the “executor” of the build step (we will export the tests from Selenium IDE to .cs and then compile them to the dll libraries), so we also install the .NET Framework 4 on the machine (if not, you can get it from here ).
After installation, look for the path to csc.exe, which lies in
"C:\Windows\Microsoft.NET\Framework\v4.0.<еще пара циферок с версией>"
Install Mozilla Firefox as it will be used by the settings of the connection.
In order for csc to be able to compile the export tests, you need to download and put a certain number of additional libraries and put it in “C: \ Selenium” (the compilation process will occur automatically from this directory). Here then we can take them.
Download and unpack in "C: \ Selenium".
This completes the preparation of the agent’s build, you can proceed with the build configuration to run the tests.
Configuring TeamCity
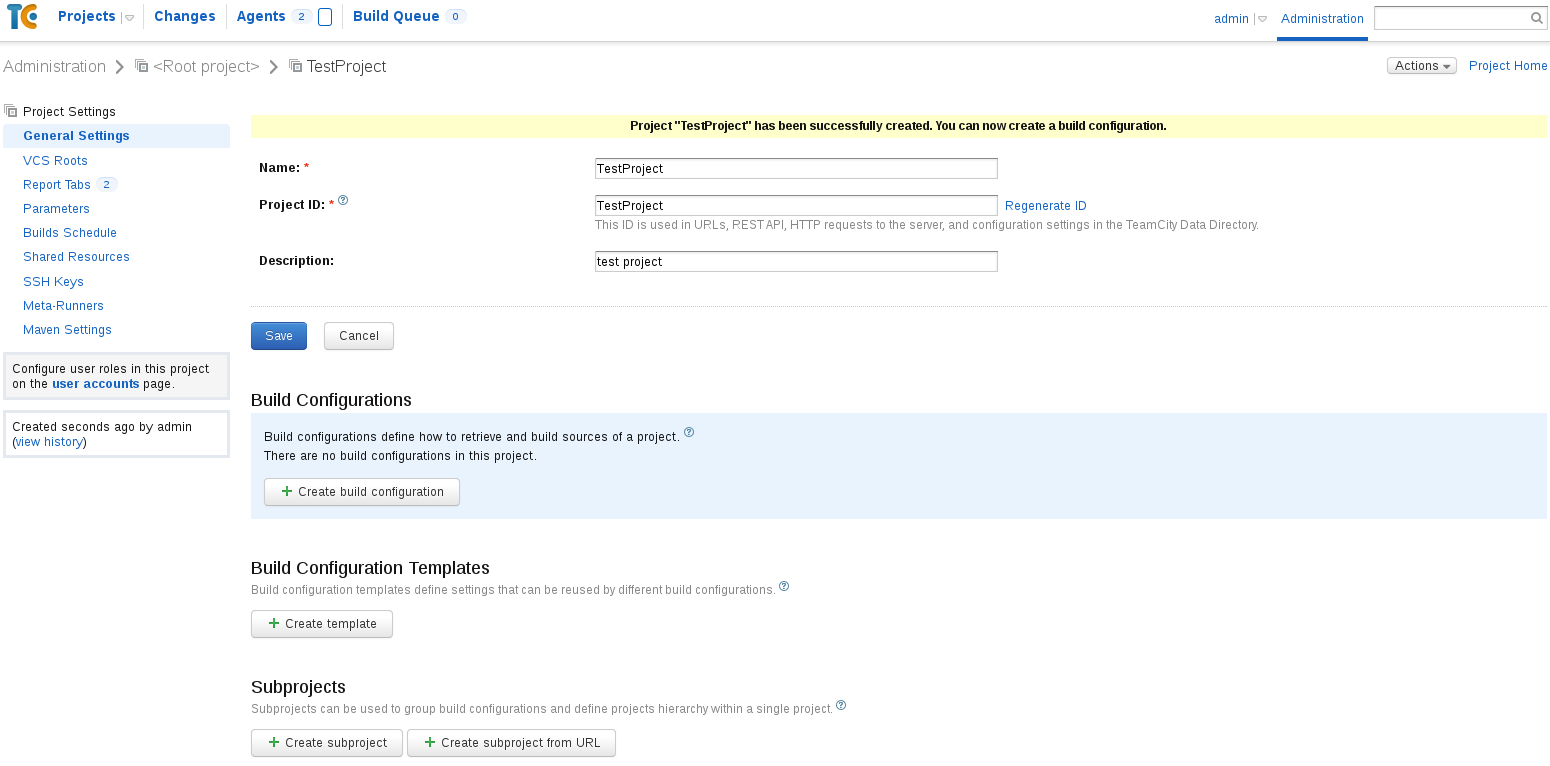
We go to the TimCity admin panel and click to create a project, enter the name, id, description and “Create”.
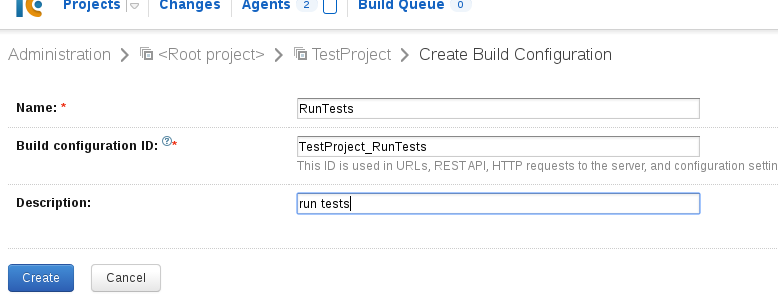
We go to the setup page of the new project, and click “Create Build Configuration”, fill out the familiar three fields and again the blue button.
After creating the configuration build, we get to the screen for selecting an existing repository, or as in our case, since there are no connected repositories, creating a new one. It’s good practice to “pick up” a repository with a live project (take tests from it and then compile and run it) in order to monitor changes in the repository and trigger code changes (continuous integration), but since I’m showing a “demo” here , then we will connect the “left” repository, and we won’t check it out. Our goal is to run tests and get a report.
We hook up any repository (as an option to open the repository with github / bitbucket), test the connection, and again “Create”:
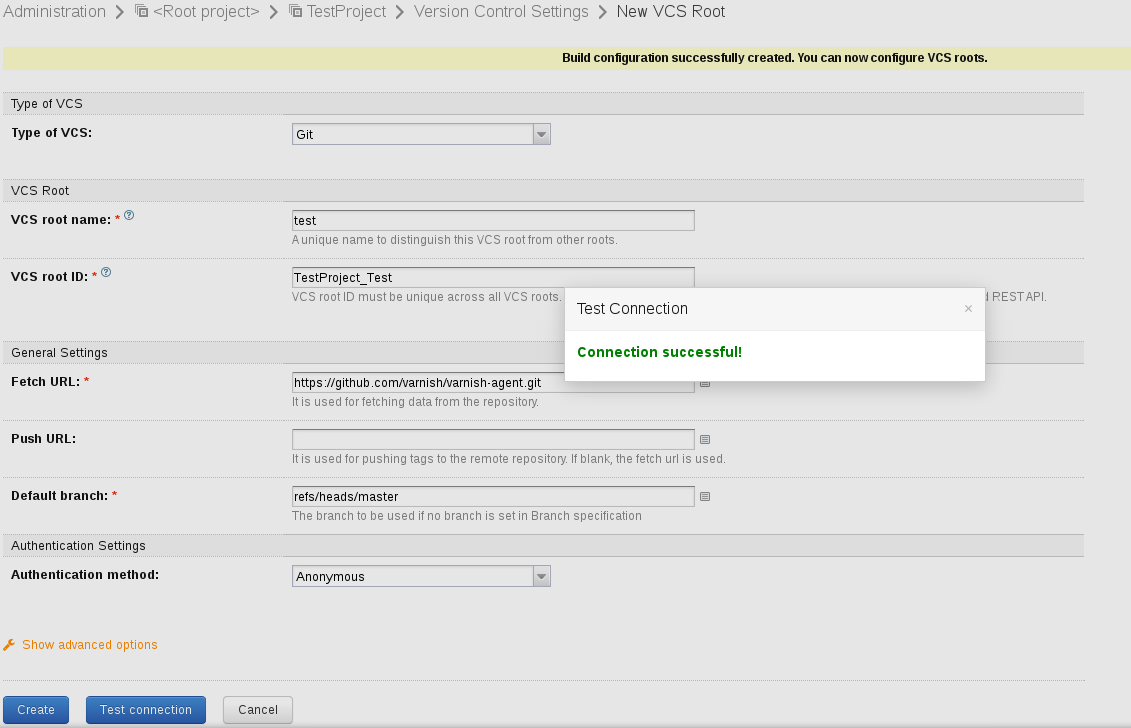
We get to the window with configuring the build repositories (I set the VCS checkout mode: as Do not checkout files automatically, so as not to monitor unnecessary repository):

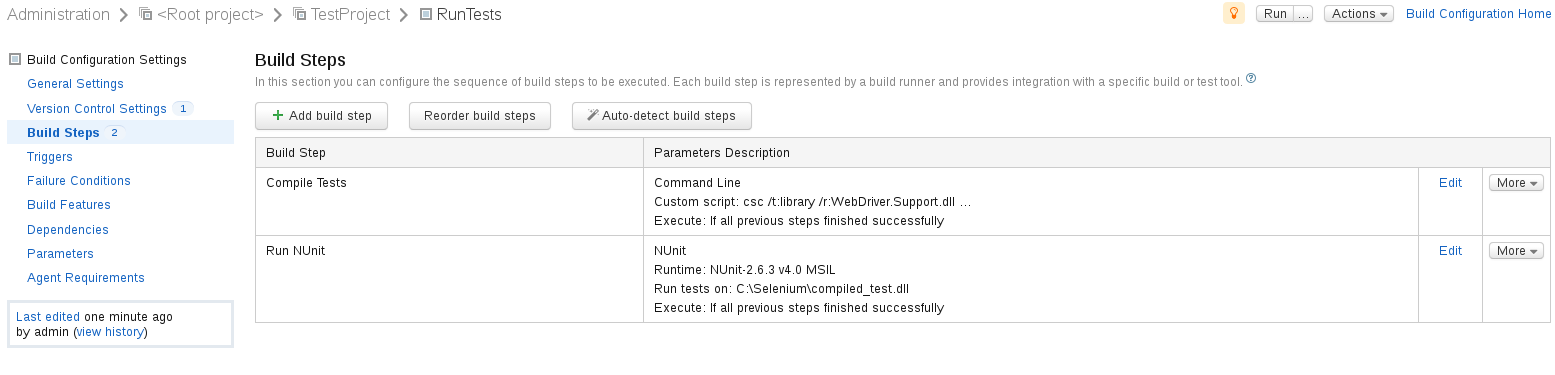
Getting to the fun part. Here I will take two steps, the first will start compiling tests from source (.cs) into libraries for NUnit, and the second will already run tests with NUnit.
Go to the next tab of the Build Steps build settings, and complete the first step with the Add build step button, in the Runner type list, look for the Command Line and select it. Enter the name of the step, insert the following into the script field:
csc /t:library /r:WebDriver.Support.dll /r:WebDriver.dll /r:ThoughtWorks.Selenium.Core.dll /r:Selenium.WebDriverBackedSelenium.dll /r:nunit.framework.dll /r:System.Data.dll /r:System.Data.Services.Client.dll /out:"C:\Selenium\compiled_test.dll" "C:\Selenium\reg.cs"
And click “Save”.
The script will launch the compiler, start compiling the exported test with the Selenium IDE, which lies along the path “C: \ Selenium \ reg.cs” and put the compiled library in the file “C: \ Selenium \ compiled_test.dll", which we in the next step we will pass to NUnit.

We add one more build step, only as runner we select NUnit already.
We fill in both the screenshot and the Run tests from: register the path along which the compiled test will put the first step, in our case “C: \ Selenium \ compiled_test.dll” - and save it.
As a result, we get the following:
Congratulations, the minimum configuration is completed, it remains only to write the first test and run its execution.
Create the first test
We ask QA to stick a simple test in Selenium IDE and export it to "C # / NUnit / Remote Control".

The only thing that needed to be fixed was the settings for connecting to the web browser.
I give an example of a test.
using System;
using System.Text;
using System.Text.RegularExpressions;
using System.Threading;
using NUnit.Framework;
using OpenQA.Selenium;
using OpenQA.Selenium.Firefox;
using Selenium;
namespace SeleniumTests
{
	[TestFixture]
	public class open_page
	{
		private IWebDriver driver;
		private ISelenium selenium;
		private StringBuilder verificationErrors;
		[SetUp]
		public void SetupTest()
		{
			verificationErrors = new StringBuilder();
			//driver = new FirefoxDriver(); - что подсунул сгенерированный тест
			driver = new FirefoxDriver(new FirefoxBinary(@"C:\Program Files (x86)\Mozilla Firefox\firefox.exe"), new FirefoxProfile(), TimeSpan.FromMinutes(10)); // прохардкожений путь к существующему firefox
			selenium = new WebDriverBackedSelenium(driver,  "http://habrahabr.ru/");
			selenium.Start();
		}
		[TearDown]
		public void TeardownTest()
		{
			try
			{
				driver.Close();
			}
			catch (Exception)
			{
				// Ignore errors if unable to close the browser
			}
			Assert.AreEqual(string.Empty, verificationErrors.ToString());
		}
		[Test]
		public void TheOpen_pageTest()
		{
			selenium.Open("/");
			selenium.Click("link=О сайте");
			selenium.WaitForPageToLoad("30000");
		}
	}
}
We look at the result
We go to TimCity, click Run opposite our build, wait for the test to complete, and enjoy the result. Build green, 1 test passed.

PS As I mentioned above, we write tests, put them in the project repository, trigger the project assembly for each commit, after the build we take the tests, compile and run and, if successful, make a post comit hook push to the repository and possibly even deploy to the staging environment. And all this is completely automatic.