How we stopped being afraid of Ogre and started making a game on it
How to make mistakes. 2011
As the name implies, back in 2011, we made the third mistake, choosing Ogre3D as the basis for the game engine. The third, because the first mistake was the decision to make the game, and the second was to make it on your own engine. Fortunately, these were the very mistakes with which the fascinating story begins. This is an adventure in which we have covered almost the entire path of development of game engines, as the embryo goes through all stages of evolution.
Of course, like all novice developers, we had little idea of what and why we were going to do. We were driven by the desire to tell our story, create our own fictional world, our own universe, and in the wake of the popularity of MMOs, the natural urge was to make our MMO with blackjack and everything due. The call came in 2010, and by 2011 the first version of the dzdok was ready. The earth was formless and empty, and darkness was above the abyss, and the Spirit of Fallout hovered over us.

We went through trial and error, collecting along the way all the jambs and rakes. Like most projects, we started with the simplest. In terms of graphics (and I will talk only about the graphic part), the first version of the engine allowed using only a diffuse map and stencil shadows.

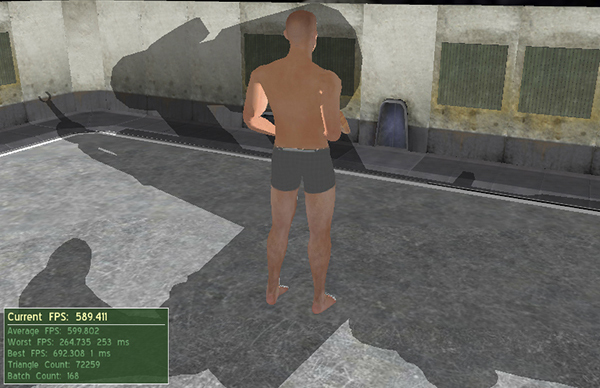
2011 One of the first screenshots
In terms of technology, in terms of graphics, we then strongly focused on games like Torchlight. But the soul demanded more, because in parallel with the development of the graphic part of the engine there was an artistic search.
By the fall of 2012, in terms of graphics, we had grown to using normal and specular maps. The influence of DOOM 3 was strongly on the fragile minds of novice developers.

2012 To DOOM 3 as to Mars.
How to choose between a pipe and a jug. 2013
In the winter of 2013, the team grew up as a beautiful three-dimensional and charming graphics programmer. The fantasies of a leading artist found a fulcrum, and the engine began to grow with graphic innovations. There was a texture of glossiness (it’s also a map of the power factor of a specular, it’s also glossiness, it’s also shininess), cascading texture shadows, DoF (effect of depth of field), RIM-lighting and a bunch of glitches. During this period, communication problems of various specialists began to emerge especially clearly. The same things for developers with different backgrounds were called completely differently, and required repeated pronunciation.
Increasingly, hot battles began to be started about the development trajectory of the engine. Given the limited budget and time, I had to choose between programming the gameplay and the visual. So, RIM appeared as a compromise between the artist’s desire to see more explicit metal, the desire of the 3D artist to have a reflection for this, and the current capabilities of the engine. The issue of switching to a ready-made engine became more and more acute: Unity3D became more functional and popular, rumors began to appear about human licensing schemes for UDK.

Beginning of 2013 The picture has become a little more fun, but not by much.

The end of 2013 The picture has become even more fun.
How to run into trouble. 2013
In the fall of 2013 the first time we went on a kickstarter. Evidence of this sad experience flashed even on Habré. We covered the campaign during the first week, since it became obvious that "it will not take off." MMOs at this point began to annoy gamers, the next “clone of VoB” (by whom the game was not planned in any way, but failed to convince gamers of this) was of no interest to anyone. As a work on the bugs, it was decided that we are now doing an RPG single with cooperative passage.

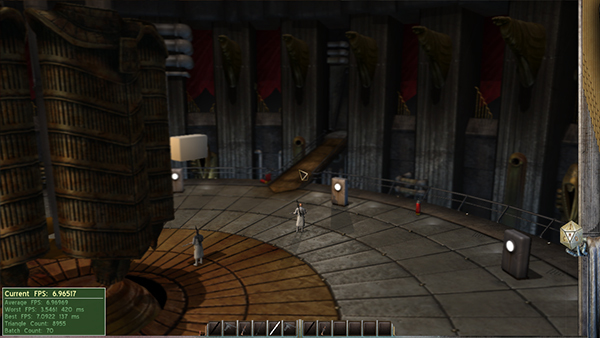
The end of 2013 Screenshot from presentation scene ..
How to find freedom. 2014
The fantasy of a leading artist required large and complex spaces. The realization of these fantasies and the leading three-dimensional man demanded the ability to operate not with five light sources, but with a much larger number of them.
The limitation of 5 (actually 8, but the FPS was already sinking on the fifth) of the light sources was due to the use of forward render (direct rendering)
Direct rendering is the standard rendering method that most engines use. Each object received by the video card goes through the full rendering path. In this case, the vertex and pixel shaders are considered for each light source separately, even for those pixels that may subsequently overlap with others. Each additional light source creates an additional iteration of calculations over the entire geometry. And with eight light sources in a scene of about 1 million visible triangles, about 9 million triangles are already drawn. This led to a very low FPS in any difficult locations ...
The Phantom of Cruises, with its hundreds of light bulbs, kept him awake at night. It was decided to switch to deferred render (deferred rendering or deferred lighting). With deferred rendering, a set of “final” images is formed without calculating the shadows: a color image, a depth image, and a normal image. Knowing the position of the light sources, the depth of the pixels and the normal, you can calculate the shading.
Compared to forward-rendering, we got a few goodies:
1) FPS increase due to the fact that the geometry is rendered only once
2) Ability to work with multiple light sources: adding a new light source has little effect on performance.
3) Acceleration of some types of post-processing, more efficient implementation of soft particles and the ability to add processing screen-space reflection. Soft particles, as well as post-processing effects (DOF, SSR, SSAO) require a depth and normal map. Direct rendering does not give these cards, and they have to be rendered separately. In deferred lighting, these cards are served to us on a silver platter.
Disadvantages:
1) Translucency. Translucent objects cannot be painted in deferred lighting, as one pixel of each texture (normal, diffuse, etc.) will need to contain information about several overlapping objects. There are many different ways to solve the problem, but most often one is used - all translucent objects are rendered separately using a direct render.
2) Aliasing. In deferred lighting, fsaa turns off and all triangles are drawn with pronounced aliasing. Various methods are used to solve this problem, for example FXAA
3) The increased memory bandwidth requirement of the video card.
We considered three options for implementing deferred lighting:
Option A:

The calculation of lighting is divided into two stages:
1. At the first stage, all the opaque geometry is drawn in 4 textures. (diffuse, specular, glossiness, normal, depth map and glow map)
-diffuse, specular, glossiness are taken directly from the geometry textures,
-normals are extracted from the normal map stretched to the geometry and converted to the coordinates of the camera space.
The luminescence card is obtained by adding up self-luminescence cards, RIM lighting, ambient diffuse lighting + low backlight from the camera.
2. Using the normal, depth, diffuse, specular and gloss maps, the diffuse and specular glow of each point for each light source is calculated and incrementally added to the glow map. In the same pass, every point on the screen is checked for shadow maps.
This is a standard version of deferred lighting, implemented in most games.
Option B:

The calculation of lighting is divided into 3 stages:
1. On the first, all the opaque geometry is rendered into 1 texture (normal, depth and gloss maps are rendered)
2. According to the normal, depth and gloss maps, two maps are rendered: diffuse and specular lighting for each light source.
3. At the third stage, the final image is rendered: all the opaque geometry is drawn again, but with the diffuse and specular, the illumination of each point is calculated by multiplying the diffuse lighting by the diffuse map + the product of the specular lighting by the specular map + Rome illumination + self-illumination map + light from cameras.
Advantages of this method:
1) Less bandwidth requirements for video memory of the video card.
2) Less computational operations for each light source, because part of the operations moves from the second stage to the third.
3) The third stage can already be done with fsaa on, which increases the quality of the picture.
The disadvantage of this method is once or twice all the geometry is rendered. However, the second time it is possible to render according to the finished z-buffer prepared in the first stage.
Option B:

The calculation of lighting is divided into 3 stages:
1. At the first stage, the entire opaque geometry is drawn into 4 textures (diffuse, specular, glossiness, normal, depth map and luminance map (as the sum of adding up self-luminescence maps, RIM lighting, ambient diffuse lighting + low light) from the side of the camera)).
2. According to the normal, depth and gloss maps, two maps are rendered: diffuse and specular lighting for each light source.
3. At the third stage, the final image is rendered: the illumination of each point is calculated by multiplying the diffuse illumination by the diffuse map + the product of the specular illumination by the specular map by the self-illumination map ...
This option is a mixture of the first two options. Compared with option A, we get a gain in speed due to the features of option B: instead of four samples from the texture, there is only one.
Now we have implemented the first version of the pending meeting. All channels that are used to render the final picture can be displayed in debug mode.

After rendering the final image, post-processing is done: here we create the effect of depth of field and color correction is done. At the same stage, reflections are drawn using SSR technology.
SSR (Screen Space Reflection) is the algorithm for creating realistic reflections in a scene using data that is already rendered on the screen. Briefly: a beam is launched from the camera to the intersection with the scene. Using the normal at the intersection, reflection is considered. A depth map is traced along this reflection ray until it reaches any geometry, the luminosity of the found point is taken as a result, and it is multiplied by the specular of the reflecting point and recorded in the luminosity of the reflecting point.
Now two Screen Space Reflections algorithms are implemented:
1) Tracing takes place in the camera coordinates - slow, but giving the correct picture.
2) Tracing occurs in texture coordinates - fast but gives an error at small angles.

2014 Presentation diorama with reflections included.

2014 Presentation diorama with reflections included.
We use our game and network engine. Graphics engine - Ogre3D, Physical - Bullet. Scripting: Lua, C # (Mono). During development, I had to heavily finish Ogre3D and debug its bundle with Blender ... We plan to contact Ogre developers and suggest including our improvements in the next Ogre builds.
Programming languages used: C ++, PHP, Lua, C #, Python, Java, Groovy, Cg, GLSL, HLSL.
