3D printer Wanhao Duplicator 4 or how to save on MakerBot Replicator
After reviewing MakerBot Replicator 5, we were loaned to review Chinese Wanhao Duplicator 4 .
The mood was skeptical and attitude as well as to all Chinese. Given that we have his parent from behind the MakerBot Replicator 2 hill .
Another one post Habré about this printer did not add optimism.
What was our surprise when he earned almost immediately! Why almost? Yes, because the era of 3D printers is just beginning and it all depends on the savvy of the user.
You are an engineer! We finished the printer with a file! That should be the tagline of this printer!

However, this situation is not unique to the Chinese.
The printer is truly Chinese.Chinese parts, Chinese assembly, even the name is Chinese. Although the tree is solid, but not a single screw was tightened to the end, and a couple were completely without nuts.

How does he compensate for this? Of course at a price! It costs TWO times cheaper!
It copies the MakerBot Replicator dual and not the 2x model, as is commonly believed. All the same menu, almost all the same mechanisms, if it is painted and the nameplate redone, it will be very difficult to distinguish for a non-specialist.
It has the same parameters and real characteristics are not behind the American.
What is right all in one?
Not! If you look closely, then the backlight does not change, there is no cooling of parts, the control menu is a little slow, cheaper linear bearings are used, plastic is cheaper, even the mechanism of pushing the plastic is slightly different, etc.

There are also good solutions!
They hid a huge power supply inside (it, by the way, in our printer buzzes unpleasantly for the first minute of launch), they provide a huge roll of tape (similar to masking tape) for better adhesion of parts, they provide additional glass for the platform, and even stationery clips give them , convenient buttons (huge respect from the owners of the makerbots),

included two screws for attaching plastic to the back wall (they fit all popular plastic coils), didn’t even skimp on the kit and exactly 2 kg of ABS and PLA plastic (at best, 750 g of plastic comes with the printer).

The first time we turned on, we performed simple operations for screwing the print head, calibrating the platform and refueling the plastic.
First file job! The black guide tubes for plastic did not fit into the grooves on the extruder. Had to sharpen the ends a bit.
Included is a 2GB USB flash drive. There are instructions in English, software (about it a little later), and a trial model for different plastics. Out of the box, we downloaded a trial model for PLA plastic.
Oh miracle, it printed without any problems!
I immediately wanted to find out how things are going with two extruders at once. We have 3dTouch and Cubex printers with two and three printheads respectively. And these printers implemented the print mode very badly. They only have to print with one extruder, go into a corner, heat up another, spit out a little plastic. And so every layer! Makebot did differently, firstly, he always has two extruders heated, secondly, he switches them not every layer but every two or three layers, thirdly, he spits the plastic onto an additional wall, which is very close.
We started to deal with software. After a difficult driver installation under Windows 8, we installed the program. Recommended software ReplicatorG, although it gives freedom of action, but it does so at the expense of convenience and speed. Wanhao cannot recommend for political reasons, but I can!
Use only MakerBot Desktop with it !
I’ll try to describe the advantages: quickly, beautifully,oh *** there are all the same settings, a million times easier and more convenient.
My advice for those who think that this program has too few parameters!
Create a new print profile and open it with a text editor. While our readers are studying all the parameters , we will learn how to use this programmake sure that the part does not detach from the platform at the corners .
You can update the printer firmware. All! Now the printer itself writes that it is a replicator!
For those who want tokill, speed up their already fast MakerBot there is Sailfish firmware . We are not so picky and we have enough speed, but there are people who installed this firmware on the Chinese. Install extremely carefully!
We downloaded the model for two plastics, and began printing directly from the computer. You can print from a USB flash drive, or you can print online from a computer. Just once, the program crashed and prevented the models from being printed, so we use a USB connection without problems. With any models, the result was always deplorable. PLA plastic melted in a furnace.

A similar result was waiting for us with ABS plastic. Only by playing around with the settings did we achieve acceptable printing.
The initial settings of MakerWare were not accurate! First, the checkbox to warm up the platform is constantly removed by itself. Always check! Second, the temperature of the ABS plastic needs 260 degrees.
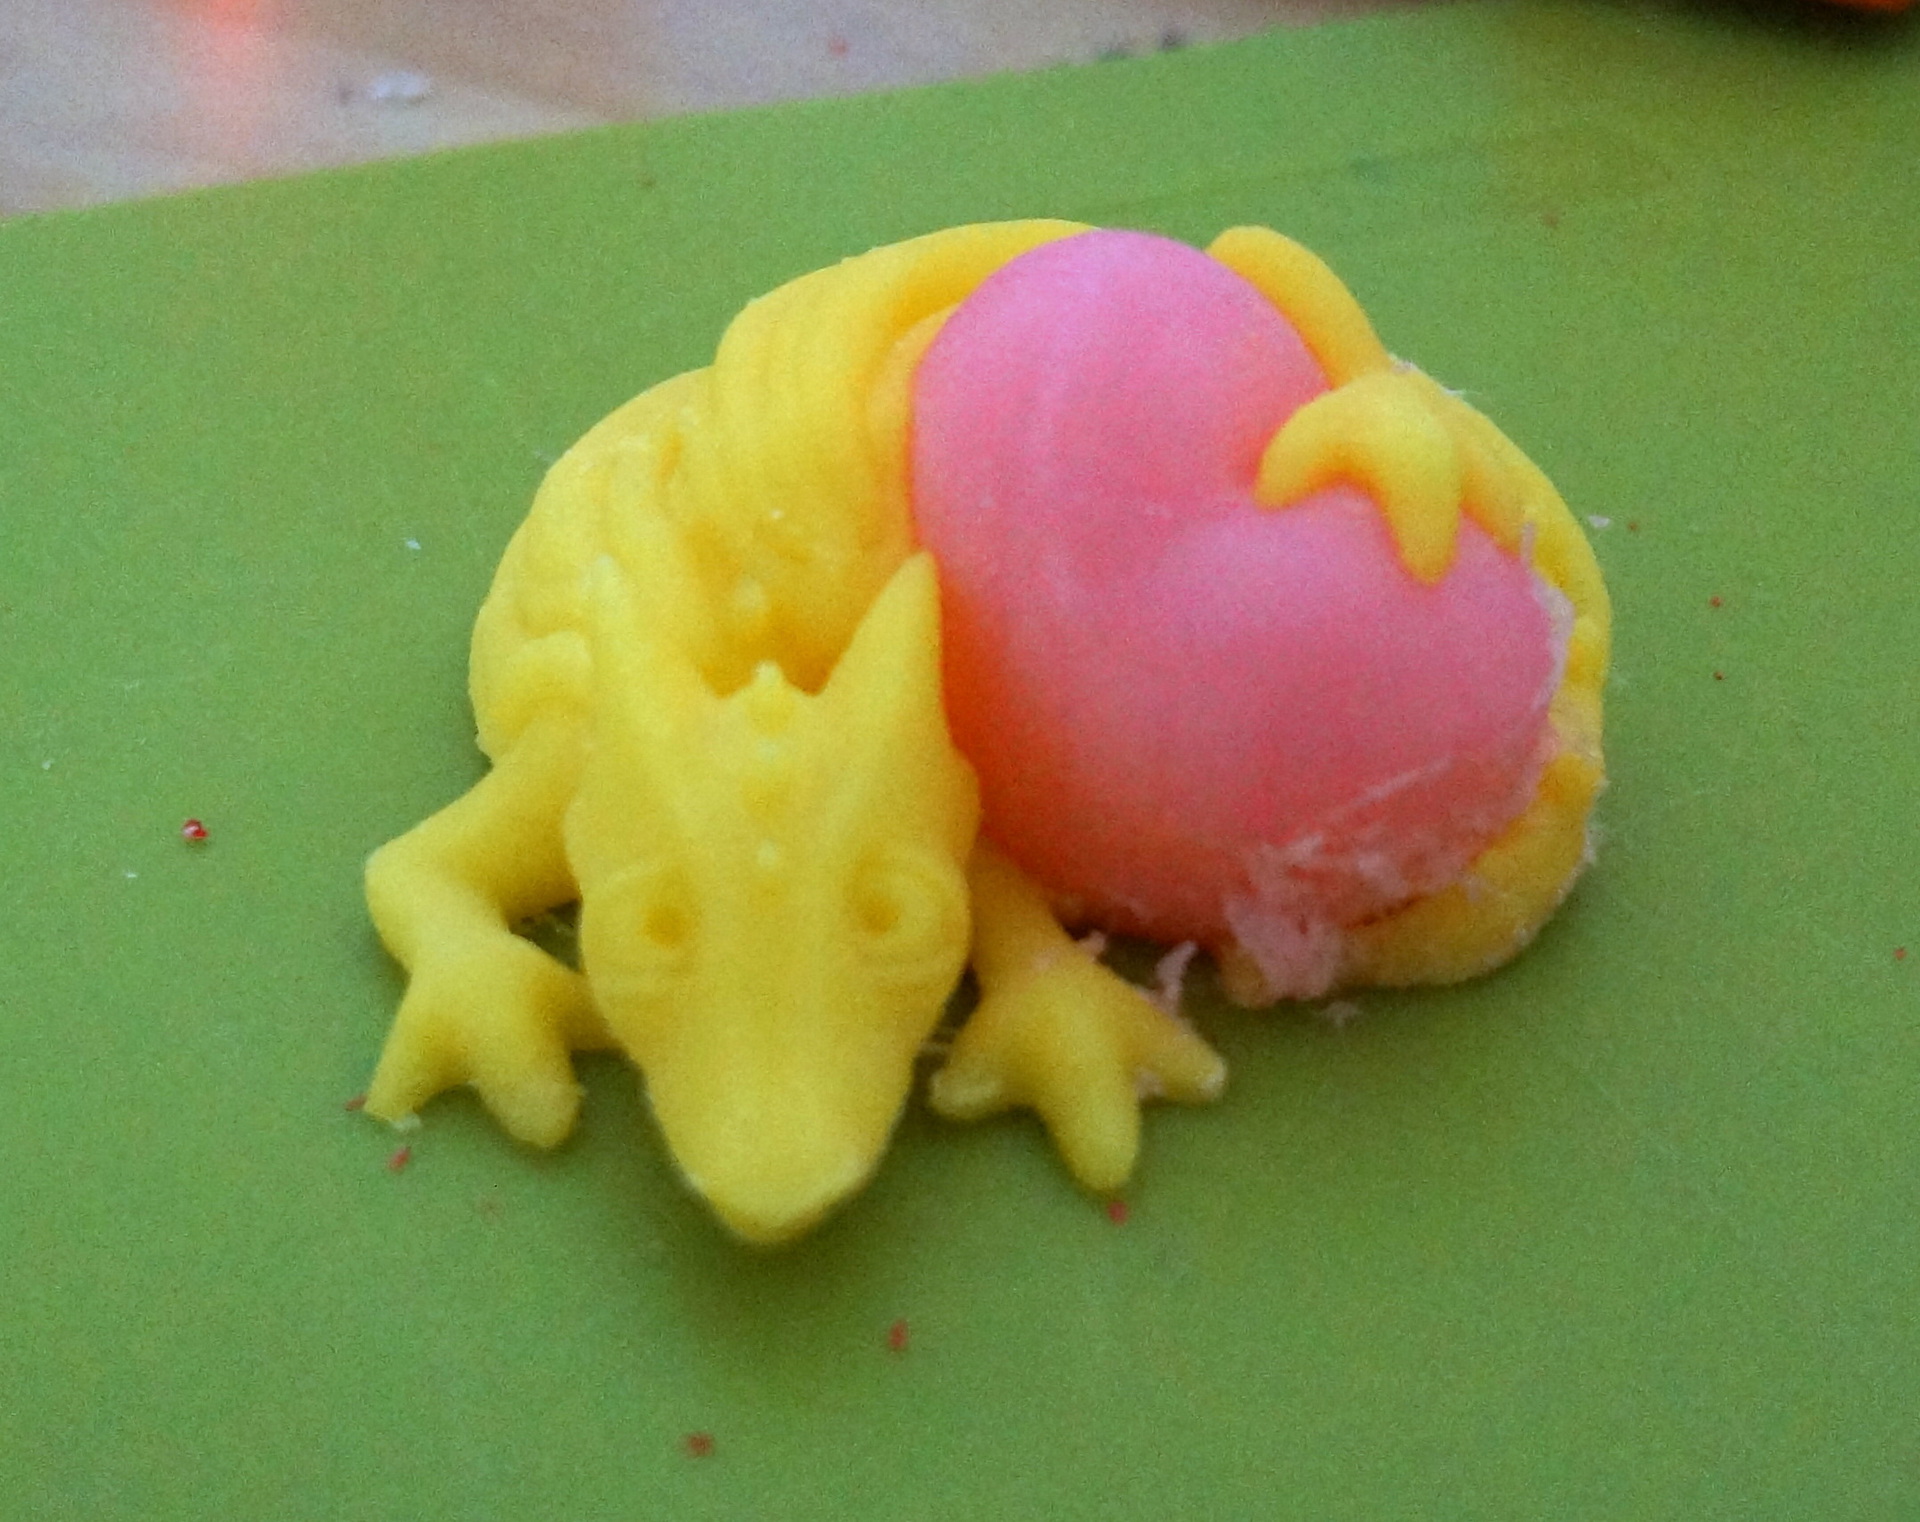
Here we have such a handsome man!
But bad luck, one plastic has shifted and fit onto another.
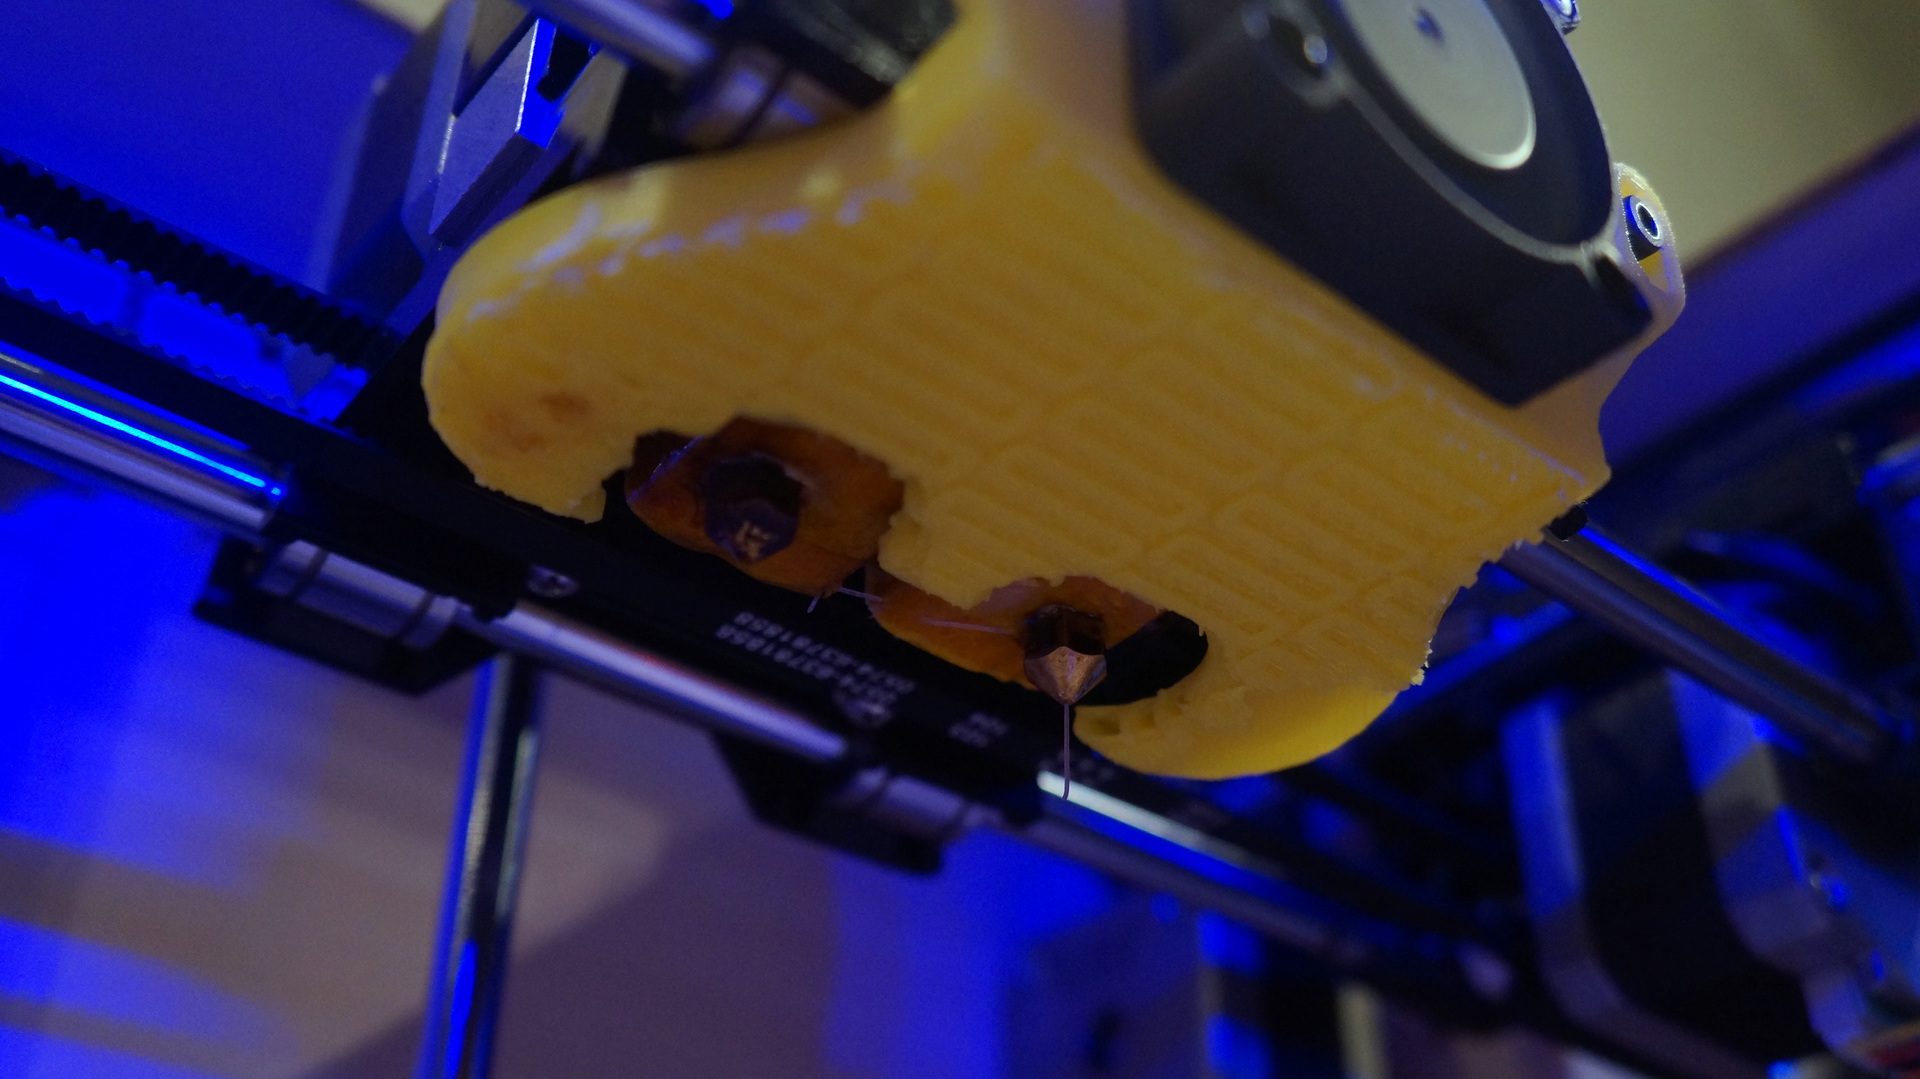
It's all about calibrating the extruder nozzles. There is a special item in the printer settings for this.
The printer makes the strips different plastic. It is necessary to choose strips that lie opposite each other.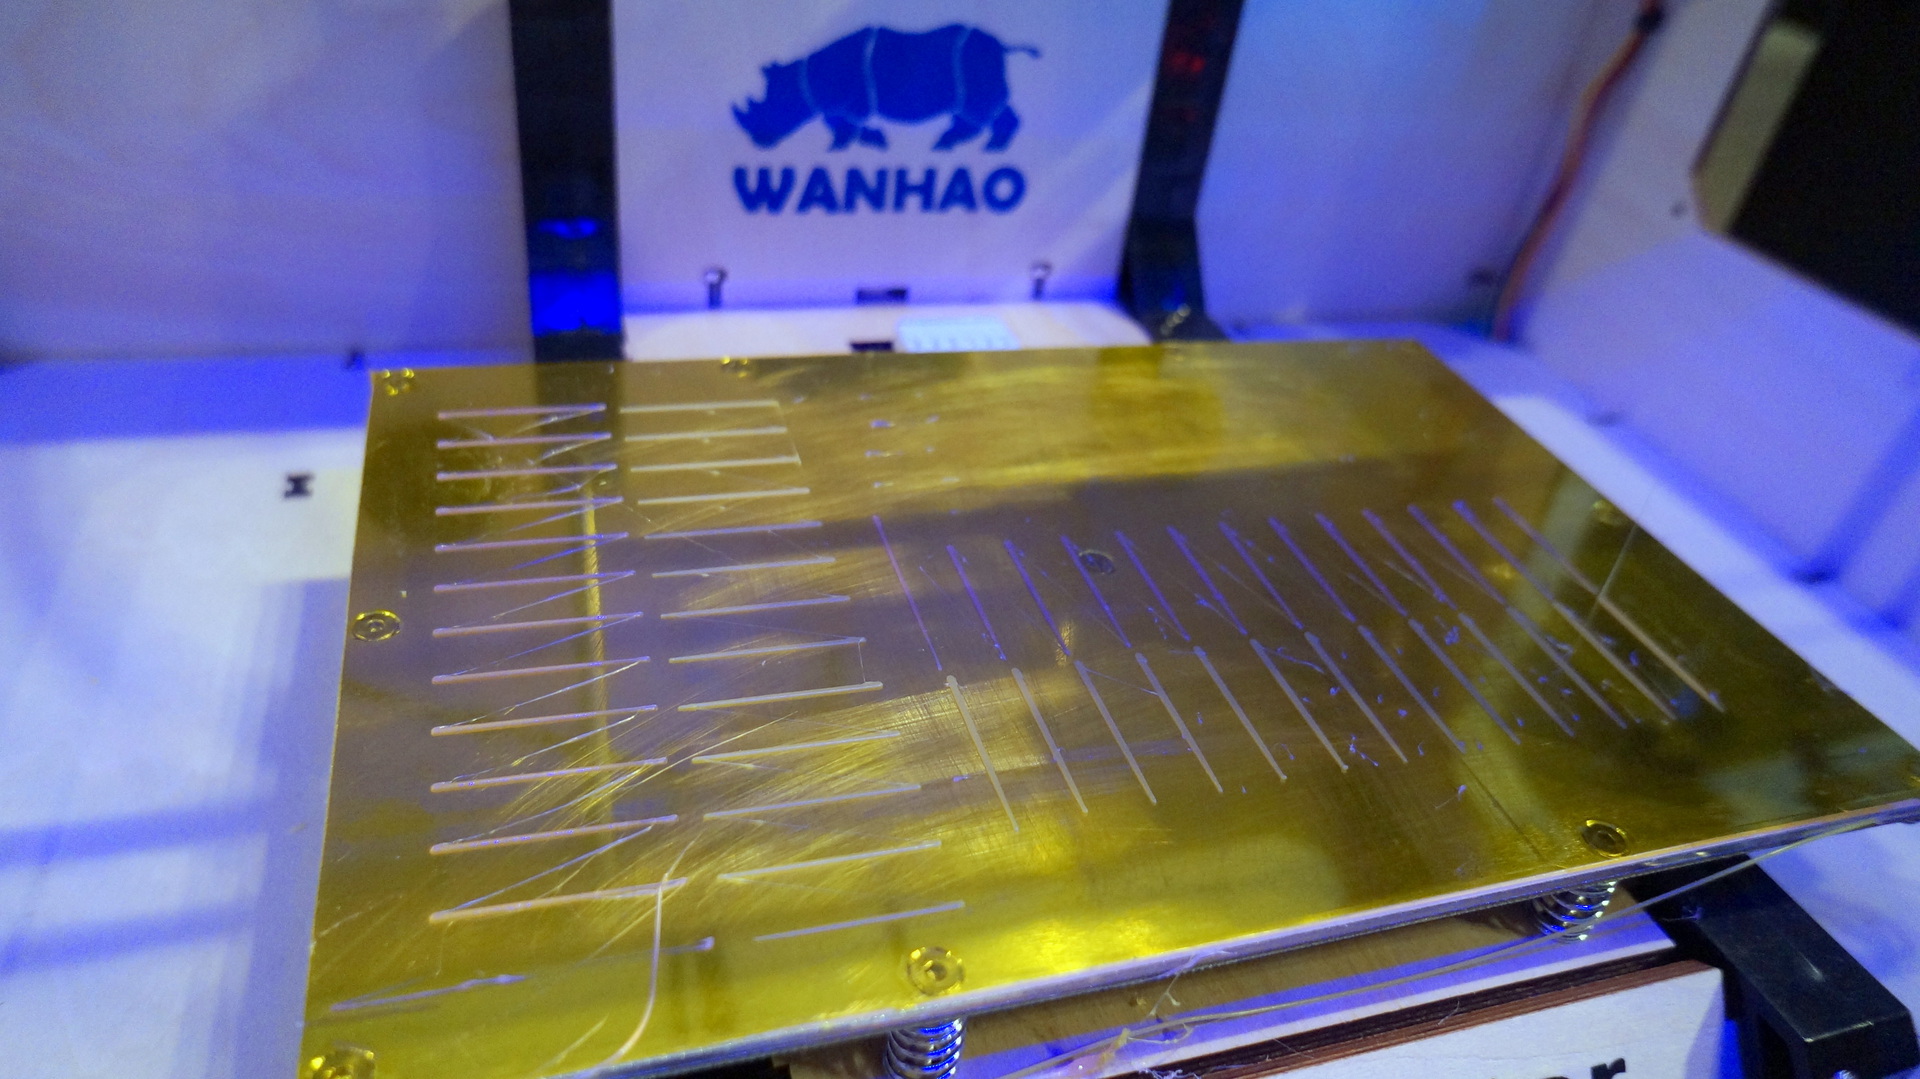
If you have a little knowledge of English, this process will go smoothly.
Despite the different settings for heating the platform, the parts either stuck or melted.
It was decided to stick the adhesive tape on the glass and print it on the glass. That was a good decision!
Place the glass immediately and stick the tape on it!
And may you be lucky not to run into the clothespins with an extruder.
After another week of printing various parts, it became clear that there was not enough cooling of the parts!
Details were defective. Even the trick to putting a cylinder model next to it so that the printer would go there and print did not save, and during this time the part managed to cool.
Only a fan helped direct the air directly under the nozzles!
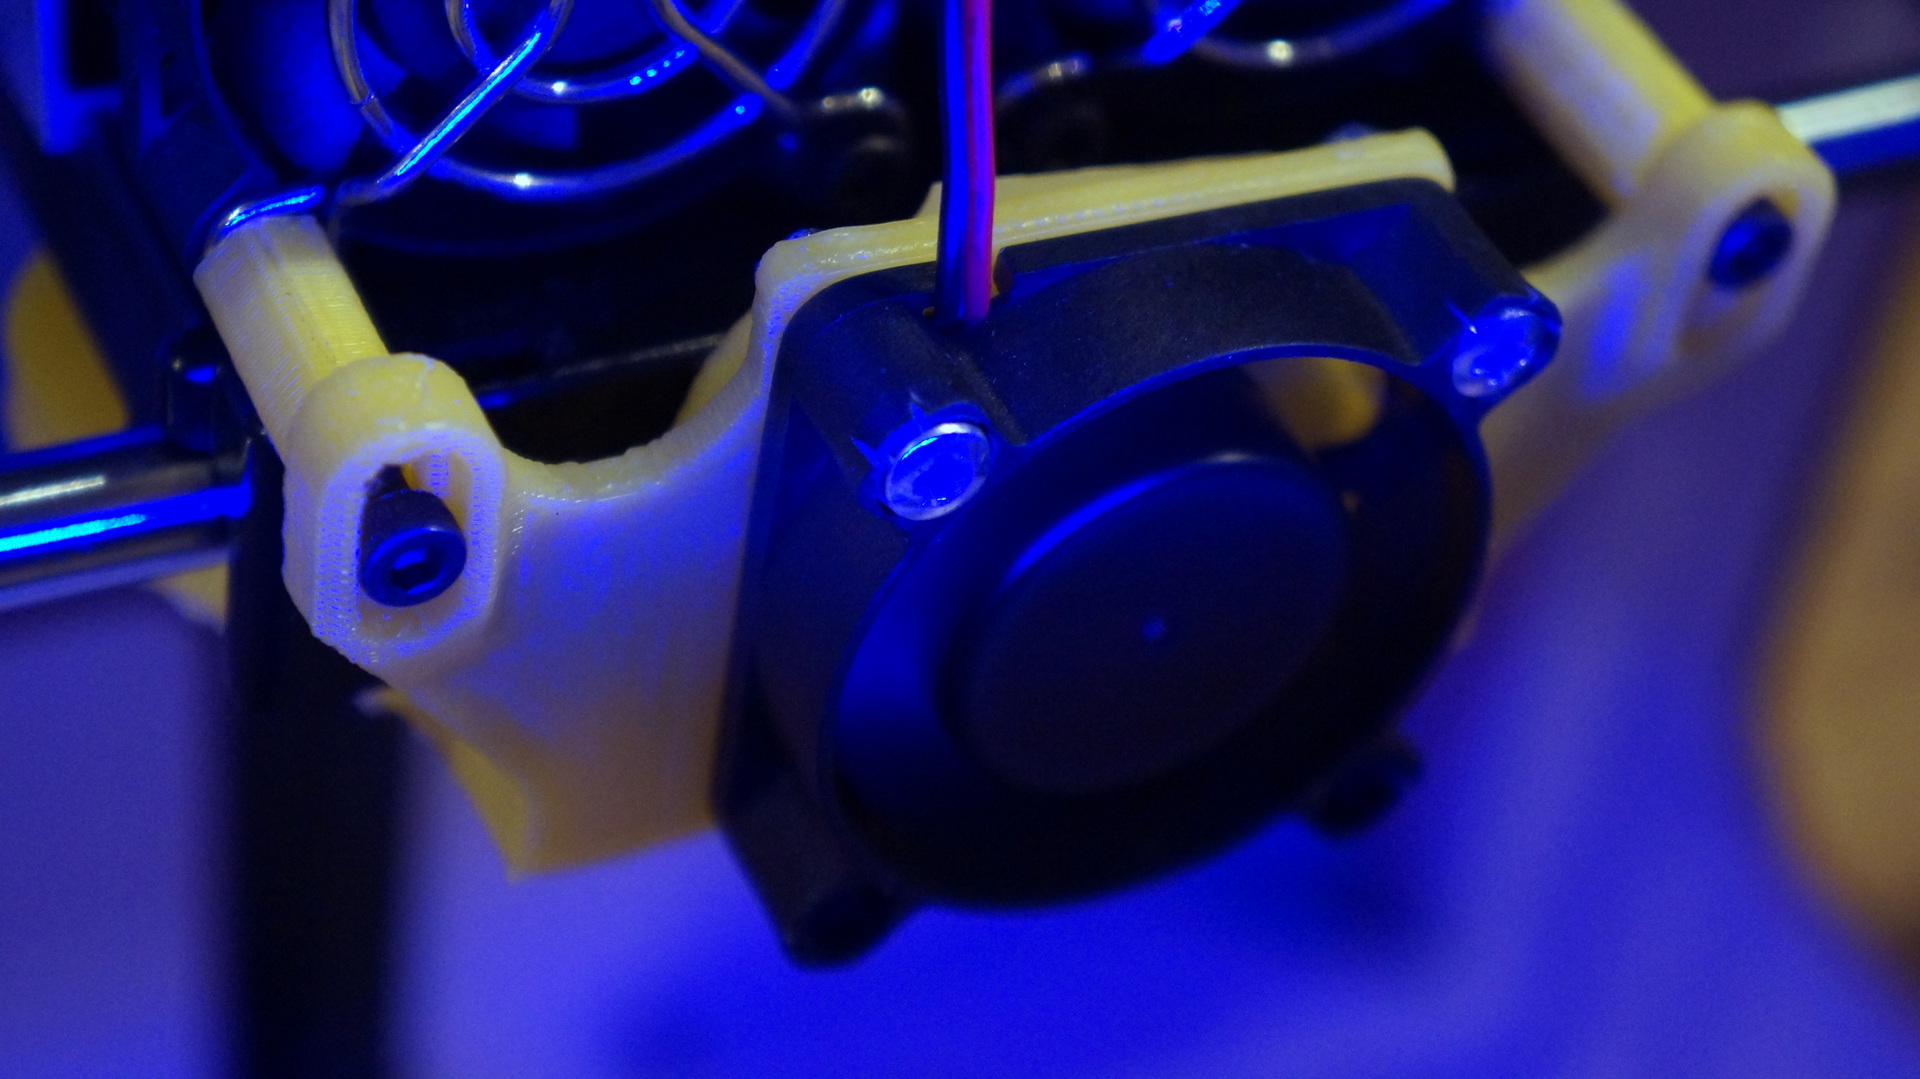
After that, the details began to turn out chic. The quality and speed are almost like that of an adult dad!
A little more I will share one trick and lay out a video of the printer.
A short video of the work of Wanhao duplicator 4 next to MakerBot Replicator 2.
m.youtube.com/watch?v=KMjJoT8zS0g
Finally, a little trick. Included with the CubeX printer is a “CubeX Magic Glue” that needs to be lubricated with a platform for better adhesion. Two small jars cost 19 euros. It is easier and more affordable to use children's silicate glue for 50 rubles! You can lubricate any printer platform, even over tapes. The adhesion of parts will increase, less marriage, and easily washed with water!
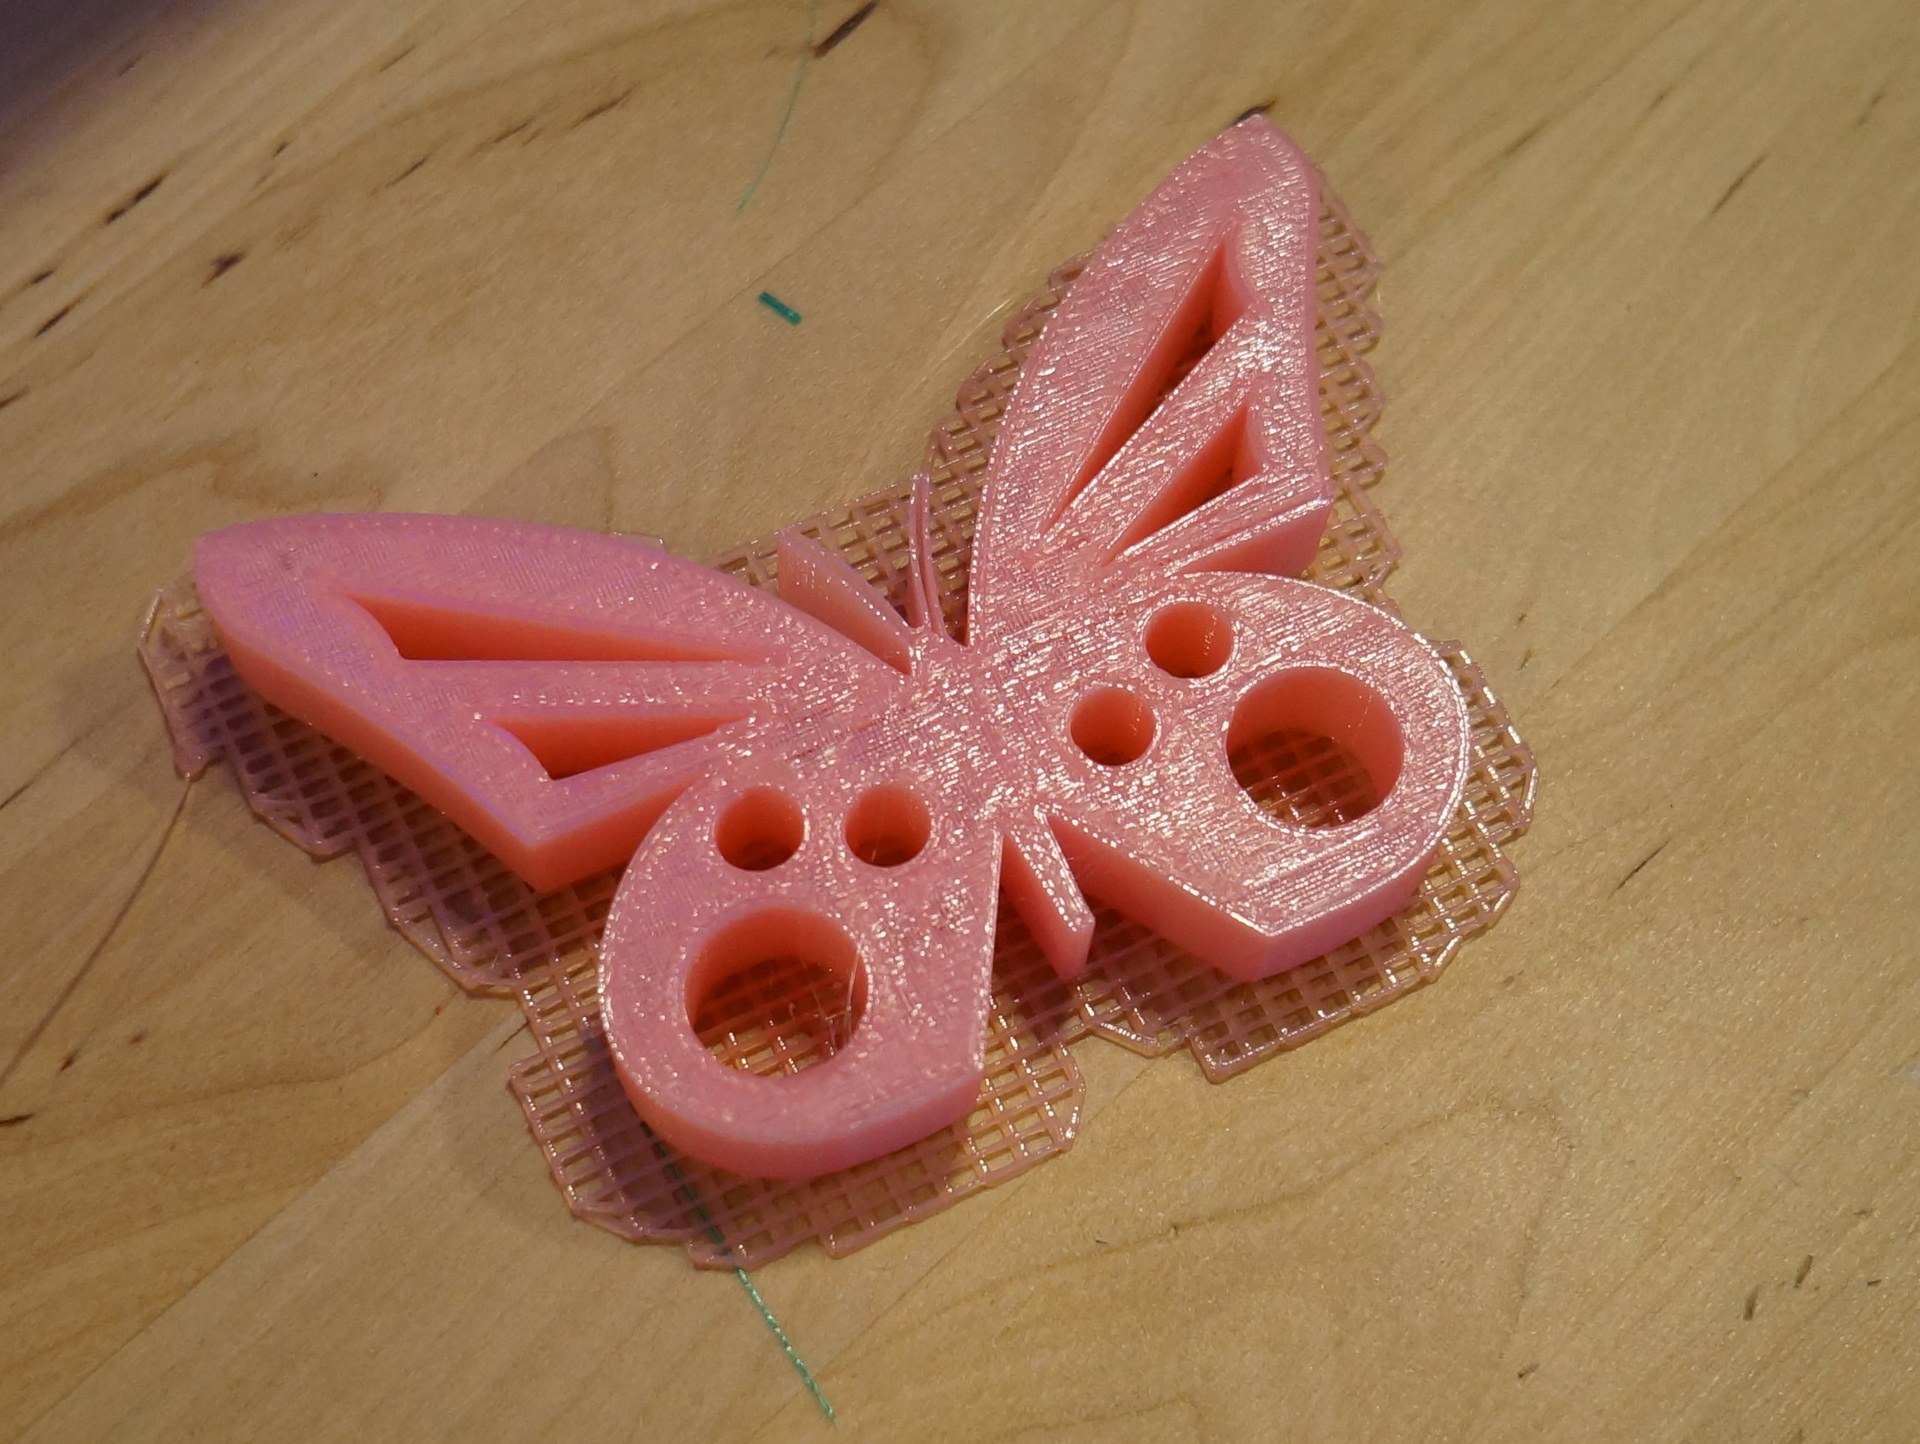
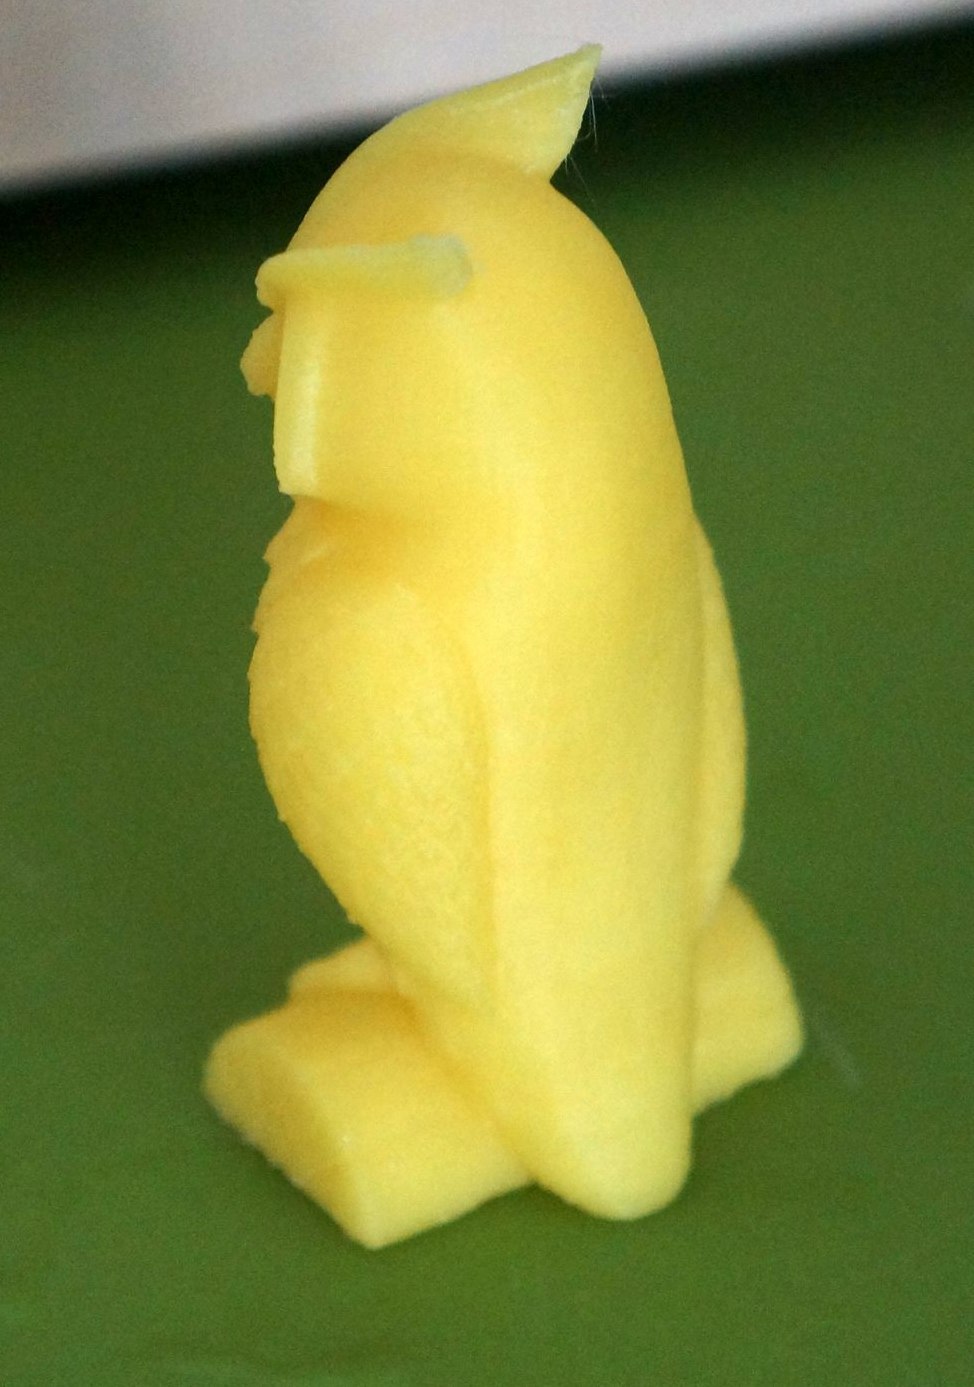
And finally, an example of printing. Fine quality, 0.1 layer, ABS, PLA substrate.
The photo is hard to see, but all the elements turned out fine, no comments, and the substrate very easily separated without effort.


Conclusion: a completely typical Chinese copy of a good device.
The mood was skeptical and attitude as well as to all Chinese. Given that we have his parent from behind the MakerBot Replicator 2 hill .
Another one post Habré about this printer did not add optimism.
What was our surprise when he earned almost immediately! Why almost? Yes, because the era of 3D printers is just beginning and it all depends on the savvy of the user.
You are an engineer! We finished the printer with a file! That should be the tagline of this printer!
However, this situation is not unique to the Chinese.
The printer is truly Chinese.Chinese parts, Chinese assembly, even the name is Chinese. Although the tree is solid, but not a single screw was tightened to the end, and a couple were completely without nuts.
How does he compensate for this? Of course at a price! It costs TWO times cheaper!
It copies the MakerBot Replicator dual and not the 2x model, as is commonly believed. All the same menu, almost all the same mechanisms, if it is painted and the nameplate redone, it will be very difficult to distinguish for a non-specialist.
It has the same parameters and real characteristics are not behind the American.
What is right all in one?
Not! If you look closely, then the backlight does not change, there is no cooling of parts, the control menu is a little slow, cheaper linear bearings are used, plastic is cheaper, even the mechanism of pushing the plastic is slightly different, etc.
There are also good solutions!
They hid a huge power supply inside (it, by the way, in our printer buzzes unpleasantly for the first minute of launch), they provide a huge roll of tape (similar to masking tape) for better adhesion of parts, they provide additional glass for the platform, and even stationery clips give them , convenient buttons (huge respect from the owners of the makerbots),
included two screws for attaching plastic to the back wall (they fit all popular plastic coils), didn’t even skimp on the kit and exactly 2 kg of ABS and PLA plastic (at best, 750 g of plastic comes with the printer).
The first time we turned on, we performed simple operations for screwing the print head, calibrating the platform and refueling the plastic.
First file job! The black guide tubes for plastic did not fit into the grooves on the extruder. Had to sharpen the ends a bit.
Included is a 2GB USB flash drive. There are instructions in English, software (about it a little later), and a trial model for different plastics. Out of the box, we downloaded a trial model for PLA plastic.
Oh miracle, it printed without any problems!
I immediately wanted to find out how things are going with two extruders at once. We have 3dTouch and Cubex printers with two and three printheads respectively. And these printers implemented the print mode very badly. They only have to print with one extruder, go into a corner, heat up another, spit out a little plastic. And so every layer! Makebot did differently, firstly, he always has two extruders heated, secondly, he switches them not every layer but every two or three layers, thirdly, he spits the plastic onto an additional wall, which is very close.
We started to deal with software. After a difficult driver installation under Windows 8, we installed the program. Recommended software ReplicatorG, although it gives freedom of action, but it does so at the expense of convenience and speed. Wanhao cannot recommend for political reasons, but I can!
Use only MakerBot Desktop with it !
I’ll try to describe the advantages: quickly, beautifully,
My advice for those who think that this program has too few parameters!
Create a new print profile and open it with a text editor. While our readers are studying all the parameters , we will learn how to use this programmake sure that the part does not detach from the platform at the corners .
You can update the printer firmware. All! Now the printer itself writes that it is a replicator!
For those who want to
We downloaded the model for two plastics, and began printing directly from the computer. You can print from a USB flash drive, or you can print online from a computer. Just once, the program crashed and prevented the models from being printed, so we use a USB connection without problems. With any models, the result was always deplorable. PLA plastic melted in a furnace.
A similar result was waiting for us with ABS plastic. Only by playing around with the settings did we achieve acceptable printing.
The initial settings of MakerWare were not accurate! First, the checkbox to warm up the platform is constantly removed by itself. Always check! Second, the temperature of the ABS plastic needs 260 degrees.
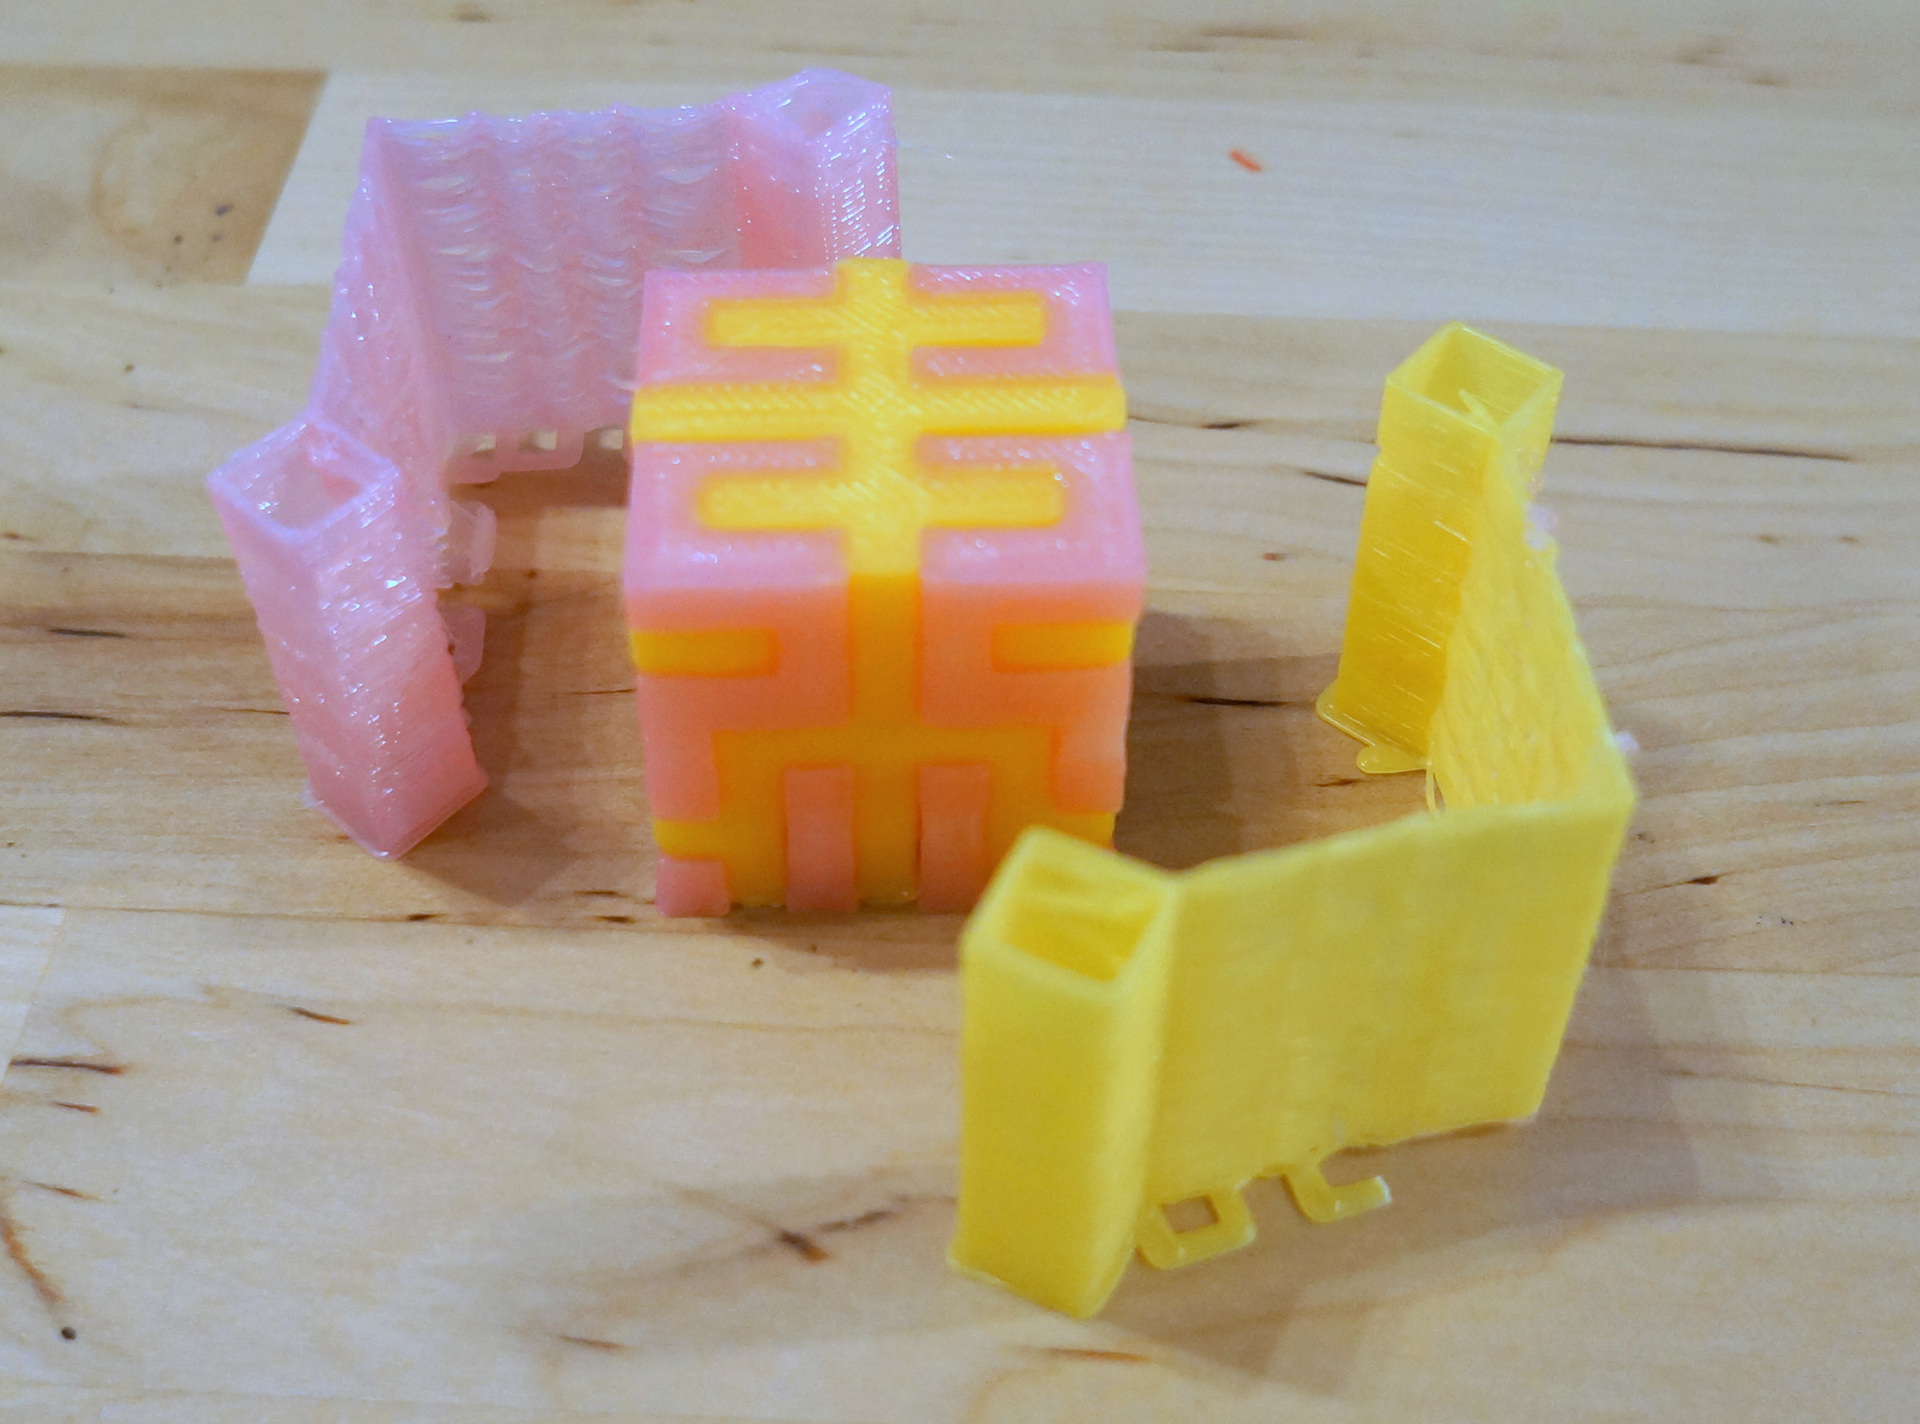
Here we have such a handsome man!
But bad luck, one plastic has shifted and fit onto another.
It's all about calibrating the extruder nozzles. There is a special item in the printer settings for this.
The printer makes the strips different plastic. It is necessary to choose strips that lie opposite each other.
If you have a little knowledge of English, this process will go smoothly.
Despite the different settings for heating the platform, the parts either stuck or melted.
It was decided to stick the adhesive tape on the glass and print it on the glass. That was a good decision!
Place the glass immediately and stick the tape on it!
And may you be lucky not to run into the clothespins with an extruder.
After another week of printing various parts, it became clear that there was not enough cooling of the parts!
Details were defective. Even the trick to putting a cylinder model next to it so that the printer would go there and print did not save, and during this time the part managed to cool.
Only a fan helped direct the air directly under the nozzles!
After that, the details began to turn out chic. The quality and speed are almost like that of an adult dad!
A little more I will share one trick and lay out a video of the printer.
A short video of the work of Wanhao duplicator 4 next to MakerBot Replicator 2.
m.youtube.com/watch?v=KMjJoT8zS0g
Finally, a little trick. Included with the CubeX printer is a “CubeX Magic Glue” that needs to be lubricated with a platform for better adhesion. Two small jars cost 19 euros. It is easier and more affordable to use children's silicate glue for 50 rubles! You can lubricate any printer platform, even over tapes. The adhesion of parts will increase, less marriage, and easily washed with water!
And finally, an example of printing. Fine quality, 0.1 layer, ABS, PLA substrate.
The photo is hard to see, but all the elements turned out fine, no comments, and the substrate very easily separated without effort.
Conclusion: a completely typical Chinese copy of a good device.