Remote Fedora / CentOS installation in headless mode without media and TFTP
What for?
In my case, I needed to transfer the home server from Ubuntu to Fedora and I was too lazy to carry it to the computer, connect it to the monitor, write the installation image to the USB flash drive. No less lazy was to raise the TFTP server and deal with PXE. The method is suitable in principle for some other distributions, but with Fedora and Centos it is a bit simpler, since the contents of the installation discs are accessible via HTTP. If you need to install any other distribution using the Anaconda installer, you can download its image, mount and copy the contents to a folder that can be accessed via FTP / HTTP. For example, this applies to RedHat and Oracle Linux.
Theory
Anaconda, knows how to network, and VNC. The source distribution does not matter at the same time, it may not even be Linux, it’s enough for us that the current OS uses GRUB (it doesn’t matter with GRUB Legacy or GRUB2, in the article I will give examples for both). We are required to create or modify an existing GRUB bootloader menu entry so that it passes parameters to the installer that:
- set up the network
- will launch the VNC server
- indicate the location of our new distribution
- display installer in VNC session
Practice
The first thing we need to do is download the kernel and RAM disk files of the distribution we need.
wget http://dl.fedoraproject.org/pub/fedora/linux/releases/20/Fedora/x86_64/os/isolinux/vmlinuz -O /boot/vmlinuz_remote
wget http://dl.fedoraproject.org/pub/fedora/linux/releases/20/Fedora/x86_64/os/isolinux/initrd.img -O /boot/initrd_remote.img
Next we need to configure GRUB. If you have GRUB Legacy installed, you just need to add the following item to the configuration file, usually /boot/grub/menu.lst
title Fedora Install
        root (hd0,0)
        kernel /vmlinuz_remote repo=http://dl.fedoraproject.org/pub/fedora/linux/releases/20/Fedora/x86_64/os/ vnc vncpassword=q1q1q1q1 ip=192.168.1.51 netmask=255.255.255.0 gateway=192.168.1.1 dns=192.168.1.1 noselinux headless xfs panic=60
        initrd /initrd_remote.img
        savedefault 0
If you are not loading from the first partition of the first disk, then the root (hd0,0) record must be changed accordingly.
If this configuration is the second one for us, then we execute
[root@localhost ~]# echo 'savedefault --default=1 --once' | grub --batch As a result, we will boot into this item once and if something goes wrong, we will return back in a couple of minutes.
If you have GRUB2, then we add our item to /etc/grub.d/40_custom in accordance with the new syntax, not forgetting that the file should end with an empty line and the numbering of the sections has shifted by one - the first section is now 1, not 0.
menuentry "Fedora Install" {
        set root=(hd0,1)
        linux /boot/vmlinuz_remote repo=http://dl.fedoraproject.org/pub/fedora/linux/releases/19/Fedora/x86_64/os/ vnc vncpassword=q1q1q1q1 ip=192.168.1.51 netmask=255.255.255.0 gateway=192.168.1.1 nameserver=192.168.1.1 noselinux headless xfs panic=60
        initrd /boot/initrd_remote.img
We update the cfg file:
[user@localhost ~]$ sudo update-grub In order to boot into our menu only once in the previous example, you can use the command
sudo grub-reboot N
where N is the number of our record.
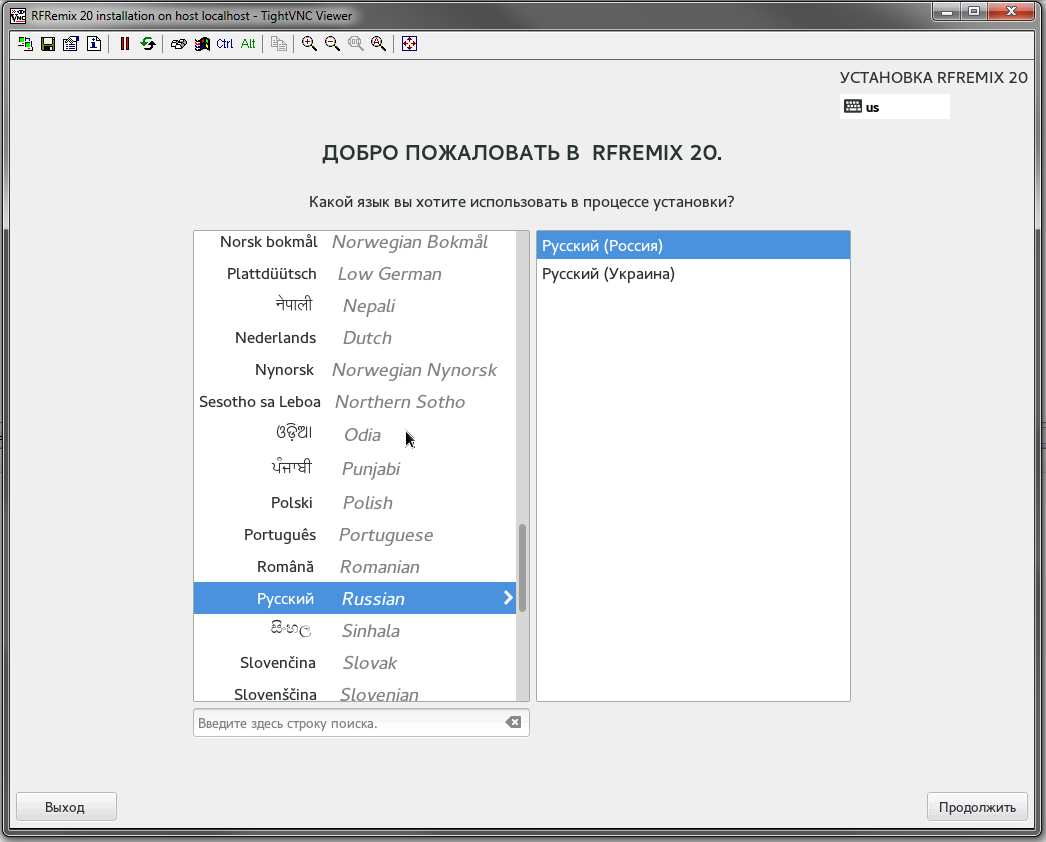
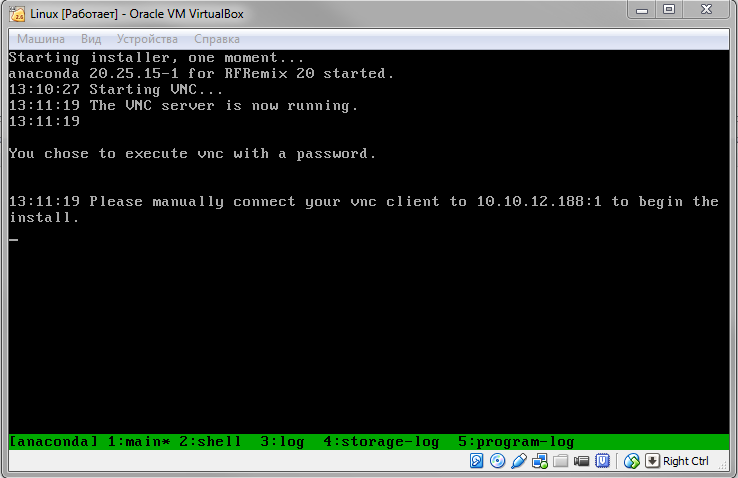
Actually, after rebooting we connect to our machine using the VNC client and perform the installation in the usual mode.
If for some reason (inappropriate distribution, unstable Internet), this method does not suit us, you can always download the installation image of the distribution you need, open it in some ISO file editor and change the GRUB configuration on this disk . For example, on the disk image of the same Fedora 20 (and RFRemix), the GRUB settings are stored in isolinux / isolinux.cfg:
label linux
        menu label ^Install RFRemix 20
        kernel vmlinuz vnc vncpassword=q1q1q1q1 ip=192.168.1.50 netmask=255.255.255.0 gateway=192.168.1.1 nameserver=192.168.1.1
        append initrd=initrd.img inst.stage2=hd:LABEL=RFRemix\x2020\x20x86_64 quiet
We save the ISO image after editing, write it, for example, to a USB flash drive and if the first item is downloading from USB, we stick the USB flash drive, send the machine to reboot and return to the workplace with a comfortable chair and a cup of coffee: