Cooking NSA SELinux
- Tutorial
 Hi Habr! With this post, I want to distract the respected community a bit from gossip on the NSA topic, and instead fill in the gap in the description of one of their technologies by writing a cross between “turn off SELinux” and “devote the best years to it to understand a small part”. In fact, both of these points of view are equally far from the truth - the technology is quite simple, transparent and allows you to do a lot. However, I want to warn about a huge number of letters, and a rather narrow target audience, because The following will not be interesting to everyone. If you have long wanted to understand what SELinux is, but did not know which side to approach, this article is for you. If you know all this for a long time and successfully apply it, then I have made enough inaccuracies so that we can discuss this in the comments.
I will not touch on topics related to the NSA in general, the ability to decrypt RSA, wiretap and other media aspects - no hype, no FUD, only technology. We will get into different sources with varying degrees of activity, add our conditions to the very heart of MLS, possibly introducing our vulnerabilities (we also make mistakes), and after that
So, if you are still interested, and you are not afraid to sit for a week in one of the many spoilers, then
Preliminary readings
I mean, you already have enough Linux experience to deploy your favorite distribution in a virtual environment. I will do everything with the example of Debian, but if you decide to repeat this path, then all this can (and very much needed) be done on the most convenient and familiar distribution kit - in the process you will learn a lot about it. I tried to write this article as educational material so that anyone could repeat step by step. I also mean that it will not be difficult for you to read the technical documentation in English - there is still very little information on SELinux in Russian.General Technology Information
There are so many rumors revolving around SELinux that you will be surprised how small our introductory volume is, there are only three links:- RH Guide : if any team is not clear, with a high probability you will find a description in it. Open it in a separate tab, useful.
- Summary of a lecture by Eli Billauer: consider it as the main collection of facts. From it you can quickly understand what's what, and know what exactly to ask Google.
- Writing Policies . Despite the ten-year-old document, it describes enough key points to understand the SELinux internal device, and how to pick it.
This is the main thing that I recommend reading before proceeding with the setup, otherwise you will constantly return to these documents. There are many other resources , but you will definitely reach them if you want to do something other than turning boolean variables on / off.
So, when you read all this, we can test ourselves with simple questions:
- What is unconfined_t / unconfined_u, and why can't SELinux be tested on it?
- What is a special case, MLS or MCS?
- What is the difference between * .te and * .if from * .fc?
The answers
- Unlimited domain / user. With the same success, you can configure SELinux on another machine.
- MCS. MLS == MCS with MLS_SENS = 1.
- Fundamentally - nothing. Though in txt write, do not forget to fix the main Makefile.
Statement of the problem and presetting
Now that we already know what we want, but don’t know how we will implement it, we can formulate the goals of the experiment:- We want to configure SELinux MLS (since we
'vegot it, let's do it to the maximum, and not ready from the repositorynext-> next-> agree); - We want to take RefPolicy as a basis ;
- Well, after that we want to check the worst case scenario - they broke us, and not just broke, but got UID = 0, and not just got it, but with constant shell access, and we forgot to remap the root to user_u. I intentionally specifically make a number of such assumptions, we will consider the worst case scenario;
- We will configure the minimum necessary copy, otherwise there will be no article, but a saga about five hundred pages;
Server
With your permission, I'll put it under the spoiler. YMMV, you may not have Debian, and installing in KVM is no different. Any distribution installed in a minimal configuration in a virtual environment will do. Virtual - because it’s more convenient, minimal - because it’s faster.Details
We believe that the basis for the experiments is ready.Typical Debian expert installation, small nuances: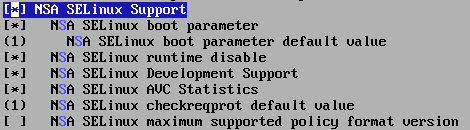
- Disk breakdown (as much as 4GB!):
- / dev / vda1 64MB as / boot, ext2.
- rest as LUKS: aes256: cbc-essiv: passphrase, all settings are maximal by default.
- inside the remainder - everything is under LVM.
- Here is fstab right away
root@sandbox:~# cat /etc/fstab # /etc/fstab: static file system information. #/dev/vda1 /boot ext2 defaults 0 2 /dev/mapper/vg0-root / btrfs defaults 0 1 /dev/mapper/vg0-usr /usr btrfs defaults 0 2 /dev/mapper/vg0-var /var btrfs defaults 0 2 /dev/mapper/vg0-tmp /tmp btrfs defaults 0 2 /dev/mapper/vg0-rhome /root btrfs defaults 0 2 /dev/mapper/vg0-swap none swap sw 0 0 - Separate sections are made for subsequent testing convenience.
- We put a minimal system with an SSH server, nothing more.
- Before completing the installation, we call the shell immediately and remember the system key:
root@sandbox:~# ssh-keygen -l -f /etc/ssh/ssh_host_ecdsa_key
256 f6:9b:ad:dd:93:cb:3d:c2:83:76:45:c3:02:e8:6a:1d  root@sandbox (ECDSA)
sed -i 's/wheezy/jessie/g' /etc/apt/sources.list  # that's no bloody enterprise
aptitude update && aptitude dist-upgrade -VR # let's go testing, it's stable enough
aptitude install vim bash-completion deborphan -VR # a little comfort couldn't hurt
aptitude install policycoreutils auditd setools selinux-basics -VR # last is just helper scripts, optional
vim /etc/network/interfaces # make interfaces static
aptitude purge isc-dhcp-client console-setup console-setup-linux kbd iproute module-init-tools $(deborphan)
@local$ ssh-keygen -b 521 -t ecdsa -f selinux-test
@remote# mkdir /root/.ssh && cat selinux-test.pub > /root/.ssh/authorized_keys2 && chown && chmod
mkdir src && cd src && wget -c http://kernel.org/pub/linux/kernel/v3.0/linux-3.10.18.tar.bz2 && tar jxf linux*tar.bz2 && cd linux* && make menuconfig && make -j$((2* $(grep processor /proc/cpuinfo | wc -l))) deb-pkg && make clean
.config
# if you are lazy to configure yourself, here's my .config, usable on KVM+libvirt
wget -O - $aboveimage | dd bs=1 skip=3991 | xzcat
Automate policy assembly
It was more convenient for me to collect the policies on the local machine and to install them on the server as a deb package. So I took the path of least resistance.up'n'enter style
wget http://oss.tresys.com/files/refpolicy/refpolicy-2.20130424.tar.bz2
tar jxf refpolicy-2.20130424.tar.bz2
cp -rp refpolicy custom #all our modifications
asroot# mkdir /usr/share/selinux/custom # so we can 'make install' here
asroot# mkdir /etc/selinux/custom
asroot# chown $USER:$USER /etc/selinux/custom /usr/share/selinux/custom
asroot# touch /etc/selinux/custom/setrans.conf && chown $USER:$USER /etc/selinux/custom/setrans.conf # we'll need it later
asroot# aptitude install selinux-utils python-selinux policycoreutils checkpolicy # these are for policy build
#!/bin/bash
# sample deb build for custom selinux policy
# harvests policy from local system
version='0.0.1'
name='selinux-policy-custom'
description='Custom MLS SELinux policy'
cf="${name}-control"
cc="${name}-Copyright"
# depends and conflicts shamessly ripped from selinux-policy-mls
read -d '' cheader << EOF
Section: non-free
Priority: optional
Homepage: http://selinux/
Standards-Version: 3.9.2
Package: ${name}
Version: ${version}
Maintainer: secadm_r
Pre-Depends:
Depends: policycoreutils (>= 2.1.0), libpam-modules (>= 0.77-0.se5), python, libselinux1 (>= 2.0.35), libsepol1 (>= 2.1.0)
Conflicts: cron (<= 3.0pl1-87.2sel), fcron (<= 2.9.3-3), logrotate (<= 3.7.1-1), procps (<= 1:3.1.15-1), selinux-policy-refpolicy-strict, selinux-policy-refpolicy-targeted, sysvinit (<= 2.86.ds1-1.se1)
Architecture: all
Copyright: ./selinux-policy-custom-Copyright
Description: ${description}
EOF
read -d '' postinst << "EOF"
File: postinst 755
 #!/bin/sh -e
 set -e
 if [ "$1" = configure ]; then
        /usr/sbin/semodule -s custom -b /usr/share/selinux/custom/base.pp $(find /usr/share/selinux/custom/ -type f ! -name base.pp | xargs -r -n1 echo -n " -i")
 fi
 #DEBHELPER#
 exit 0
EOF
function make_policy() {
        cd custom
        make clean
        rm -rf /usr/share/selinux/custom/*
        make install
        cd ..
}
function make_files() {
        echo 'SELinux custom policy copyright:TODO' > ${cc}
        echo -e "$cheader" > ${cf}
        echo -e "$postinst" >> ${cf}
        echo -en "\nFiles:  " >> ${cf}
        # our setrans file
        echo -e " /etc/selinux/custom/setrans.conf /etc/selinux/custom" >> ${cf}
        # /etc/selinux dir
        find /etc/selinux/custom -type f ! -name \*LOCK | xargs -r -n1 -If -- sh -c 'echo " f $(dirname f)"' >> ${cf}
        # /usr/share/selinux/custom dir
        find /usr/share/selinux/custom -type f | xargs -r -n1 -If -- sh -c 'echo " f $(dirname f)"' >> ${cf}
}
function cleanup() {
        rm -f ${cc} ${cf}
}
function build_deb() {
        equivs-build ${cf}
        [ $? -eq 0 ] && cleanup
}
rm ./${name}*deb # glob is ok
make_policy
make_files
build_deb
scp -P 22 -i ~/.ssh/selinux-test selinux*deb root@selinux:/tmp/
- We clean everything (make clean)
- We collect and install policies (make install)
- We find everything that is installed (we know where to look), collect the package
- Fill in the server in / tmp
- In postinst, he himself will find that he has updated, pull semodule and reload the policy
SELinux, the first acquaintance.
The server is ready, the build system is ready, the reference policy is loaded, now you can start the fun part. (At about this stage, evaluating the already existing volume of the article, the seditious thought crept into dividing it intoFor the first assembly, let's determine the parameters, I chose these:
$ sed '/^#/d;/^$/d' build.conf
TYPE = mls
NAME = custom
DISTRO = debian
UNK_PERMS = reject
DIRECT_INITRC = n
MONOLITHIC = n
UBAC = y
CUSTOM_BUILDOPT =
MLS_SENS = 4
MLS_CATS = 32
MCS_CATS = 32
QUIET = n
essence numero uno
As an experiment, try setting MONOLITHIC = y and compiling a policy without setting it - make policy. The result is policy.conf, the textual representation of the policy. Right here, in a simple form, kindly deployed m4 from the whole pile of macros, everything that SELinux will allow is described. In other words (Warning: bad analogy time!): If secadm_r is like the head of the Security Council, approving access levels and tolerances, then SELinux is an ordinary security officer checking these lists, and in policy.conf, in fact, lists with fields:
1. who (scontext) - where (tcontext) - to whom (class) - why (call) (plus, in the case of MLS: show your admission level as well, and if it is less than it should be, I won’t even look at the rules.)
1. who (scontext) - where (tcontext) - to whom (class) - why (call) (plus, in the case of MLS: show your admission level as well, and if it is less than it should be, I won’t even look at the rules.)
We create all the necessary configs, which we will edit to our needs: make conf . First, edit the policy / modules.conf that appears , I disabled (modulename = off) almost all the modules in the contrib group. Plus - faster assembly, fewer modules. Minus - possible underestimation of contexts. I will explain with an example:
- The context / dev / xconsole, although more related to logging, is defined in the xserver module;
- Having disabled it, the context began to be inherited from the directory / dev /;
- And with high probability everything that wanted to write in / dev / xconsole, and was taken into account in RefPolicy, immediately broke. Correct - of your choice: either enable the xserver module, or redefine the context in any of its local modules.
contrib_off
As soon as we started editing modules.conf , we passed the point of no return, after which we must understand what we are doing and why. A possible undetermination of contexts is just the first example of how our actions affect the system. grep -A5 contrib policy/modules.conf | grep "= module$" | wc -l # total number
grep -A5 contrib policy/modules.conf | grep "= module$" | sed 's/ = module//' | xargs -r -n1 -I__n -- sh -c 'sed -i "s/^__n = module$/__n = off/" policy/modules.conf' # kekeke
# turn some servicess off too (xserver + postgresql)
# turn _on_ logrotate,mta,postfix,ulogd, and whatever you think you need
Looking ahead, I’ll immediately say a little about the wonderful audit2allow utility : it eats audit.log, and in a fairly understandable form (especially with the -Rev keys) gives us what we need to add to the policy so that these messages do not appear in the log anymore. So, if you are anywhere (and this is almost everywhere) on the Internet you will meet a recommendation
grep something-something /var/log/audit/audit.log | audit2allow -M mymegamodule
semodule -i mymegamodule
Now it's time to runmake install , and if everything is fine, then collect our package and put it on the server:
dpkg -i /tmp/selinux-policy-custom*deb
sed -i 's/^SELINUX=.*$/SELINUX=enforcing/;s/^SELINUXTYPE=.*$/SELINUXTYPE=custom/' /etc/selinux/config
selinux-activate # if you installed helper package selinux-basics
# if not: touch /.autorelabel
# add 'selinux=1 security=selinux' to cmdline
reboot # let's rock!
When is rocking "rocking" and when is it "shaking" *
Chef, it's all gone. Nothing works. We can’t even access ssh - connection closed by host. Meet SELinux. As remarkably accurately formulated by Eli Billauer:What is SELinux?However, it’s good if you get to this point. This is exactly the behavior that we need, and now we will begin to understand why it does not allow us.
In a nutshell: a machine that tells you permission is denied.
the essence of the numeric duo, this time without bad analogies
Oh yes, I forgot to say that starting from this moment, you will need access to the server not only via ssh, it may not work. Fortunately, in our case it is a virtual server, there is always VNC / SPICE / etc (link specialist for FSKN). We try to log in locally - it doesn’t let it in. Great situation to immediately illustrate how from itIf you carefully read the preliminary documentation, then you probably remember the decision-making procedure:
- DAC first. If it’s forbidden, then it won’t even get to SELinux, permission denied will be ordinary, unix, familiar to all of us from the time when we just got acquainted with our first * nix system.
- Then the MAC. If no matching permission rules are found, permission denied will already be from SELinux. On some distributions (RH), the lines containing " SELinux is preventing " will appear in the logs , some will not, but all will have something in audit.log.
go out
At this stage, audit.log contains all the reasons for - Don't panic.
- We are overloaded - for example, sending Ctrl + Alt + Del, acpid will do everything for us.
- We catch grub at the boot stage, change selinux = 1 to selinux = 0
- We boot, go as root.
cp /var/log/audit/audit.log /root
wc -l /root/audit.log
195
- How to read logs
The first line tells us that auditd successfully (res) started, and on behalf of system_u, the role of system_r, in the domain auditd_t, it belongs to all categories (c0.c31) of our maximum level (s3). According to BLP , this means that information from any level can successfully fall into the hands of auditd (write up), and it can read from any level (read down). If it’s not entirely clear, then let’s recall who developed this architecture and what they meant by recording information - transferring information from the source (who writes) to the recipient (where / to whom it writes). And then everything falls into place - the Top Secret level really cannot write its data to the Secret level (i.e. down, down) - they will become compromised, hence the " no write down". About read up , I hope, is more obvious. Also in MLS there are additional restrictions, buttype=DAEMON_START msg=audit(1383338997.597:1957): auditd start, ver=2.3.2 format=raw kernel=3.10.17-vm-slnx auid=4294967295 pid =1319 subj=system_u:system_r:auditd_t:s3:c0.c31 res=successI was asked to keep silentabout this further.
The second line tells us that the acpid daemon, with all possible maximum regalia (uid = 0 gid = 0 euid = 0 suid = 0 fsuid = 0 egid = 0 sgid = 0 fsgid = 0), root the root and bofh sysop, using the initrc_t context (started) accessed (type = SYSCALL) the socket (syscall = 102), and ( suddenly ) was not recognized, not called, and, as a result, was sent (success = no exit = -13). Although, this should not be surprising, because we all know that Linux is not the most important root, there are more important ones :-) Atype=SYSCALL msg=audit(1383338997.620:219): arch=40000003 syscall=102 success=no exit=-13 a0=3 a1=afbe1c10 a2=a779b000 a3=ffffffc8 items=0 ppid=1338 pid=1346 auid=4294967295 uid=0 gid=0 euid=0 suid=0 fsuid=0 egid=0 sgid=0 fsgid=0 ses=4294967295 tty=(none) comm="acpid" exe="/usr/sbin/acpid" subj=system_u:system_r:initrc_t:s0-s3:c0.c31 key=(null)
riddle for inquisitive minds - which socket did it contact? *
Well, take the third line, from the middle. Logs AVC (Access Vector Cache) is for us the most interesting. The above, for example, indicates that the established policy does not have an allow rule so that the source (scontext) with the above tolerance working in the restorecond_t domain performs a search ({search} and tclass = dir) in the directory with the number inode = 376 with context var_run_t. An illustration of what? Right, no read up. What was looking for? Find / var / run -inum 376 will answer this question . Just from a similar line audit2allow will make the allowing rule.type=AVC msg=audit(1383338997.810:233): avc: denied { search } for pid=1470 comm="restorecond" name="/" dev="tmpfs" ino=376 scontext=system_u:system_r:restorecond_t:s0-s3:c0.c31 tcontext=system_u:object_r:var_run_t:s3:c0.c31 tclass=dir
Etc. As you can see, there is nothing complicated in these logs. SELinux is not difficult qualitatively , it is difficult quantitatively, and at first unusual, but nothing more. Again, if something is not clear, you can always drive an impersonal string into Google or search here . So, we believe that we now can read and understand the logs.
* I won’t give a guess, write in comments. - How to fixThere are two main options that you may encounter:
- Invalid context
- Lack of permitting rule
The third option, which is rarely seen but the most unobvious, is a violation of MLS restrictions (policy constrain violation), and adding an allow rule in this case will not help, you have to go into the very heart of MLS and edit the restrictions. Here, every change should already be made with full understanding of why it is being made and what exactly it should decide. Thoughtless changes are guaranteed to reduce your level of security. You have been warned (again).
Now the canvases are about pro solution methods, tackle in tackle due to size:- incorrect context solutionAn example of an invalid context:
In debian / lib, in RefPolicy / usr / lib. Edit:root@sandbox:~# ls -laZ /lib/systemd/systemd-udevd -rwxr-xr-x. 1 root root system_u:object_r:bin_t:s0 210380 Sep 23 12:24 /lib/systemd/systemd-udevd @local$ grep systemd-udevd custom/policy/ -R custom/policy/modules/system/udev.fc:/usr/lib/systemd/systemd-udevd -- gen_context(system_u:object_r:udev_exec_t,s0)
semanage is one way. Such a change is advisable, but in our case it may not survive the policy update (if we start to supply our /etc/selinux/custom/contexts/files/file_contexts.local ). Another option is to redefine locally, rebuild the policy, roll it (and set the policy at the same time).root@sandbox:~# semanage fcontext -m -t udev_exec_t /lib/systemd/systemd-udevd # try to modify /usr/sbin/semanage: File context for /lib/systemd/systemd-udevd is not defined root@sandbox:~# semanage fcontext -a -t udev_exec_t /lib/systemd/systemd-udevd # ok, add root@sandbox:~# grep udev /etc/selinux/custom/contexts/files/file_contexts.local /lib/systemd/systemd-udevd system_u:object_r:udev_exec_t:s0 - solution for lack of permitting ruleTake this line, for example:
The decryption of the log is simple, but the constant engagement with this eventually tires. Drop it in the log, and let the machine work for us:type=AVC msg=audit(1383338997.860:251): avc: denied { module_request } for pid=1524 comm="sshd" kmod="net-pf-10" scontext=system_u:system_r:sshd_t:s0-s3:c0.c31 tcontext=system_u:system_r:kernel_t:s3:c0.c31 tclass=system
And here already, we begin to think - we ask ourselves simple questions:root@sandbox:~# audit2allow -Rev -i /root/log require { type kernel_t; type sshd_t; class system module_request; } #============= sshd_t ============== # audit(1383338997.860:251): # scontext="system_u:system_r:sshd_t:s0-s3:c0.c31" tcontext="system_u:system_r:kernel_t:s3:c0.c31" # class="system" perms="module_request" # comm="sshd" exe="" path="" # message="type=AVC msg=audit(1383338997.860:251): avc: denied { # module_request } for pid=1524 comm="sshd" kmod="net-pf-10" # scontext=system_u:system_r:sshd_t:s0-s3:c0.c31 # tcontext=system_u:system_r:kernel_t:s3:c0.c31 tclass=system " allow sshd_t kernel_t:system module_request;- What's happening? sshd asked to load the module into the kernel. Ok, net-pf-10 is not much needed, because we do not have ipv6.
- What was offered to us? Allow sshd_t domain to load modules into the kernel. Of course, if we allow, then there will be no such mistake. And if he asks for an enemy module?
- What do they write on the Internet? Hehe . Thank you, but no, we don’t really need a Boolean variable to resolve this functionality.
- What are we doing? Yes, we forbid sshd to beg in this direction, let it work on what they gave. When we need ipv6, we will download it ourselves, even before ssh starts.
As you can see, we changed the rule to dontaudit sshd_t kernel_t: system module_request; - this means to prohibit, and do not write to the log. By the way, if you find that some functionality does not work, and the log is empty, then most likely this is just the dontaudit rule. Just rebuild the policy without them: semodule -DB , and get ready for the flow of messages to the log.mkdir policy/modules/local && cd policy/modules/local echo 'Local layer -- differences from reference policy. ' > metadata.xml echo '##sshd local policy ' > sshd_local.if echo '## no file contexts redefined here' > sshd_local.fc cat > sshd_local.te <policy_module(sshd_local, 0.0.1) > ################################################################## > require { > type kernel_t; > type sshd_t; > class system module_request; > } > #============= sshd_t ============== > # dont audit requests for module load > # NOTE: this may hide some denials in the future > dontaudit sshd_t kernel_t:system module_request; > > EOF
We specify our module in modules.conf, collect the policy, upload it to the server, look:
The rule appeared, the module is loaded. Difficult? Yah. Long and dreary? Oh yeah.root@sandbox:/tmp# sesearch --allow -s sshd_t -t kernel_t | grep system root@sandbox:/tmp# sesearch --dontaudit -s sshd_t -t kernel_t | grep system root@sandbox:/tmp# dpkg -i selinux-policy-custom_0.0.1_all.deb (Reading database ... 20371 files and directories currently installed.) Preparing to replace selinux-policy-custom 0.0.1 (using selinux-policy-custom_0.0.1_all.deb) ... Unpacking replacement selinux-policy-custom ... Setting up selinux-policy-custom (0.0.1) ... root@sandbox:/tmp# sesearch --dontaudit -s sshd_t -t kernel_t | grep system dontaudit sshd_t kernel_t : system module_request ; root@sandbox:/tmp# semodule -l | grep sshd_local sshd_local 0.0.1 - solution for MLS restrictionsHere is the problem (the level of spoilers is over nine thousand !! 1one):the problemHere is the description:
type=AVC msg=audit(1383338997.630:221): avc: denied { sendto } for pid=1351 comm="acpid" path="/dev/log" scontext=system_u:system_r:initrc_t:s0-s3:c0.c31 tcontext=system_u:system_r:syslogd_t:s3:c0.c31 tclass=unix_dgram_socket type=SYSCALL msg=audit(1383338997.630:221): arch=40000003 syscall=102 success=no exit=-13 a0=3 a1=afbe15d0 a2=a779b000 a3=ffffffc8 items=0 ppid=1 pid=1351 auid=4294967295 uid=0 gid=0 euid=0 suid=0 fsuid=0 egid=0 sgid=0 fsgid=0 ses=4294967295 tty=(none) comm="acpid" exe="/usr/sbin/acpid" subj=system_u:system_r:initrc_t:s0-s3:c0.c31 key=(null)the decriptionHere are the existing rules:root@sandbox:~# audit2allow -Rev -i /tmp/x require { type syslogd_t; type initrc_t; class unix_dgram_socket sendto; } #============= initrc_t ============== # audit(1383338997.630:221): # scontext="system_u:system_r:initrc_t:s0-s3:c0.c31" tcontext="system_u:system_r:syslogd_t:s3:c0.c31" # class="unix_dgram_socket" perms="sendto" # comm="acpid" exe="" path="" # message="type=AVC msg=audit(1383338997.630:221): avc: denied { sendto } for # pid=1351 comm="acpid" path="/dev/log" # scontext=system_u:system_r:initrc_t:s0-s3:c0.c31 # tcontext=system_u:system_r:syslogd_t:s3:c0.c31 tclass=unix_dgram_socket "#!!!! This avc is a constraint violation. You will need to add an attribute to either the source or target type to make it work. #Constraint rule: # Possible cause source context and target context 'level' differ allow initrc_t syslogd_t:unix_dgram_socket sendto;the sesearchAs you can see, the resolving rule is already there. Moreover, not in the MLS version, this access would be allowed.root@sandbox:~# sesearch --allow -s initrc_t -t syslogd_t -c unix_dgram_socket Found 2 semantic av rules: allow initrc_t syslogd_t : unix_dgram_socket sendto ; allow unconfined_domain_type domain : unix_dgram_socket { ioctl read write create getattr setattr lock relabelfrom relabelto append bind connect listen accept getopt setopt shutdown recvfrom sendto recv_msg send_msg name_bind } ;offtopicРешение. Находим искомое ограничение, читаем:Заодно можете оценить всю прелесть unconfined домена. Можно все, на то он и «неограничен». Именно поэтому, тестирование SELinux на чем-то, отличном от strict, смысла особого не имеет. И даже если у вас strict, но тестируемый объект — unconfined, то, в общем-то, выводы о нужности и надежности SELinux делать рановато, даже если очень-очень хочется :-)
Итого, sendto в сокет (t1 пишет в t2) разрешено если:mlsconstrain unix_dgram_socket sendto (( l1 eq l2 ) or (( t1 == mlsnetwriteranged ) and ( l1 dom l2 ) and ( l1 domby h2 )) or (( t1 == mlsnetwritetoclr ) and ( h1 dom l2 ) and ( l1 domby l2 )) or ( t1 == mlsnetwrite ) or ( t2 == mlstrustedobject )); # scontext=system_u:system_r:initrc_t:s0-s3:c0.c31 # tcontext=system_u:system_r:syslogd_t:s3:c0.c31- нижний уровень доступа t1 равен таковому у t2 (s0 != s3), или
- t1 помечен как mlsnetwriteranged (нет, смотрим список seinfo -amlsnetwriteranged -x), остальные условия уже не важны, или
- t1 помечен как mlsnetwritetoclr (нет, аналогично), или
- t1 помечен как mlsnetwrite (нет, такой только setrans_t), или
- t2 помечен как mlstrustedobject (нет, syslogd_t там нет, но есть devlog_t)
«WTF?!» — скажет внимательный читатель. В логе же tcontext~syslogd_t, а у файла devlog_t? Посмотрим ps:root@sandbox:~# ls -laZ /dev/log srw-rw-rw-. 1 root root system_u:object_r:devlog_t:s3:c0.c31 0 Nov 1 23:06 /dev/log
Следите за руками: rsyslog, запущеный в домене syslogd_t, создает сокет, который наследует его домен, по адресу /dev/log; но файл по адресу /dev/log имеет контекст devlog_t согласно определенным контекстам для файлов. Иными словами, мы sendto не в файл делаем, а в сокет, и именно это нарушает ограничения. Вот подробно на этот вопрос ответил автор SELinux, Stephen Smalley. А вот один из вариантов решения, сразу с патчами. А вот тут обсуждается нежелательность объявления домена syslogd_t как mlstrustedobject, поскольку все объекты /proc/`pidof rsyslog`/ тоже станут mlstrustedobject. Но, несмотря на это, в Fedora именно так это и решили. Чтож, не будем сопротивляться — это вполне продемонстрирует как решать задачу, описываемую в данном спойлере, а провалиться детали мы и так можем на каждом шагу, надеюсь, я это тоже показал. Создаем свой второй модуль, вот содержимое файлов:root@sandbox:~# ps -auxZ | grep [r]syslog system_u:system_r:syslogd_t:s3:c0.c31 root 1338 0.0 0.3 30784 972 ? Ssl Nov01 0:00 /usr/sbin/rsyslogd
Указанный макрос все сделает за нас. Не забываем добавить в modules.conf перед сборкой политики.$ grep '' syslogd_local.* syslogd_local.fc:# no file contexts redefined here syslogd_local.if:##syslogd local policy syslogd_local.te:policy_module(syslogd_local, 0.0.1) syslogd_local.te:################################################################## syslogd_local.te:require { syslogd_local.te: type syslogd_t; syslogd_local.te:} syslogd_local.te: syslogd_local.te:#============= syslogd_t ============== syslogd_local.te:# mark syslogd_t as mlstrustedobject syslogd_local.te:# this is possible security hole, TODO: get some heavy brain augmentation and investigate syslogd_local.te:mls_trusted_object(syslogd_t);
- Что исправлятьВсе что не работает, у вас список может отличаться. Наперво, переключаемся в режим permissive (/etc/selinux/config), и добиваемся того, чтобы audit.log c момента загрузки вышеописанных ошибок не содержал, особенно проверяем сам вход, newrole, ssh. Потом переключаемся в enforcing, и проверяем что все ок. Вот как выглядел auditd лог у меня после загрузки и входа по ssh:
Все, что мне пришлось для этого поменять, я выложу патчем на самом сервере, здесь не привожу, так как, во первых, многовато, и во-вторых, попробуйте сами. Не пожалеете.root@sandbox:~# sestatus SELinux status: enabled SELinuxfs mount: /sys/fs/selinux SELinux root directory: /etc/selinux Loaded policy name: custom Current mode: enforcing Mode from config file: enforcing Policy MLS status: enabled Policy deny_unknown status: denied Max kernel policy version: 28 root@sandbox:~# cat /var/log/audit/audit.log type=DAEMON_START msg=audit(1383360996.062:2774): auditd start, ver=2.3.2 format=raw kernel=3.10.17-vm-slnx auid=4294967295 pid=1278 subj=system_u:system_r:auditd_t:s3:c0.c31 res=success type=CONFIG_CHANGE msg=audit(1383360996.180:20): audit_backlog_limit=320 old=64 auid=4294967295 ses=4294967295 subj=system_u:system_r:auditctl_t:s0-s3:c0.c31 res=1 type=LOGIN msg=audit(1383361036.430:21): login pid=1568 uid=0 old auid=4294967295 new auid=0 old ses=4294967295 new ses=1 type=LOGIN msg=audit(1383361038.410:22): login pid=1571 uid=0 old auid=4294967295 new auid=0 old ses=4294967295 new ses=2 root@sandbox:~# id -Z root:secadm_r:secadm_t:s0-s3:c0.c31
So, we are all set up, the system boots in enforcing mode. By this time, as a rule, an attentive reader already has extensive knowledge of modularization, is fluent in the structure of politics, sincerely loves (or no less genuinely hates) the m4 syntax, is subscribed to the NSA mailing list, knows two dozen sources of information on SELinux and a dozen developers by name .
It is time to climb a little deeper into the territory, not much described in the documentation.
Mls
If you are a little familiar with all sorts of criteria for assessing security , you probably know that, first of all, there are a great many of them (with separate (PDF) profiles (PDF), most of which are developed by various kinds of para-military organizations), and that the result is some the number of parrots , characterizing the rigidity of the requirements presented during the passage. Mlsadds to the existing SELinux restrictions two more levels of control, vertical (levels) and horizontal (categories). The first is nothing more than “tolerances”, where a higher tolerance implies access to a subordinate (“top secret” can read documents with the heading “secret”), and the second - various categories of the same level, where permission to read one category does not mean permission to read the rest.Since both of these levels of control can be assigned to any objects that SELinux works with, this allows you to implement almost any requirements for the classification of information and its flows:
- Hierarchical access, TopSecret -> Secret -> Unclassified, for any objects. A complete list is in the flask directory;
- Marking both files and, for example, network connections or tables in the database;
- Prevention of information leakage to lower levels regardless of user rights in the system;
- Default access restriction for any users (including root), with further differentiation of roles depending on authentication.
- And other overkill for 99% of systems.
As part of this experiment, I used these levels and categories:
root@sandbox:~# cat /etc/selinux/custom/setrans.conf
Domain=Playbox
# levels
s0=SystemLow
s3:c0.c31=SystemHigh
s0-s3:c0.c31=SystemLow-SystemHigh
s1=Confidential
s2=Secret
# employee categories
s1.c0=Ninjas
s1.c1=Pirates
s1.c2=Jesuses
# secret stuff
s2.c0=Aliens
s2.c1=BigBrother
nginx
We get users and roles, for example like this:On the Internet there is a module for nginx, but it does not quite suit us, since it is written for MCS (only s0). Therefore, we will use the opportunity to scratch NIH and write a module from scratch. To begin with, we are determined with contexts, using dpkg -L and lsof , I selected these:
После этого, пробегаемся по логу, маленькими частями вытаскивая запросы (grep nginx /var/log/audit/audit.log | grep 'sysctl'), анализируя их и добавляя, например, для sysctl:
/usr/sbin/nginx         --      gen_context(system_u:object_r:nginx_exec_t,s1:c0.c2)
/etc/init.d/nginx               gen_context(system_u:object_r:nginx_initrc_exec_t,s1:c0.c2)
/etc/nginx(/.*)?                gen_context(system_u:object_r:nginx_etc_t,s1:c0.c2)
/var/log/nginx(/.*)?            gen_context(system_u:object_r:nginx_var_log_t,s1:c0.c2)
/var/run/nginx(/.*)?            gen_context(system_u:object_r:nginx_var_run_t,s1:c0.c2)
/var/www(/.*)?                  gen_context(system_u:object_r:nginx_var_www_t,s1:c0.c2)
/var/lib/nginx(/.*)?            gen_context(system_u:object_r:nginx_var_lib_t,s1:c0.c3)
template(`web_server_template',`
       type $1_t, web_server;
       allow blah blah;
       # so we can call web_server_template(nginxN) in modname.te
')
root@sandbox:~# cat nginx_local.te
policy_module(nginx_local, 0.0.1)
##################################################################
type nginx_t;
type nginx_exec_t;
type nginx_initrc_exec_t;
type nginx_etc_t;
type nginx_var_log_t;
type nginx_var_run_t;
type nginx_var_www_t;
type nginx_var_lib_t;
corecmd_executable_file(nginx_exec_t);
init_script_file(nginx_initrc_exec_t)
files_type(nginx_etc_t)
logging_log_file(nginx_var_log_t)
files_pid_file(nginx_var_run_t)
files_type(nginx_var_www_t)
files_type(nginx_var_lib_t)
init_ranged_daemon_domain(nginx_t, nginx_exec_t, s1:c0.c2)
После этого, пробегаемся по логу, маленькими частями вытаскивая запросы (grep nginx /var/log/audit/audit.log | grep 'sysctl'), анализируя их и добавляя, например, для sysctl:
# /read kernel sysctl values
require {
     type sysctl_kernel_t;
     class dir { search };
     class file { open read };
}
allow nginx_t sysctl_kernel_t:dir { search };
allow nginx_t sysctl_kernel_t:file { open read };
# socket bind
require {
     type node_t;
     type http_port_t;
     class tcp_socket { name_bind setopt bind create listen node_bind };
     class capability { net_bind_service setuid setgid };
}
allow nginx_t http_port_t:tcp_socket { name_bind };
allow nginx_t node_t:tcp_socket { node_bind };
allow nginx_t self:tcp_socket { bind create setopt listen };
allow nginx_t self:capability { net_bind_service setuid setgid };
such
, which is our final goal.policy_module(nginx_local, 0.0.1)
##################################################################
type nginx_t;
type nginx_exec_t;
type nginx_initrc_exec_t;
type nginx_etc_t;
type nginx_var_log_t;
type nginx_var_run_t;
type nginx_var_www_t;
type nginx_var_lib_t;
corecmd_executable_file(nginx_exec_t);
init_script_file(nginx_initrc_exec_t)
files_type(nginx_etc_t)
logging_log_file(nginx_var_log_t)
files_pid_file(nginx_var_run_t)
files_type(nginx_var_www_t)
files_type(nginx_var_lib_t)
init_ranged_daemon_domain(nginx_t, nginx_exec_t, s1:c0.c2)
# rules
# /sys and /sys/devices/systemcpu/online
require {
type sysfs_t;
class dir { search };
class file { read open };
}
allow nginx_t sysfs_t:dir { search };
allow nginx_t sysfs_t:file { read open };
# /read kernel sysctl values
require {
type sysctl_kernel_t;
type sysctl_t;
class dir { search };
class file { open read };
}
allow nginx_t sysctl_kernel_t:dir { search };
allow nginx_t sysctl_kernel_t:file { open read };
allow nginx_t sysctl_t:dir search;
# self configs and symlinks
require {
type nginx_etc_t;
class dir { open read search };
class file { open read getattr };
class lnk_file { read };
}
allow nginx_t nginx_etc_t:dir { open read search };
allow nginx_t nginx_etc_t:file { open read getattr };
allow nginx_t nginx_etc_t:lnk_file { read };
# /etc/localtime, /etc/passwc, etc (no pun intended)
require {
type locale_t;
type etc_t;
class file { read open getattr };
}
allow nginx_t locale_t:file { read open getattr };
allow nginx_t etc_t:file { read open getattr };
# pid file
require {
type var_run_t;
class dir { search write add_name remove_name } ;
class file { write read create open unlink };
}
allow nginx_t var_run_t: dir { search };
allow nginx_t nginx_var_run_t: file { read write create open unlink };
allow nginx_t nginx_var_run_t: dir { search write add_name remove_name };
# libs
require {
type var_lib_t;
class dir { search getattr };
}
allow nginx_t var_lib_t:dir search;
allow nginx_t nginx_var_lib_t: dir { search getattr };
# socket bind
require {
type node_t;
type http_port_t;
class tcp_socket { name_bind setopt bind create listen node_bind };
class capability { net_bind_service setuid setgid };
}
allow nginx_t http_port_t:tcp_socket { name_bind };
allow nginx_t node_t:tcp_socket { node_bind };
allow nginx_t self:tcp_socket { bind create setopt listen };
allow nginx_t self:capability { net_bind_service setuid setgid };
# socket accept
require {
class tcp_socket { read write accept };
}
allow nginx_t self:tcp_socket { read write accept };
# logs
require {
type var_log_t;
class dir { search };
class file { open append };
}
allow nginx_t var_log_t:dir { search };
allow nginx_t nginx_var_log_t:dir { search };
allow nginx_t nginx_var_log_t:file { open append };
# www
require {
class dir { search getattr };
class file { read getattr open };
}
allow nginx_t nginx_var_www_t:dir { search getattr };
allow nginx_t nginx_var_www_t:file { read getattr open };
root/sysadm_r@sandbox:~# adduser alice
...skipped...
root/sysadm_r@sandbox:~# adduser bob
...skipped...
root/secadm_r@sandbox:~# semanage user -a -R user_r -L s1 -r s1-s1:c0 ninjas
root/secadm_r@sandbox:~# semanage user -a -R user_r -L s2 -r s2-s2:c0 aliens
root/secadm_r@sandbox:~# semanage login -a -s ninjas alice
root/secadm_r@sandbox:~# semanage login -a -s aliens bob # or, ninjas to supervise alice
root/secadm_r@sandbox:~# restorecon -RFvv /home/
# thats all, folks.
- both users cannot write data in a directory below their minimum level;
- both users cannot read from objects above their tolerance level;
- both users are limited by their category. When you add permissions to read other domains, they will be able to read only files with category c0;
- root cannot read user files without changing the context;
- if the bean has the same SELinux ID as alice, he will be able to read its files (if DAC allows) and see its processes;
- the web server will not be able to write anywhere except for its directories, even if it is asked to put core - we have almost the entire system in s0, and it is s1.
Funky time
Well, now, finally, there will be slides. For a full-fledged demonstration, I bought a small VPSK for this article, next to the NSA, and quickly completed everything I did on it. Directly on this system, you can see what SELinux is, go under the root and type rm -rf / * first and foremost, run all sorts of scripts / splits and rootkits, in general, show this to the NSA a kuzkin mother. But before you do this fascinating thing, let's go over it again, both in terms of assumptions and limitations:As part of this training course, we:
- We believe that anyone got root access to the server.
- We believe that he can log in via ssh and run an interactive shell.
- We believe that the root we have is not instantiated on user_u, as Russell Coker did in his play machine . Of course, this assumption is not recommended in production (like all the previous ones, of course :-)
- We believe that we did not customize the kernel (no grsec, I decided not to include this in the article and tests)
- We believe that we have almost no firewall.
But also, there is something for which SELinux is not intended, namely:
- SELinux это не средство ограничения ресурсов. Он не спасет от :(){ :|:& };:. Поэтому мне пришлось настроить небольшую защиту от fork bombs, но все-же — не пробуйте; в лучшем случае, вас кикнет и вы больше не сможете зайти, в худшем — если будете проявлять упрство — то и другие не смогут зайти, пока я все не почищу.
- SELinux это не средство защиты от атак на другие ресурсы. Поэтому мне пришлось ограничить доступ наружу с демо сервера. Если вы сможете продемонстрировать, как вы отключаете SELinux или iptables — вы большой молодец, но к следующей версии я это поправлю. Скорее всего, это косяк не SELinux, а мой :-)
- We consider the server in the minimum configuration, there are no compilers / debuggers and all that usually does not happen on the prod. The full version of the MLS Play Machine will come later, when I deploy it not on VPS, but on a more controlled infrastructure. But there is scp - you can copy something interesting.
- And yes, in the best traditions of the organization that developed SELinux, console recording is also being tested on the server at the same time :-) And you yourself understand that NSA, Arizona, Area51 are nearby, and here root access. It’s necessary to write, all of a sudden a car is shoved into me by central processors. Remove the record - you are also a great fellow, and also write in the comments.
- 0day - at your discretion. If it pops up, I will certainly be flattered. Although, to whom I tell :-)
I did not start a domain, this is for a toy version 0.0.2. Version 0.0.1
here
And yes, a separate request is please behave. No need to kill all root processes and disturb others; the user is one at all.I don’t specifically give the link: http://162.213.198.69