Stop twisting - 2. About cable mounting methods
- Tutorial
At the request of the audience, so to speak. Correctly connecting the cable is half the battle, but if it hangs freely, it won’t live for a long time - it will either hurt, or tear, or bite off (not necessarily with evil intentions). Or maybe just under his weight to slip out of the connection. Or it may not slip out, which is even worse - go find the place where the contact disappears. So this article will talk about how you can fix the cable so that it does not go away.
Yes, and here such mounts are ugly, uncomfortable, and give out a layman:
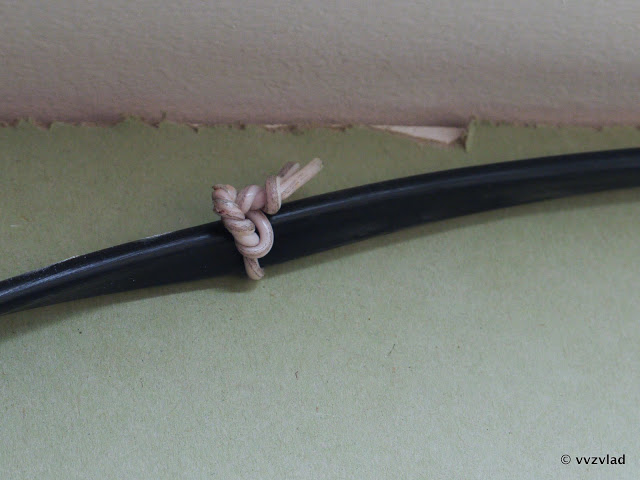
What, in essence, is the process of attaching wires? These are actions aimed at connecting (it can be rigid or not, detachable, or one-piece, etc.) of one object (cable), which is not able to independently maintain its position in space, to another object (wall, beams, masts and other exotic), which, as a rule, is much harder and does not need additional supports.
The walls are different, it is a fact. But in most cases, their classification can be reduced to three types:
Problems usually do not arise, only a screw and a screwdriver are needed. Well, and someone who will twist, of course. It twists easily, holds tight, hang anything. After twisting it leaves a minimum hole.
We make a hole with a puncher, a drill (for singles, do at least 20 pieces with a percussion drill — you shouldn’t value yourself), a chipper (for masochists, or Soviet Socialist-Revolutionaries), insert a plastic dowel there (chopik, as the Tajiks say), or Soviet-style: manually machined piece of wood, and we already screw it into it. With the right choice of the size of the dowel and hole - it keeps excellent. After dismantling, it already leaves a hole more.
And here questions traditionally arise - when you try to screw a screw in there, it fails, spins uselessly, not wanting to hold on. If you manage to wrap it there, you can’t hang anything heavier than the picture - at any noticeable load, it will simply bend and break out of the wall, leaving a hole behind it.
For such cases, there are many solutions that are called - fasteners for hollow structures. Here are 3 of the most common types:
It looks like this: Of the minuses - you need to drill a hole in advance, and not a small one.

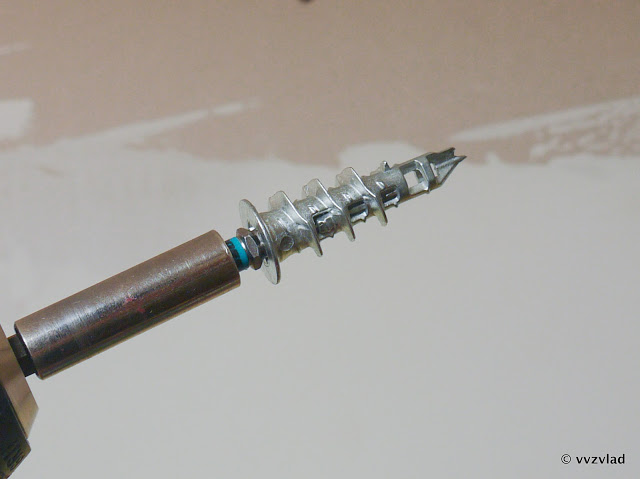
Driva (dowel with DRIVA drill (metal) or TT22 (plastic)), an awesome-looking drill,
It looks like this: It is
inserted into a screwdriver (although you can get by with a drill, and even a screwdriver), and it twists into the wall, like a regular screw:
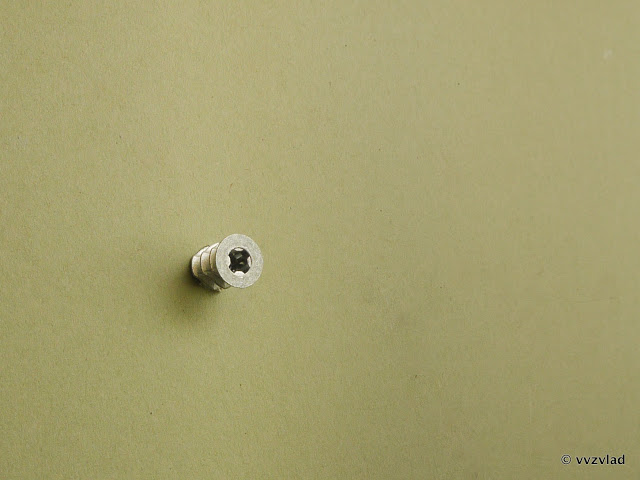
It turns out here is a plaque in which the screw is
already screwed : After that, you can screw everything that you need onto this screw necessary. I showed metal above, but there are also plastic ones:
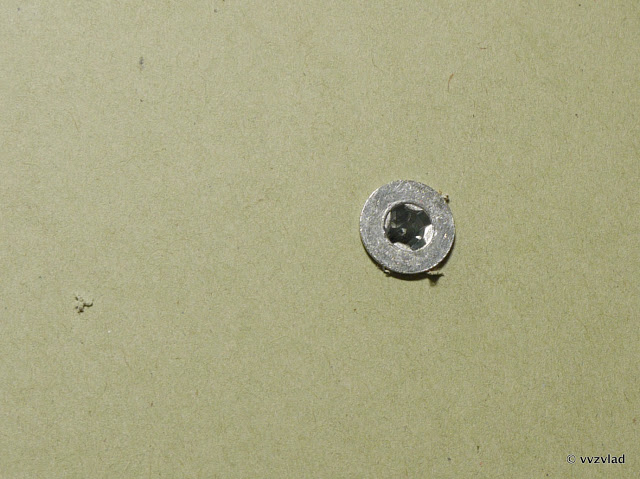
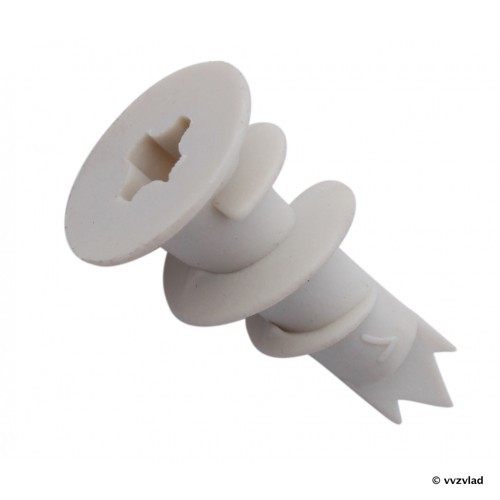

The meaning is simple. A hole is made in the wall, the dowel is straightened and pushed into the wall. You begin to tighten the screw - it catches the back of the dowel and pulls it against the wall, compressing it so that it is pressed against the wall on the other side.
Disadvantages - he must definitely keep something from “your” side, otherwise a thin bezel will slip, and the dowel along with the screw disappears into the depths of the wall. You can’t just hang a picture on a string on such a dowel.
All of the above fasteners are used only for hollow structures - walls from GVL, GKL.
As a result of the above measures, we have a wall, ready to screw in screws. But you won’t be able to fasten the wire with screws, this only works with the Soviet telephone “noodles”. One of the principles of cable management is that organization tools must not damage the cable.
Option one: wires in the pipe.
Or rather in the corrugation. It is called " Pipe corrugated PVF with a broach. " A broach is the wire that sticks out from both ends. One end is fixed to the wire: And the second must be carefully pulled, and the cable will be in the corrugation. Pieces in the middle - mounts. They are screwed to the wall with screws: And the corrugation snaps into them: It turns out like this:
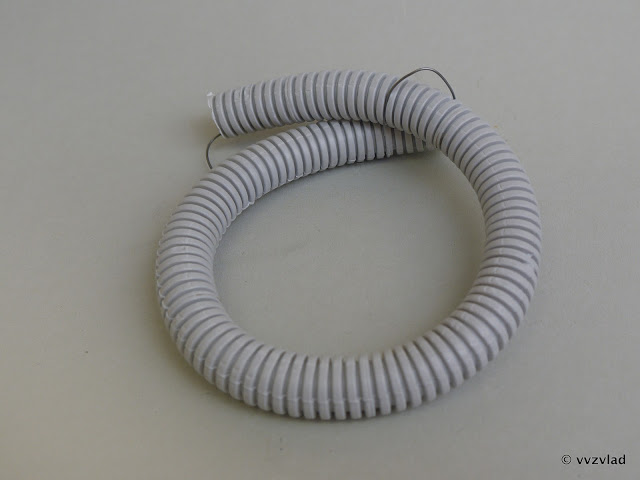
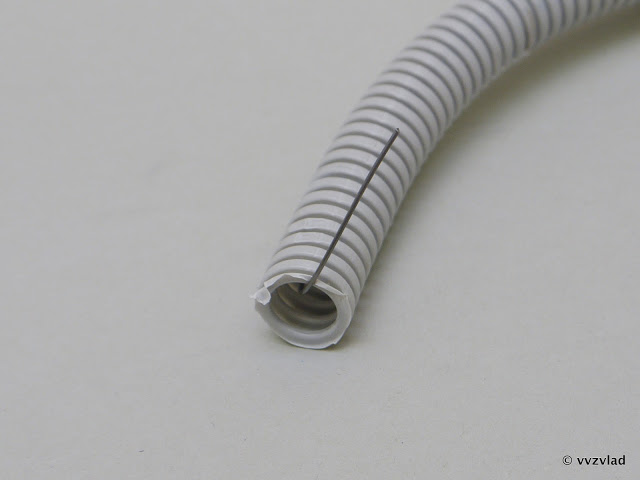
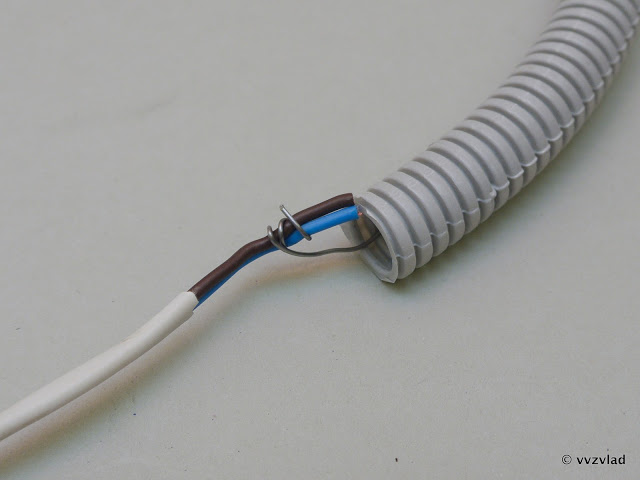

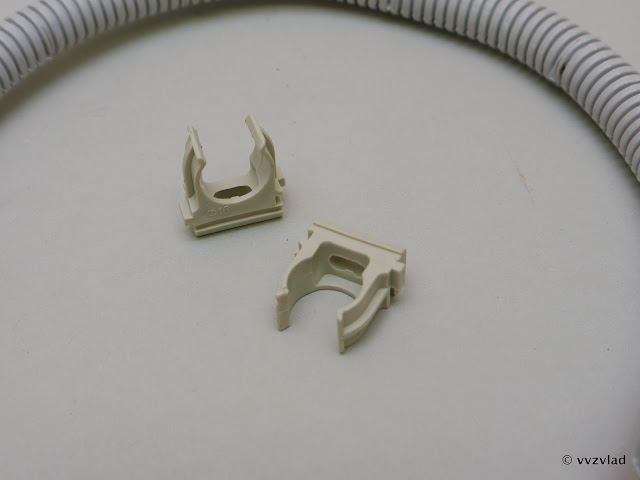
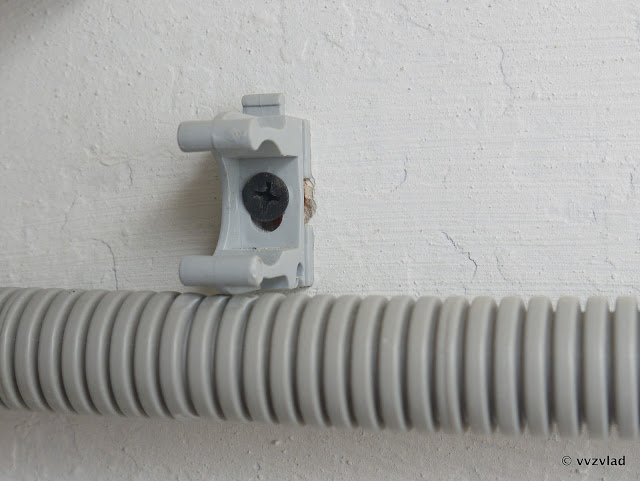
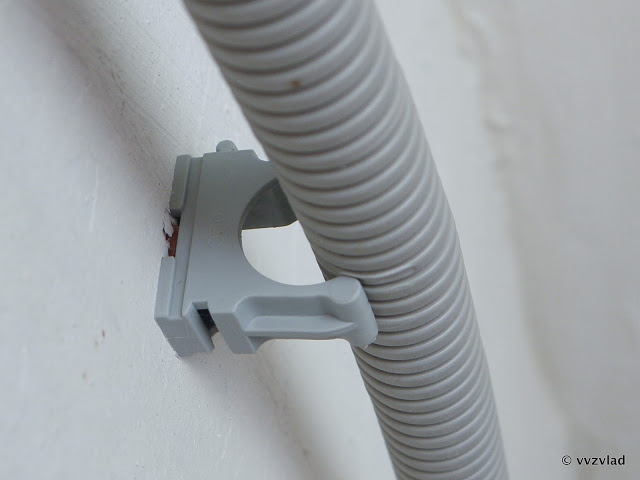
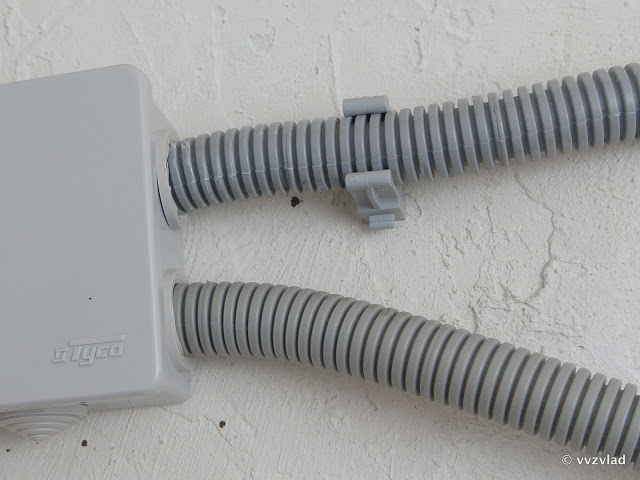
For greater convenience, the fasteners can snap into each other, for smooth installation of several corrugations at once.
The main advantage of the corrugation is that it is airtight. Therefore, it can be used on the street: True, it must be borne in mind that in this case there should not be cuts and holes on it, and if there are, they should be from the bottom. A couple of liters of water can easily pour into the holes located at the top, and tear the corrugation out of the mounts under its own weight. For such cases, there are special mounts that still snap on top, but for some reason I have not seen them in stores for a long time. Of course, all connections for outdoor use should be sealed whenever possible. At least a simple sealant, if there are no seals.
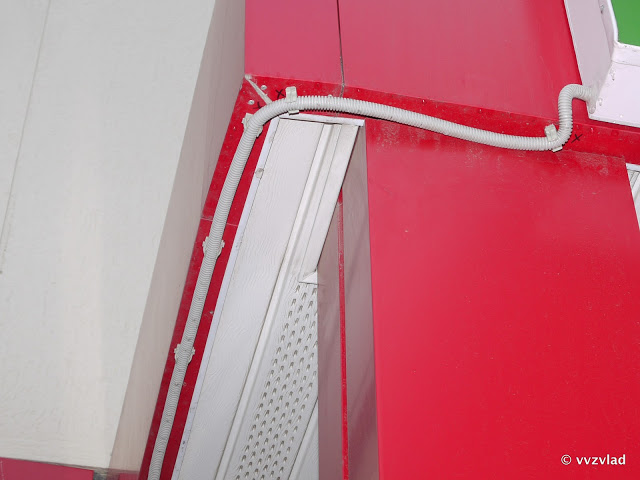
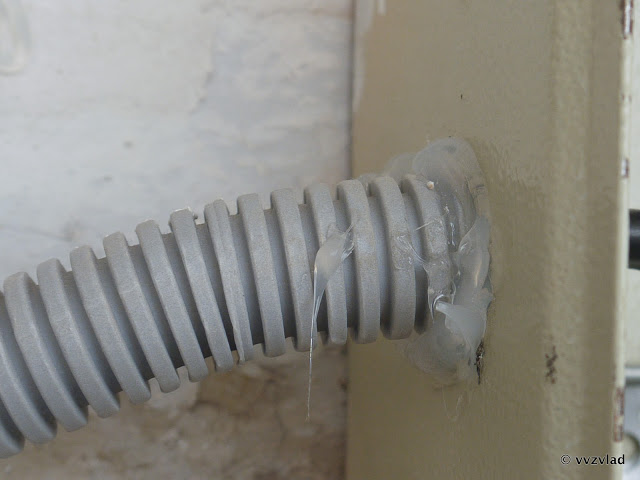
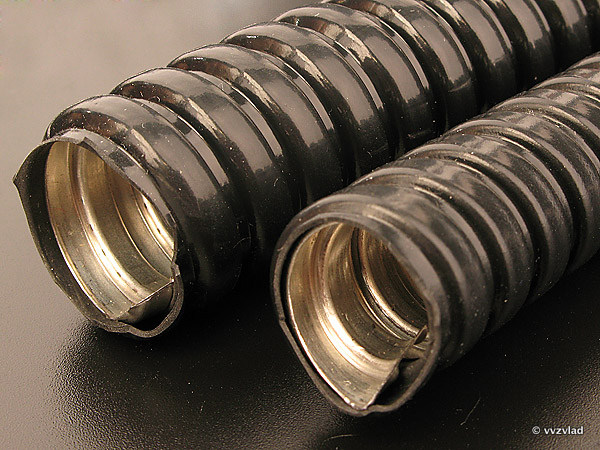
Also, PVC corrugation does not like frequent poking-pulling out of fasteners, ideally - it fixed everything. Otherwise, it wrinkles and cracks: By the way, here the fasteners are snapped into each other. And it does not support combustion, does not allow the wires to catch fire, restricting the air flow to them, and saves them from crushing the wires when they are walled up in expanding mixtures. True, such a sleeve should not be placed where there is a risk of flooding, or rodent gnawing. In these cases, it is better to use the same corrugation, but metal. It is called a metal hose , usually with a long code, in which size, thickness, shell, etc. are encrypted. But I usually buy it, poking at the window, "and now this is 10 meters." :)

And the corrugation saves the wires from prying eyes, and the sense of beauty - from the type of wires. But, let’s say, we have a bundle of wires that will not offend our feelings of beauty, because it will be laid behind a suspended ceiling or closed by a partition.
To begin with, it must be collected in order to visually distinguish it from other similar bundles, and to prevent entanglement.
I think no one needs to explain what a nylon screed is ? Everyone saw her at least once. At one of the ends there is a head with a ratchet latch: And along the rest of the length of the screed there is an inclined corrugated surface. The latch passes only in one direction, and in the other - it stops. Wrap the wires, snap, tighten to the limit. At will - cut off the tip.
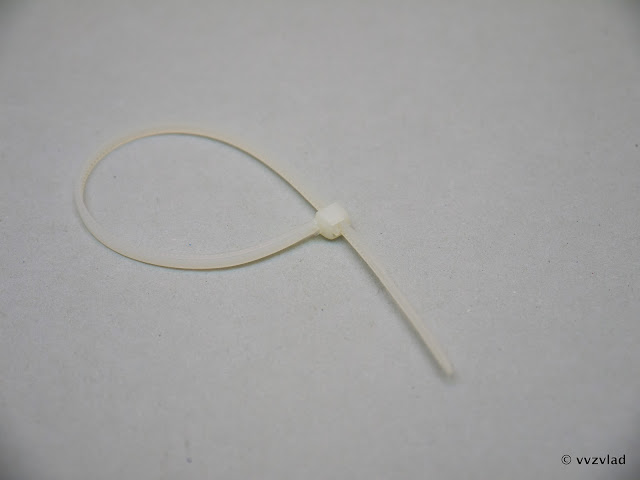

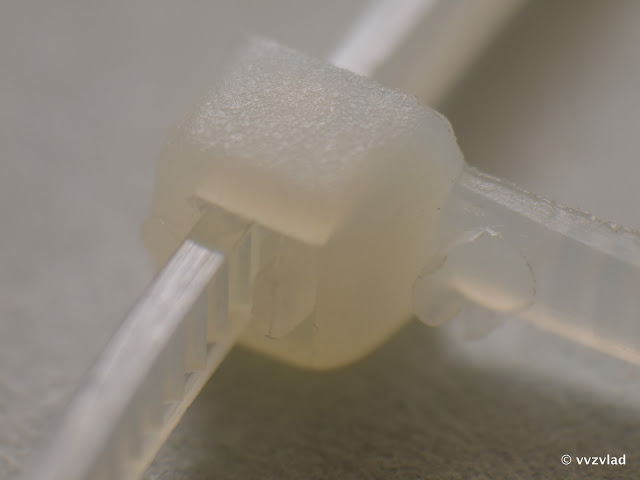
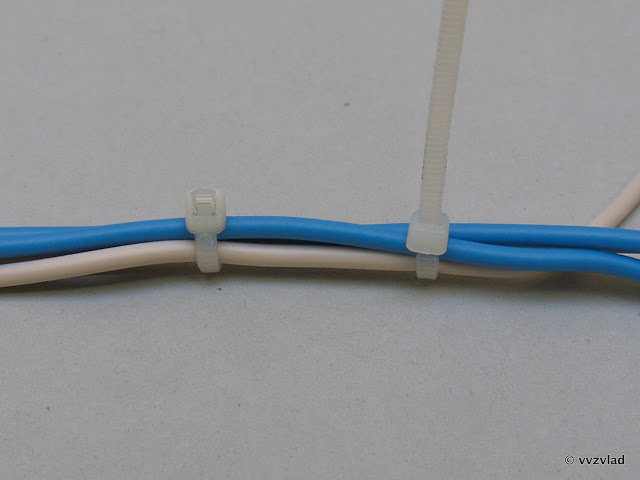
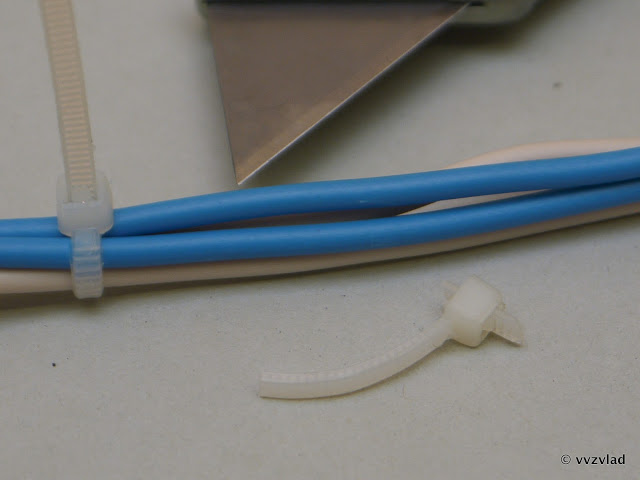
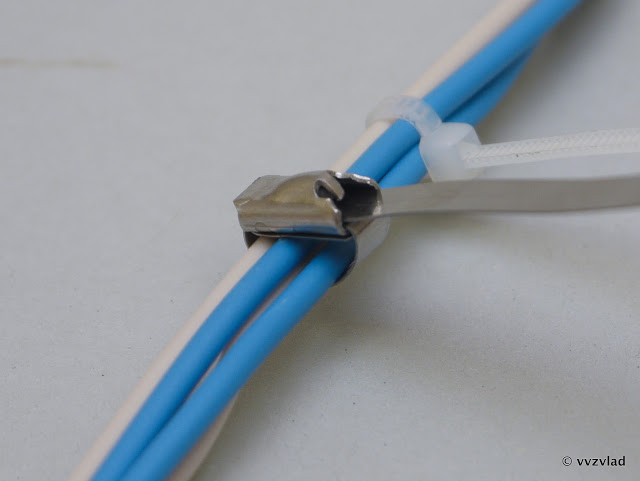
By itself, one-time. Something needs to be pulled out or added - we cut, and we click a new one. It is not suitable for freezing temperatures and bright sun - it becomes fragile in the frost, after which the first gust of wind effectively breaks the cable ties along the entire length of the cable. It crumbles after exposure to the sun (from a month to a year or two, depending on the manufacturer). They do not like excessive tension and loads - they are torn. In short, the destiny of a polyethylene coupler is the organization of light cables, their fastening to panels. Do not hang the cable on the cable ties, at least completely. Fasten to something else. For example, on a metal screed: They are called - a stainless steel screed .
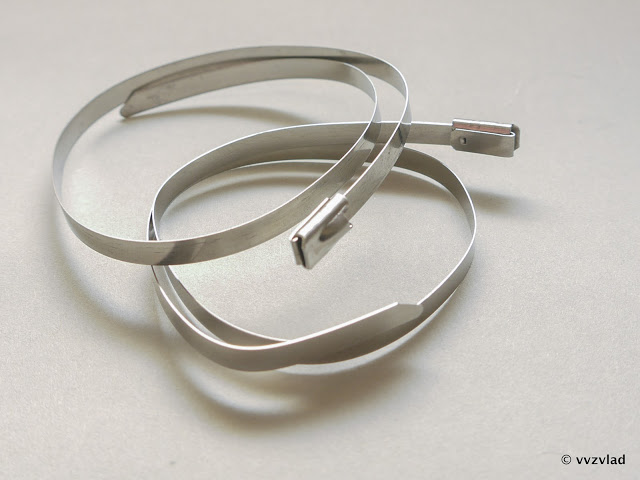
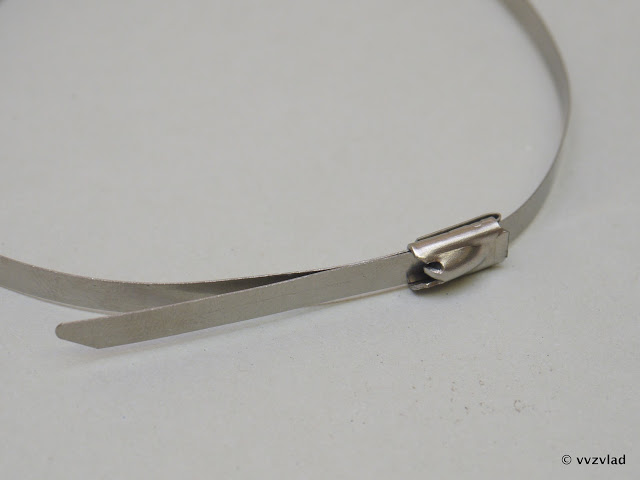
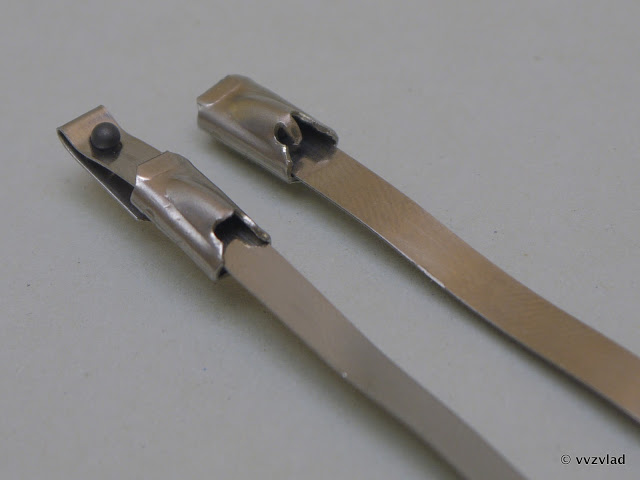
The principle is clear, refuel and tighten. Very durable, holds, emnip up to 30kg one minimum. It bites only with wire cutters, do not try to “unscrew” the gap with pliers - it easily cuts through the cable sheath, but it does not break. Principle of work: Inside - a rough ball inside a tapering cavity. When you push the tape in the “right” direction - it rolls out to the wide side (the small metal tongue doesn’t fall out completely, it can be seen in the photo), and when you try to pull it back - the ball rolls back, falls into a narrow slot, and is pressed to the tape the stronger, the harder you pull. But it’s inconvenient to fix the couplers to the screws. To eliminate this drawback, there are platforms for cable clamps
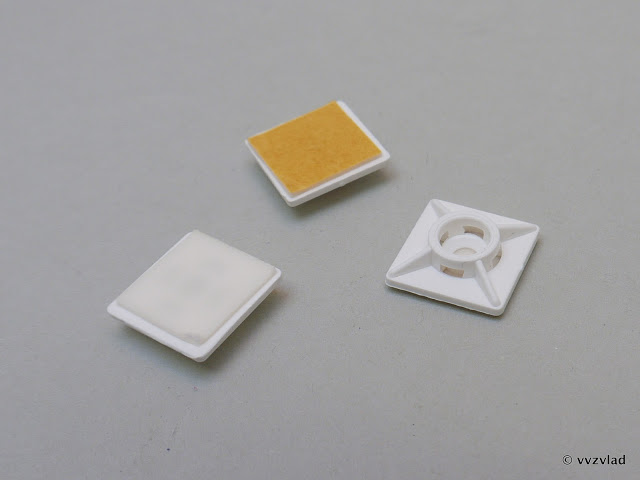
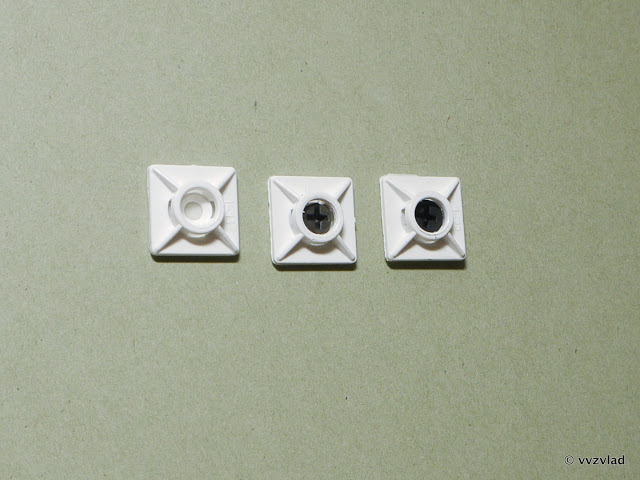
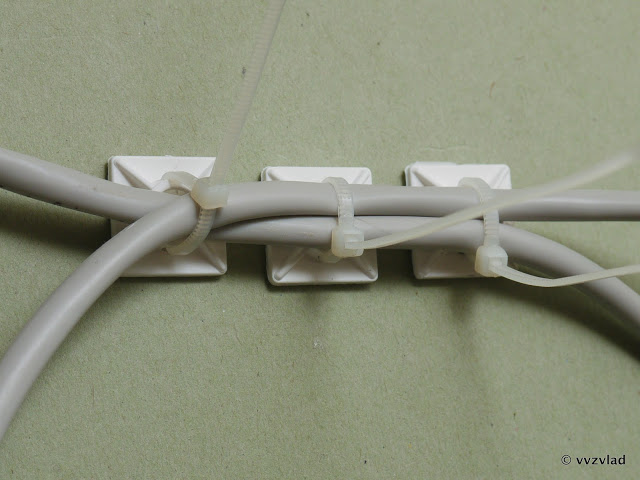
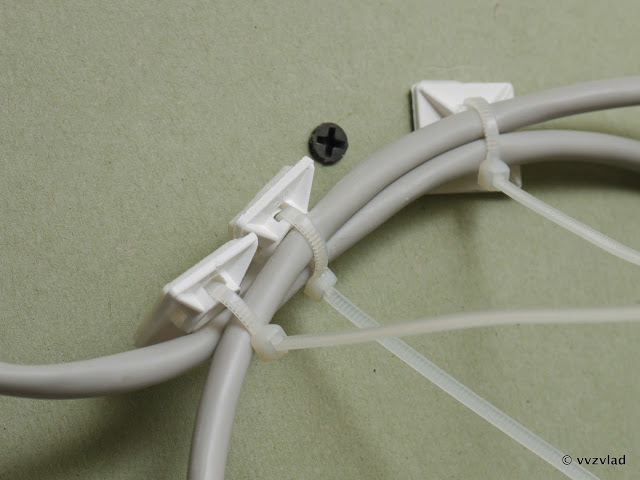
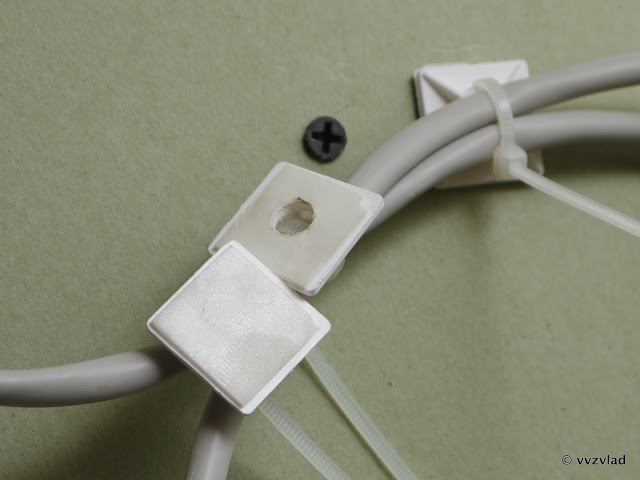
There are views with or without glue pad. Of course, you can count on the glue pad only when laying telephone wiring laid on the floor in a very quiet place where no one walks. IMHO, the only application of the site is to glue it immediately to the right place, before screwing it in with a screw (there is a special hole in the center for this). Then we thread the cable tie into the narrow holes and fix it on the cable. By the way, here are three types - for glue, for a screw, and for a screw in a metal dowel. We pull: Only a normal screw with a wide head, twisted into a DRIVA dowel, is firmly held. One of my favorite pieces is a wall plug .
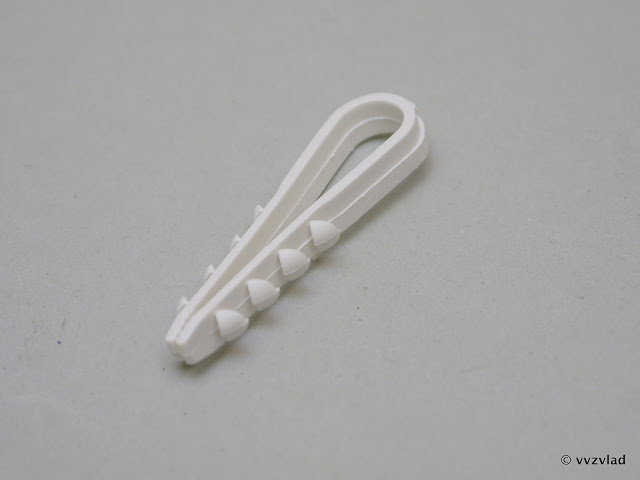
Great solution. I think that everyone has already guessed what to do with it, but I will nevertheless explain. We drill a hole: We wrap the cable with a cable tie: And we stuff it into the hole! All. The cable is securely fixed. The clamp is much thicker than the cable tie, and with the right hole, it easily carries the weight of even a bundle of power cables. A hit of all time, the favorite fixture of the installers of the provider. Plastic mounting bracket.


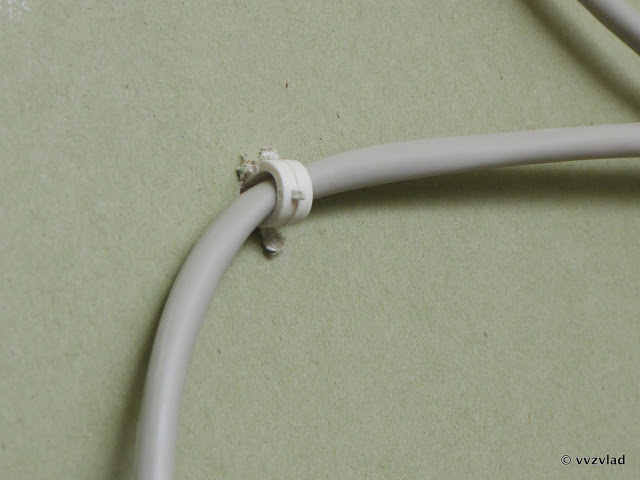

Cheap, sold in all stores. On this her virtues end. I don’t know, maybe there’s some trick, but for over 10 years I haven’t been able to learn how to score it the first time and without abuse. Cloves are small, uncomfortable to hold. It keeps well only on wooden surfaces, which, coupled with the love of the installers to mount it on the GVL, ensures the cable is torn off in a week. And sometimes they try to drive them into plastic skirting boards and plastering concrete walls. Or into a solution between bricks, yes. In general, you don’t need to do this, for such installers are burning in hell over a smoky bonfire from cable insulation.
Plastic earrings for the cable (yes, they are called that) and metal staples for the cable (I have nothing against them, unlike their plastic namesakes).
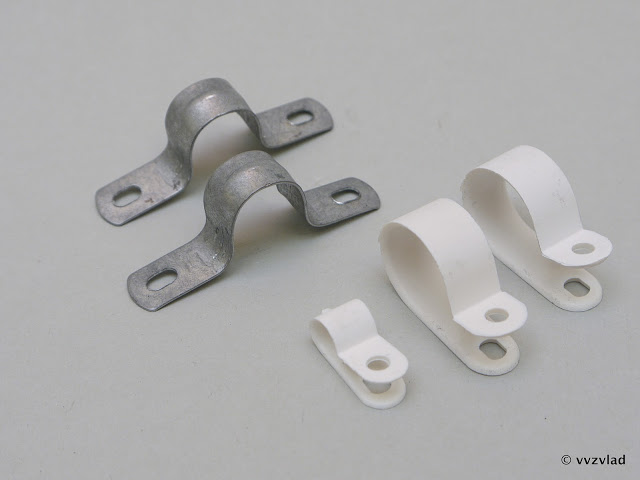
The first ones are good because they are fastened with just one screw, but unlike the dowel-clamps, it can be used several times - to unscrew the screw, add-remove the cable, and tighten again. And metal staples perfectly hold any heavy cable, and have an excellent tensile force, successfully coping with the attacks of cleaners, feet and hands of visitors and lovers to attach their cable to someone else's.
Surely, like last time, I forgot about some obvious ways, but they will probably be remembered in the comments.
And if you do not want to skip the discussion, check the box .
.
And if you don’t want to miss another useful article, you can subscribe to me in my profile (the “subscribe” button)
Yes, and here such mounts are ugly, uncomfortable, and give out a layman:

What, in essence, is the process of attaching wires? These are actions aimed at connecting (it can be rigid or not, detachable, or one-piece, etc.) of one object (cable), which is not able to independently maintain its position in space, to another object (wall, beams, masts and other exotic), which, as a rule, is much harder and does not need additional supports.
The walls are different, it is a fact. But in most cases, their classification can be reduced to three types:
Dense
Timber, sleepers, hut, chipboard, wood, plaster and soft solutions, including gypsum. In general, where you can screw the screw without any problems.Problems usually do not arise, only a screw and a screwdriver are needed. Well, and someone who will twist, of course. It twists easily, holds tight, hang anything. After twisting it leaves a minimum hole.
Solid
Solid solutions, concrete, brick, cements, screeds. Where the screw does not turn.We make a hole with a puncher, a drill (for singles, do at least 20 pieces with a percussion drill — you shouldn’t value yourself), a chipper (for masochists, or Soviet Socialist-Revolutionaries), insert a plastic dowel there (chopik, as the Tajiks say), or Soviet-style: manually machined piece of wood, and we already screw it into it. With the right choice of the size of the dowel and hole - it keeps excellent. After dismantling, it already leaves a hole more.
Thin
Plastic, drywall, gypsum plasterboard, and other delicate materials, behind which there is a void. Accordingly, it is better not to twist the screw there - most of it will simply hang in the air.And here questions traditionally arise - when you try to screw a screw in there, it fails, spins uselessly, not wanting to hold on. If you manage to wrap it there, you can’t hang anything heavier than the picture - at any noticeable load, it will simply bend and break out of the wall, leaving a hole behind it.
For such cases, there are many solutions that are called - fasteners for hollow structures. Here are 3 of the most common types:
Molly (MOLLY, "umbrella"), a special case of anchor bolts.
A serious metal structure that opens (sometimes even with a special tool) on the other side of the wall, and does not disappear. And you can do anything with it - at least hang a chandelier (some models already come with a hook and a mounting bracket for the fixtures), at least hanging equipment.It looks like this: Of the minuses - you need to drill a hole in advance, and not a small one.

Driva (dowel with DRIVA drill (metal) or TT22 (plastic)), an awesome-looking drill, as if specially created for lobotomy
It looks like this: It is
inserted into a screwdriver (although you can get by with a drill, and even a screwdriver), and it twists into the wall, like a regular screw:
It turns out here is a plaque in which the screw is
already screwed : After that, you can screw everything that you need onto this screw necessary. I showed metal above, but there are also plastic ones:


Butterflies (butterfly plugs, TNF, TNF-W)

The meaning is simple. A hole is made in the wall, the dowel is straightened and pushed into the wall. You begin to tighten the screw - it catches the back of the dowel and pulls it against the wall, compressing it so that it is pressed against the wall on the other side.
Disadvantages - he must definitely keep something from “your” side, otherwise a thin bezel will slip, and the dowel along with the screw disappears into the depths of the wall. You can’t just hang a picture on a string on such a dowel.
All of the above fasteners are used only for hollow structures - walls from GVL, GKL.
As a result of the above measures, we have a wall, ready to screw in screws. But you won’t be able to fasten the wire with screws, this only works with the Soviet telephone “noodles”. One of the principles of cable management is that organization tools must not damage the cable.
Option one: wires in the pipe.
Or rather in the corrugation. It is called " Pipe corrugated PVF with a broach. " A broach is the wire that sticks out from both ends. One end is fixed to the wire: And the second must be carefully pulled, and the cable will be in the corrugation. Pieces in the middle - mounts. They are screwed to the wall with screws: And the corrugation snaps into them: It turns out like this:


For greater convenience, the fasteners can snap into each other, for smooth installation of several corrugations at once.
The main advantage of the corrugation is that it is airtight. Therefore, it can be used on the street: True, it must be borne in mind that in this case there should not be cuts and holes on it, and if there are, they should be from the bottom. A couple of liters of water can easily pour into the holes located at the top, and tear the corrugation out of the mounts under its own weight. For such cases, there are special mounts that still snap on top, but for some reason I have not seen them in stores for a long time. Of course, all connections for outdoor use should be sealed whenever possible. At least a simple sealant, if there are no seals.


Also, PVC corrugation does not like frequent poking-pulling out of fasteners, ideally - it fixed everything. Otherwise, it wrinkles and cracks: By the way, here the fasteners are snapped into each other. And it does not support combustion, does not allow the wires to catch fire, restricting the air flow to them, and saves them from crushing the wires when they are walled up in expanding mixtures. True, such a sleeve should not be placed where there is a risk of flooding, or rodent gnawing. In these cases, it is better to use the same corrugation, but metal. It is called a metal hose , usually with a long code, in which size, thickness, shell, etc. are encrypted. But I usually buy it, poking at the window, "and now this is 10 meters." :)


And the corrugation saves the wires from prying eyes, and the sense of beauty - from the type of wires. But, let’s say, we have a bundle of wires that will not offend our feelings of beauty, because it will be laid behind a suspended ceiling or closed by a partition.
To begin with, it must be collected in order to visually distinguish it from other similar bundles, and to prevent entanglement.
I think no one needs to explain what a nylon screed is ? Everyone saw her at least once. At one of the ends there is a head with a ratchet latch: And along the rest of the length of the screed there is an inclined corrugated surface. The latch passes only in one direction, and in the other - it stops. Wrap the wires, snap, tighten to the limit. At will - cut off the tip.


By itself, one-time. Something needs to be pulled out or added - we cut, and we click a new one. It is not suitable for freezing temperatures and bright sun - it becomes fragile in the frost, after which the first gust of wind effectively breaks the cable ties along the entire length of the cable. It crumbles after exposure to the sun (from a month to a year or two, depending on the manufacturer). They do not like excessive tension and loads - they are torn. In short, the destiny of a polyethylene coupler is the organization of light cables, their fastening to panels. Do not hang the cable on the cable ties, at least completely. Fasten to something else. For example, on a metal screed: They are called - a stainless steel screed .


The principle is clear, refuel and tighten. Very durable, holds, emnip up to 30kg one minimum. It bites only with wire cutters, do not try to “unscrew” the gap with pliers - it easily cuts through the cable sheath, but it does not break. Principle of work: Inside - a rough ball inside a tapering cavity. When you push the tape in the “right” direction - it rolls out to the wide side (the small metal tongue doesn’t fall out completely, it can be seen in the photo), and when you try to pull it back - the ball rolls back, falls into a narrow slot, and is pressed to the tape the stronger, the harder you pull. But it’s inconvenient to fix the couplers to the screws. To eliminate this drawback, there are platforms for cable clamps


There are views with or without glue pad. Of course, you can count on the glue pad only when laying telephone wiring laid on the floor in a very quiet place where no one walks. IMHO, the only application of the site is to glue it immediately to the right place, before screwing it in with a screw (there is a special hole in the center for this). Then we thread the cable tie into the narrow holes and fix it on the cable. By the way, here are three types - for glue, for a screw, and for a screw in a metal dowel. We pull: Only a normal screw with a wide head, twisted into a DRIVA dowel, is firmly held. One of my favorite pieces is a wall plug .


Great solution. I think that everyone has already guessed what to do with it, but I will nevertheless explain. We drill a hole: We wrap the cable with a cable tie: And we stuff it into the hole! All. The cable is securely fixed. The clamp is much thicker than the cable tie, and with the right hole, it easily carries the weight of even a bundle of power cables. A hit of all time, the favorite fixture of the installers of the provider. Plastic mounting bracket.


Cheap, sold in all stores. On this her virtues end. I don’t know, maybe there’s some trick, but for over 10 years I haven’t been able to learn how to score it the first time and without abuse. Cloves are small, uncomfortable to hold. It keeps well only on wooden surfaces, which, coupled with the love of the installers to mount it on the GVL, ensures the cable is torn off in a week. And sometimes they try to drive them into plastic skirting boards and plastering concrete walls. Or into a solution between bricks, yes. In general, you don’t need to do this, for such installers are burning in hell over a smoky bonfire from cable insulation.
Plastic earrings for the cable (yes, they are called that) and metal staples for the cable (I have nothing against them, unlike their plastic namesakes).

The first ones are good because they are fastened with just one screw, but unlike the dowel-clamps, it can be used several times - to unscrew the screw, add-remove the cable, and tighten again. And metal staples perfectly hold any heavy cable, and have an excellent tensile force, successfully coping with the attacks of cleaners, feet and hands of visitors and lovers to attach their cable to someone else's.
Surely, like last time, I forgot about some obvious ways, but they will probably be remembered in the comments.
And if you do not want to skip the discussion, check the box
 .
. And if you don’t want to miss another useful article, you can subscribe to me in my profile (the “subscribe” button)
