DIY House: adult doll houses
If you wind the wire on a toothpick, you get a great wire for a tiny phone. The sharpened end of the same toothpick is an almost finished pencil. Yellow stationery gum are idle? With proper imagination of them can make excellent pasta. There is a whole line of craftsmen who build miniatures from pipettes, chopsticks from popsicle and scraps of packaging. It looks easy, but it is difficult to repeat from the first time, it is checked. Fortunately, there are ready-made DIY House kits - each box contains materials and instructions to make a charming miniature room with a working backlight. We collected a couple and share our impressions.
Speaking of miniatures and rumboxes
Creating miniatures and scale models lies at the intersection of "real" art, folk art and toys. In Russian, a “modeller” is usually understood as a serious geek who builds small tanks, airplanes, beautiful ship models or, at worst, paints figures from Warhammer.
In fact, the world of miniature things is wider. Take the rumbox - a miniature model of the room. All over the world, amateur modellers do such things and even compete in assembling points for speed. The American artist Narcissus Niblak Thorn (1882–1966) went down in history as one of the popularizers of this type of art. In the 30s and 40s of the 20th century, Madame Thorn created a whole collection of incredibly detailed tiny rooms reliably reproducing historical interiors: from living rooms and dining rooms in the houses of the highest American class of the XVIII – XIX centuries - to the French boudoir of the period of Louis XV and the English Tudor Hall era.
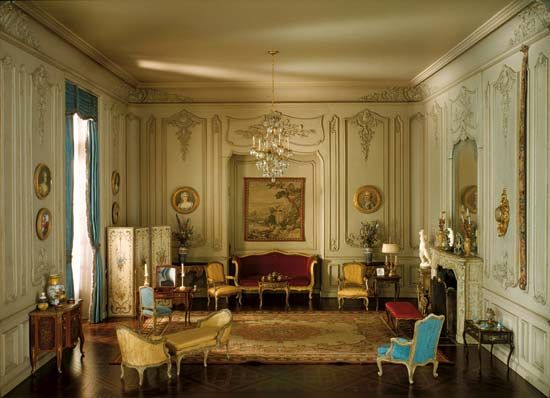
Thorn's rooms came to the Art Institute of Chicago, where most of them exhibit today. By the way, the Great Depression “helped” the artist in many ways. Because of the high unemployment, Thorn was able to hire many people with special skills who worked with her on tiny interiors.
Designers DIY House - this is exactly the classic rumboksy. But, of course, much easier to perform than the works of Narcissus Thorn and her assistants.
Getting started
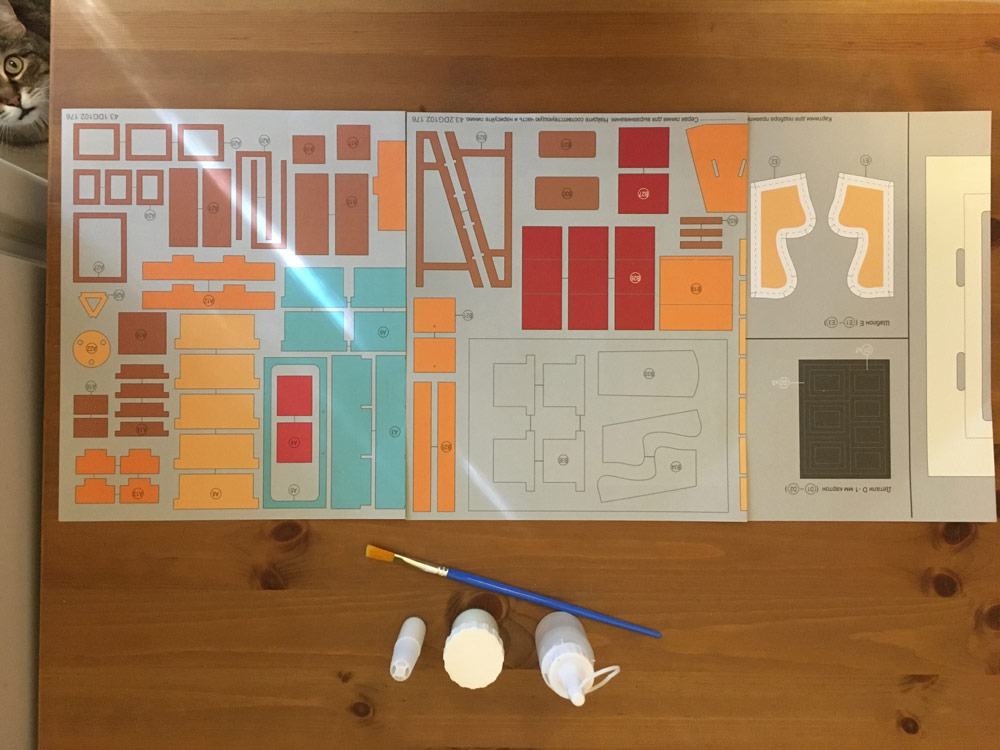
In the box is a booklet with instructions in Russian, under it - bags of materials. They are all marked with a letter and a number, so that the system works as with Lego sets of designers: look at the desired combination in the instructions, take the right bag.

The bags are folded all sorts of things: wooden blanks, wire, pieces of cloth, toothpicks, colored paper, transparent plastic. Separately - paper sheets with images of plant leaves, labels, inscriptions, covers and pages of books. Details of pots, sachets and other miniature items are printed on a brown sheet of crafting paper. Yes, all this is to be cut.
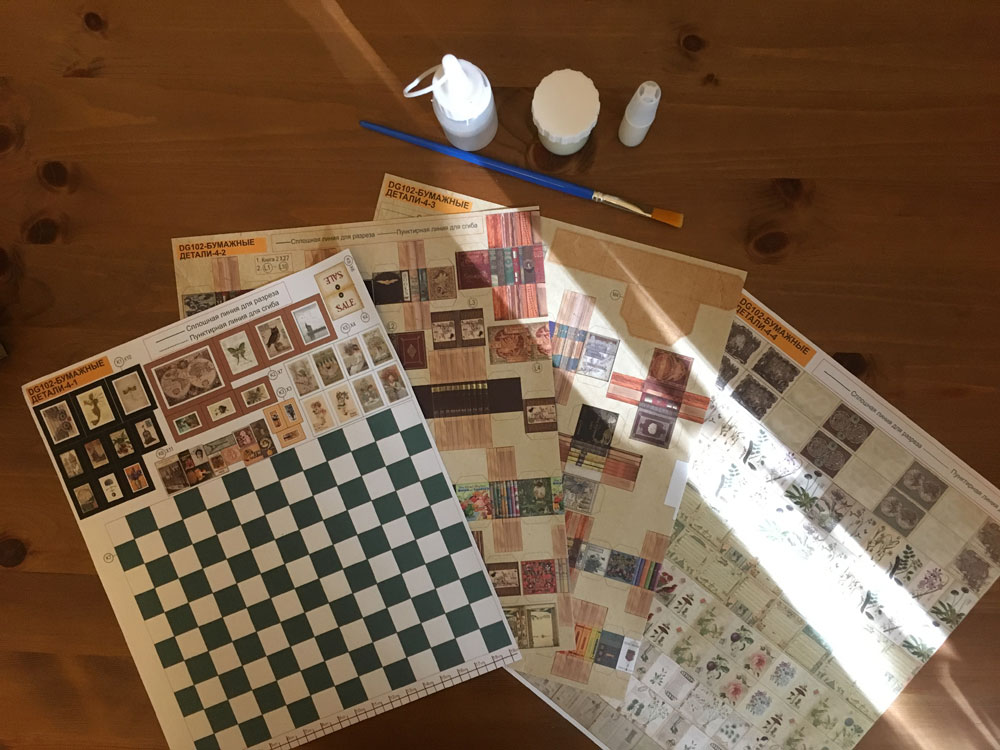
But the sheet with large-scale samples is not necessary to touch. It is specifically given in order to attach to it wooden sticks without marks and check that it is the right part.
The kit includes paint, bottles with silicate glue and white glue. A soft brush and tweezers are offered from the tools. Additionally, you will need scissors, a stationery knife, and possibly pliers. The instruction insists on them, but the wire bends also with fingers.

The ruler will help a lot, because you have to carefully cut pieces of cloth and paper. For those who are too lazy to look for a tool, the divisions are applied to the edge of the sheets with details for cutting. His own bitter experience suggests that the line is still preferable.
The process has begun
The instruction consists of individual items, each of which shows how and what to do correctly. As mentioned above, the first is the list of materials. Then - as they are cut, glued and assembled.
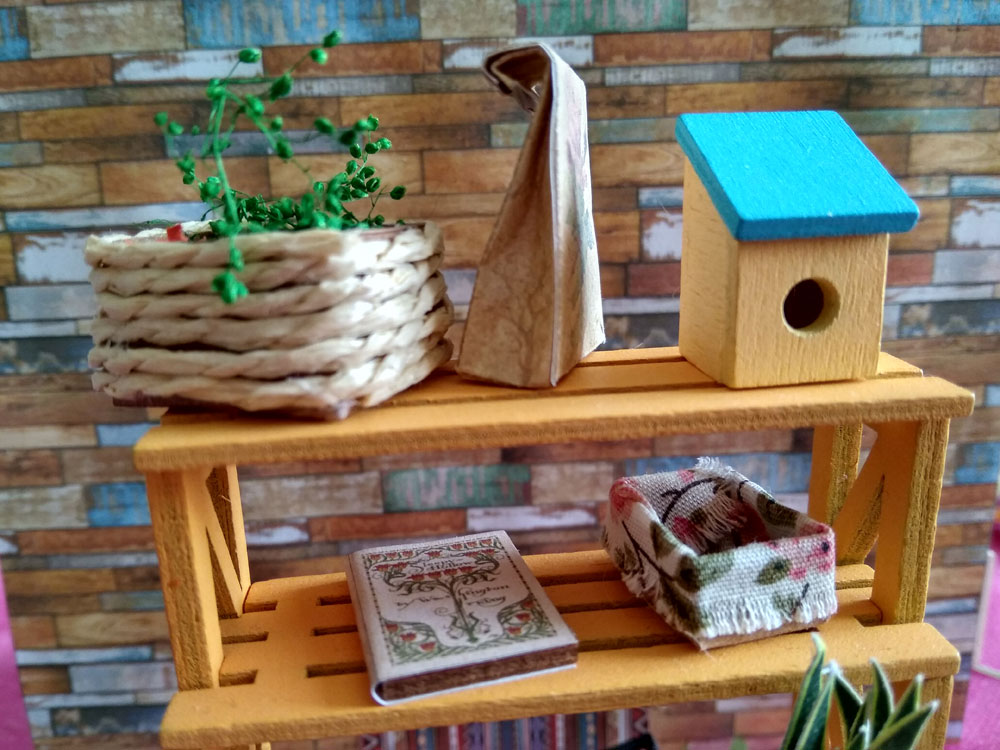
Take for example the pot with fern. First, we cut a part out of craft paper, assemble it according to the origami principle - the folds are indicated by a dotted line. It turns out the pot. Then another detail is assembled, the “ground” of the pot, to which the plant will cling.
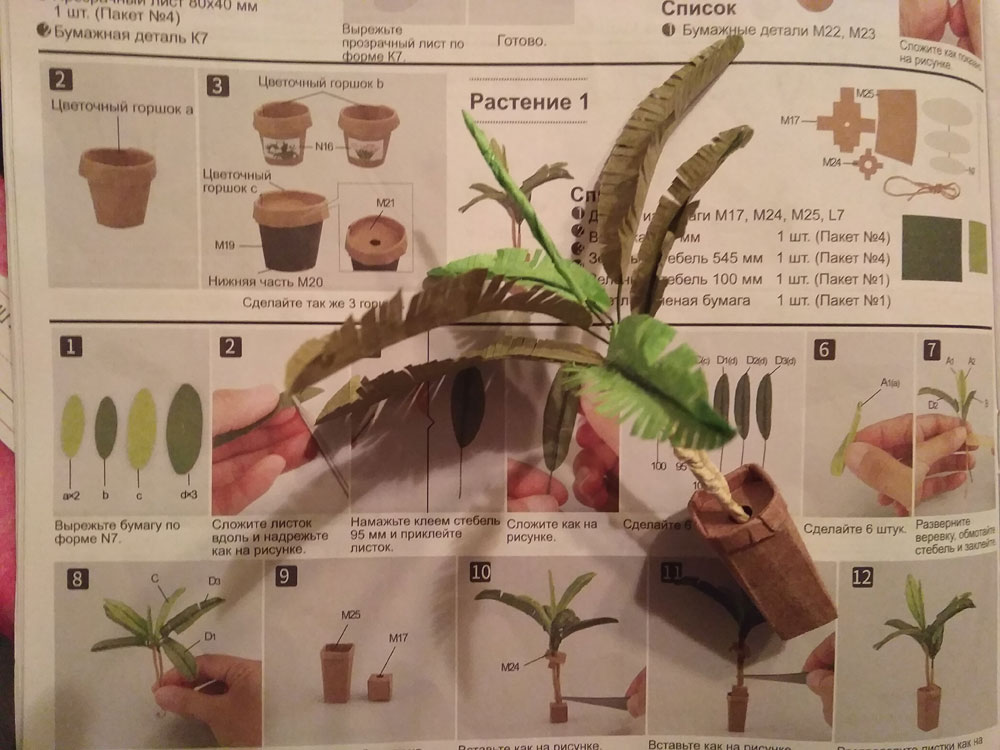
Leaf samples are cut from a white sheet. Put them to the leaves of thin green paper and cut the finished parts. The resulting leaves are cut into a fringe. One leaf twist. Glue in the middle of the leaves of the stems-wires. We compose a potted composition from the resulting elements.

Miniature furniture and other furniture are collected on the same principle. It is easy to collect items from wooden bars, and the result is not less pleasing to the eye. Almost like IKEA furniture assembled from the first attempt.

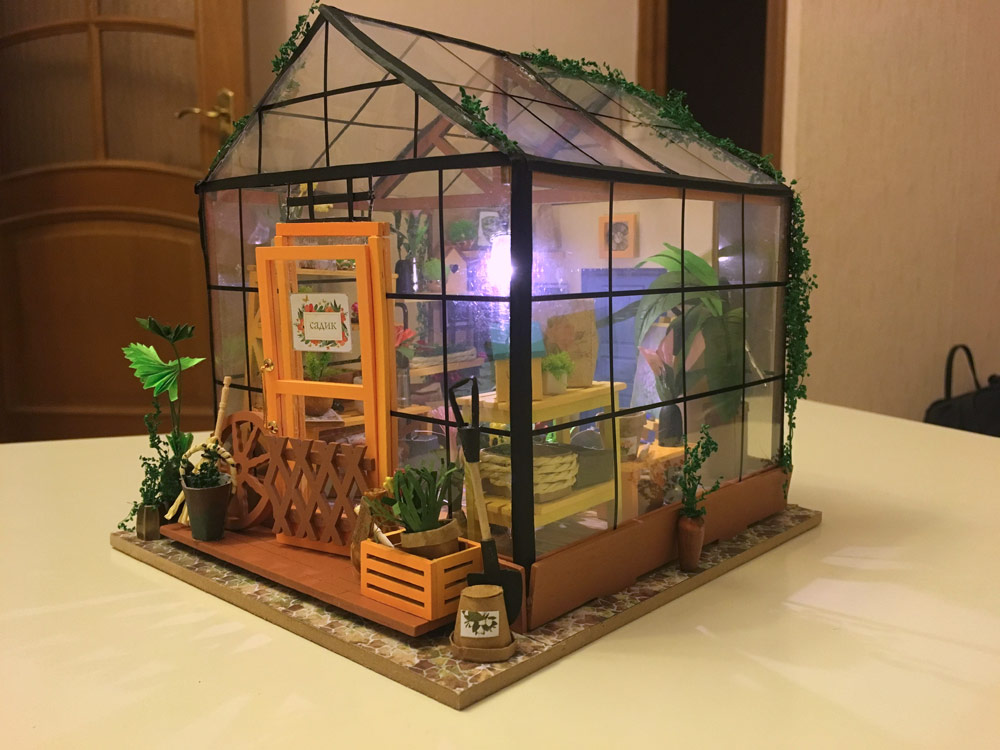
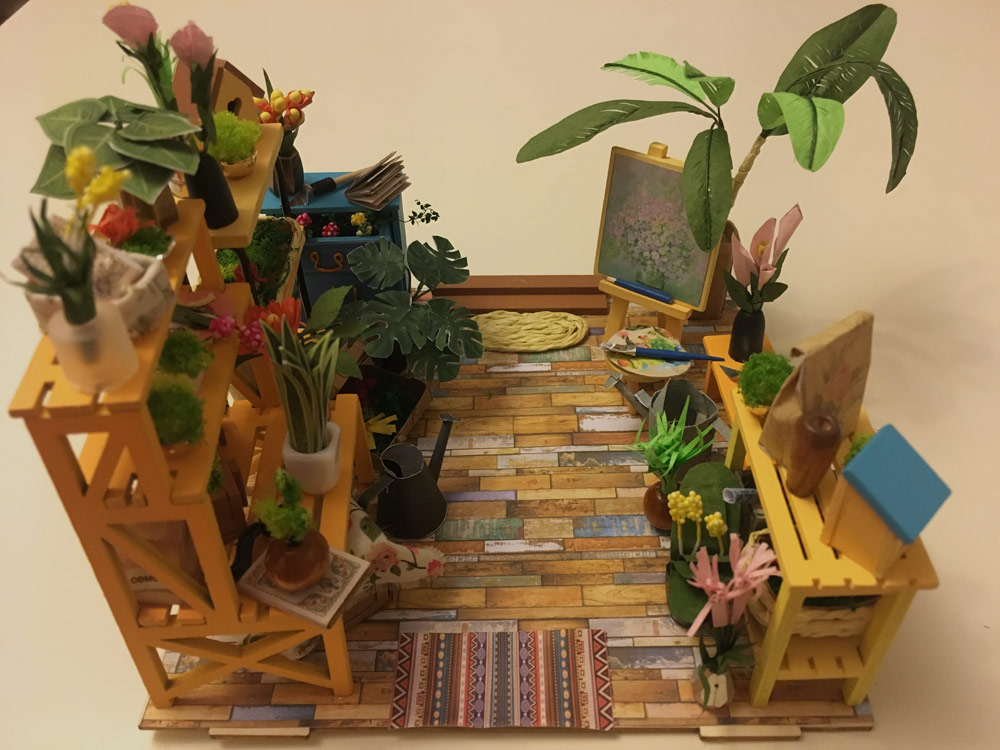
Finished figures are exhibited in the "room" or pasted on its walls, if it is paintings and posters. The room must be assembled from pre-sawn wooden floors, walls and roofs.
Unlike Lego, DIY House designers are more flexible. A pair of Lego kits, based on a favorite show or movie, are assembled into identical dioramas and models. Of the two identical DIY House boxes, two unlikely rooms will come out. If desired, they can always be “pumped out” - find another paper, fabric, paint, and apply them instead of or together with those offered in the box.
Hard craft
Noticed how simple everything is described? "We take that piece, sticking to it, it turns out great." In the laconic verb "we glue" the dog is buried. Gluing is the most difficult operation in DIY House sets.
Difficulties can begin with the quality of the composition. In one of the kits, which we folded, the PVA broke up into fractions, shaking no longer helped. Clay had to buy.

But silicate glue firmly connects everything that is glued in the DIY House, there are a lot of it and enough for all the details. It requires skill: the contents of the bottle are drawn into threads, rolled into drops, and not always applied well the first time, especially on paper. The parts to be glued must be kept together for a long time and ensure that they are attached to each other correctly. Correct the error then it will be difficult. It is easier to accidentally break a model card than to undo a crookedly rising element.
The second problem is the tiny size of the items. An adult who has forgotten the delights of kindergarten handicrafts and school lessons of labor will have a hard time.

The details of the size of a nail are hard to cut. Hold your breath and take a sharp nail scissors. For images printed on white sheets there is a small insurance - a few spare parts. They are circled in red. With colored paper is more difficult, because in a set it is a bit. A couple of mistakes with planning is not fatal, but still it is worth scrolling through the instructions in advance and figuring out how best to cut the pieces.
All DIY House kits have a difficulty rating. It is expressed in hours required for assembly. Apparently, the complexity is directly proportional to the number of complex models of plants in the kit. Here's what the rating would look like if the DIY House designers were a video game:
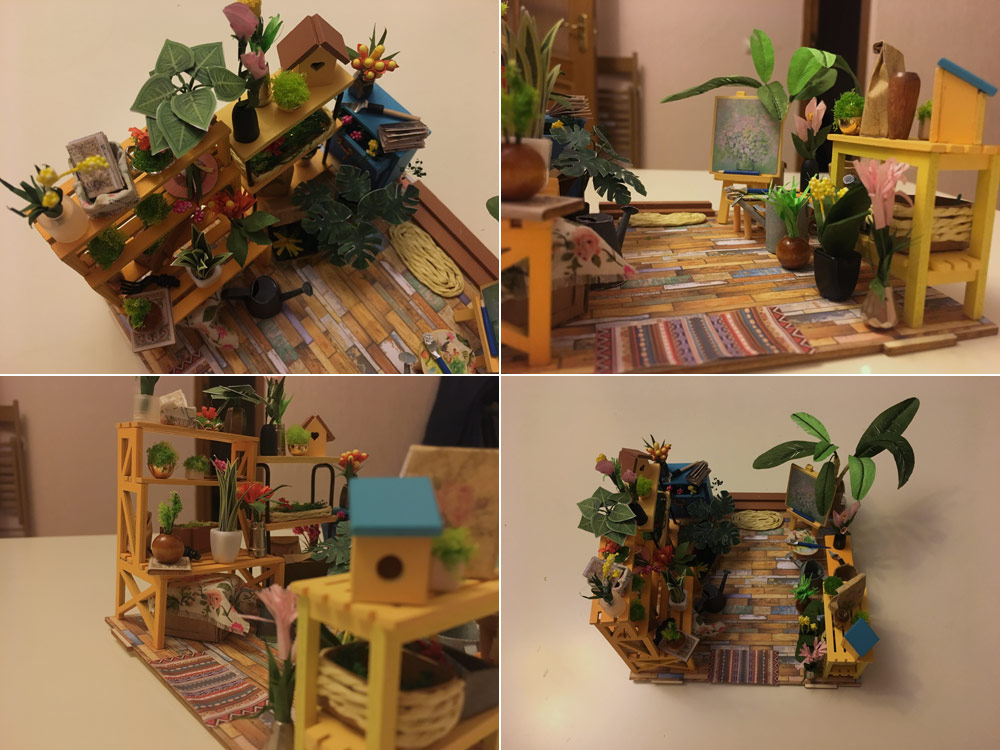
Orangery - 28 hours. Level "Torture".
Garden — 24 hours. "Master".
Kitchen - 24 hours. "Master".
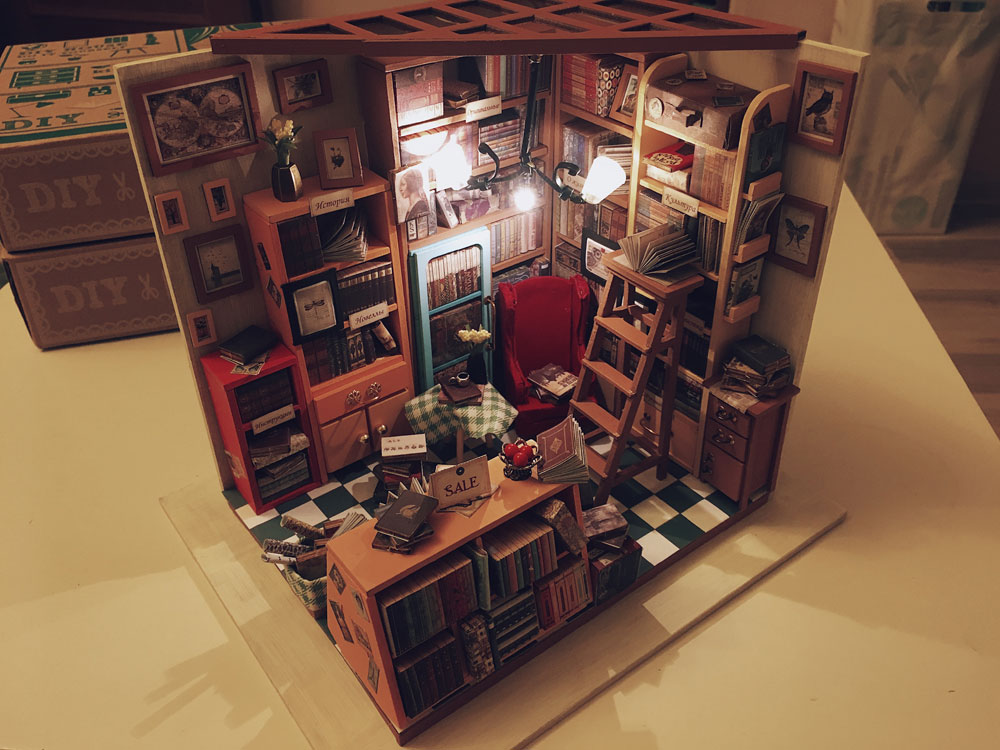
Book shop - 24 hours. "Master".
Living room - 24 hours. "Master".
Cafe - 24 hours. "Master".
Atelier - 20 hours. "Expert".
Art Workshop - 20 hours. "Expert".
Living room - 18 hours. "Tall".
Confectionery - 15 hours. "Usual".
On the loggia - 15 hours. "Usual".
Soho Time - 15 hours. "Usual".
Attic - 15 hours. "Usual".
An important point! A clock is just an indication of the level of complexity, and not an unequivocal estimate of the time spent on assembling a designer. For people with dexterous fingers, sharp eyesight, artistic experience and remarkable patience, the figure will be correct. The rest can safely multiply by two.
Let there be light
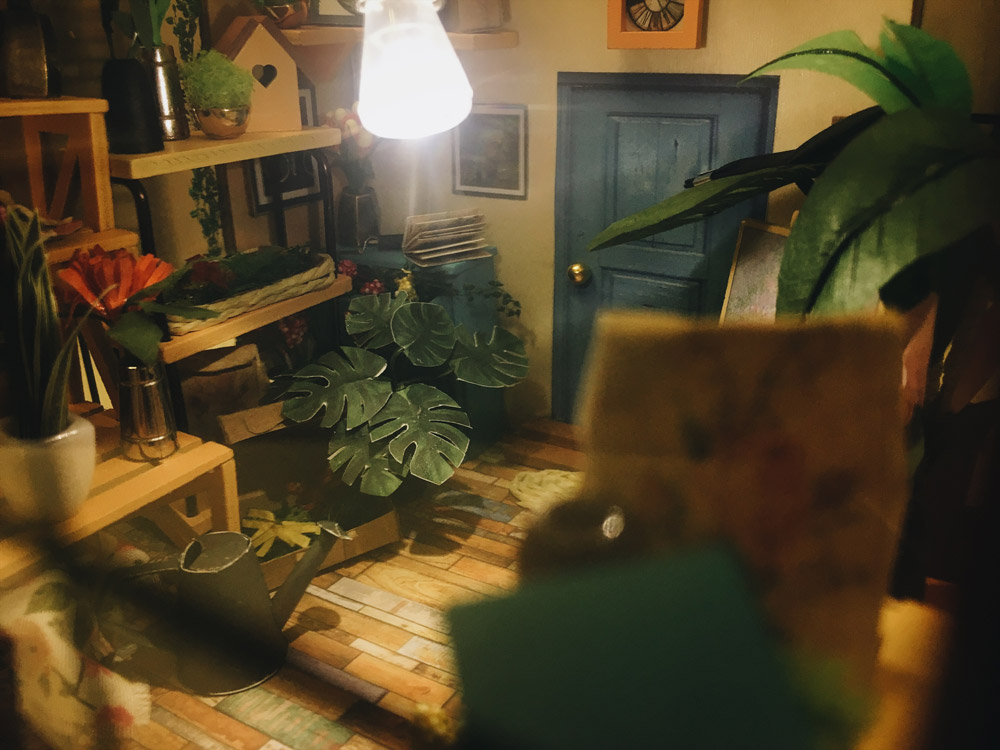
The final chord when assembling the DIY House is wiring the light. Yes, the designers are electrified!
The backlight is assembled from complete wires, light bulbs and batteries. This step does not cause any difficulty even for the humanities. All items are assembled according to the instructions. The wires connect color to color, thus connecting to the power supply unit on batteries. No soldering iron needed. The light is not constantly lit, it can be turned on and off. The unit with batteries and remote control hides in the base of the model.
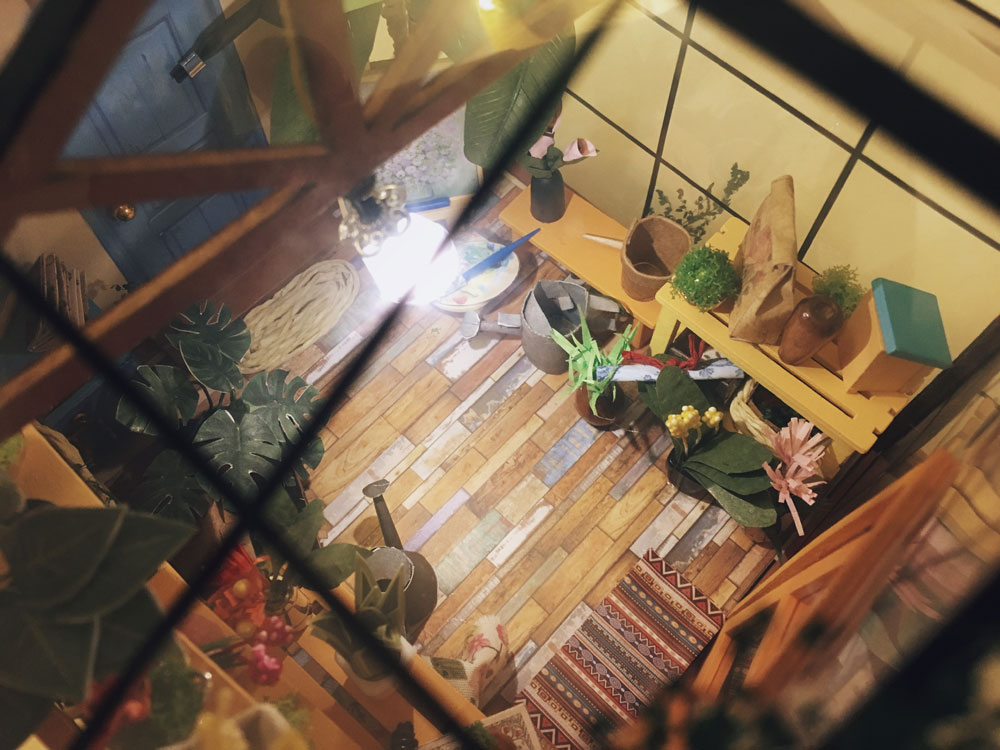
The backlight looks very cool in the evening. Tiny objects, delineated by thicker shadows, are acquired in realism. These are not roughly cut out paper leaves and scraps of rope and cardboard planted on glue, but rather natural-looking miniature decorations.

All the DIY House constructors mentioned in the article can be purchased at Madrobots.ru . Until July 31, Habr readers will receive a 10% discount on the DIYHABR promo code.