We send letters from ASP.NET MVC
Often in applications there is a need to send letters to users. Today I will show how with the help of ActionMailer .Net this task is easily solved. Its main advantage in the representation of sent letters in the form of controller actions, the body of the letter is represented by the display, as well as the fact that in debug mode it allows you to save letters directly to the hard drive, without using a mail server.
Create an empty project. Using NuGet, we add an ActionMailer:
For demonstration, we will create one Home controller and add four actions to it: for the main page, for sending, for successful sending and in case of unsuccessful sending:
Now add the model for writing:
Create a mapping for the Index action. We will have this simple little form with the necessary fields:
We get this form:
Now create a controller that will directly send our letters. Call it EmailController and inherit from MailerBase. We also add and implement the action of sending a letter:
To, From, Subject - are internal properties of the controller, and the values from them will be used when sending an email. It is worth noting that To is a list, so bulk mailings are possible.Spammers will rejoice.
Now add a view to our action. In this case, the view will play the role of the body of the sent letter, i.e. you can add html markup:
I’ll also notice about naming view files. In the default version, it will have a name: ResetPassword.cshtml. For correct operation of ActionMailer, you need to add .html so that the name takes the following form: ResetPassword.html.cshtml.
Also, for correct operation, you need to add parameters for sending mail. The first option for saving sent almost to the local disk:
And the second option when using a mail server:
These lines must be added to Web.config , in the section
Well, now let's add the logic of sending a letter to the Index action of our Home controller:
Now, when you click on the button, our letter will be sent (or saved to disk).
Additional Resources:
http://geeksharp.com/2011/01/26/actionmailer-net-email-templates-for-the-mvc-crowd/
Create an empty project. Using NuGet, we add an ActionMailer:
PM> Install-Package ActionMailer
For demonstration, we will create one Home controller and add four actions to it: for the main page, for sending, for successful sending and in case of unsuccessful sending:
public class HomeController : Controller
{
    public ActionResult Index()
    {
        return View();
    }
    [HttpPost]
    public ActionResult Index(EmailModel model)
    {
        throw new NotImplementedException();
    }
    public ActionResult Success()
    {
        return View();
    }
    public ActionResult Error()
    {
        return View();
    }
}
Now add the model for writing:
public class EmailModel
{
    public string Subject { get; set; }
    public string From { get; set; }
    public string To { get; set; }
    public string Body { get; set; }
}
Create a mapping for the Index action. We will have this simple little form with the necessary fields:
@model TestSendEmail.Models.EmailModel
@{
Layout = "~/Views/Shared/_Layout.cshtml";
ViewBag.Title = "Index";
}
@using(Html.BeginForm("Index", "Home", FormMethod.Post, new { @class = "well"}))
{
@Html.ValidationSummary()
@Html.TextBoxFor(m => m.Subject, new { @class = "input-xxlarge" })
@Html.TextBoxFor(m => m.To, new { @class = "input-xxlarge" })
@Html.TextBoxFor(m => m.From, new { @class = "input-xxlarge" })
@Html.TextAreaFor(m => m.Body, new { @class = "input-xxlarge" })
}
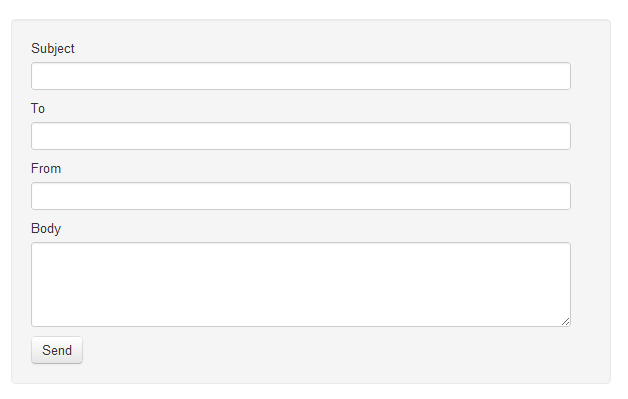
We get this form:
Now create a controller that will directly send our letters. Call it EmailController and inherit from MailerBase. We also add and implement the action of sending a letter:
public class EmailController : MailerBase
{
    public EmailResult SendEmail(EmailModel model)
    {
        To.Add(model.To);
        From    = model.From;
        Subject = model.Subject;
        return Email("SendEmail", model);
    }
}
To, From, Subject - are internal properties of the controller, and the values from them will be used when sending an email. It is worth noting that To is a list, so bulk mailings are possible.
Now add a view to our action. In this case, the view will play the role of the body of the sent letter, i.e. you can add html markup:
@model TestSendEmail.Models.EmailModel
@{
Layout = null;
}
@Model.Subject
@Model.Body
I’ll also notice about naming view files. In the default version, it will have a name: ResetPassword.cshtml. For correct operation of ActionMailer, you need to add .html so that the name takes the following form: ResetPassword.html.cshtml.
Also, for correct operation, you need to add parameters for sending mail. The first option for saving sent almost to the local disk:
And the second option when using a mail server:
These lines must be added to Web.config , in the section
Well, now let's add the logic of sending a letter to the Index action of our Home controller:
[HttpPost]
public ActionResult Index(EmailModel model)
{
    if (ModelState.IsValid)
    {
        try
        {
            new EmailController().SendEmail(model).Deliver();
            return RedirectToAction("Success");
        }
        catch (Exception)
        {
            return RedirectToAction("Error");
        }
    }
    return View(model);
}
Now, when you click on the button, our letter will be sent (or saved to disk).
Additional Resources:
http://geeksharp.com/2011/01/26/actionmailer-net-email-templates-for-the-mvc-crowd/