Kitchen computer table

In the evenings, having a laptop, but without having a cozy corner to work behind it, the only logical way out is to occupy a favorable position in the kitchen. Do not bother anyone and do not bother you. I think many will understand me.
The idea of transforming a kitchen table into a computer one arose during a walk in the famous Swedish store, where I saw a table with a rising lid - saving space, convenience and comfort all rolled into one. But he did not suit me for two reasons: the price (about 7500 rubles) and the surface of the countertop - obviously not for the kitchen.
Initial conditions
My kitchen table consisted of two pieces of countertops left over after assembling the kitchen, connected by two bars and placed on legs. The only thing left was to add a little and a little refine. It was planned to make a miracle over the weekend, but the work dragged on for a month.
Materials and tools
I compiled a list of necessary items in advance, making changes along the way. That's what came out in the end.
Materials:
- screed for countertops - 2x50 rubles.
- countertop 1m - 720 rubles.
- timber 2500x95x45 - 180 rubles.
- board 2000x95x20 - 100 rubles.
- piano loop 120cm - 210 rubles.
- gas spring 100N - 2x130 rubles.
- Metal plate 500x80 - 2x85 rubles.
- leatherette 2m - 150 rubles.
- LED strip 1m - 250 rubles.
- transformer - 215 rubles.
- switch - 60 rubles.
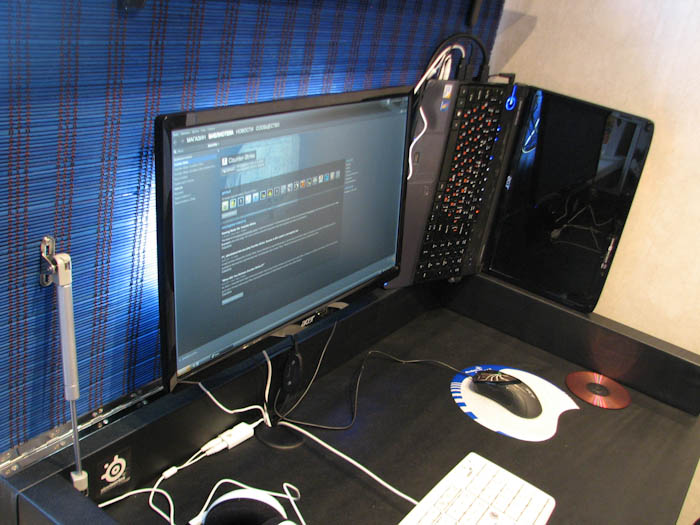
- monitor bracket - 220 rub
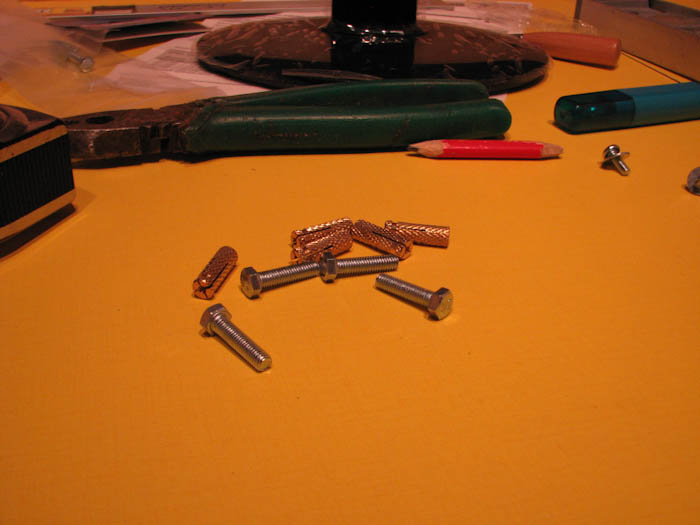
- dowel 5x16 1 pack - 60 rub.
- 5x20 bolts 6 pcs. - 30 rub.
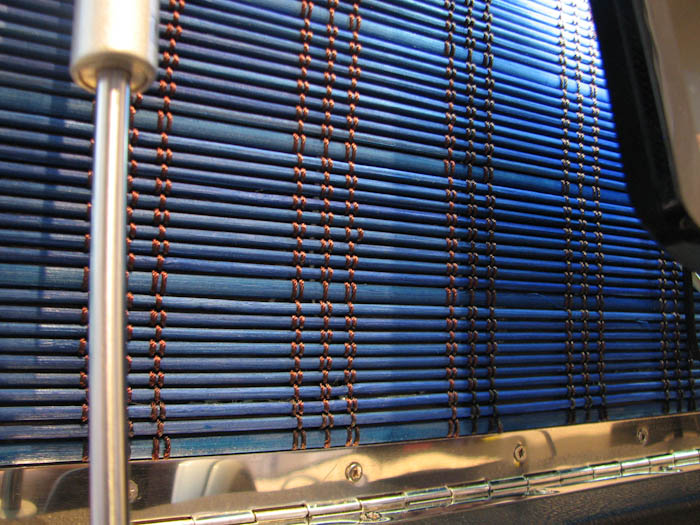
- bamboo canvas (width 1.2m) 0.6m - 270 rubles.
- contact adhesive (“Moment” universal) - 60 rubles.
- screws
Additionally:
- 1m HDMI cable - 200 rubles.
- DVI-HDMI angular swivel adapter - 600 rubles.
Instruments:
- screwdriver
- jigsaw
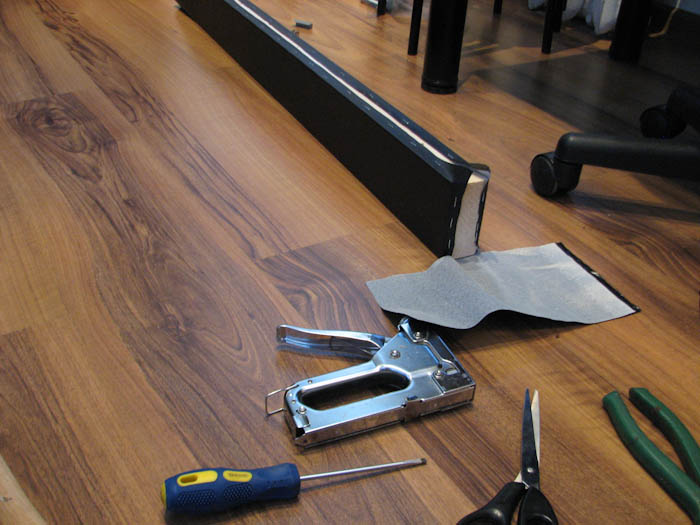
- furniture stapler
- pliers
- screwdrivers
- building knife
- scissors
- awl
- wood drill
- Angle grinder (grinder)
- hammer
- roulette
- pencil
- sandpaper
- iron
Work
1. Preliminary cut. At first, a beam of 3000x120x45 was purchased, a height of 12 cm is clearly visible, but I did not immediately understand my mistake. Further it will be clear why. The photo shows a gap between the halves of the countertop.
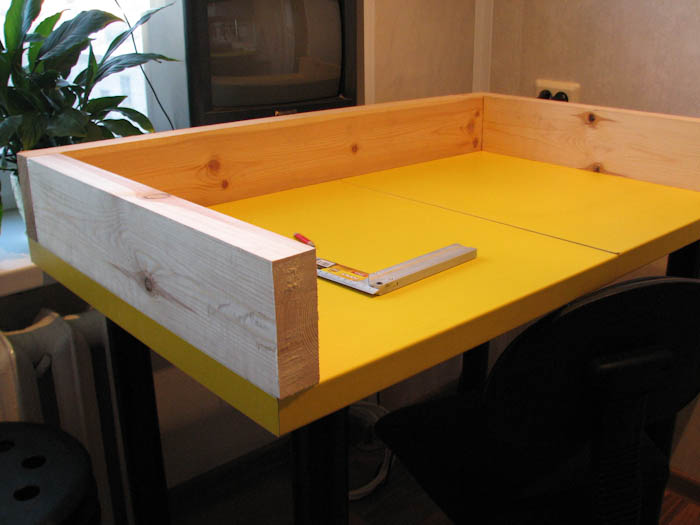
2. Mark holes for mounting the piano loop. The stage is not necessary, but greatly facilitates the work.
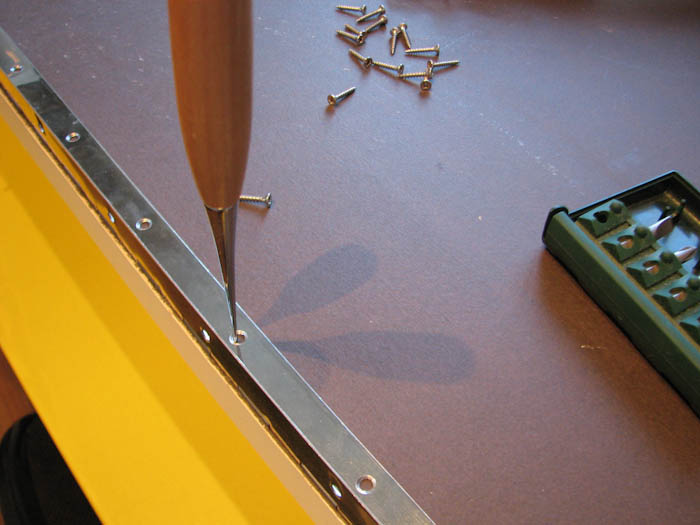
3. Fastening the piano loop.

4. Pre-assembly. The bars are bolted to the table top from below with 100mm screws.
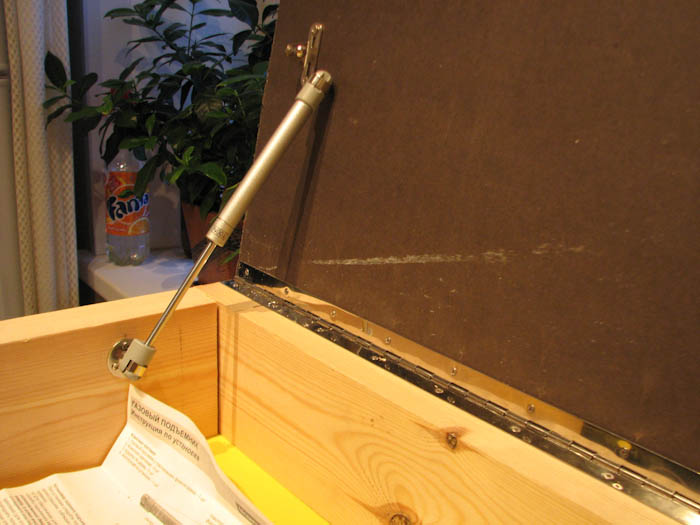
5. Fastening gas springs. They had to tinker with them in order to choose the right angle at which the table cover could close without resting on the spring rod.
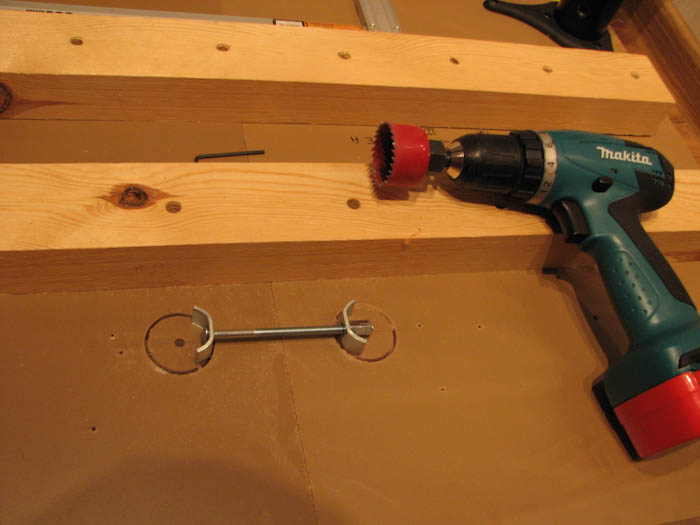
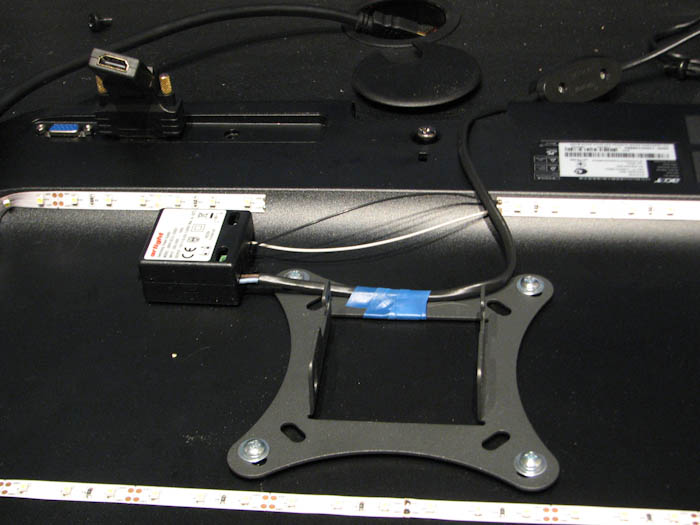
6. For fixing the monitor bracket, these dowels and bolts were chosen.
7. Bracket mounting.
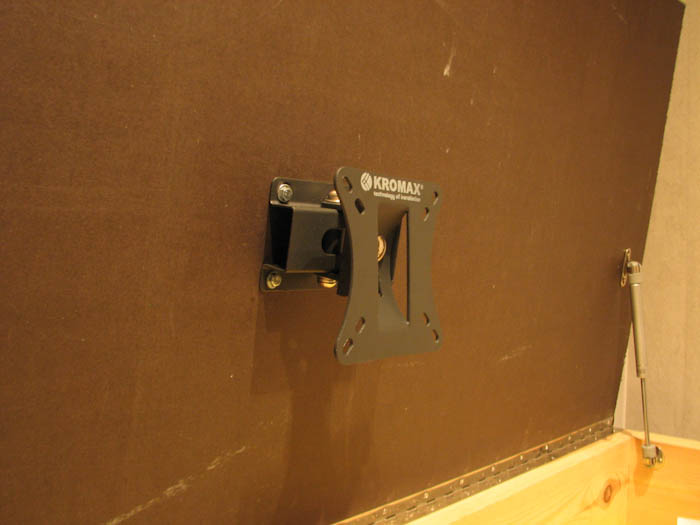
8. Mount the monitor.
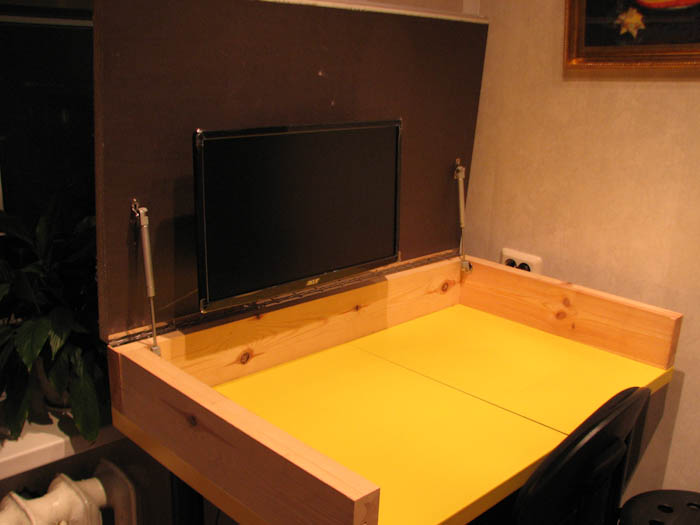
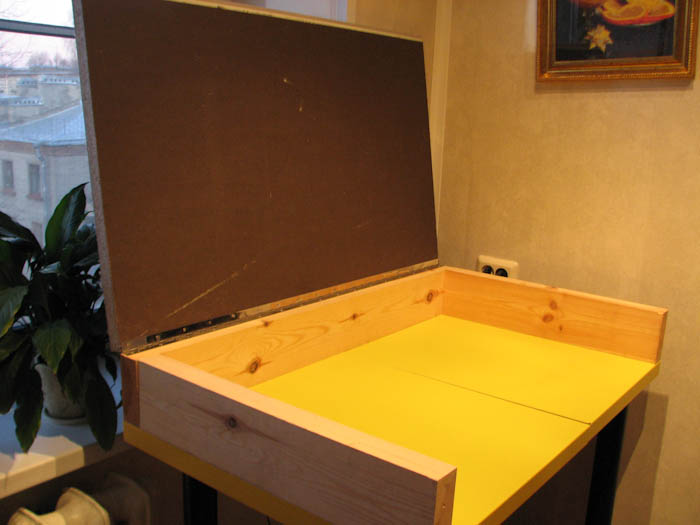
9. Interim result.
At this stage, it became clear that the surface of the table rose to an inadmissible 14 cm and sitting at it became uncomfortable even to me (height 183 cm), not to mention the children. The decision to cut off the legs of the table was long overdue, but not 14 (!) Centimeters, because another problem arises - the knees will rest against the bottom of the table.
On what we save the treasured centimeters:
- change the bar 3000x120x45 to the bar 2500x95x45 - minus 2.5 cm
- change the bracket indented from the wall 68 mm to the bracket indented 32 mm
- remove the bars supporting the bottom half of the countertops - minus 4.5 cm
The result - cut the legs of the table by 8 cm.
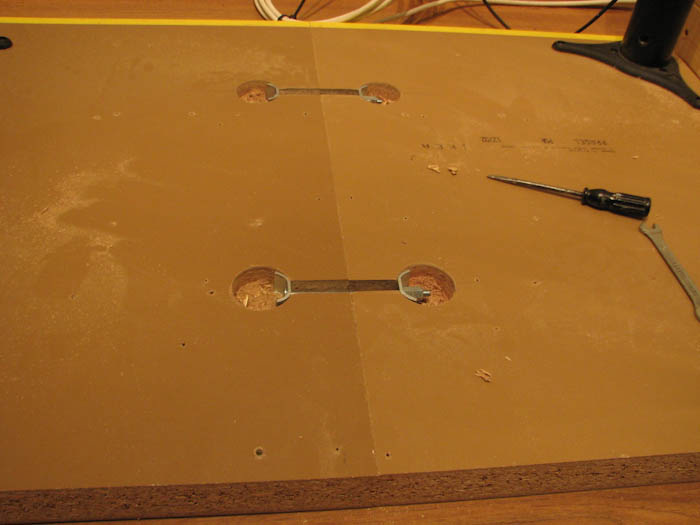
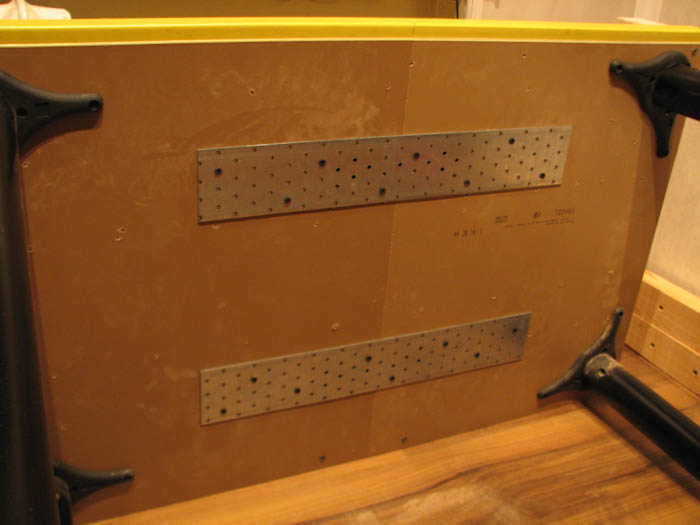
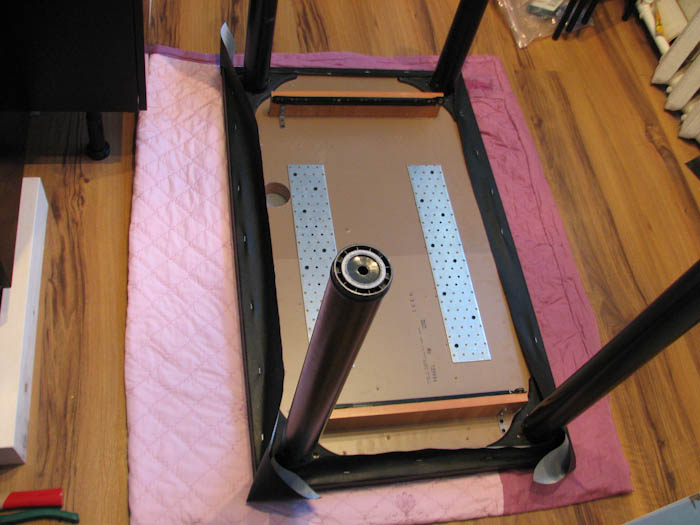
10. Screed and reinforcement of countertops.
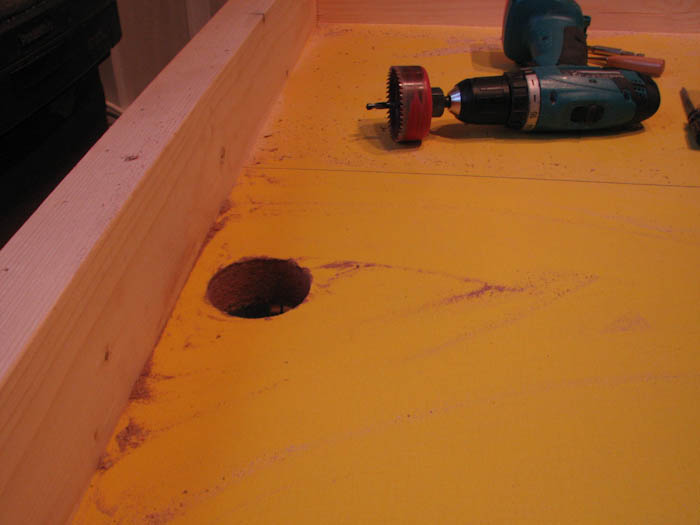
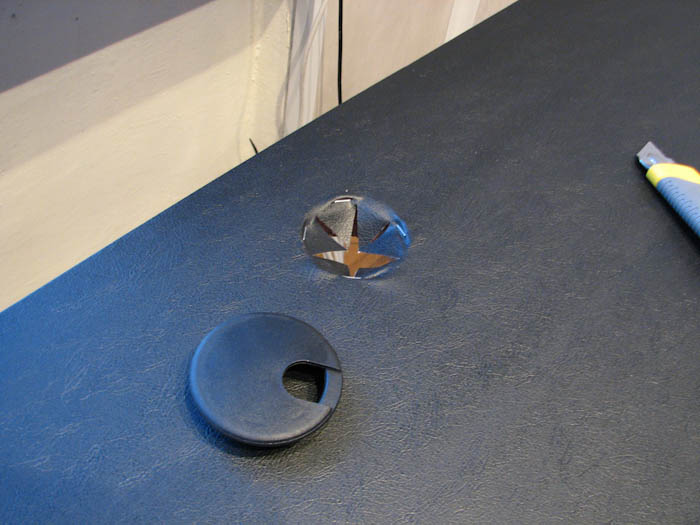
11. A hole for the computer plug.
12. Tight leatherette.
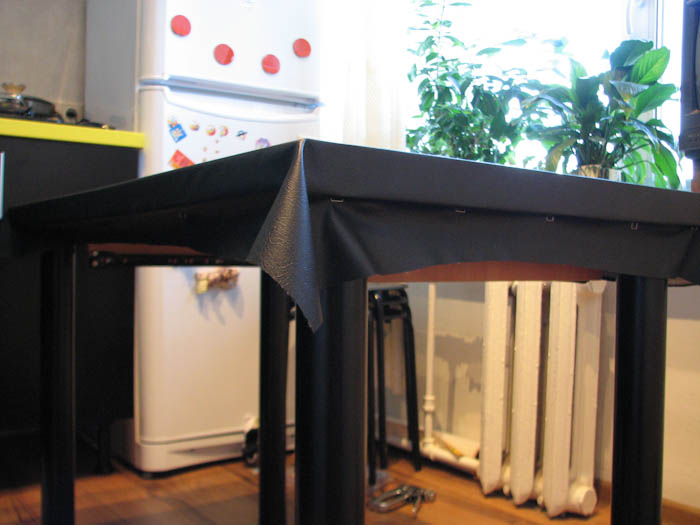
In the photo below you can see the mount for the drawer, on which it was planned to lay the laptop. It’s sad, but I had to get rid of it, because she interfered with her knees.
13. Monitor backlight. Everything is simple here - tape, transformer, socket.
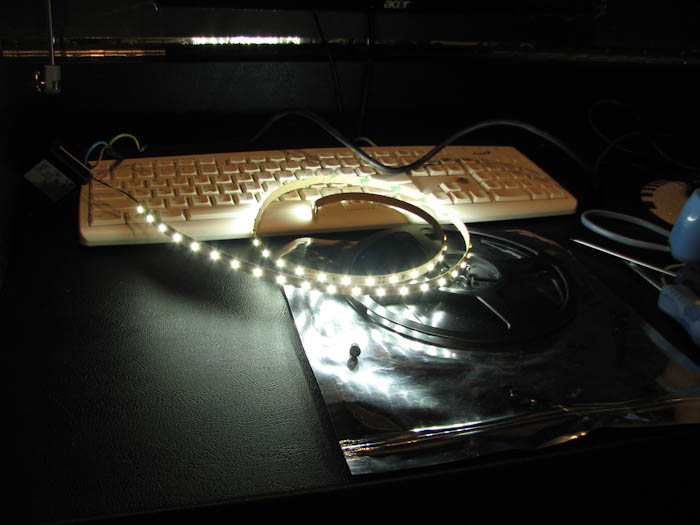

... and here is the electrical tape ...
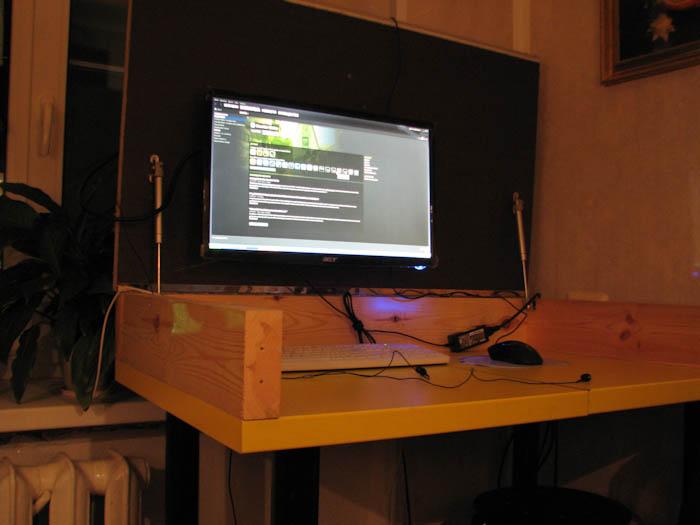
14. The final result. Evening lighting.

I apologize for the fact that there is no photo of work with a bamboo canvas. It is glued to the usual moment universal adhesive.
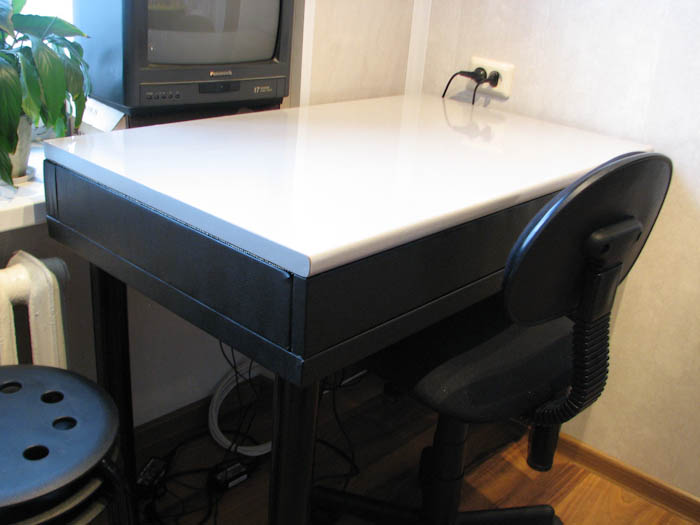
This is how the table looks in the closed position.
Well, a few more photos.
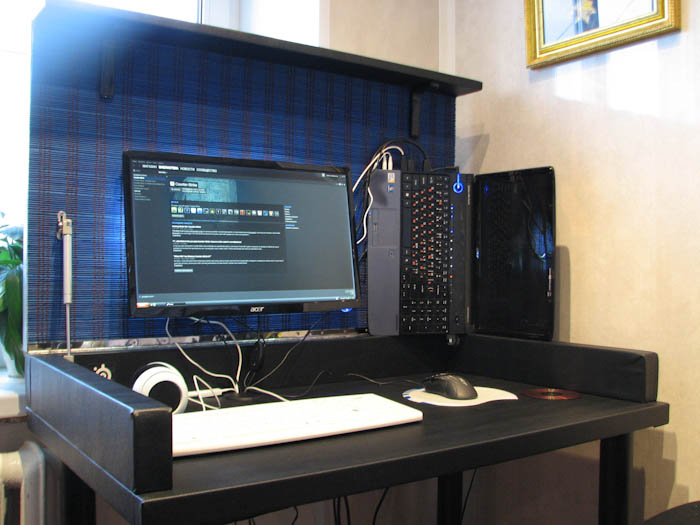
After work, the laptop is folded and placed on the table.
A little explanation
All 220V wires are stuck in an extension cord screwed to the bottom of the table.
It took a lot of time to search for materials, which is why the work took almost a month.
There are not enough photos of some stages of the work, I apologize for this - I was fond of the process and forgot to photograph the assembly process.
An angular HDMI adapter was needed because of the peculiar design of the monitor, the outputs of which are perpendicular to the screen. The adapter allows you to run the HDMI cable along the monitor and reduce the distance between the back of the monitor and the tabletop.
The monitor was presented for a birthday and is not included in the total price.
To summarize
Final costs amounted to about 3,500 rubles. Received a lot of pleasure from working with your hands, not your head. And, of course, now there is a cozy computer desk.
PS. I am pleased to hear your suggestions on where to put away the laptop.
UPD There are many questions, whether it is convenient to sit at the table. Here are the numbers: 65 cm - the distance from the floor to the bottom of the countertop, 81 cm - the distance from the floor to the highest point. With my height of 183 cm there is enough space to put my foot on my foot.
UPD2. I got rid of the laptop - under the window sill on a shelf attached to the wall, I put the system unit. Now all that remains is to open the lid and the work / play area is ready.