FPGA board to Raspberry Pi
Some time ago, the Raspberry Pi3 board appeared at my disposal. Its capabilities are really impressive: a fast quad-core processor, and embedded hardware codecs / audio / video / jpeg decoders, Ethernet / WIFI, USB2, HDMI ... Just a real computer. It's very cool that there is a GPIO connector, which allows different craftsmen to connect something non-standard and special. There are a huge number of different expansion boards that are installed on this connector: displays, LED screens, engine adapters, ADC boards ...
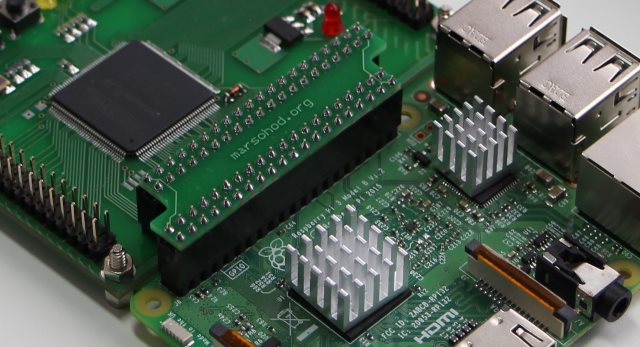
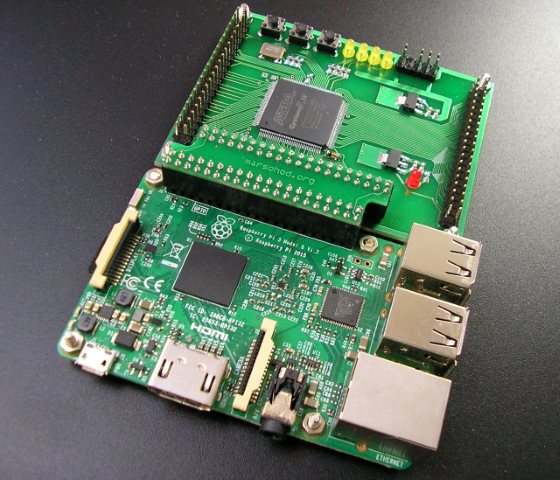
I would like to talk a little about the FPGA motherboard Rover2RPI, which, like other expansion cards, connects to the GPIO connector of the rasberry, and adds to our microcomputer completely new properties.
The fee is pretty simple. It has:
- FPGA Cyclone IV EP4CE6E22C8
- logical elements 6272;
- built-in 270Kbit memory;
- 15 multipliers (18x18);
- PLL 2;
- Four LEDs;
- Three buttons;
- Quartz generator 100 MHz;
- Possibility of installing an EPCS4 chip (in case the board will be used independently);
- JTAG connector (in case the board will be used autonomously);
- Two 40 pin connectors each with 28 custom GPIO - connectors compatible with Raspberry;
- One 40 pin connector to connect to the Raspbery, on which you can use 24 or 20 GPIO (depending on whether the EPCS4 chip is installed).
The Mars Rover 2RPI is not installed above the Raspberry Pi, but from the side, through a special adapter. This is done intentionally. Raspberry Pi3 and so pretty hot when loading 4 cores, cover the top on top seems not very humane in terms of cooling.
So you can connect the Raspberry Pi2 / Pi3:
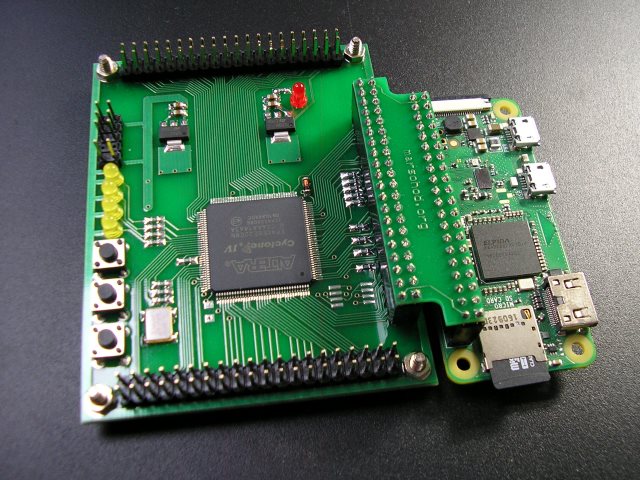
Here is the Pi-zero:
Maybe (but this is not accurate), the same expansion card can be used with OrangePi.
The very first application of this board that comes to mind is to double the number of GPIO signals: there was one connector, and it became two. You just need to create and load the necessary project into the FPGA, well, you have to manage the outputs in some special way, there are many options: serial port, SPI, GPIO, you can use DMA ...
You can download the FPGA of the Mars Rover 2RPI directly from Raspberry through JTAG signals, which, of course, are displayed in GPIO
- tck → GPIO7
- tms → GPIO0
- tdi → GPIO11
- tdo ← GPIO1
There is such open source project OpenOCD, debugger and debager, which allows using Raspberry as JTAG programmer. OpenOCD is a server, you can start it, and then connect to it even remotely with a telnet and by executing the “svf” command you can upload an image of the compiled project to FPGA. Read more about OpenOCD on raspberry pi .
Here is just a video demonstration:
The very first “test” project for the Mars Rover 2RPI is ready, although it is not very impressive with its functionality. The first project for FPGA is usually always a “blinking LED”, such a kind of “hello World!” Of the world of microcontrollers and FPGA.
Its source can be taken on github: github.com/marsohod4you/m2rpi_first
But even here, even in this simple case, there is already an interaction between the FPGA and the microcomputer. From raspberry you can send bytes to the FPGA via the serial port, which change the blinking speed of the LED. Moreover, the first “test project” of the FPGA takes a byte from the serial port, modifies it (adds one), and sends it back. Of course, quite primitive, but already the interaction of two FPGA systems and a processor.
Video Demonstration:
This is my first experience accessing FPGAs from Raspberry. I think it would be interesting to try to do really complex projects, such as capturing video camera footage and transmitting them via DMA to FPGA for processing. I think there may be a lot of interesting projects with this expansion card.