The process of developing a website in pictures
Our three characters: programmer, designer and client.

Step 1: Discussion

Naturally, any project begins with a meeting with a client. At the first meeting, you need to determine the main areas of work - which product needs to be done, what functions it will have, what materials will be required (texts, images, etc.).
Step 2: Brainstorming

Think about how you will develop the product. What is important and what is not? What should be on each page? Depending on the size of the project, you may need to create a visual site map. Preparing a site map is important for the proper organization of information.
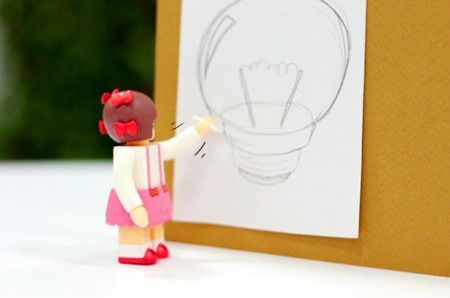
Step 3: wireframes

A framework is a site’s skeleton that contains all the navigation elements, functions, information blocks that will be included in the final version of the site, but without graphic design. It is used to identify problems or missing items. In the future, it will be used as a plan at the stages of design and software development.
How you will create wireframes is up to you. For small projects, you can make images in Photoshop or Illustrator. For larger ones, you may need HTML-based wireframes on which you can test the behavior.
Step 4: content planning

After the site map and wireframes are ready, you and your client need to start planning content - especially text. The preparation of information is the largest work that the client performs in the project, and it can take a really long time.
Step 5: Initial Design

In the meantime, the designer can work on the initial version of the design - the design of the main page and the main internal pages.
Step 6: Customer feedback

After developing the initial design, the customer must verify that you are moving in the right direction and, if necessary, make adjustments.
Step 7: Refining the design
... which is likely to require changes to the original version.
Step 8: Reconcile

So far, everyone is happy.
This chain “development - coordination - revision” can be repeated at various stages of the project. In addition to the preparation of information, the approval of intermediate results is another function of the client.
Step 9: Design additional pages and elements

After the approval of the basic design, you can proceed to design the remaining pages and additional elements.
Step 10: Affirmation

And again everything is checked, finalized and finally approved.
Step 11: Creating HTML

Now you can start creating HTML pages.
Step 12: ... and CSS

Step 13: Presentation

And again customer feedback.
Step 14: Testing

The final stage of development is debugging. The work of the site needs to be checked on all platforms, to eliminate technical problems, to check errors in the text.
Step 15: Starting

The picture says “The End” - but, of course, you won’t take the check and you will not hide behind the door. After starting the site you need to look another 10 days or so, and in case of problems, fix them.
Translation of the original here .
The original is here .
Step 1: Discussion
Naturally, any project begins with a meeting with a client. At the first meeting, you need to determine the main areas of work - which product needs to be done, what functions it will have, what materials will be required (texts, images, etc.).
Step 2: Brainstorming
Think about how you will develop the product. What is important and what is not? What should be on each page? Depending on the size of the project, you may need to create a visual site map. Preparing a site map is important for the proper organization of information.
Step 3: wireframes
A framework is a site’s skeleton that contains all the navigation elements, functions, information blocks that will be included in the final version of the site, but without graphic design. It is used to identify problems or missing items. In the future, it will be used as a plan at the stages of design and software development.
How you will create wireframes is up to you. For small projects, you can make images in Photoshop or Illustrator. For larger ones, you may need HTML-based wireframes on which you can test the behavior.
Step 4: content planning
After the site map and wireframes are ready, you and your client need to start planning content - especially text. The preparation of information is the largest work that the client performs in the project, and it can take a really long time.
Step 5: Initial Design
In the meantime, the designer can work on the initial version of the design - the design of the main page and the main internal pages.
Step 6: Customer feedback
After developing the initial design, the customer must verify that you are moving in the right direction and, if necessary, make adjustments.
Step 7: Refining the design
... which is likely to require changes to the original version.
Step 8: Reconcile
So far, everyone is happy.
This chain “development - coordination - revision” can be repeated at various stages of the project. In addition to the preparation of information, the approval of intermediate results is another function of the client.
Step 9: Design additional pages and elements
After the approval of the basic design, you can proceed to design the remaining pages and additional elements.
Step 10: Affirmation
And again everything is checked, finalized and finally approved.
Step 11: Creating HTML
Now you can start creating HTML pages.
Step 12: ... and CSS
Step 13: Presentation
And again customer feedback.
Step 14: Testing
The final stage of development is debugging. The work of the site needs to be checked on all platforms, to eliminate technical problems, to check errors in the text.
Step 15: Starting
The picture says “The End” - but, of course, you won’t take the check and you will not hide behind the door. After starting the site you need to look another 10 days or so, and in case of problems, fix them.
Translation of the original here .
The original is here .