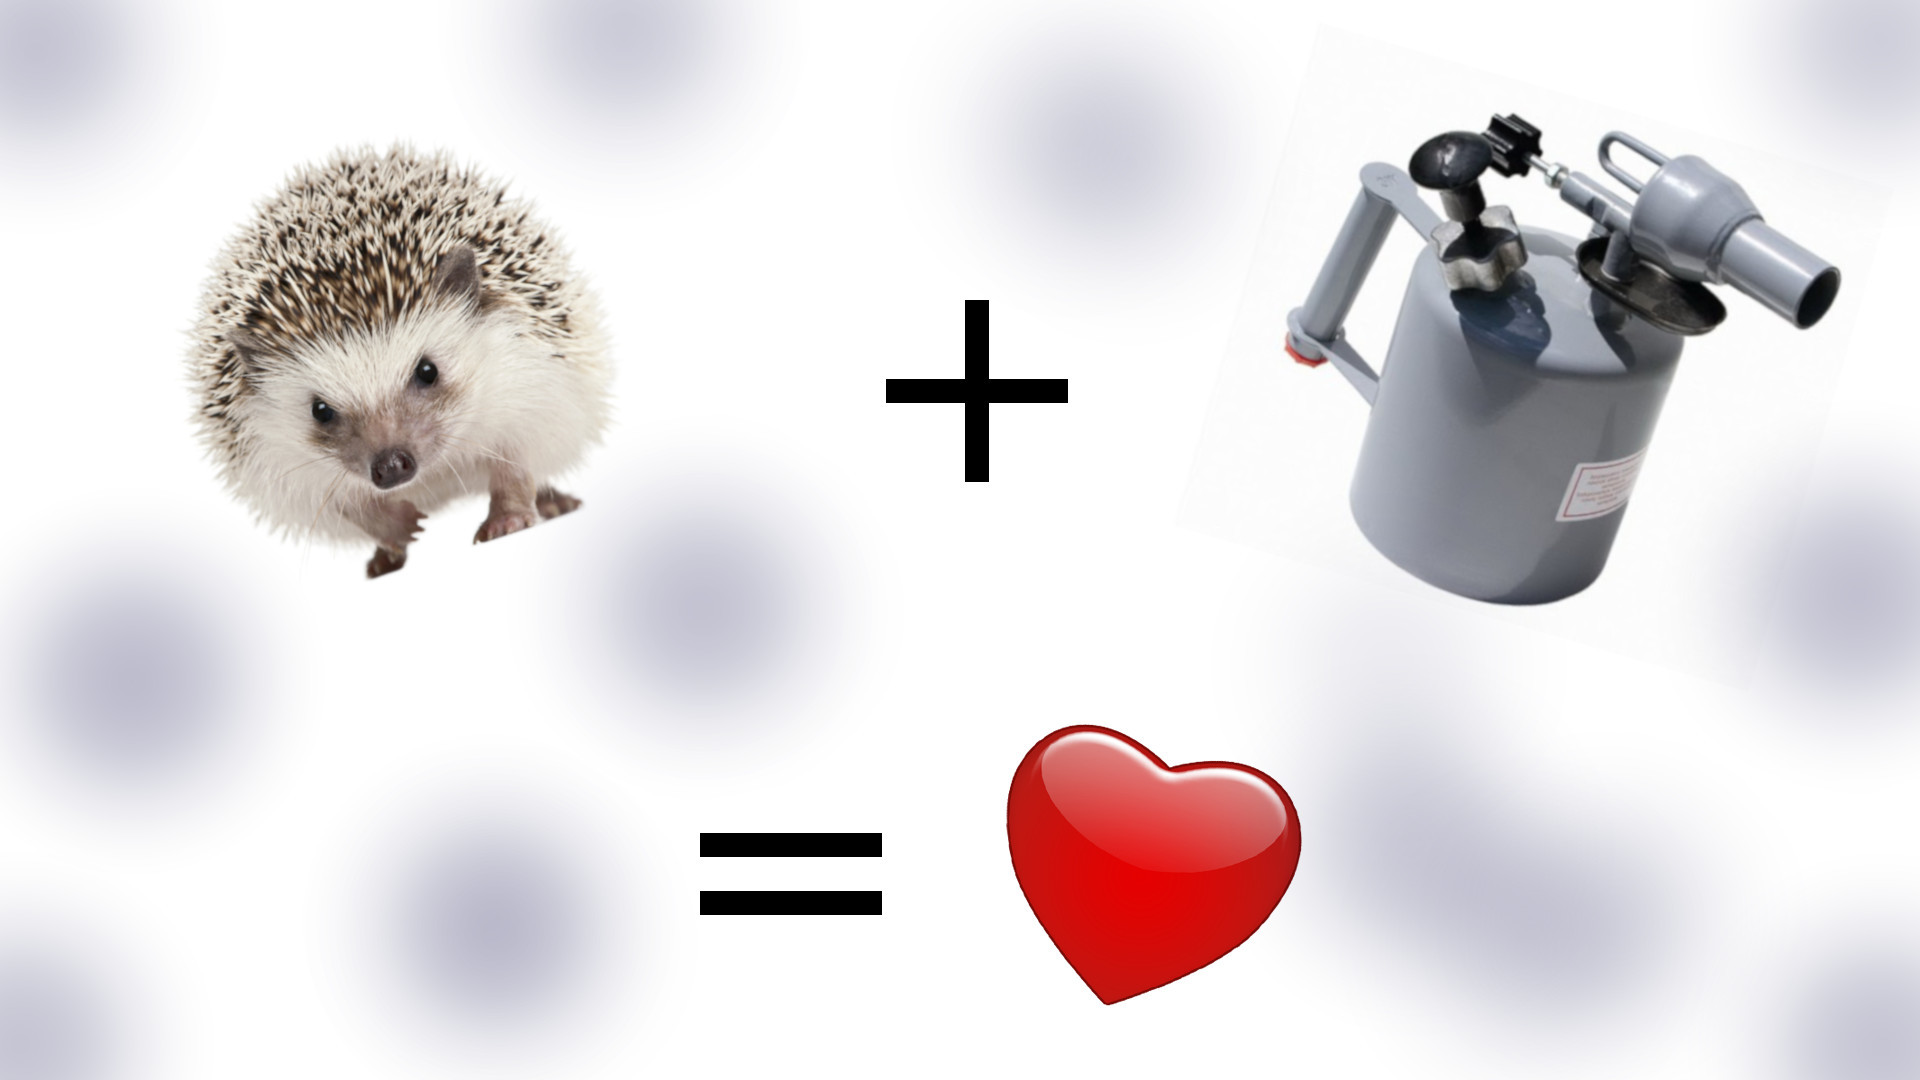
Palace for Hakko T12, or what the soldering station has in common with a hedgehog
Good day to you, dear geeks and sympathizers! Read carefully these lines of the great poet:
I knew only thoughts of power,Mikhail Yurievich was able to accurately describe the mental torment overwhelming many radio amateurs in search of a powerful, fully automatic, accurate, universal, reliable and inexpensive soldering station.
One, but fiery passion:
She, like a worm, lived in me.
Gnawed soul and burned!
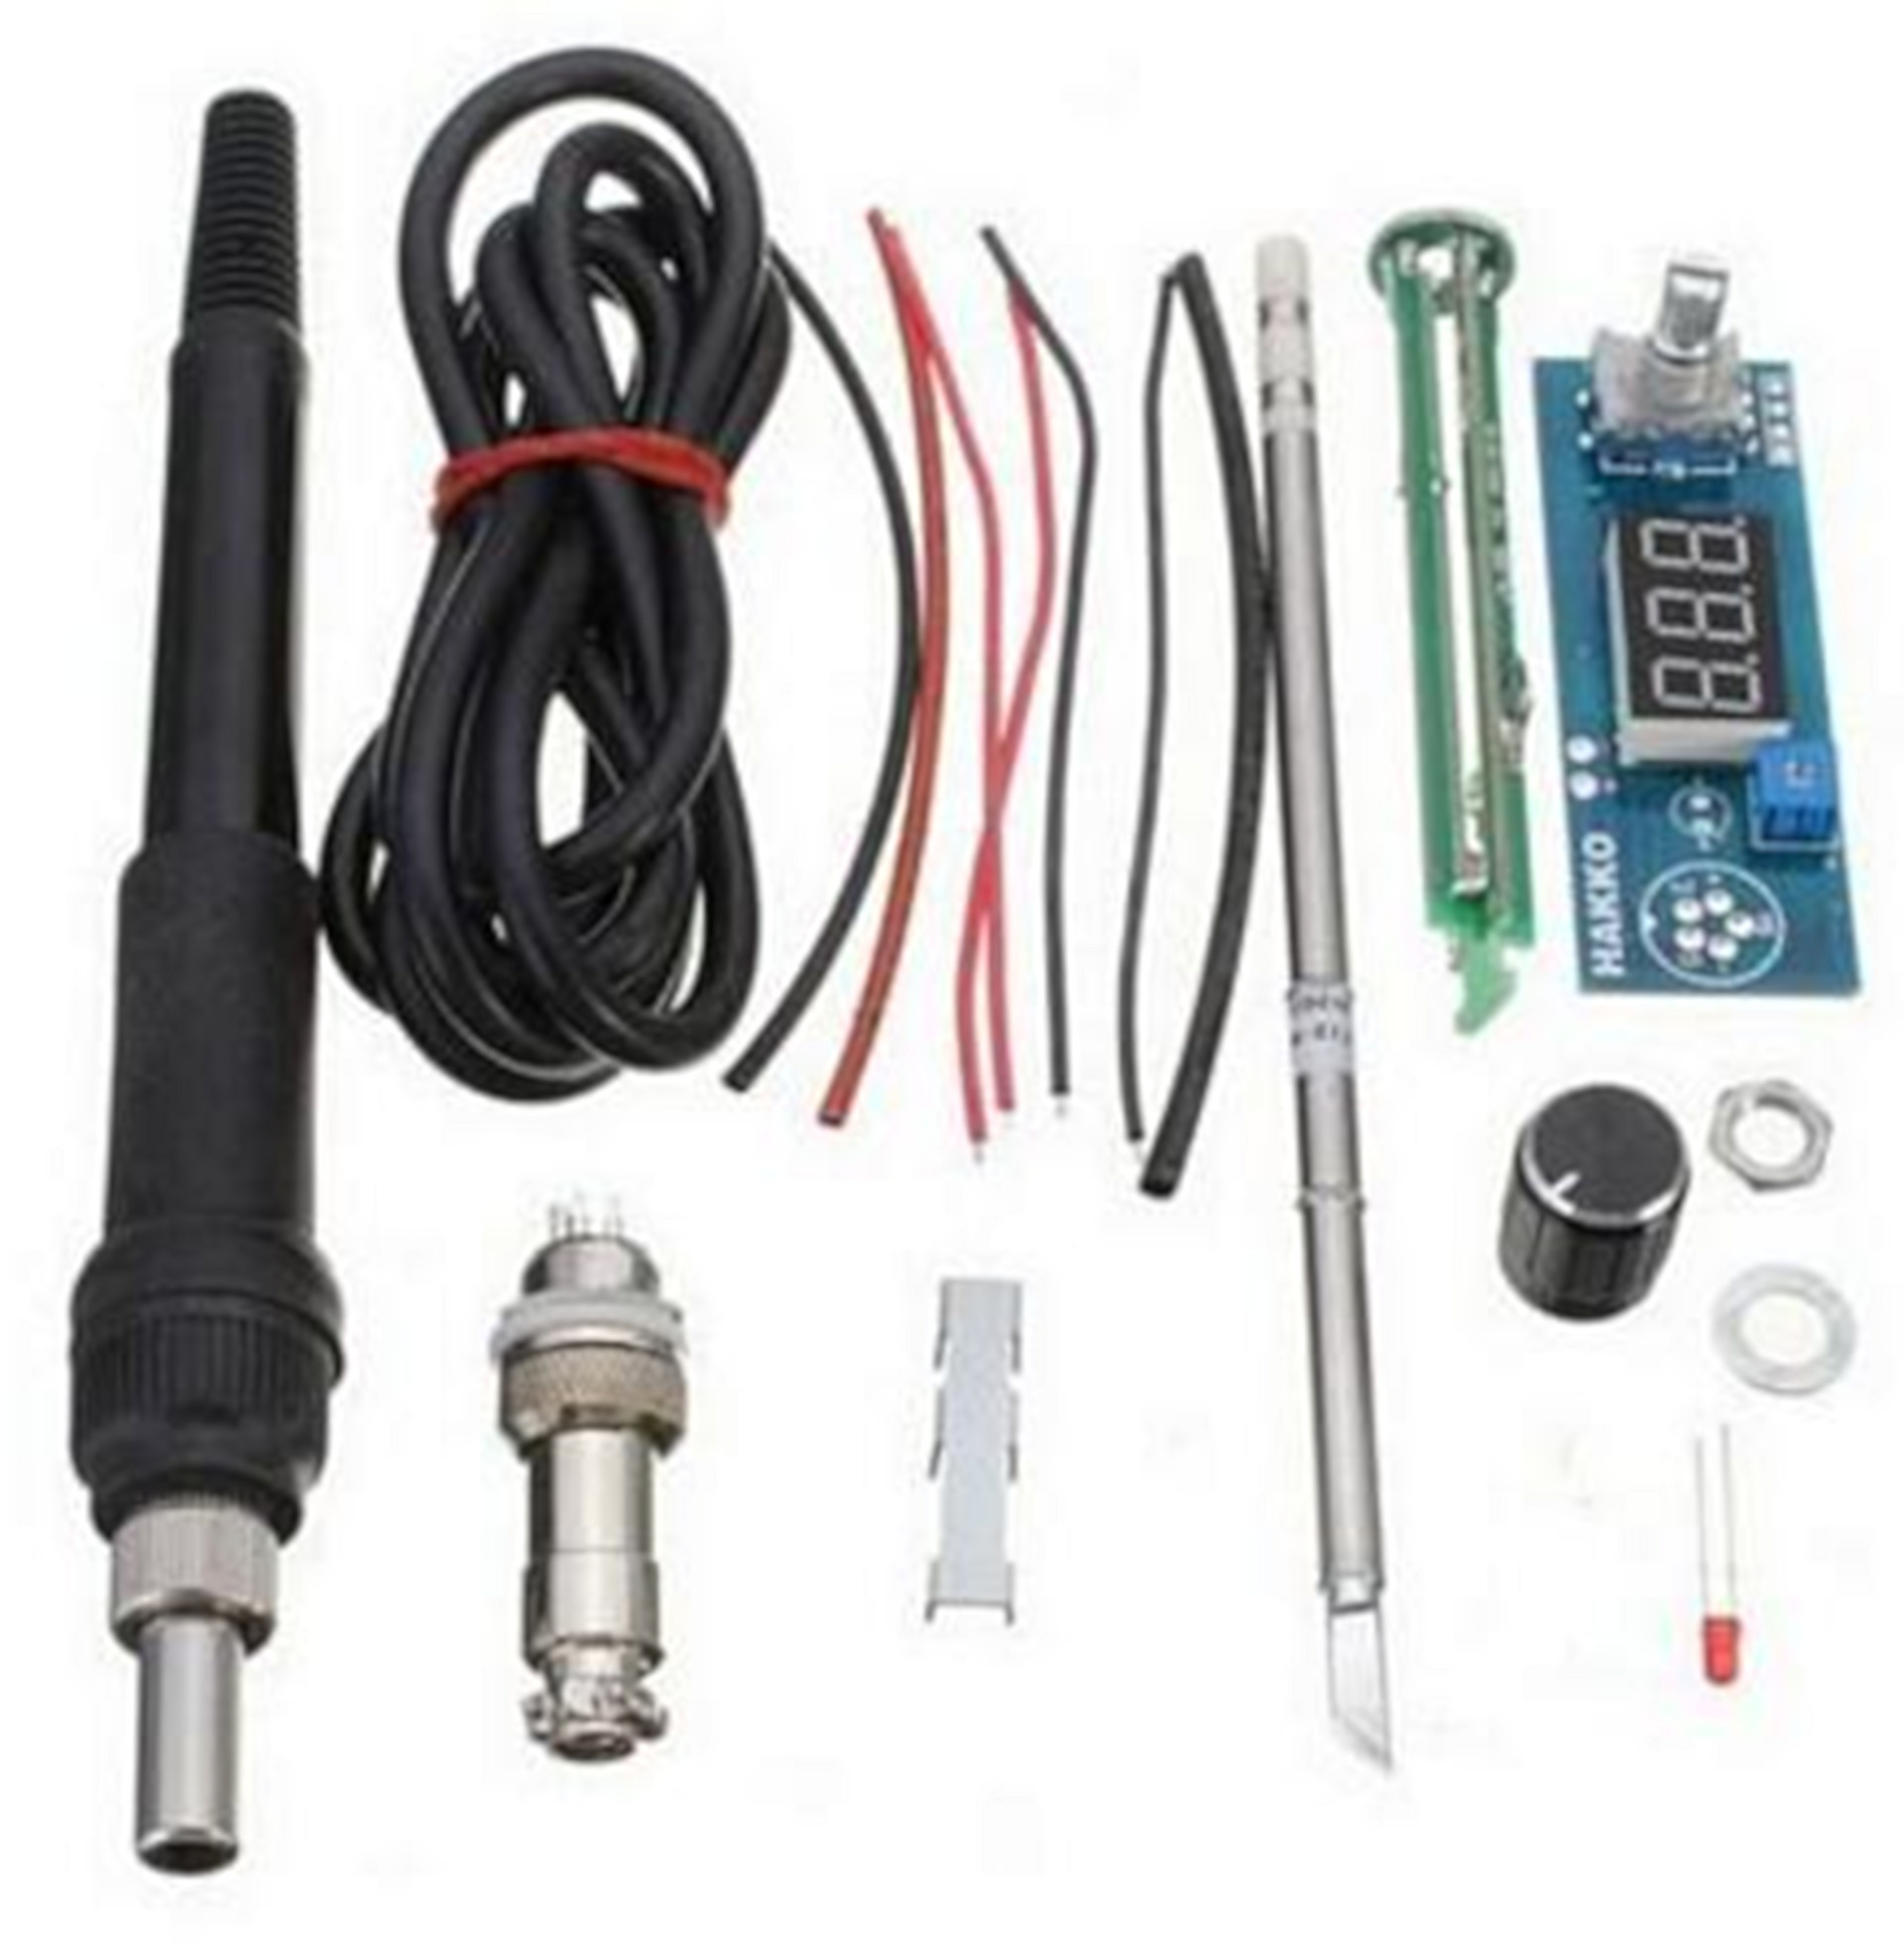
Thanks to the hardworking Chinese comrades, the above-described (as, incidentally, many others) dream may well come true at relatively low financial cost. It's about a kit for assembling a soldering station on Hakko T12 tips. This kit costs less than 18 euros on Aliexpress and contains all the necessary parts except the power supply and the case. There are many reviews of this kit on the net.
A compact one-watt (in fact, no) 24 volt power supply costs about 8 euros with shipping.
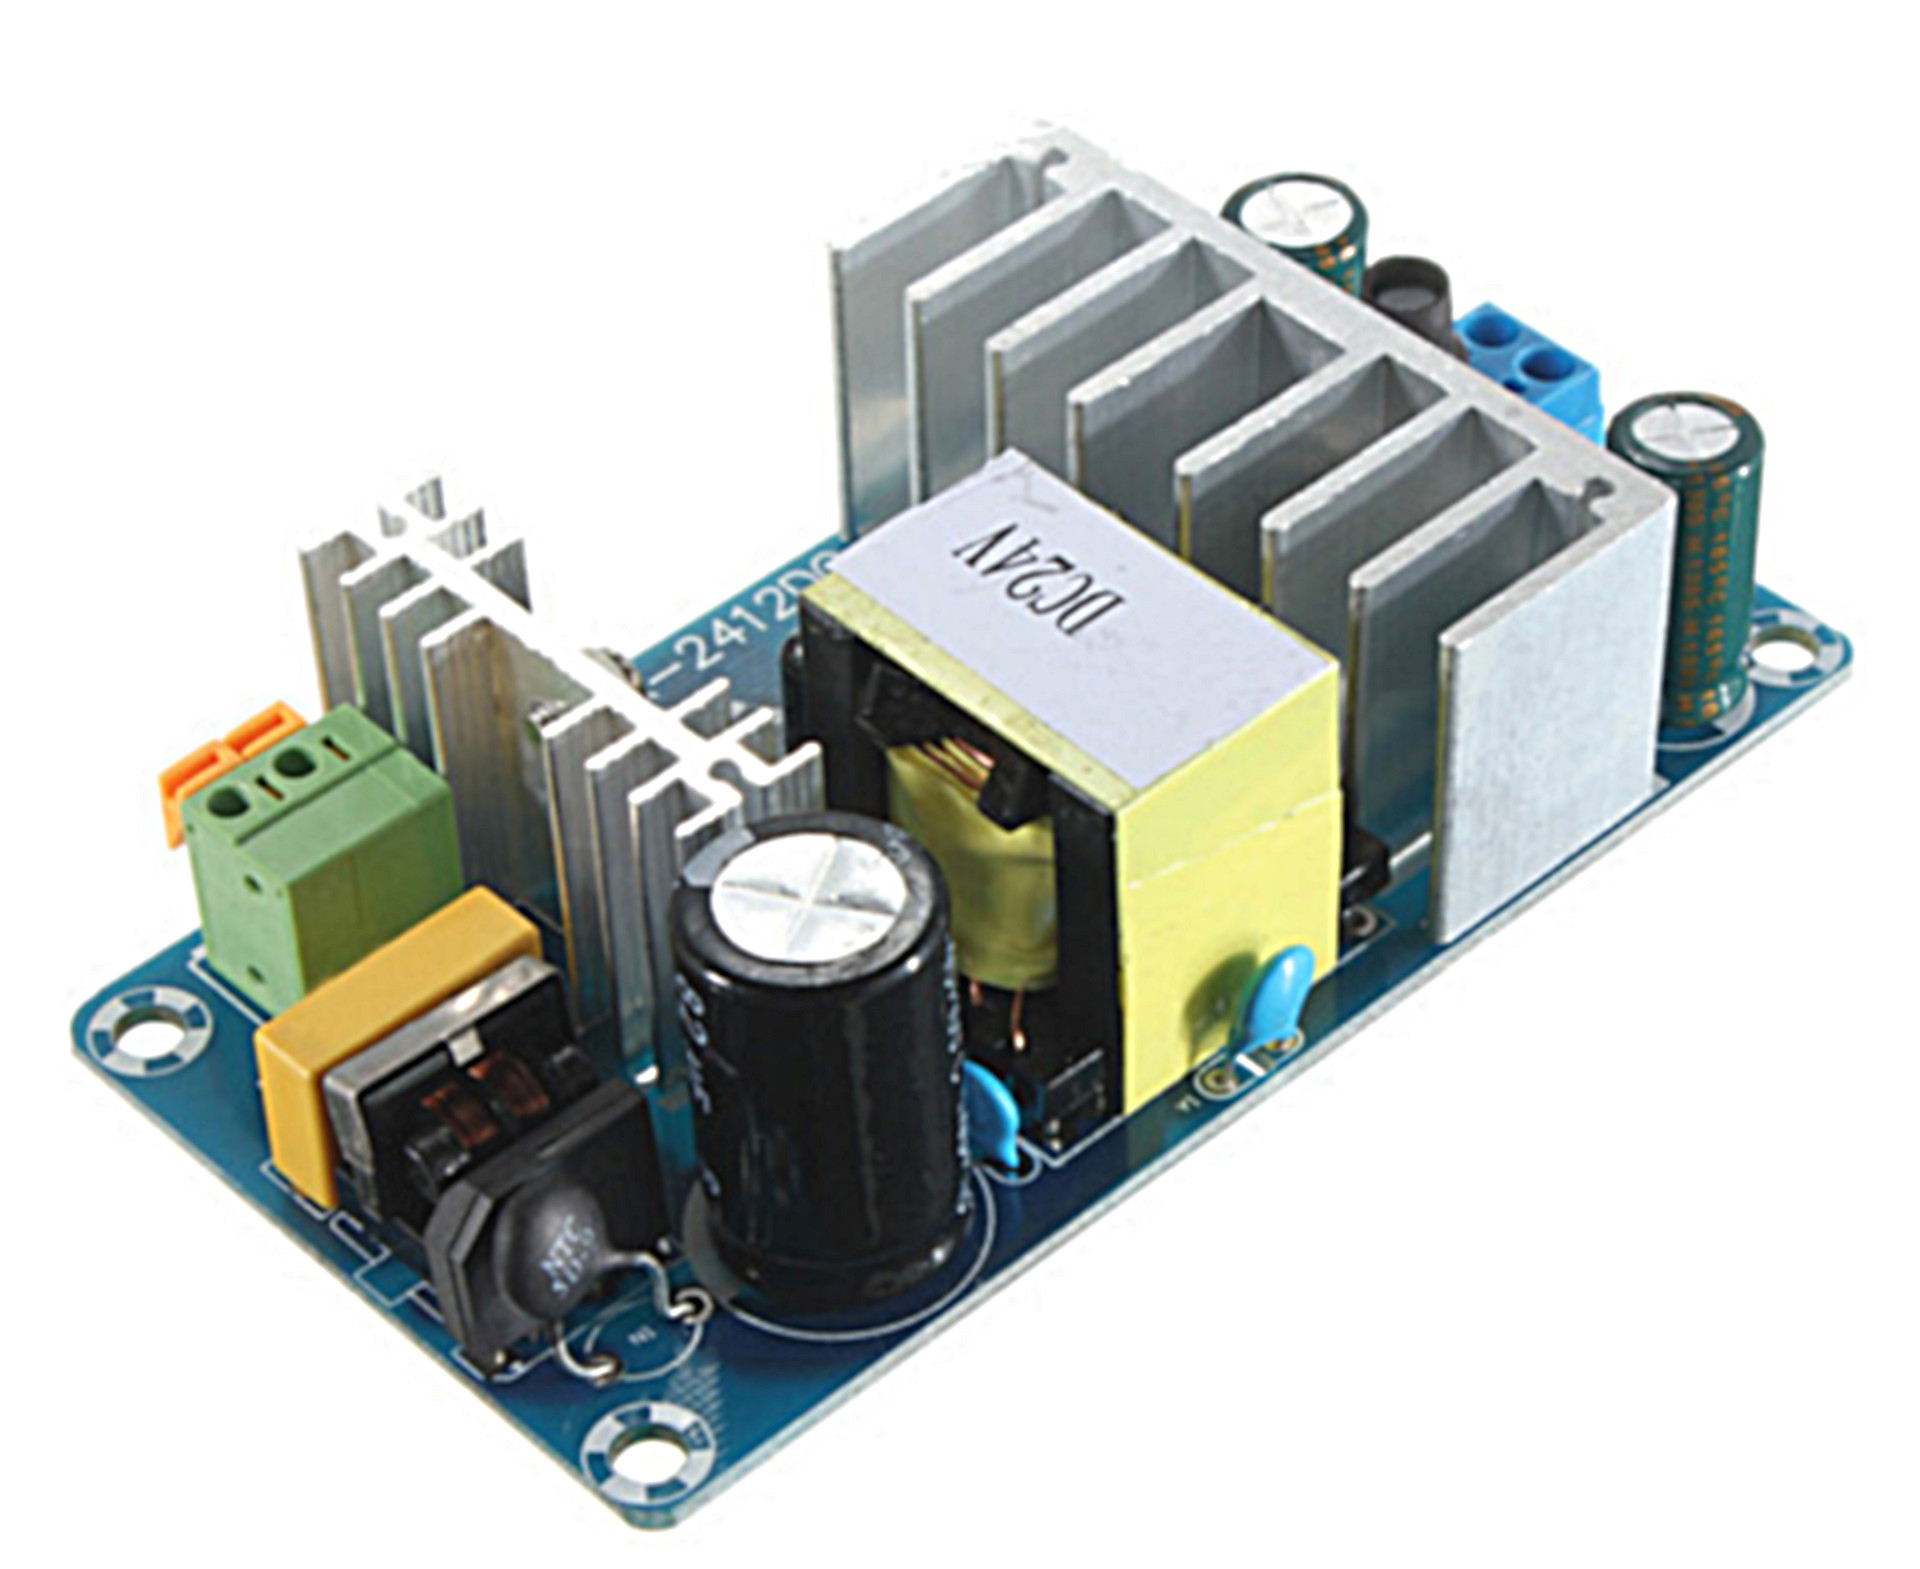
The problem with this power supply is significant heating at a load of more than 75 watts. Since the soldering station consumes significantly less power, this power supply can, with a clear conscience, be considered a suitable candidate.
Let's move on to the case: this is where the maximum scope for creativity opens up and significant difficulties lie for hams who do not have a 3D printer for personal use. As you know,
Some of the above parts have combined the following remarkable device:
The only problem with this device is a thin and poorly laid cable for powering the LED backlight. This cable is best replaced immediately. Since LED backlighting requires a 5 volt power supply, we will also have to purchase a voltage converter from 24 to 5 volts. The Chinese comrades part with the desired device for a symbolic 1.8 euros.
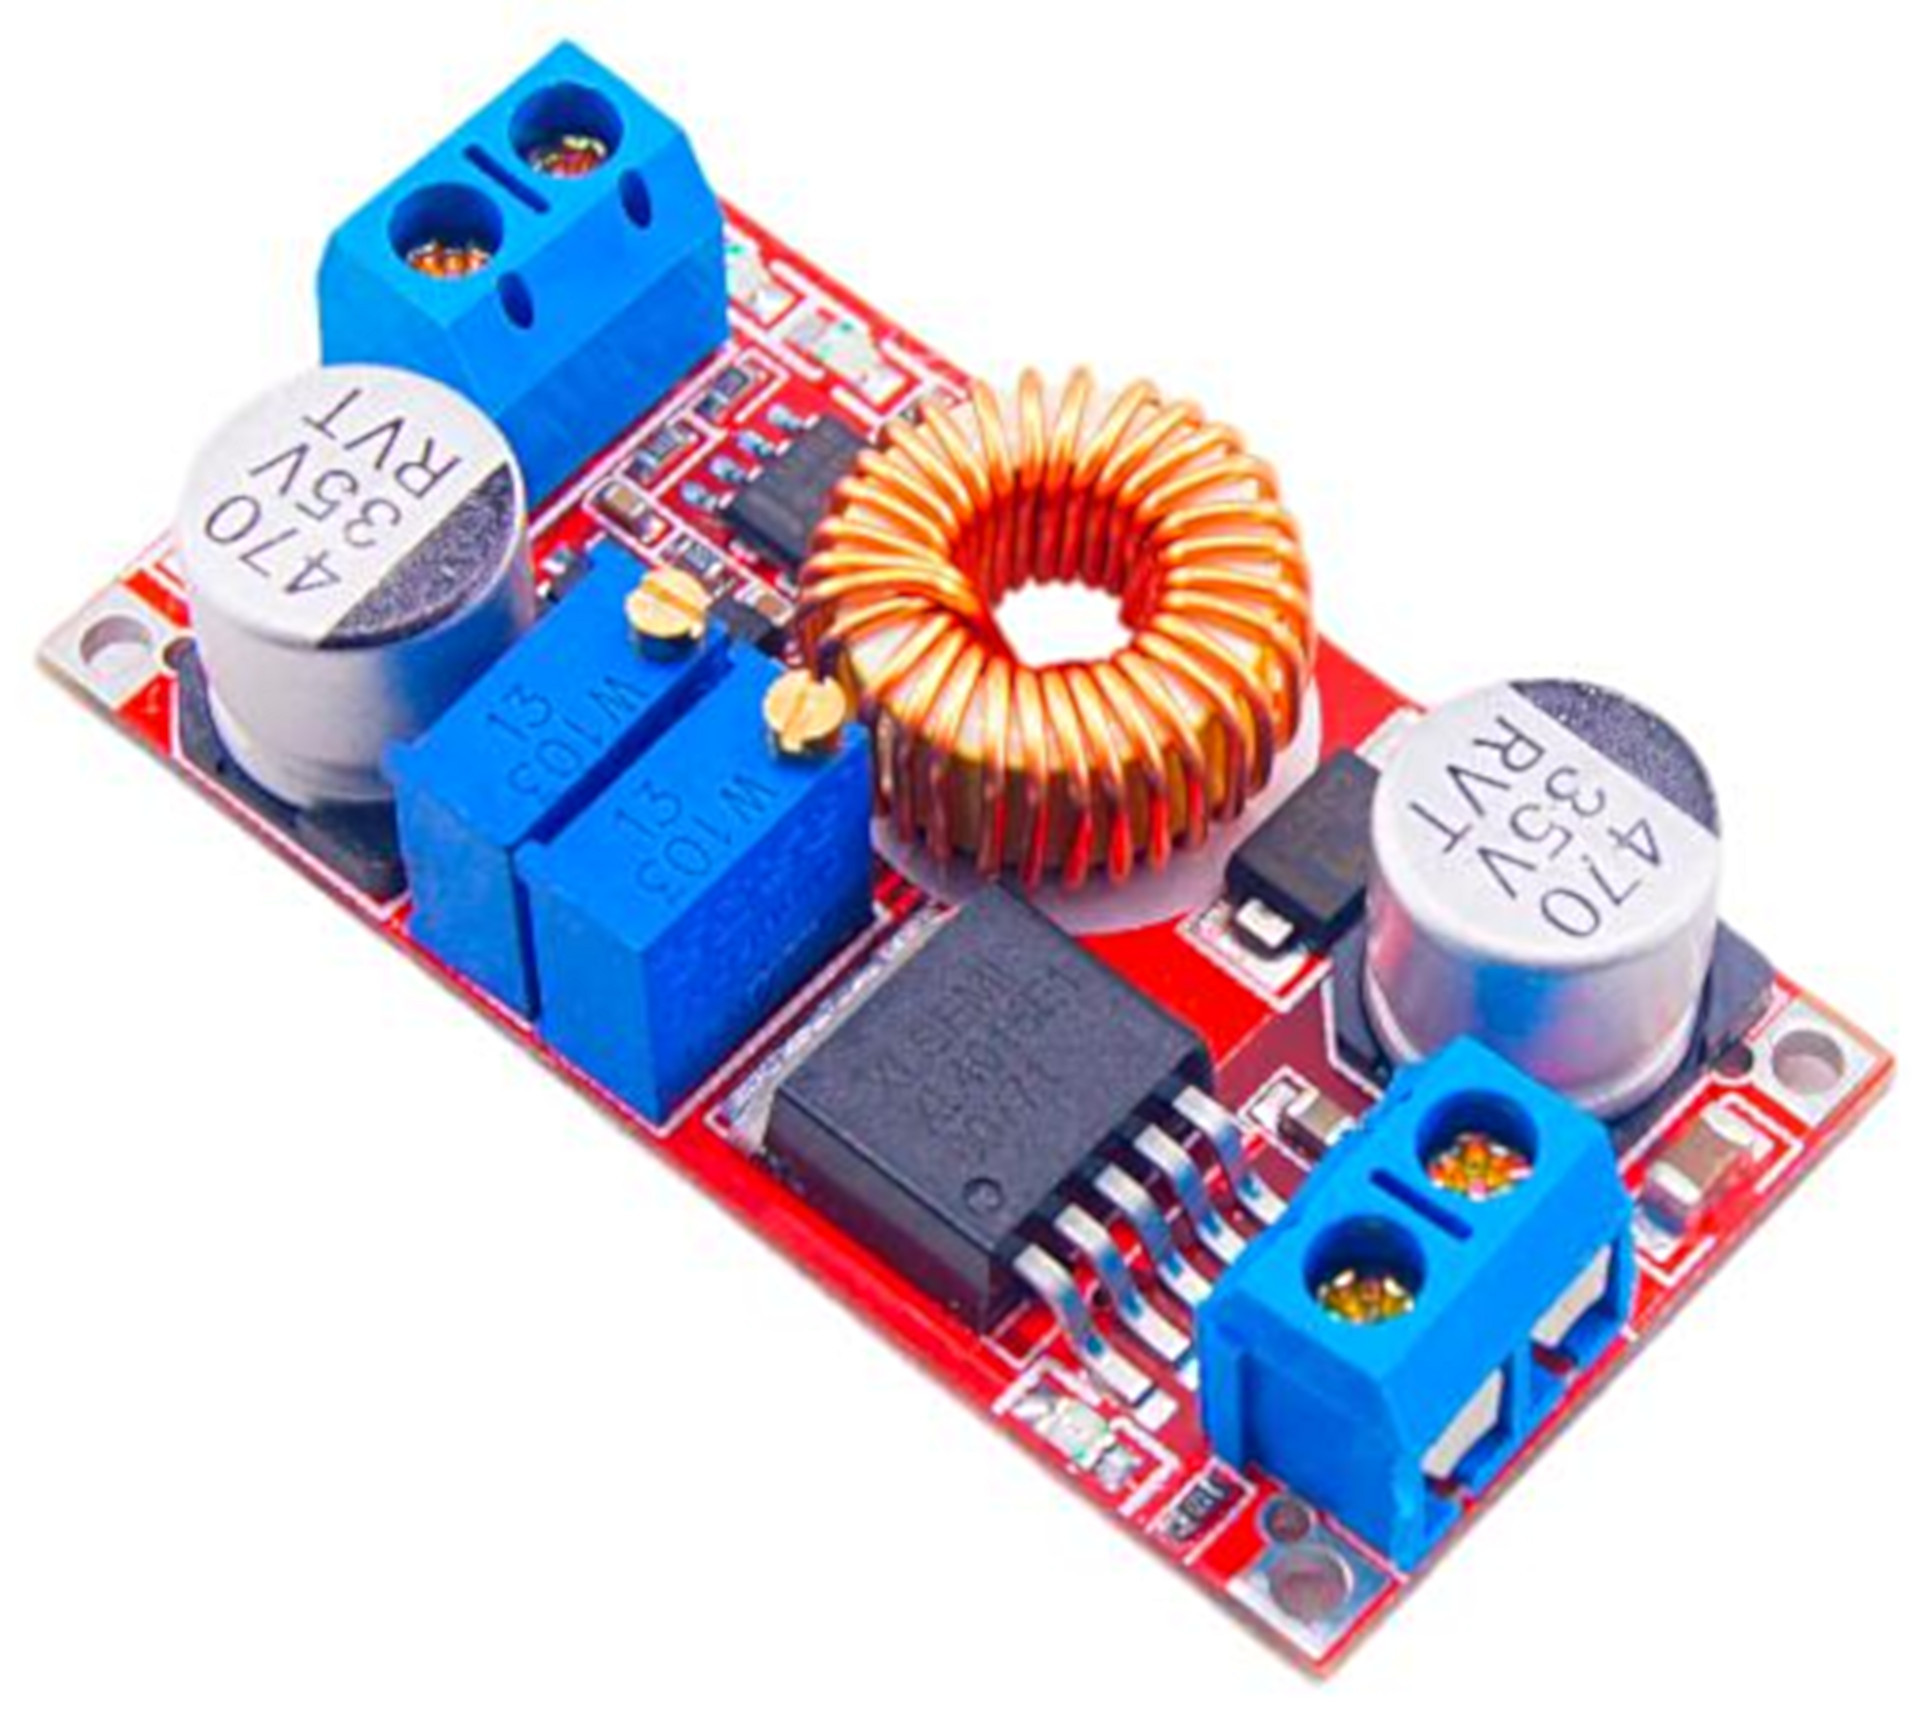
Please note: this converter is based on the XL4015 chip. Despite the claimed output current of 5 amperes, this converter operates without overheating only at a current of less than 2.3 amperes. Since this converter controls the output current, for reliable operation, you can simply set the maximum current at 2.2 amperes and forget about the problem.
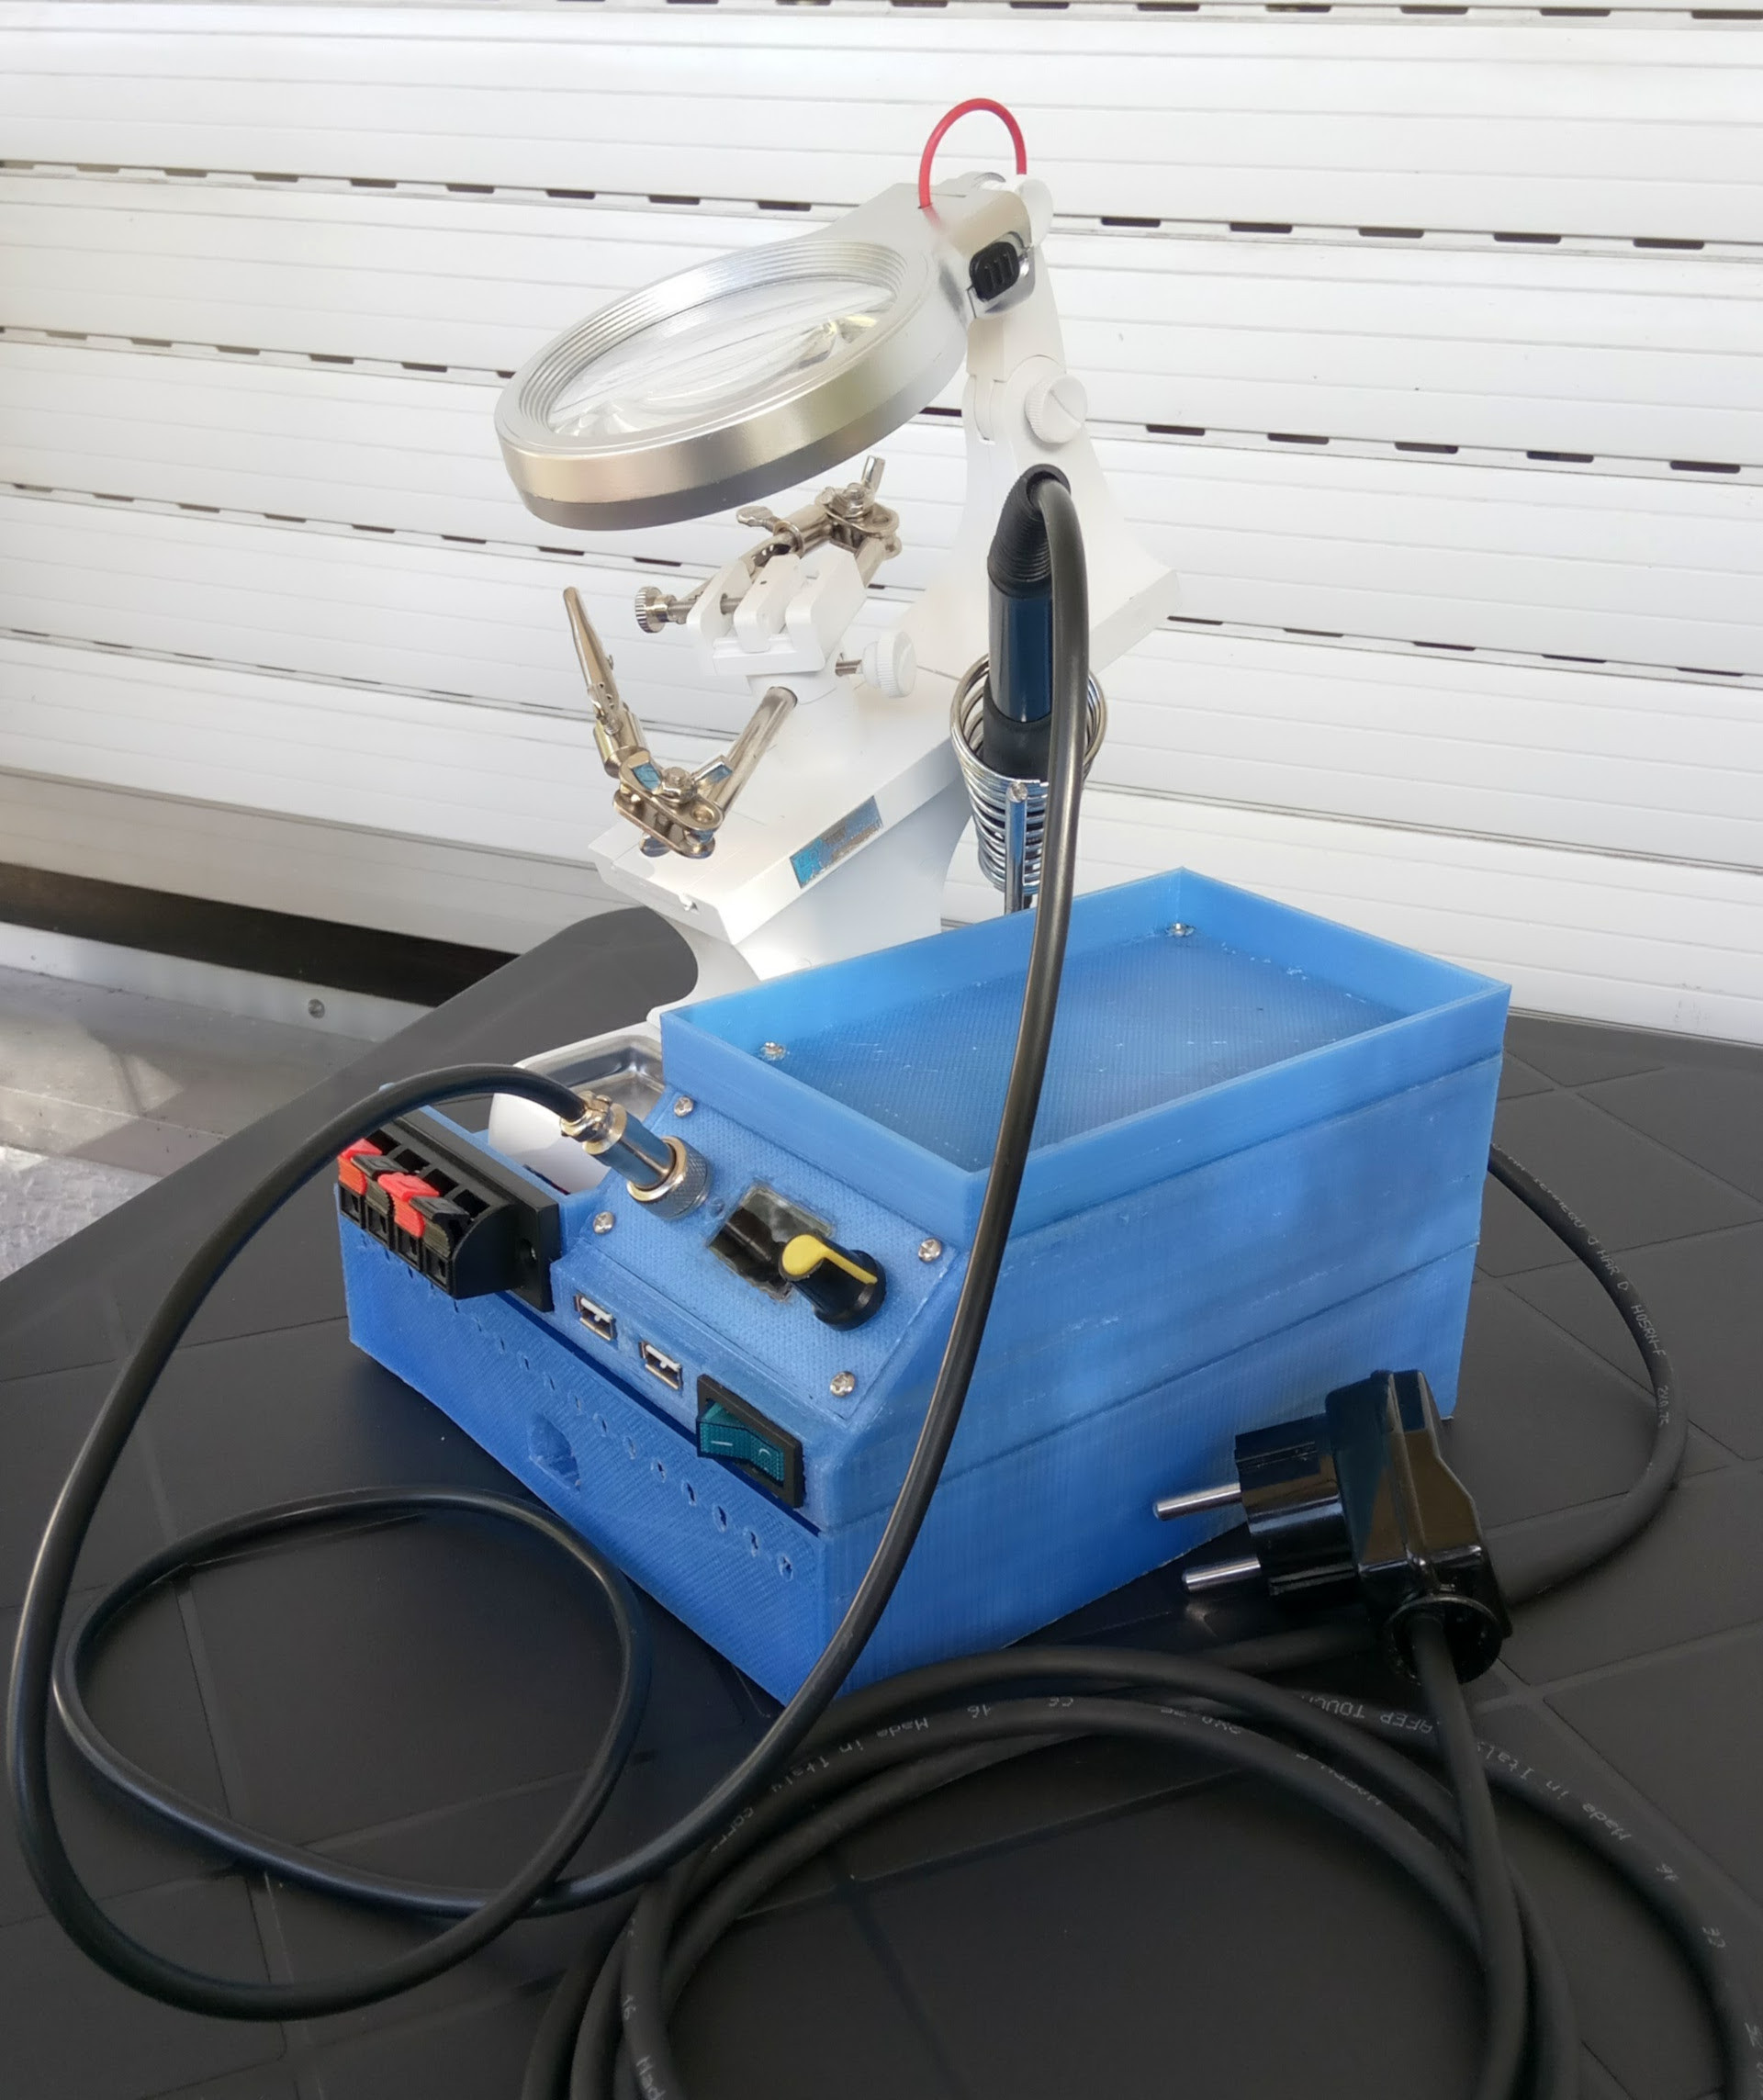
As you know, there is no such tube of toothpaste from which it would be impossible to squeeze out a little more. This highly scientific observation gave me the idea to bring the received voltage of 24 and 5 volts to the external terminals and use the soldering station as a power supply. Naturally, two USB connectors were requested on the front panel. The Germans call this the “Eierlegende Wollmilchsau” (egg-laying dairy pig).

It remains to purchase a power cable with rubber insulation (soft and does not melt), a power switch with light indication, a little mounting wire in silicone insulation (soft and does not melt), a pair of USB connectors, a four-pin terminal block (these are used to connect speakers), 20 screws M3 and 8 self-tapping screws M2.
My fakeQR home 3D printer earned the honor of making the case. The material for the case was selected PETG filament of the Chinese manufacturer Winbo (Chinese with Chinese in Chinese, or else there will be). PETG has many advantages over other materials: excellent interlayer adhesion, no warping (“shrinking”) when printing large objects, high strength and resistance to environmental factors. For example, Coca-Cola bottles are made of this material.
After a short fuss in the wonderful free CAD DesignSpark Mechanical, parts of the future megacorpus of the super-soldered megastation were created.
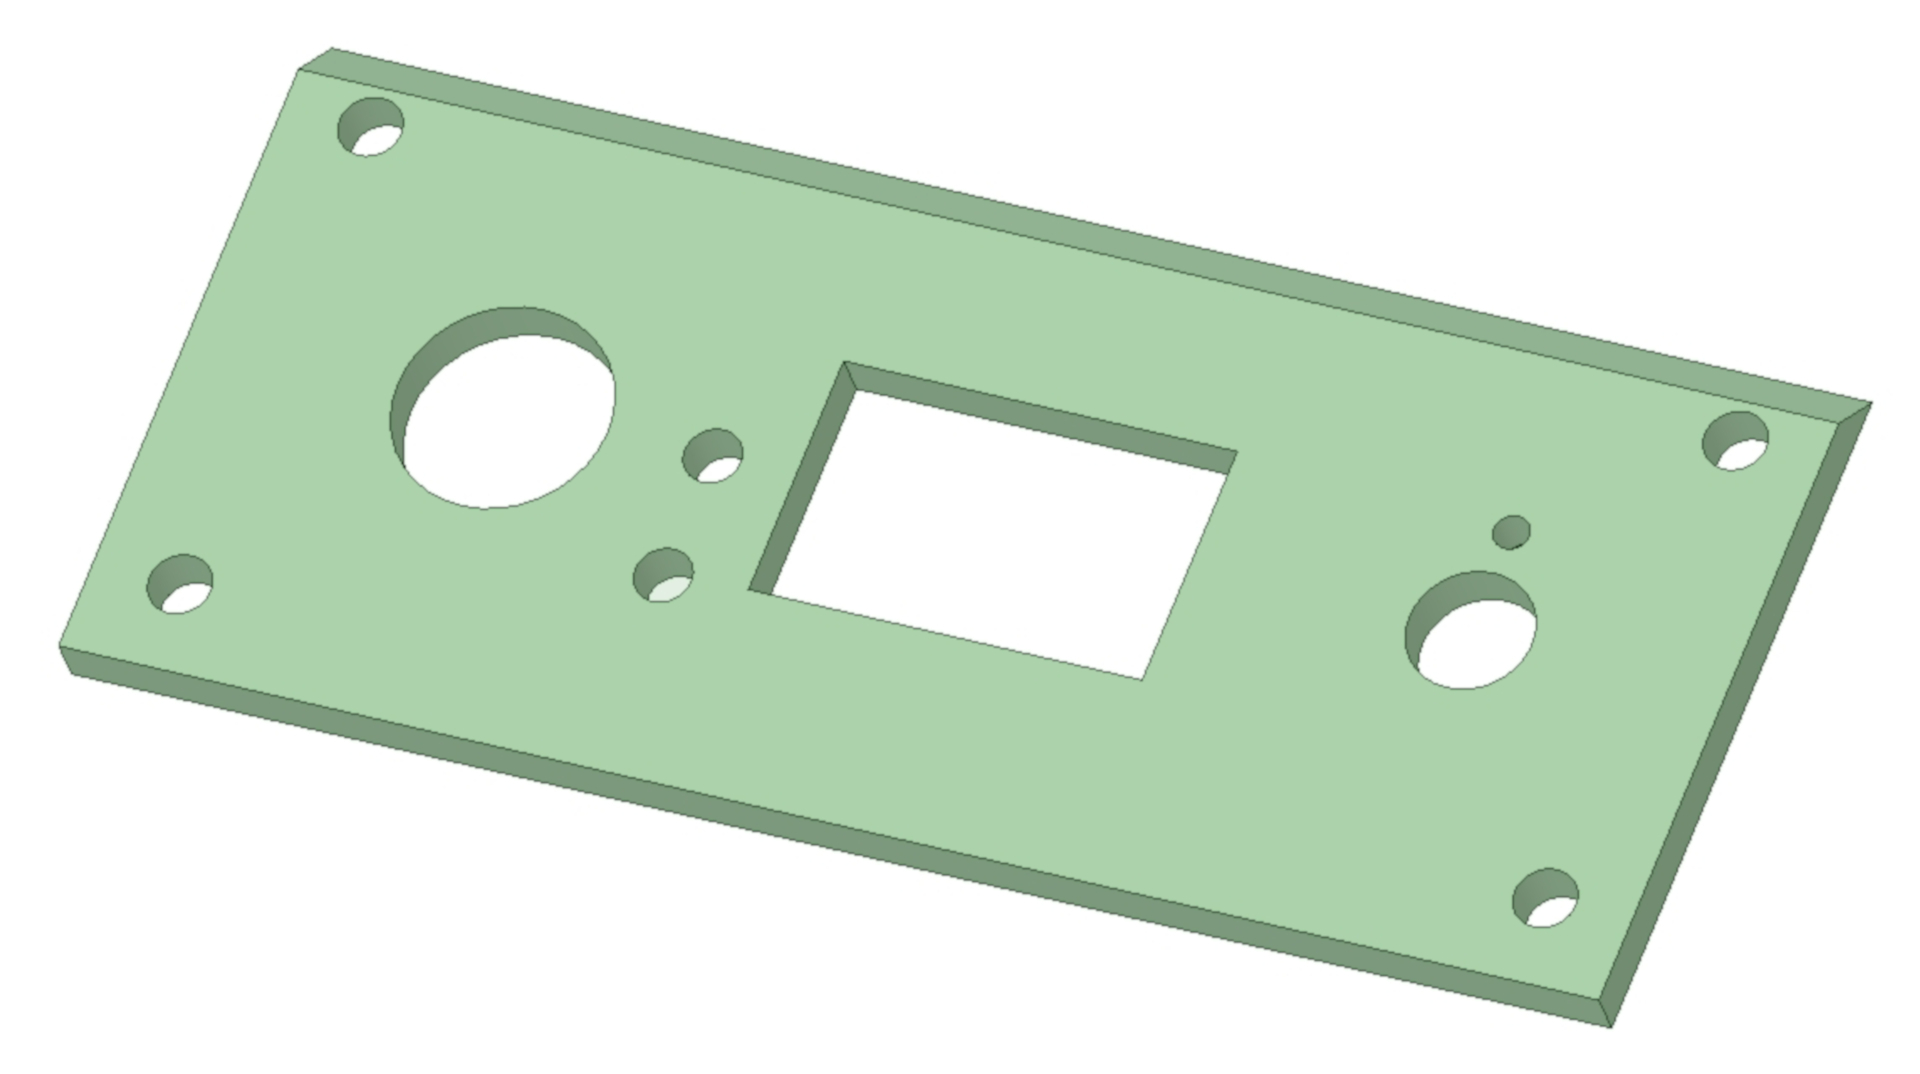
Front panel Serves for fixing the electronic control unit of the soldering station to the main part of the housing
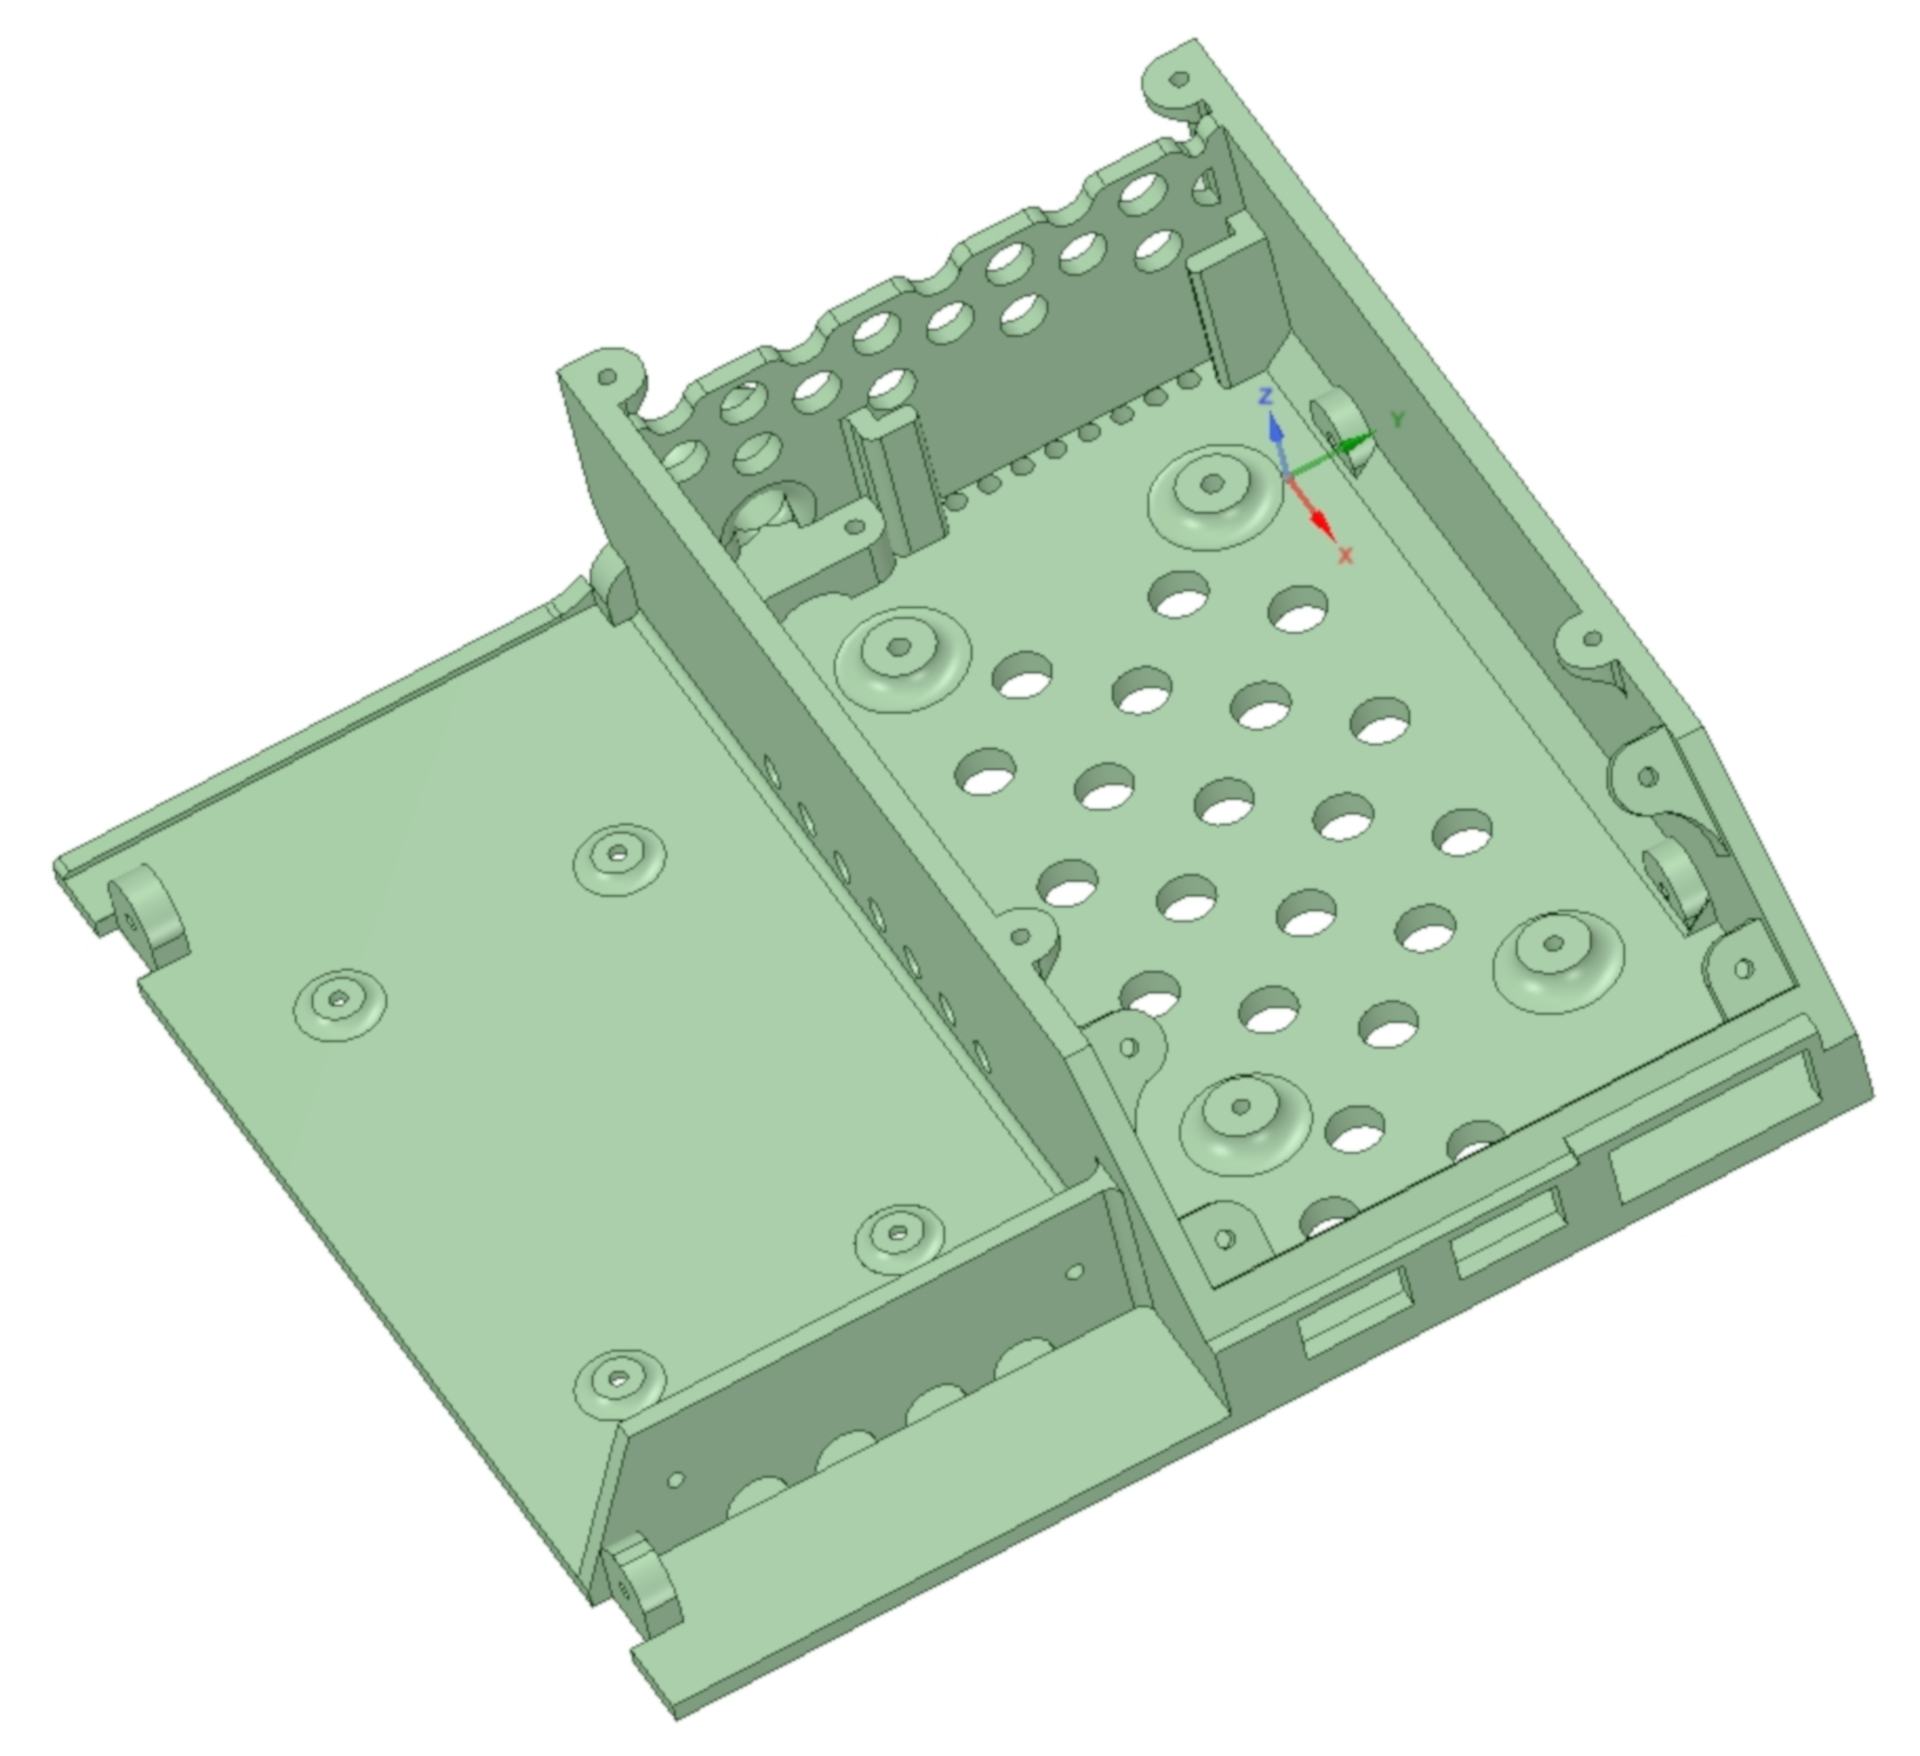
Main part. All other parts of the case and electronic components are screwed to it.
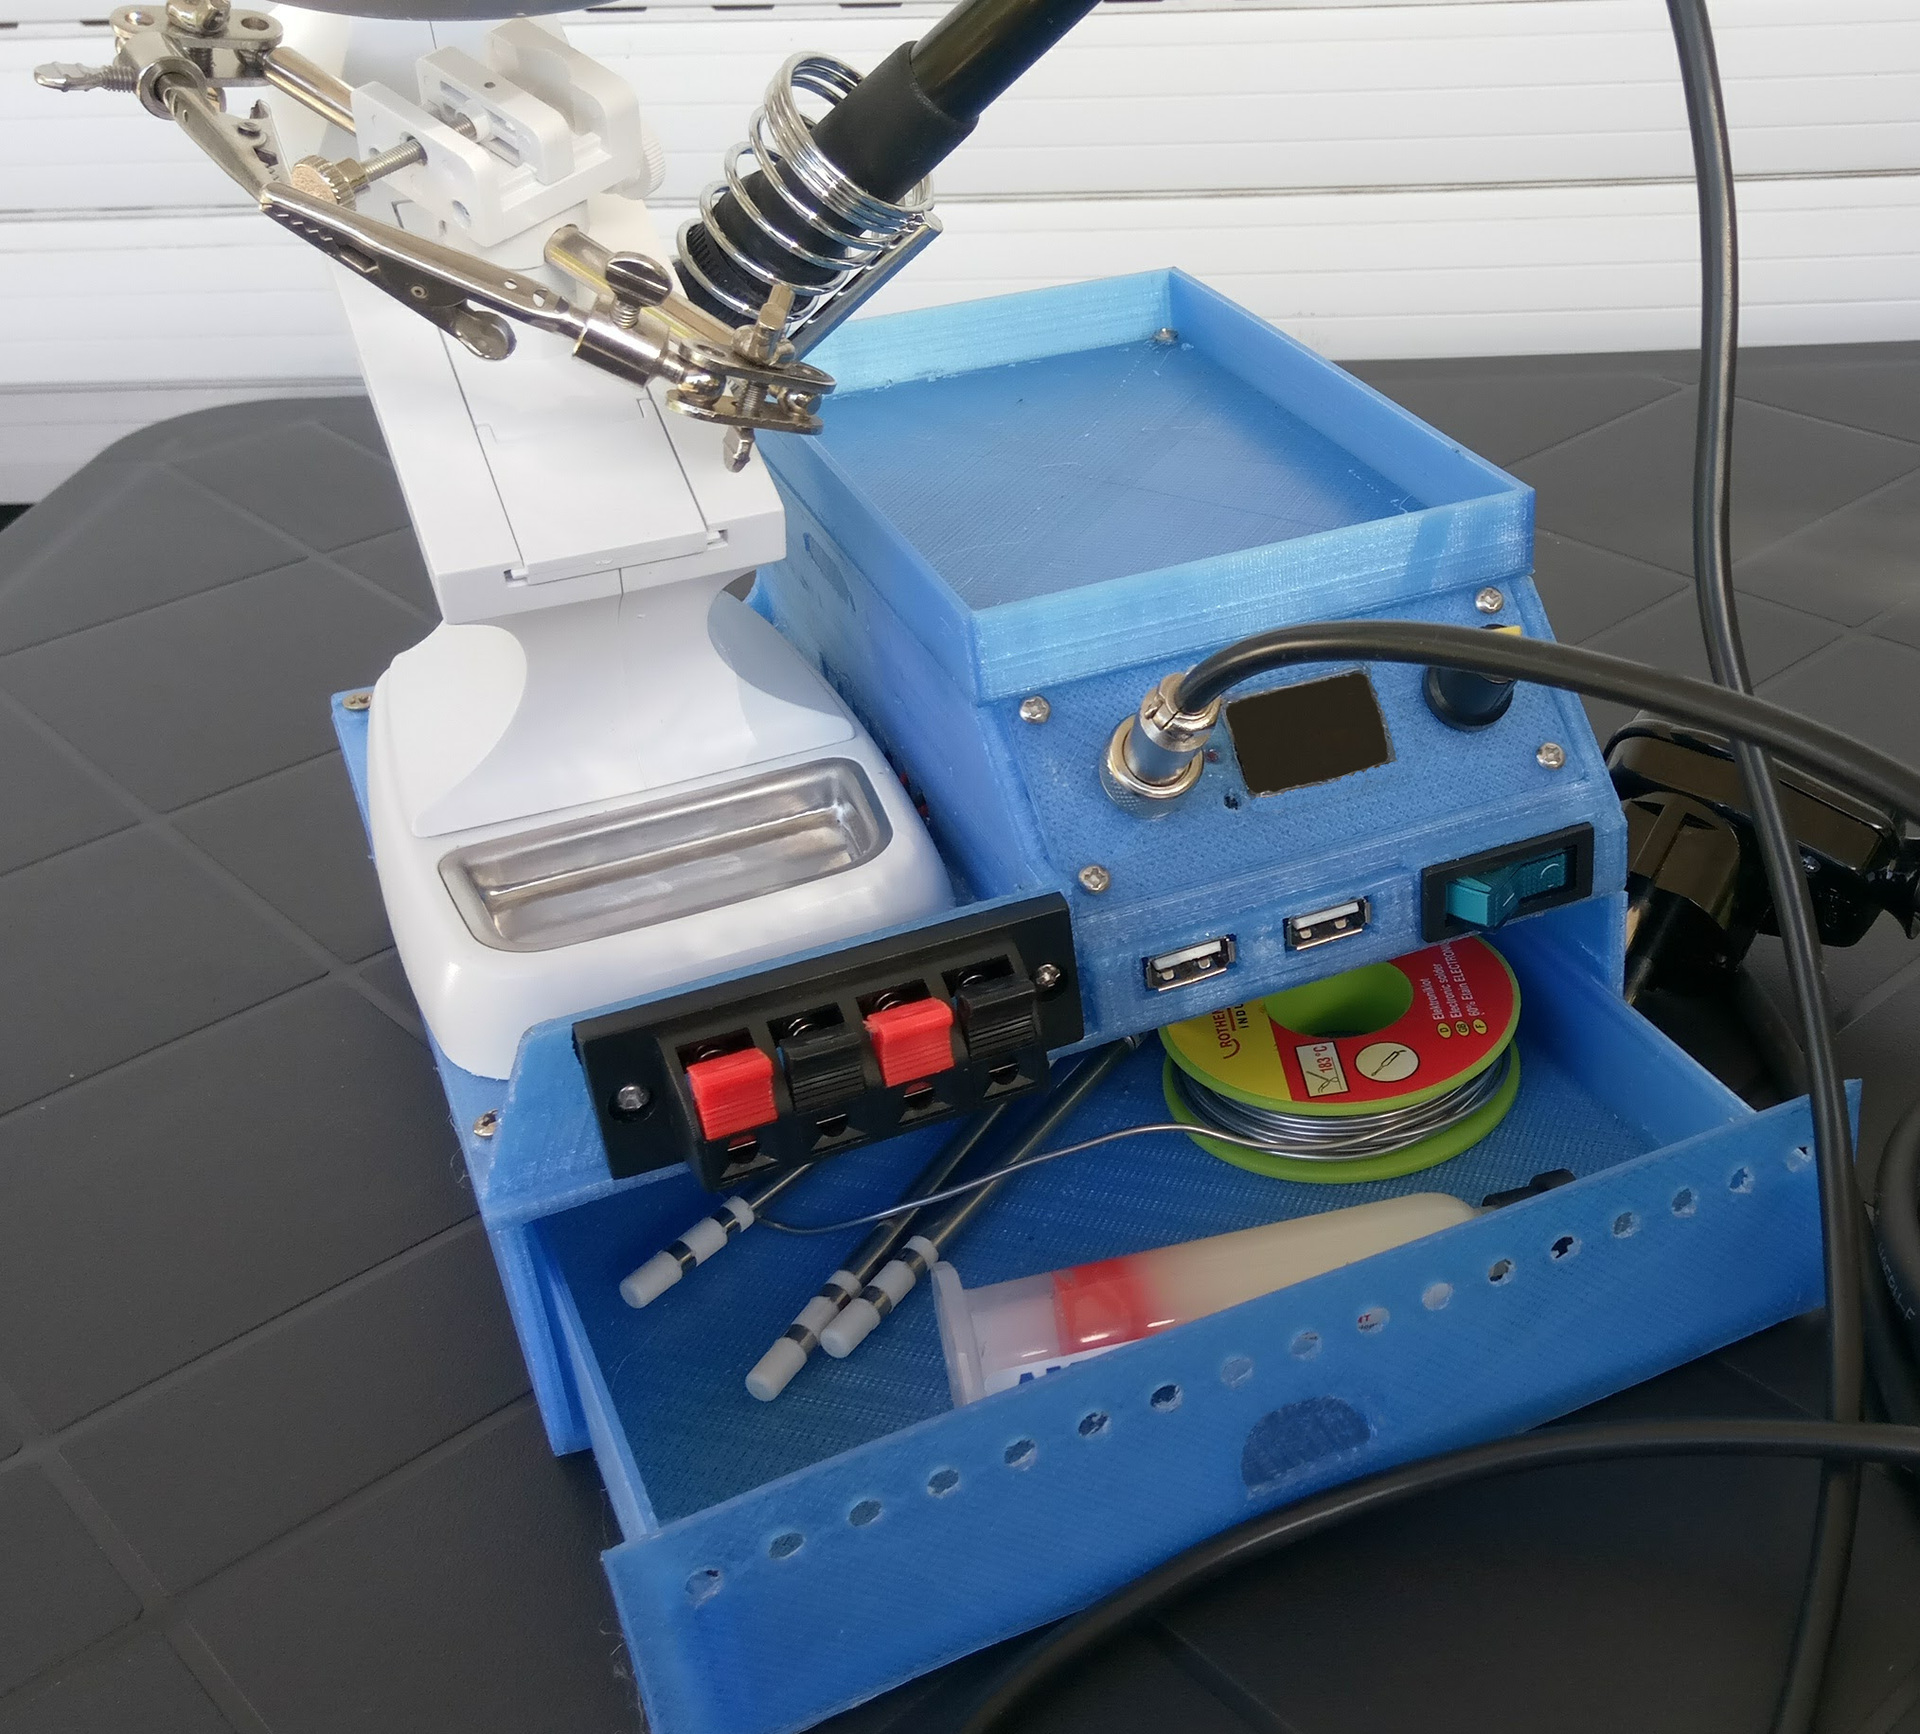
The following elements are located on the front wall of the main part: two USB sockets. power switch (the switches on the rear panel are a bit of a crime against humanity, in my opinion), ears for securing the front panel with an electronic unit. On the back wall there is a pocket for the voltage converter and ventilation holes. The hole for the power cable outside is funnel-shaped to prevent cable breaks. The power supply is located at a certain height from the bottom wall to provide free access of air through the lower ventilation holes.
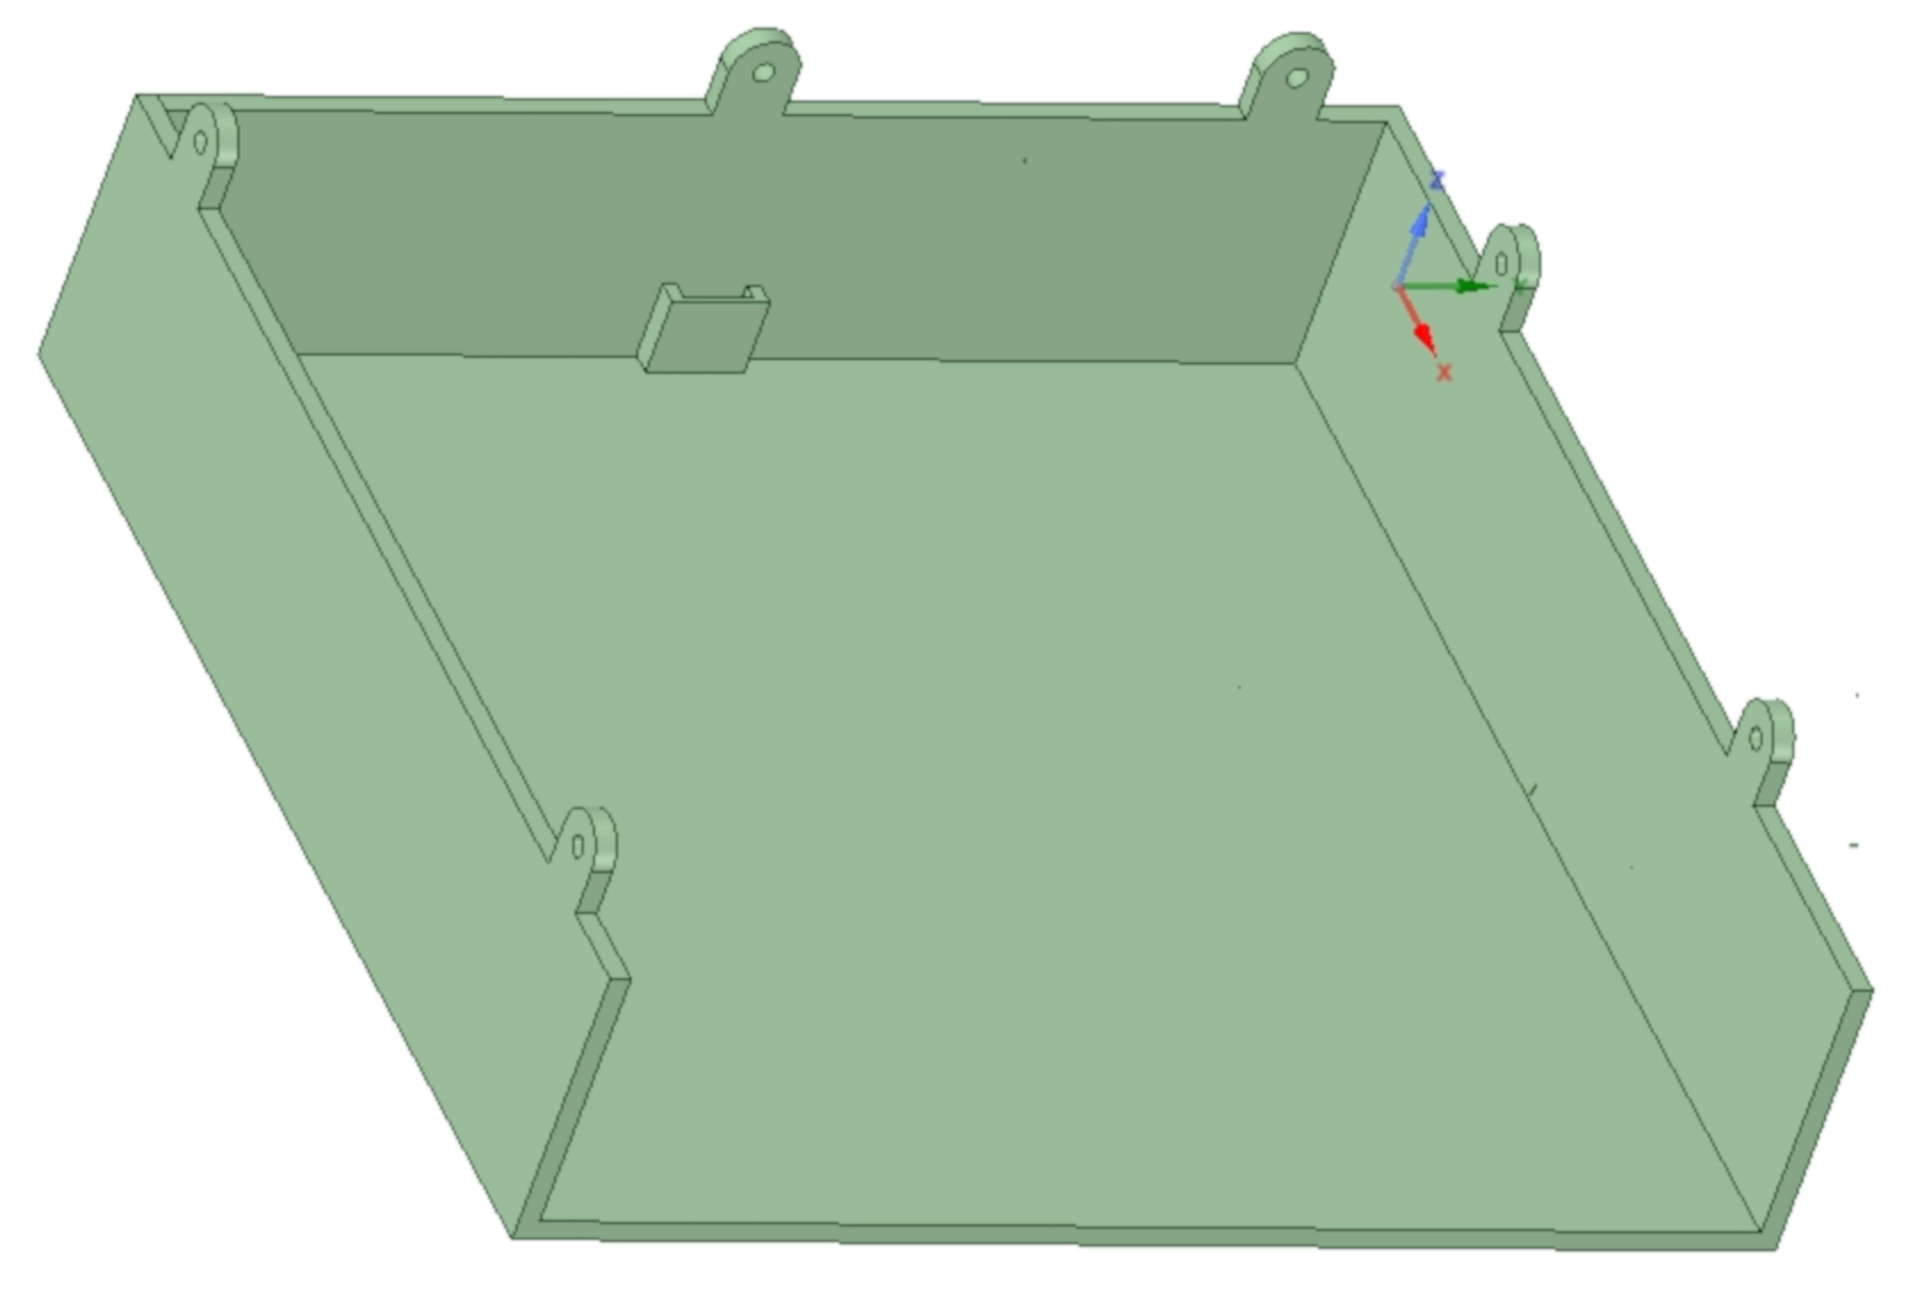
The lid of the electronics compartment is made in the form of a bath in which it is possible to fold various trifles. The case is designed so that not a drop of tin, or any small objects can get into the electronics compartment.


Lower part and drawer. A magnet pocket is located on the inner side of the back wall of the lower part, and a hole for a screw of magnetic material is provided in the corresponding place of the box. Holding the drawer with a magnet is a cheap, reliable and easy solution, in my opinion.
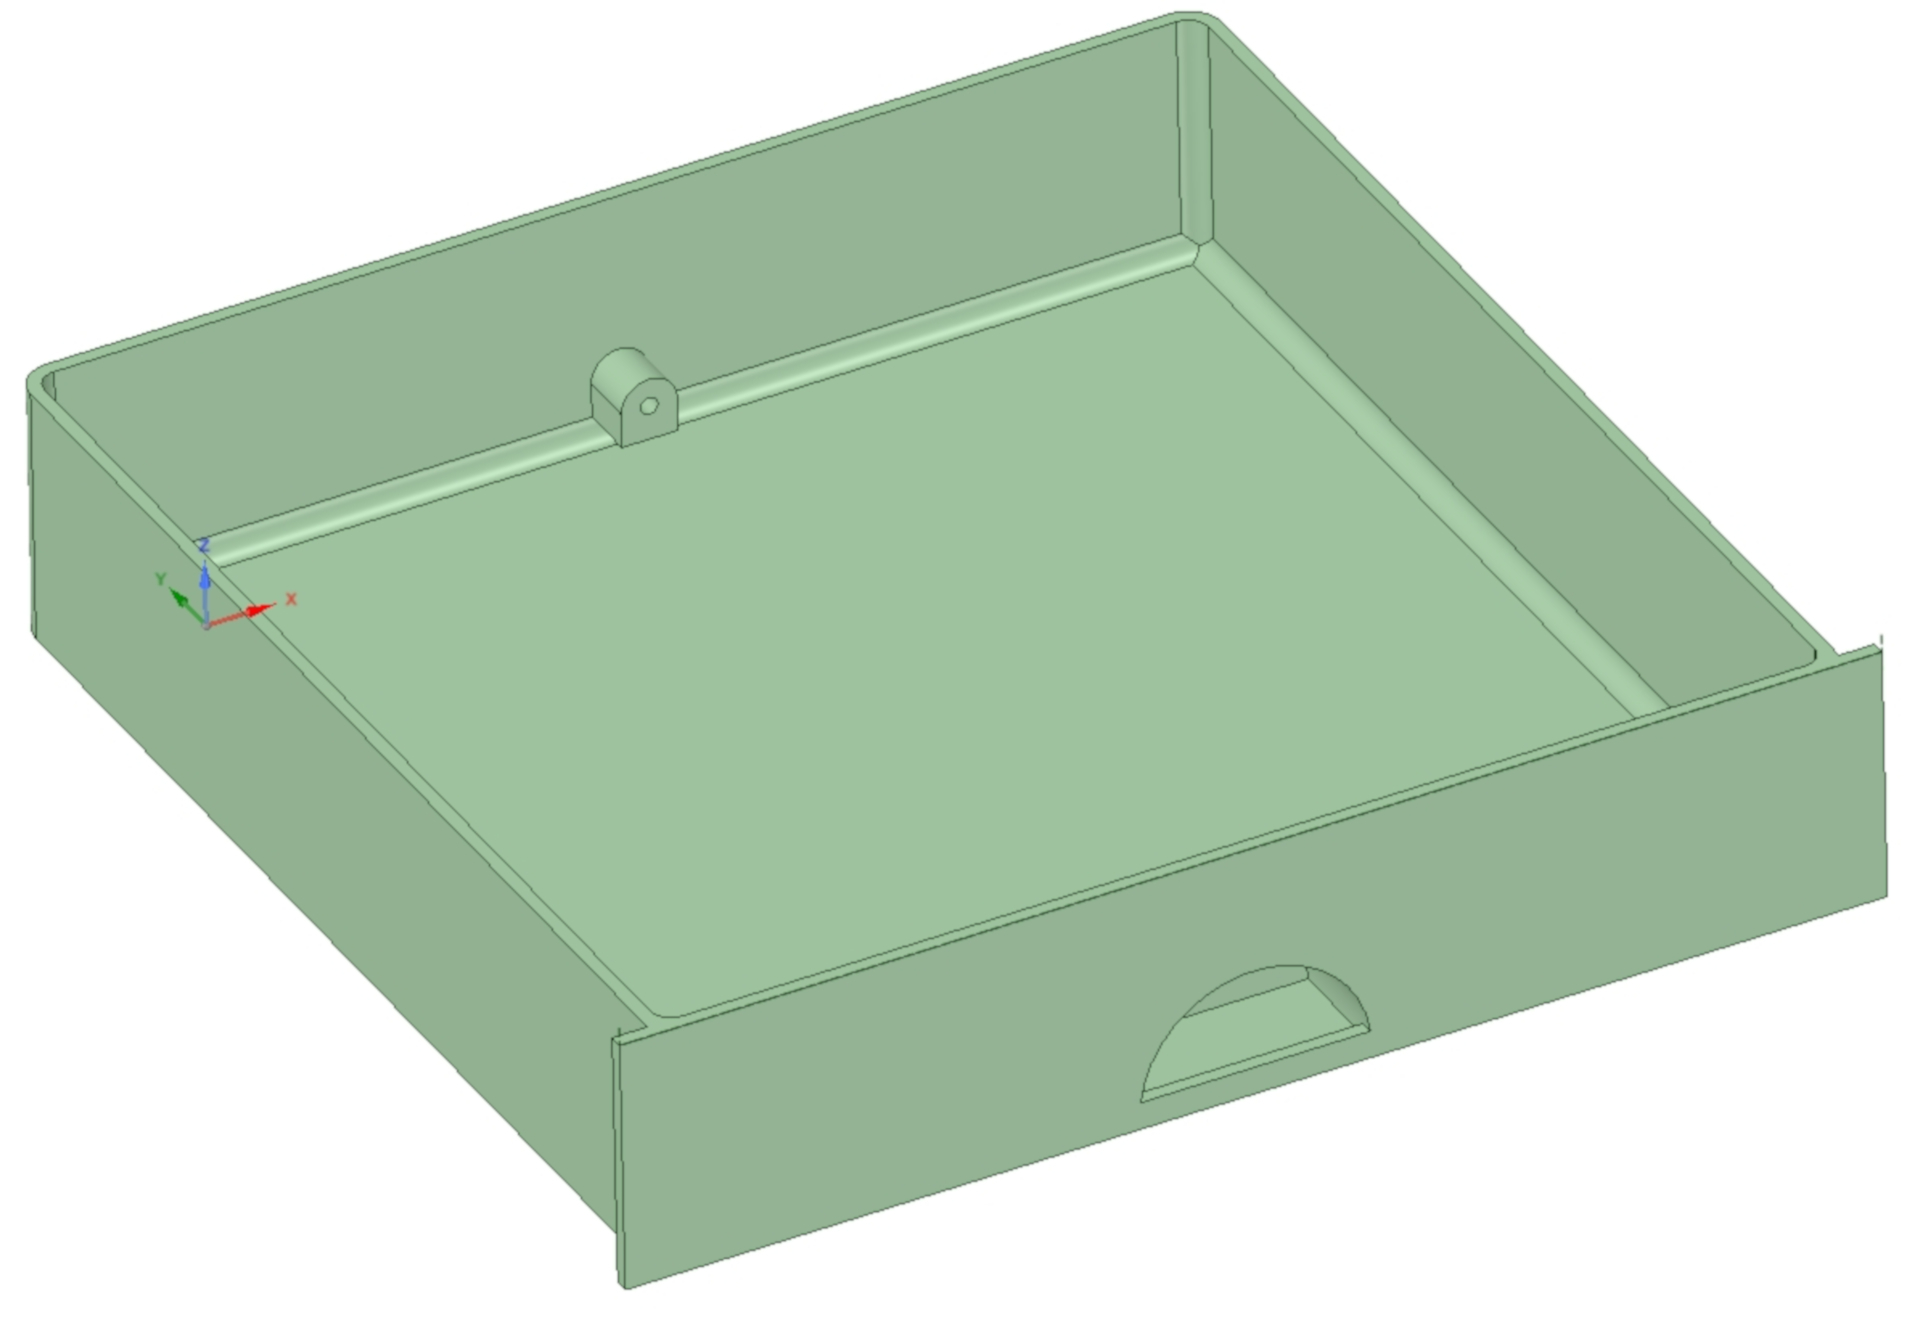
After assembly, the soldering station looks exactly like a hedgehog from the famous Ushinsky fairy tale. (the animal was “wrongly tailored and firmly sewn” and avoided many troubles).
After assembling the first version, 3D models were corrected, finalized and simplified, you can download them here. Published under the WTFPL license
Well, and traditional: Have fun!