AIBUS Chinese protocol and laboratory chemical reactor
Greetings Habr! Once upon a time I wrote an article about reaction flavors. A lot of time passed, I returned to this question.
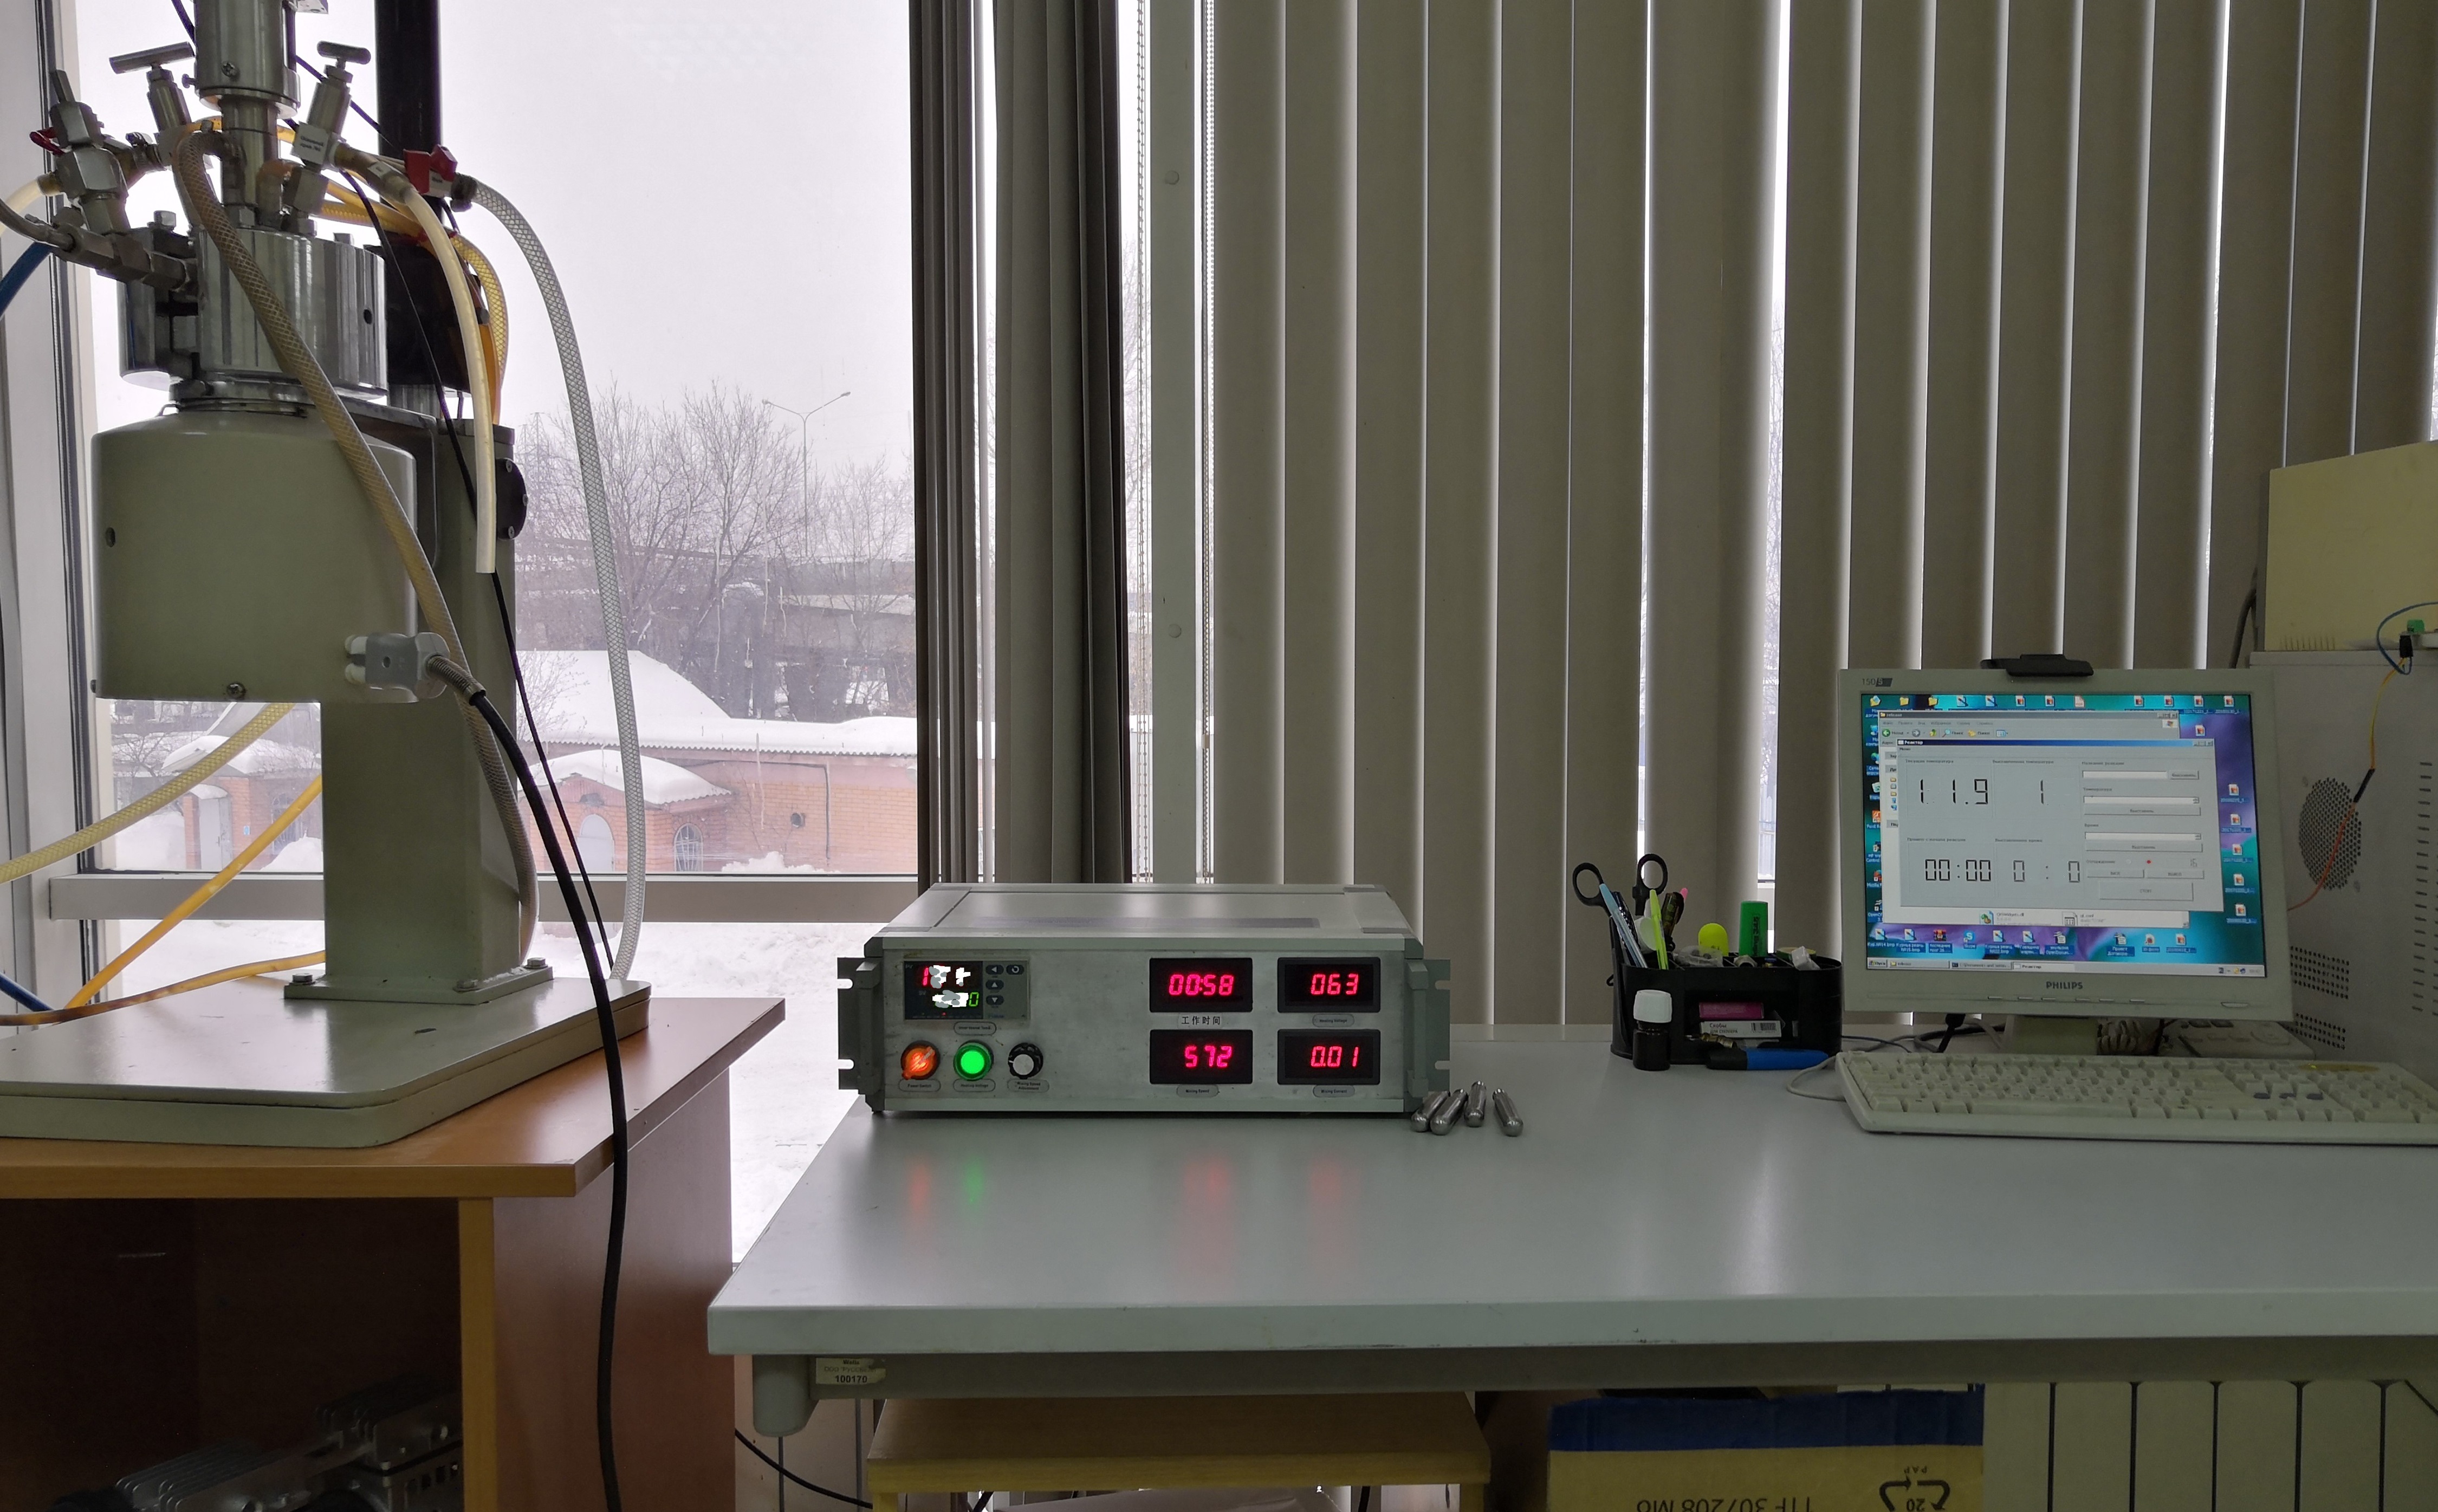
In this article, I will not go into details of the technology for developing reaction flavors, but will talk about my experience in automating my working hours and sharing a code that might come in handy. I came across a Chinese-made laboratory chemical reactor and, unfortunately, it lacked tools for automating cooling, reading and writing data, and programming modes, which was very important. The reactor itself was an ordinary metal blank on a tripod, with a heater up to 350 degrees. Yudian AI518 controller is responsible for temperature control .
The good news for me was the presence of an RS-485 port in it.
Yes, Yudian AI518 has timers and some very simple programs, but firstly, it was very interesting to make your own “blackjack” with windows and buttons, and secondly it’s not very convenient to poke on a regular controller, I would like that do on the computer.
Since I had experience working with Arduino controllers, I initially decided to make communication and control through it, then I already had the idea to write a program on Qt that will be responsible for control and automation, and Arduino Mega for the formation and decryption of packets with AI518.
Since the cold water enable valve can be located at a distance from the computer and the installation itself, it was decided to build an additional controller that will turn on / off the cold water valve on command and read and send the cooling temperature. Yes, at the end of the project, I realized that the construction was very heaped up, it would be possible to get rid of the RS485 whistle on a computer and use one program, but the ambition to make your own device fueled interest.
Total in our bunch:
First of all, the communication structure between mega and nano was written.
When everything worked stably, I began to read a lot about different data transfer protocols, but could not find the one that I needed. The fact is that the regular Yudian AI518 controller communicates with the outside world via the AIBUS protocol, as I understand it is the Chinese analogue of MODBUS. ( documentation ) I did this for the first time and focusing on the documentation and the help of all possible forums.
Outgoing packet structure for Yudian AI518:
The structure of the incoming package for Yudian AI518:
In fact, it turned out that packages from all devices come to Mega (from nano with cooling temperatures, from AI518 with updated reactor temperature and other values and commands from the computer). Then Mega united everything in one package and sent it to a computer, where the QT program read it.
Mega-computer package structure:
Since the Chinese protocol is silent, if the sent packet does not fit the description, selecting the structure, I generally began to think that it was broken, but in the end everything worked out. When I saw the first correct numbers in the log, there was happiness ...
In order to protect the controller on the Arduino nano from moisture, I decided to etch my own board and put it in the case. It's not a tricky thing, there are many descriptions of how to do this, but I chose LUT technology. ( LUT ). The most difficult thing was to choose a suitable glossy inkjet paper, which normally prints a laser printer. But after all the trial and error, we got such a device.

But what about the program on the computer, with buttons and windows. Fortunately, such things are very easy to do on Qt. We are able to formulate requests and read them from a “Basurmanian” device, now it is necessary that we can set modes, plot a time-temperature graph, give at the end of the reaction a report on the heating rate to the set temperature, the reaction time itself, the cooling rate to a certain temperature and etc. Combining all this into a separate structure, according to QSerialPort, through the COM port to which Arduinka itself is connected, we transmit and accept values.
The most difficult thing was to compile the finished project under Windows XP. Unfortunately, these systems are at work and I had to dance with a tambourine for a couple of days to make it work. Since I did this already the second day, I didn’t lay out the exact instructions without deliberately and sorting out all the proposed options from the forums.
The result was a program that works and helps me at my workplace and saves a lot of time (I will not post the QT project, since there is nothing interesting there. Transferring data through QSerialPort, and then whatever your heart desires).
Links to firmware for Arduinok:
→ For Nano
→ For Mega
In this article, I will not go into details of the technology for developing reaction flavors, but will talk about my experience in automating my working hours and sharing a code that might come in handy. I came across a Chinese-made laboratory chemical reactor and, unfortunately, it lacked tools for automating cooling, reading and writing data, and programming modes, which was very important. The reactor itself was an ordinary metal blank on a tripod, with a heater up to 350 degrees. Yudian AI518 controller is responsible for temperature control .
The good news for me was the presence of an RS-485 port in it.
Yes, Yudian AI518 has timers and some very simple programs, but firstly, it was very interesting to make your own “blackjack” with windows and buttons, and secondly it’s not very convenient to poke on a regular controller, I would like that do on the computer.
Since I had experience working with Arduino controllers, I initially decided to make communication and control through it, then I already had the idea to write a program on Qt that will be responsible for control and automation, and Arduino Mega for the formation and decryption of packets with AI518.
Since the cold water enable valve can be located at a distance from the computer and the installation itself, it was decided to build an additional controller that will turn on / off the cold water valve on command and read and send the cooling temperature. Yes, at the end of the project, I realized that the construction was very heaped up, it would be possible to get rid of the RS485 whistle on a computer and use one program, but the ambition to make your own device fueled interest.
Total in our bunch:
- Native controller Yudian AI518.
- Arduino Mega + 2 RS485 converters (MAX485)
- Arduino nano + 1 RS485 (MAX485) converter + thermocouple + 12V transistor.
- 12V cold water valve.
First of all, the communication structure between mega and nano was written.
struct packet_arduino_pomp //пакет Arduino nano
{
  byte start_byte_one;//в коротком пакете равен 212
  byte start_byte_two;//в коротком пакете равен 211
  byte temp_pomp;//температура охлаждения
  byte on_of_pomp;//on-off насоса (1 или 0)
  byte CRC8;//контрольная сумма
  /*упаковать*/
  void pask()
  {
    CRC8 = (start_byte_one + start_byte_two + temp_pomp + on_of_pomp + tmp) / 10;
  }
  /*проверка упаковки*/
  bool test_pask()
  {
    if (CRC8 == (start_byte_one + start_byte_two + temp_pomp + on_of_pomp + tmp) / 10) return 0; //ОК
    return 1; // ошибка
  }
};
When everything worked stably, I began to read a lot about different data transfer protocols, but could not find the one that I needed. The fact is that the regular Yudian AI518 controller communicates with the outside world via the AIBUS protocol, as I understand it is the Chinese analogue of MODBUS. ( documentation ) I did this for the first time and focusing on the documentation and the help of all possible forums.
Outgoing packet structure for Yudian AI518:
struct tagREQ_FRM_T
{
  uint8_t  u8DevAddr1;
  uint8_t  u8DevAddr2;
  uint8_t  u8ReqType;
  uint8_t  u8DevPara;
  uint8_t  u8LoParam;
  uint8_t u8HiParam;
  uint8_t  u8LoSumCheck;
  uint8_t  u8HiSumCheck;
} ;
The structure of the incoming package for Yudian AI518:
struct tagANS_FRM_T
{
  uint8_t  u8LoPV;
  uint8_t  u8HiPV;
  uint8_t  u8LoSV;
  uint8_t  u8HiSV;
  uint8_t  u8MV;
  uint8_t  u8ALm;
  uint8_t  u8LoParam;
  uint8_t  u8HiParam;
  uint8_t  u8LoSumCheck;
  uint8_t  u8HiSumCheck;
};
In fact, it turned out that packages from all devices come to Mega (from nano with cooling temperatures, from AI518 with updated reactor temperature and other values and commands from the computer). Then Mega united everything in one package and sent it to a computer, where the QT program read it.
Mega-computer package structure:
struct packet_big //пакет PC
{
  byte start_byte_one;//в длинном пакете равен 254
  byte start_byte_two;//в длинном пакете равен 232
  byte temp_pomp;//температура охлаждения
  byte on_of_pomp;//on-off насоса (1 или 0)
  byte ex_temp_reactor_one;//текущая температура в реакторе 1
  byte ex_temp_reactor_two;//текущая температура в реакторе 2
  byte current_temp_reactor;//выставленная температура в реакторе
  byte timer_ex;//таймер
  byte tmp;//пока не трогаем
  byte CRC8;//пока не трогаем
  void pask()
  {
    CRC8 = (start_byte_one + start_byte_two + temp_pomp + on_of_pomp + ex_temp_reactor_one + ex_temp_reactor_two + current_temp_reactor + timer_ex + tmp) / 10;
  }
  /*проверка упаковки*/
  bool test_pask()
  {
    if (CRC8 == ((start_byte_one + start_byte_two + temp_pomp + on_of_pomp + ex_temp_reactor_one + ex_temp_reactor_two + current_temp_reactor + timer_ex + tmp)) / 10) return 0; //ОК
    return 1; // ошибка
  }
};
Since the Chinese protocol is silent, if the sent packet does not fit the description, selecting the structure, I generally began to think that it was broken, but in the end everything worked out. When I saw the first correct numbers in the log, there was happiness ...
In order to protect the controller on the Arduino nano from moisture, I decided to etch my own board and put it in the case. It's not a tricky thing, there are many descriptions of how to do this, but I chose LUT technology. ( LUT ). The most difficult thing was to choose a suitable glossy inkjet paper, which normally prints a laser printer. But after all the trial and error, we got such a device.
But what about the program on the computer, with buttons and windows. Fortunately, such things are very easy to do on Qt. We are able to formulate requests and read them from a “Basurmanian” device, now it is necessary that we can set modes, plot a time-temperature graph, give at the end of the reaction a report on the heating rate to the set temperature, the reaction time itself, the cooling rate to a certain temperature and etc. Combining all this into a separate structure, according to QSerialPort, through the COM port to which Arduinka itself is connected, we transmit and accept values.
The most difficult thing was to compile the finished project under Windows XP. Unfortunately, these systems are at work and I had to dance with a tambourine for a couple of days to make it work. Since I did this already the second day, I didn’t lay out the exact instructions without deliberately and sorting out all the proposed options from the forums.
The result was a program that works and helps me at my workplace and saves a lot of time (I will not post the QT project, since there is nothing interesting there. Transferring data through QSerialPort, and then whatever your heart desires).
Links to firmware for Arduinok:
→ For Nano
→ For Mega