Morse Key and Klopfer
- Transfer
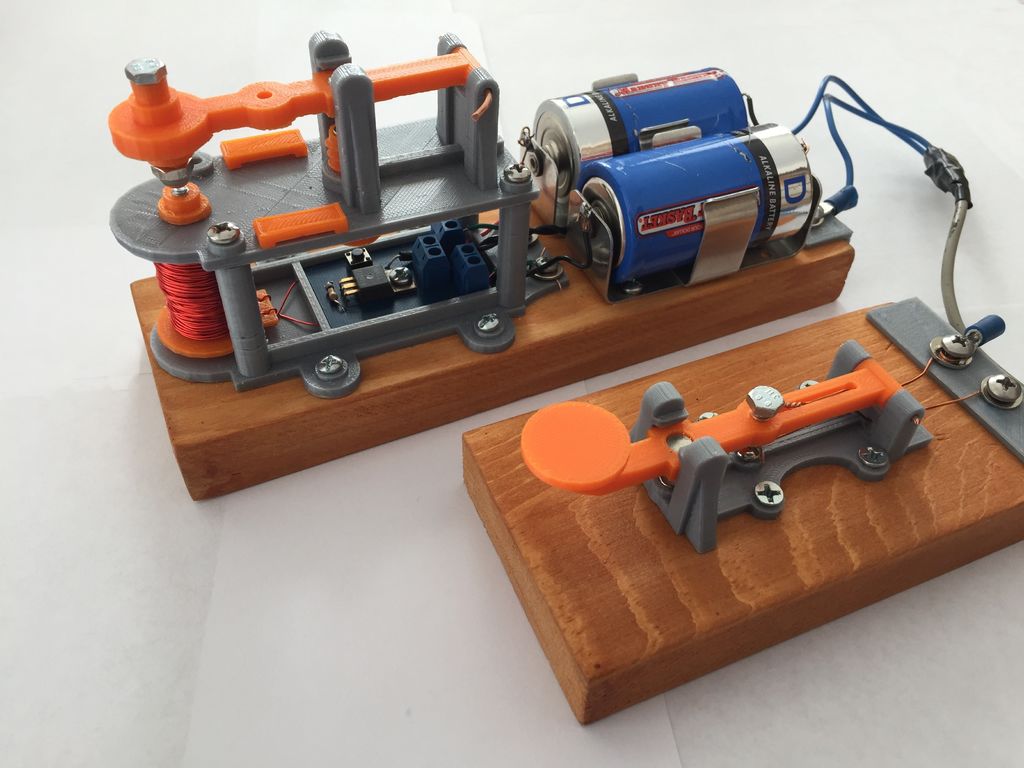
A feature of the proposed design of the Morse key and Klopfer (German Klopfer - letters. One of the meanings is “door knocker”) is the use of 3D-printed parts.
First, consider the key device.

The numbers denote:
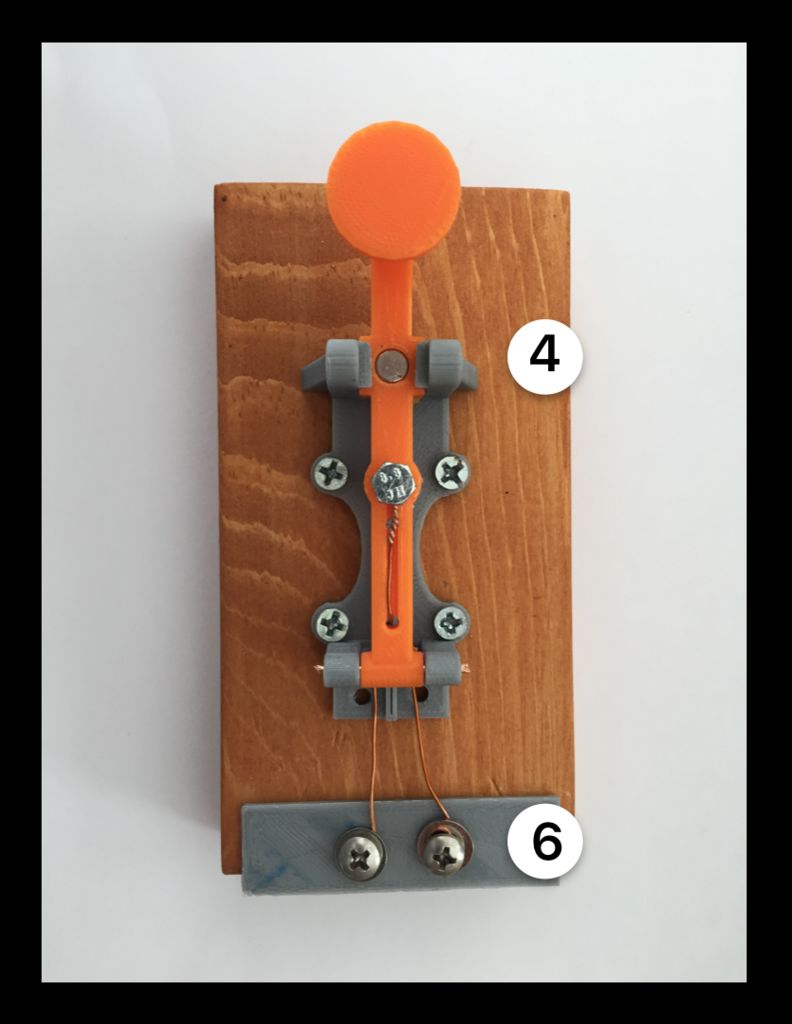
1 - the upper contact bolt around which the wire is wound. If it is in PVC insulation, it must be cleaned with a stripper, if varnished winding - with an emery cloth. A bolt in the author's version of M3.5, under another you will have to redo the thread in the STL file. By rotating the bolt, you can adjust the clearance.
2 - lower contact screw, screwed into a wooden stand, a stripped wire is also wound around it.
3 - a loop, the hole diameter in it is 2 mm, it is convenient to use a single-core wire with a cross section of 14 AWG as a pin (this is about 2 mm 2so you have to choose between 1.5 and 2.5).
4 and 5 - openings for the upper and lower magnets, each of which holds two neodymium magnets with dimensions of 6x3 mm. They replace the spring to return the key.
6 - clamps for connecting the line between the key and the klopfer.
Klopfer is a little more complicated.
The numbers indicate:
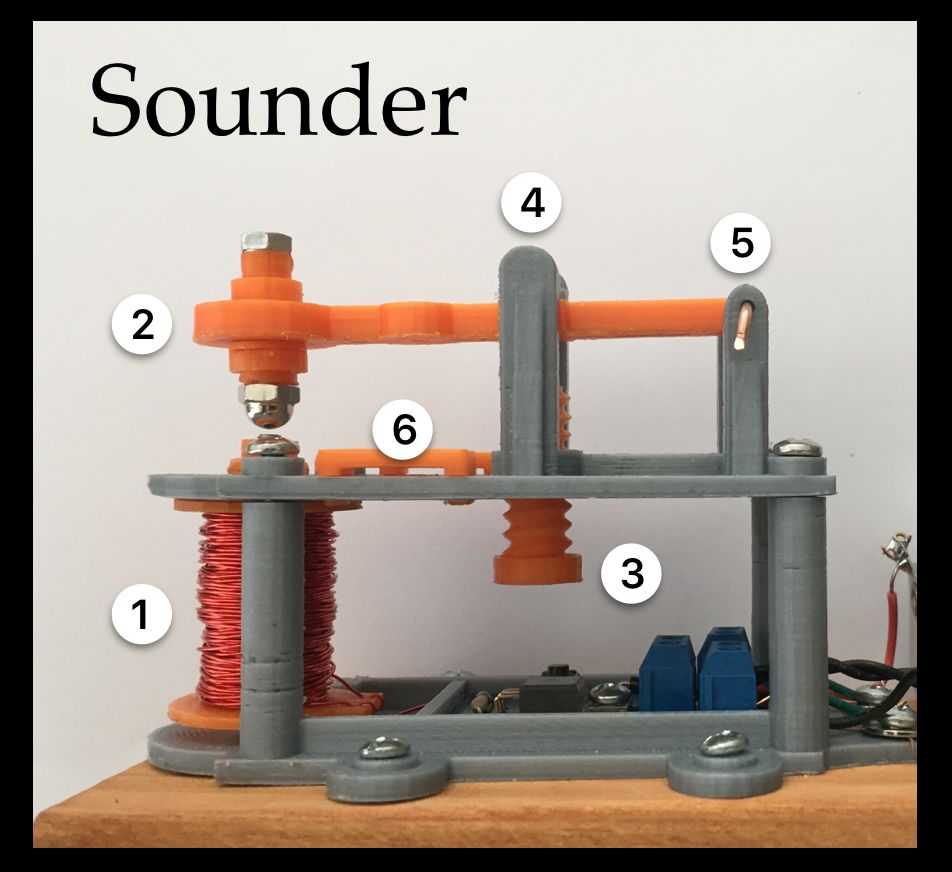
1 - electromagnet. Wrap the M3.5x40 screw with electrical tape, wrap several hundred turns of the winding wire. Leave “tails” about 200 mm long each.
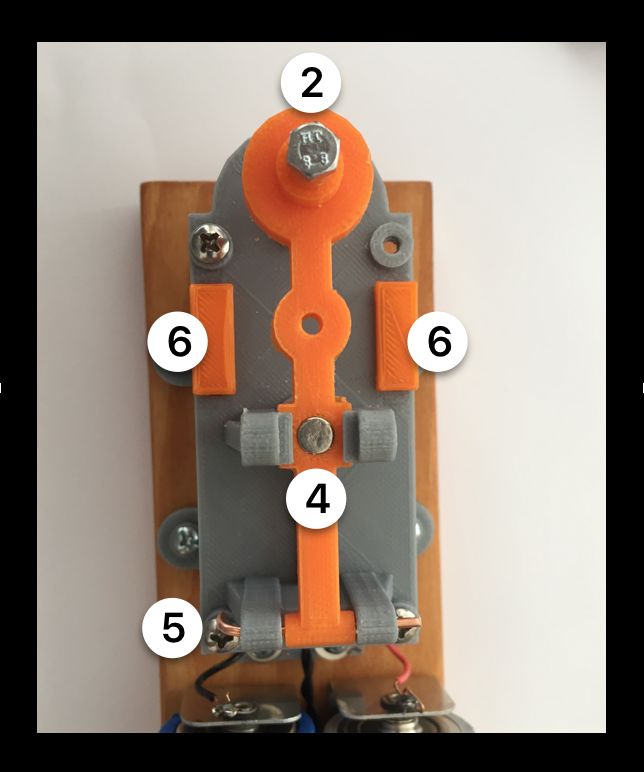
2 - lever with a M3.5x20 bolt, on which a cap nut is screwed, knocking on the electromagnet core screw.
3 - holder of two neodymium magnets with dimensions of 3x6 mm, the thread allows you to adjust the height.
4 - two of the same magnets pressed into the lever, their task is also to replace the spring.
5 - loop designed for the same hard wire as in the key.
6 - a slot for a paper tape in case you want to add a pencil, bobbins and an engine with a reducer to the klopfer.
Next to the electromagnetic is the control circuit:
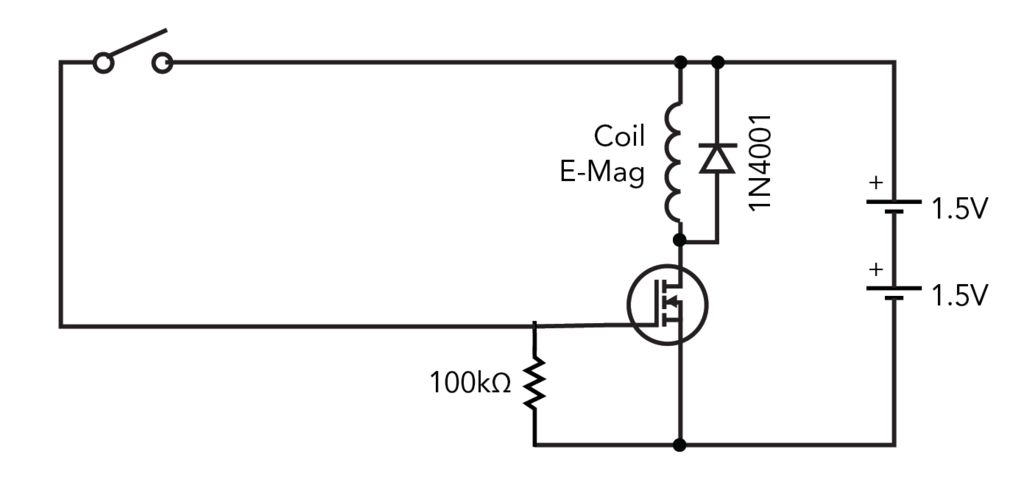
Type of MOS transistor in the author's version - IRF3205. The clamps for the line and the line itself between the key and the klopfer are not shown in the diagram. The design of the battery compartment is shown on KDPV, you can use the finished compartment 2xC or 2xD.
STL files:
All parts together
Key base separately
Upper and lower parts of the klopfer separately
Separate details, which in the author's version are orange
Separate plate for clamps
Design in action: