Creating an AR Game with Vuforia
- Transfer
- Tutorial
[There are voluminous GIFs under the cut]
Augmented reality (AR) has suddenly become a very popular term. Thanks to Vuforia, developers can easily complement the physical world with digital content.
Although the release of ARKit and ARCore helped to increase the popularity of augmented reality, other platforms and SDKs already existed. One of them was Vuforia; and recently, Unity entered into a partnership agreement with Vuforia and integrated this AR platform into the Unity game engine.
In this tutorial, I will create an AR game using the Vuforia SDK integrated with the Unity engine. In the process, I will talk about the following key components:
- Set up data transfer from augmented reality camera
- Image tracking - what it is and how it works
- Attaching Digital Content to a Physical Object
- Create custom interactions that trigger depending on what the camera sees
Note: this tutorial on Vuforia assumes that you already know the basics of development in Unity. If you're new to Unity, then check out the great Getting Started In Unity tutorial .
Development of AR-games in Unity
There are many AR devices on the market, but the main goal of AR applications is the mobile space of platforms such as iOS and Android. It is here that the combination of Unity and Vuforia is convenient - in cross-platform development. Another plus is that the application can be tested in the editor. For this, you just need a webcam!
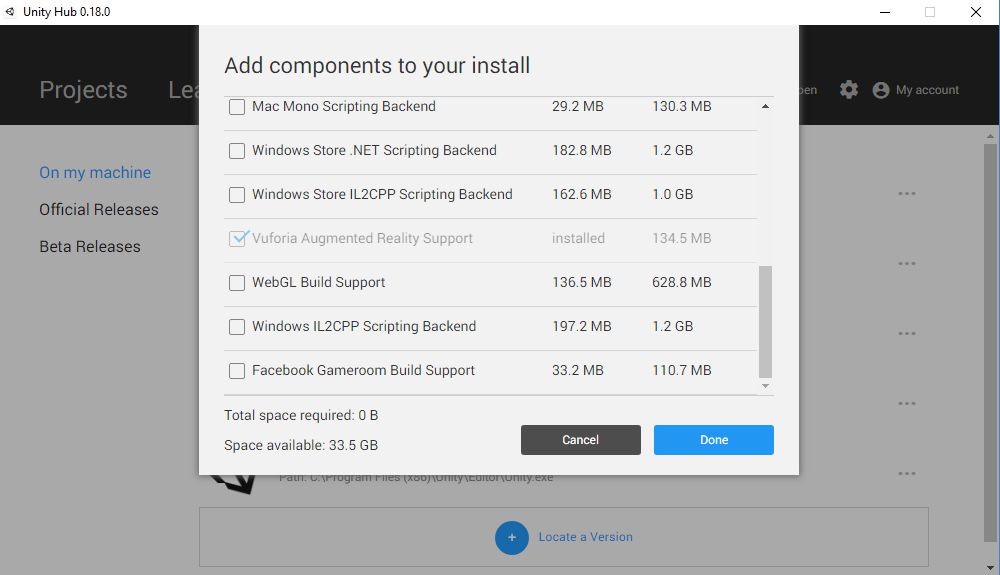
Before you begin, download the latest version of Unity and install the Vuforia Augmented Reality Support component . If you use the Unity Hub , you can add this component to an already installed version of Unity.
Getting to work
Now that you have Unity, Vuforia and a webcam, you need to download a sample project ( from here ).
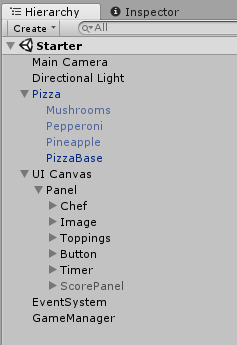
After downloading, extract the files and open the How to Make an AR Game Using Vuforia Starter project in Unity . When the project loads, open the Starter scene from the Scenes folder and look at the Hierarchy window:
After reviewing the composition of the project, click on the Play button in the editor to fill out the order in our pizza game.
Great, we can play with pizza, but our real challenge is to turn this into an AR game.
Note: UI assets for this tutorial have been downloaded from shareicon.net.
Meet the Vuforia Chef
To do this, we need to make the virtual pizza appear on the tracker image that we hold in the real world. After adding the filling to the order, you can physically “serve” the pizza, taking it out of the camera's visibility ...
But everything has its time. First you need to replace Main Camera with AR Camera . Remove the Main Camera from the scene , and then right-click in the Hierarchy .
Then add Vuforia -> AR Camera . This will pop up this window:
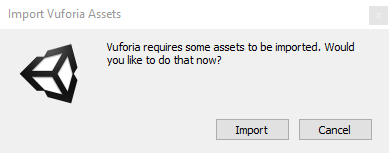
Click Import and wait for the Vuforia Package to be imported into the project, and quite a few files will be added.
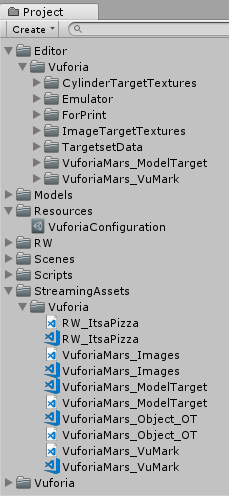
You can ignore the new files in the Editor and Streaming Assets folders . These are just templates; The files we need are included in the project.
The Vuforia folder contains all the prefabs and scripts used by the Vuforia platform that we will use.
It is also worth mentioning the VuforiaConfiguration file inside the Resources folder . This file was added because a license is required to develop the Vuforia application. However, if you wish, you can get a free developer license for the Vuforia Developer Portal .
Note:if your project does not have an App License Key, then it can be found in the README file. Copy the line into the inspector field of the VuforiaConfiguration file .
Now that we have AR Camera in the scene, there’s only one thing left to do - turn on Augmented Reality!
Go to Edit -> Project Settings -> Player . Scroll down to the XR Settings options and make sure the Vuforia Augmented Reality Supported checkbox is checked .
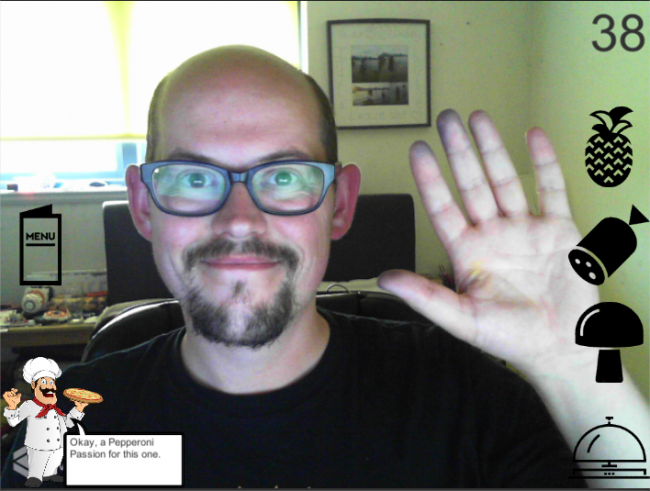
Click in the Play editor and say hello to yourself!
Note: if you clicked on play and the “Vuforia Initialization Failed” screen appears, then try restarting Unity. This is a random bug that appears only on some systems.
Introduction to Pattern Recognition
Admiring yourself is great, of course, but weren't we going to make a pizza game?
By default, Vuforia works with Image Recognition . Pattern recognition, also called Tracker Recognition or Image Tracking, is a process in which a camera recognizes a predefined image and knows what to do with it, for example, render some content on top of it. This works best when the tracking image somehow matches the content, for example, floor plans for building rendering work well on top of the image with the building.
How it works:It is very important to choose a good quality image for tracking. When using Vuforia, you can upload the selected image to the developer's portal to check the quality of its tracking, and this must be done before starting development. The developer portal assigns a rating to the image, but, more importantly, shows its “characteristic points”. For the tracker to be good, these characteristic points (feature points) should be densely distributed over the image and there should not be any repeating patterns in them. At runtime, the camera searches for these characteristic points to calculate its location relative to the image.
For this tutorial, the image and tracking database are already configured. The image of the pizza is located in the Materials folder that you downloaded earlier. Ideally, print it out. Or you can open it on some digital device, and then “show” it to the camera. Here's what the image looks like in Vuforia Tracker Database:
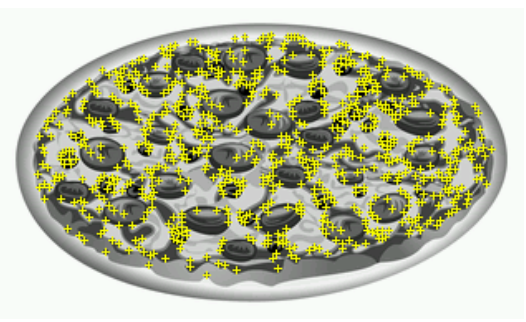
As you can see, the characteristic points are well distributed. It’s also pizza, which is convenient!
Adding Image Targets to the Scene
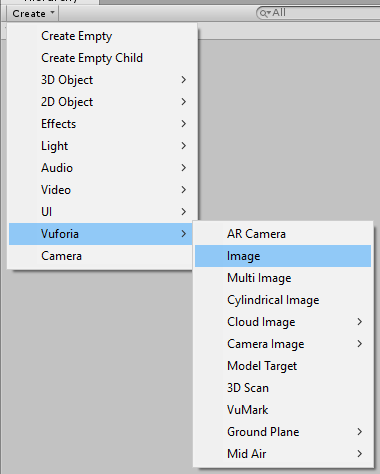
It's time to do the magic! We will make virtual pizza appear on top of our pizza. Again, use the Create menu in the Hierarchy and select Vuforia -> Image .
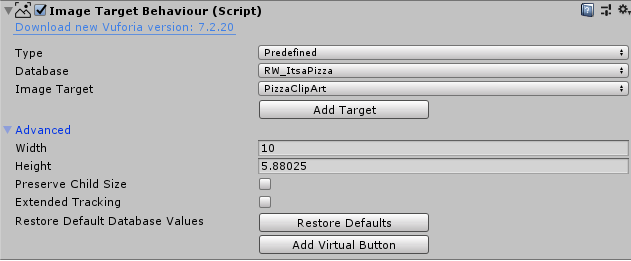
Now we have an Image Target GameObject in the scene . Look at this target in the inspector and you will see several components. The most important are Image Target Behavior and Default Trackable Event Handler . We will examine the second in more detail later, but for now, make sure that the options for the Image Target Behavior drop-down list are configured as follows:
- For Database selected RW_ItsaPizza
- For Image Target is selected PizzaClipArt
Remember the files added earlier to the project that I asked to ignore? You found them! Vuforia is adding several Image Target sample databases so that we can start developing and use them for examples, such as the one we are using, already added to the materials.
Note: the Pizza tracker is the only image target in your database; however, there can be hundreds of images in one database. In addition, there can be several databases in one application.
Now that we have configured the AR Camera and Image Tracker in the scene , we have everything you need for augmented reality to work! In the Editor, click on the Play button and place the printed image in front of the camera.

We got pizza!
Attaching Game Objects to Trackers as Child Objects
The pizza is a little small, but it is firmly stuck to the tracker image. You can also notice that if you remove the tracked image, the pizza will remain hanging in the air.
The fact is that while the webcam can see the image tracker , Vuforia is able to update the position of the AR Camera in the scene. If you want to see this in action, configure the Unity Editor so that both the Game and Scene windows are visible at the same time , then select AR Camera and click Play.
How to make pizza behave correctly when the camera is working? Select ImageTarget in the Hierarchy. You will see that its scale on each axis is 10 . This is controlled by the Image Target Behavior component . In the advanced section, you can see that the Width parameter has a value of 10 . It was set when the image was uploaded to the Vuforia Developer website.
Hint: don't you understand why Image Target was set to width 10 in this tutorial? When size is not a significant factor for the application, setting it to 10 provides the camera with an increased likelihood of tracking, while maintaining a good position for content between the near and far planes of the AR Camera. However, sometimes it is necessary that augmented reality has a certain scale. In this case, you need to set the size of the image-tracker so that it matches the physical measurements when uploading to the developer's portal.
Now select GameObject Pizza in the Hierarchy . Drag it to ImageTarget to make it a child. The scale will change to
(X: 0.1, Y: 0.1, Z: 0.1). Return it to the values (X: 1, Y: 1, Z: 1)and also shift the Position up to 0.01the Y axis . Thanks to this, Pizza will comply with ImageTarget .
Press Play again and you will see that the pizza is on top of the image, and also disappears when the image disappears from the frame.
Exploring DefaultTrackableEventHandler
This behavior is taken from the DefaultTrackableEventHandler of the ImageTarget . Open the script and view it.
The script is well commented, but it is worth paying attention to some aspects:
- The Start function registers this script as an Event Handler for the TrackableBehaviour (in this case, ImageTargetBehaviour ).
- OnDestroy removes this link.
- OnTrackableStateChanged is the most important function. Her code tells what should happen when the tracking state changes.
- OnTrackingFound and OnTrackingLost are called from OnTrackableStateChanged . In DefaultTrackableEventHandler, they toggle the Renderer , Collider, and Canvas components of any child.
When the camera detects an image, it no longer just moves the AR Camera ; she also orders GameObject Pizza to turn on all of its Renderer components , and when the image disappears from the camera, he again orders to turn them off.

Digest this information for now.
Create your own tracking actions
It is time to do something with this information!
Remove the DefaultTrackableEventHandler component from ImageTarget . Then add the PizzaTrackableEventHandler , which can be found in the Scripts folder . Then open PizzaTrackableEventHandler . This is a clone of DefaultTrackableEventHandler , but the code in OnTrackingFound and OnTrackingLost has been deleted - you have to solve this problem !
Enabling and disabling Renderer components comes in handy in almost every AR application, so let's get that code back. If you get stuck, you can copy it fromDefaultTrackableEventHandler or found under the spoiler below.
The code
protected virtual void OnTrackingFound()
{
    var rendererComponents = GetComponentsInChildren(true);
    // Enable rendering:
    foreach (var component in rendererComponents)
    {
        component.enabled = true;
    }
}
protected virtual void OnTrackingLost()
{
    var rendererComponents = GetComponentsInChildren(true);
    // Enable rendering:
    foreach (var component in rendererComponents)
    {
        component.enabled = false;
    }
}
We are ready to turn this project into a game in augmented reality!
Look at the UI and find the button that the player needs to press to complete their pizza.
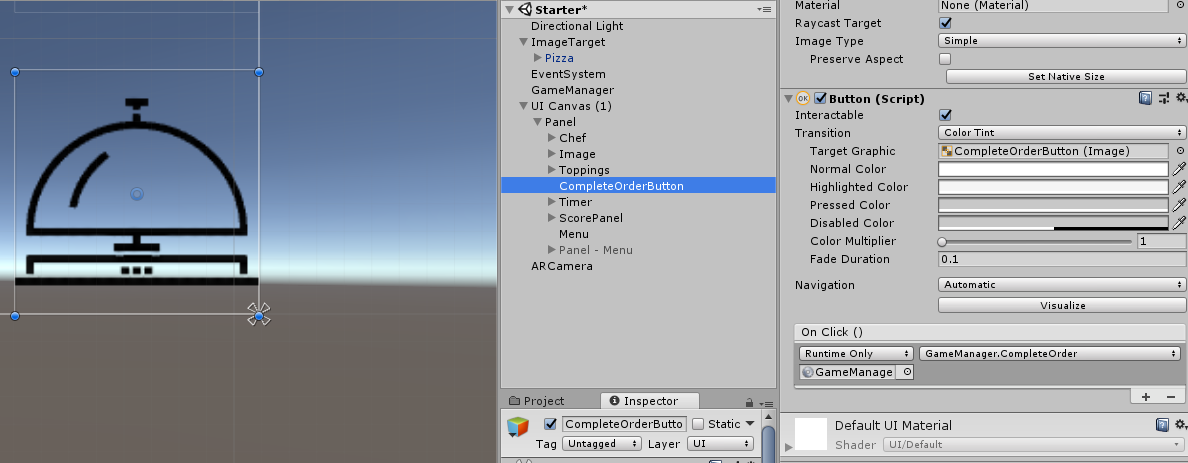
As you can see, when a button is pressed, Event is called
GameManager.CompleteOrder(). Instead of forcing the player to press the button, you can make sure that he “served” pizza to complete the order (he moved the tracker out of the camera's visibility). At the beginning of PizzaTrackableEventHandler, add a UnityEvent to call when Image loses tracking.
using Vuforia;
using UnityEngine;
using UnityEngine.Events;
public class PizzaTrackableEventHandler : MonoBehaviour, ITrackableEventHandler
{
    public UnityEvent OnTrackingLostEvent;
...
Now let's call the event in the OnTrackingLost method :
protected virtual void OnTrackingLost()
{
    var rendererComponents = GetComponentsInChildren(true);
    // Enable rendering:
    foreach (var component in rendererComponents)
    {
        component.enabled = false;
    }
    //Trigger our event
    OnTrackingLostEvent.Invoke();
}
This makes PizzaTrackableEventHandler more flexible, because now we can set the execution of any actions if tracking is lost. Save the PizzaTrackableEventHandler , return to the Unity Editor and wait for the compilation to complete. When it ends, make it
GameManager.CompleteOrder()called when the tracking pizza tracker is lost. Finally, disable or remove CompleteOrderButton in the UI.
Save the scene, click Play and serve pizza!
Where to go next
Congratulations, you completed the tutorial!
An example project can be downloaded from here .
For more information about developing with Vuforia in Unity, see the Vuforia Developer Library or the Unity tutorial .
Do not forget to set up a developer account for yourself on the Vuforia portal . You can also try uploading several different trackers there to check how they are tracked.
For more details, read about virtual buttons . Vuforia web site has sample materials. Check if you can create these virtual buttons to replace the UI in a pizza game.
Come up with new ideas for augmented reality games. Maybe this is a card fighting game in which creatures jump directly from the cards? What about tower defense, where do you control a combat helicopter using your phone?